How to Divide and Transplant Bearded Iris
A step-by-step guide to dividing bearded iris: choose the local timing window, remove unhealthy rhizomes, replant at soil level, and care for new divisions.
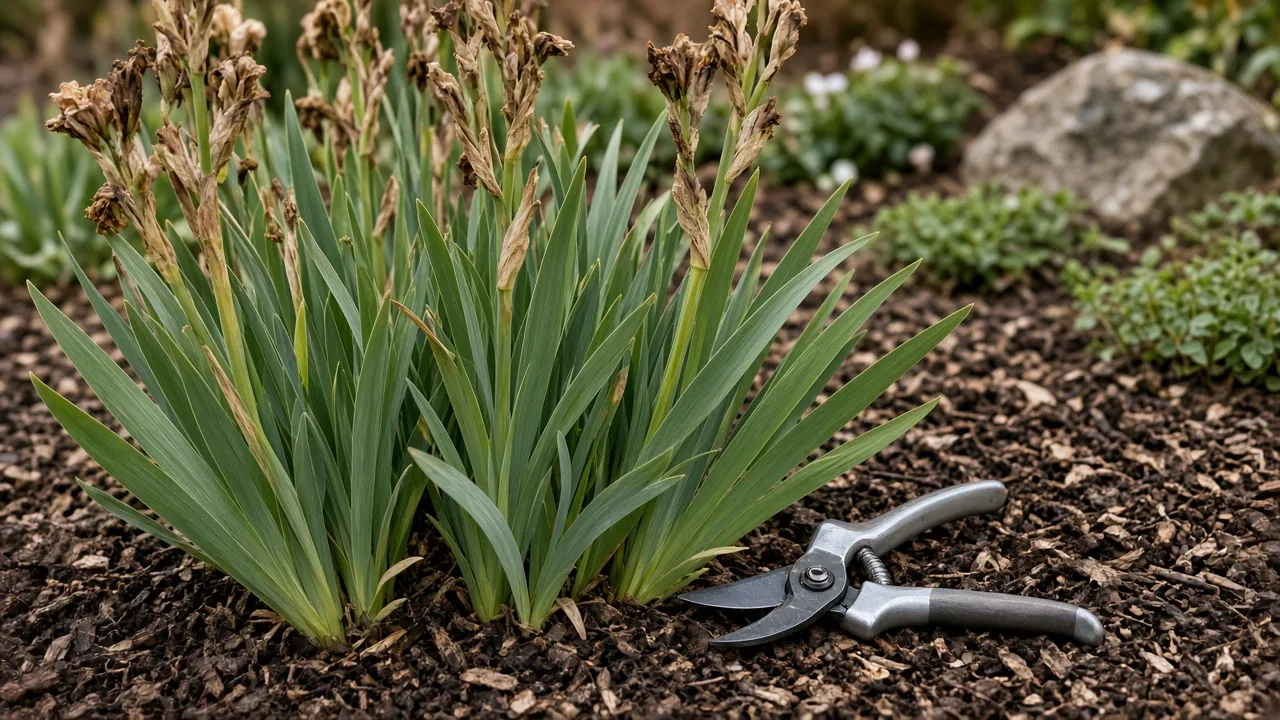
Divide bearded iris after flowering, during the locally suitable late-summer window, when the plants have time to make roots before hard frost. Lift the clump, keep firm rhizome sections with healthy roots and at least one living fan, discard damaged or rotting tissue, and replant with the roots under soil and the rhizome at soil level or barely covered. The exact calendar date is regional; the shallow planting principle is not.
This method is for bearded iris, whose thick horizontal rhizomes sit near the soil surface. It is not a universal recipe for every iris. First confirm what kind you have, then choose timing based on your local climate and the condition of the clump. Careful division can reduce crowding and renew flowering, but a healthy new division may need a season to settle before it blooms again.
The short answer
If a bearded iris clump has become crowded, stopped blooming well, or formed a bare center, divide it after flowering rather than while it is actively sending up bloom stalks. In Iowa, Iowa State University Extension’s iris guidance identifies July or August as the best time to dig, divide, and transplant bearded iris. North Carolina State Extension likewise places division in mid- to late summer, while in a Pacific Northwest example Clackamas County Master Gardeners advise late summer into fall, with enough time for establishment before frost. These are regional examples, not dates to apply everywhere.
Lift the clump with a garden fork, separate the younger, healthy rhizomes, and discard sections that are soft, foul-smelling, hollowed, or badly damaged. Replant each division with roots spread downward and the top of the rhizome exposed at grade or covered only very lightly. Keep soil draining freely and do not bury the rhizome beneath a deep layer of soil or mulch.
Identify the kind of iris before you dig
“Iris” describes a large group of plants with different underground storage organs and growth habits. A quick look at the base of the plant, its label, or a photo from bloom season can prevent you from using the wrong division method. When the plant identity is uncertain, check a reliable botanical or local extension reference before cutting.
Bearded iris grow from rhizomes
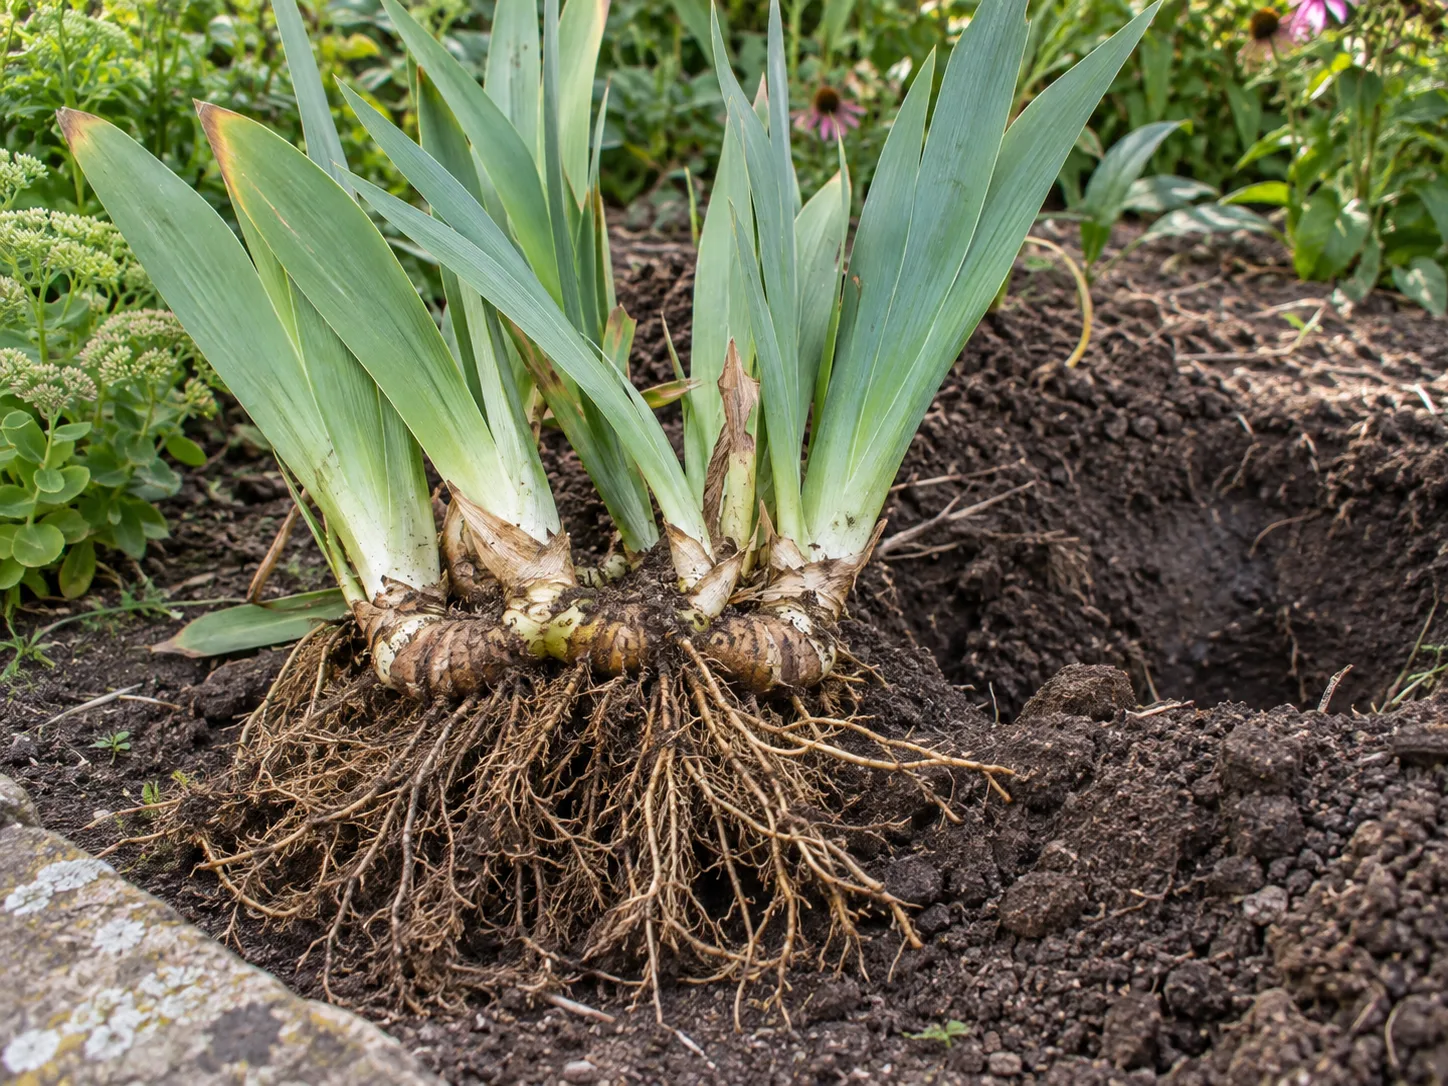
Garden bearded iris, often sold as German iris or Iris × germanica, grow from thick, fleshy rhizomes. A rhizome is a modified stem that grows horizontally at or just beneath the soil surface. It has nodes, small roots along its underside, and a fan of upright, sword-shaped leaves at the growing end. Over time, new rhizomes extend outward and the older central area can become congested or unproductive.
That visible, horizontal structure is the part you divide. Each useful piece should be attached to a living fan, a firm, healthy rhizome, and several roots. Iowa State Extension gives those three parts as the basis of a bearded-iris division. The fan is a cluster of leaves arising from one growth point; it is not a separate bulb. The NC State Plant Toolbox profile for bearded iris also describes this group as rhizomatous and emphasizes well-drained soil and shallow placement.
Not every iris is divided this way
Some beardless irises, including Siberian and Japanese types, also grow from rhizomes, but their root systems, division size, and timing differ. For example, Iowa State Extension gives Siberian iris a separate schedule—early spring as new growth begins or late summer—and calls for sections with several growing points and a good root system. Do not transfer the July-or-August bearded-iris calendar or its single-fan division rule to beardless iris. Bulbous irises, such as Dutch iris, grow from bulbs and are handled according to bulb-planting guidance rather than by slicing a fleshy bearded-iris rhizome. Clackamas County Master Gardeners distinguish rhizomatous irises from bulbous irises when discussing division.
So don’t assume that “beardless” means “bulb,” or that every iris should be exposed at the surface. This article’s shallow, visible-rhizome instructions apply specifically to bearded iris. If you have a named cultivar, retain its tag; if you only know that the plant is an iris, identify it before lifting or follow species-specific guidance from your local extension service.
When to divide bearded iris in your region
The useful window begins after flowering, when the current bloom is finished and the plant is moving into a quieter growth period. Many gardeners divide in mid- or late summer, but regional climate shifts what “late” means. July or August is Iowa State Extension’s recommendation for bearded iris in its Iowa guidance; it is a regional calendar, not a universal rule. A cool, wet region may have a longer fall planting window than a place where early frosts arrive quickly. A hot, dry region may require avoiding the most stressful part of summer or providing careful establishment watering.
Use plant condition and frost timing, not a universal date
Work backward from local weather. In a cold-winter area, aim to replant early enough that the divisions can make roots before the ground freezes; Clackamas County Master Gardeners suggest allowing roughly four to six weeks before the first frost for their guidance. In a milder region, the usable window may extend later. Use a local extension calendar or gardening service for your area rather than copying a month from another climate.
Choose a day when the soil is workable and the plant is not wilted from severe heat or drought. Avoid dividing just before a heat wave, during waterlogged conditions, or while the iris is in active bloom. If you miss the ideal post-bloom period, wait for the next suitable window unless an urgent problem such as severe rot requires removal; then prioritize sanitation and keep any salvageable healthy pieces out of prolonged heat or cold.
Signs an iris clump is ready to divide
Bearded iris do not need to be divided on a rigid annual schedule. A healthy clump can remain in place for several years; many gardeners reassess it about every three to five years, adjusting for cultivar vigor and growing conditions. Divide sooner if flowers decline despite adequate sun and drainage, the clump is packed tightly, the center becomes bare, or rhizomes begin crowding and pushing one another out of the soil. Savvy Gardening and Gardening Know How describe crowding and reduced flowering as practical reasons to divide.
First rule out other causes of poor bloom. Deep shade, excessive nitrogen, poor drainage, drought during active growth, recent transplanting, and immature divisions can all reduce flowering. Dividing will not repair a site that stays soggy or lacks sun. Bearded iris generally flower best in a sunny position with freely draining soil; NC State Extension recommends full sun for best flowering and warns against overly wet conditions that encourage rhizome problems.
Look at the plant as a whole. New fans should be extending outward from older rhizomes; if the clump has room and flowers well, leave it alone. If the rhizomes are crowded but firm, division is routine renewal, not an emergency. If you find soft, collapsing tissue or borer damage, remove those affected sections promptly and clean your tools before moving to healthy pieces.
Tools and site preparation
Gather a garden fork or spade, a clean sharp knife or pruning saw, hand pruners, gloves, a bucket or tarp, and a hose or watering can. A small hand fork can help loosen soil around the clump. Clean soil from tools before cutting and disinfect the blade between diseased sections; this reduces the chance of transferring rot or other problems from one piece to another. Keep the sharp tools stable and cut away from your hands and body.
Prepare the new planting spot before the rhizomes are exposed. Choose a sunny site—about six or more hours of direct sun is a useful target for many bearded irises—and make sure water does not stand there after rain. Loosen compacted soil and improve drainage across the bed if needed; adding a little organic matter can improve structure, but avoid creating a rich, wet pocket. High-nitrogen fertilizer can encourage soft foliage at the expense of sturdy growth and flowering.
If you’re replanting in the same bed, remove weeds and old debris first and check whether the bed has become shaded or waterlogged. Space the new divisions so air can move between fans and future rhizomes have room to extend. Because fresh divisions should not sit in the sun and wind for hours, have their new positions marked and holes ready before lifting the clump.
How to lift the iris clump
- Cut away spent flower stalks if they remain, and shorten the leaves to about one-third of their original height (often roughly 4 to 6 inches on a typical fan). This reduces wind resistance and makes the rhizomes easier to handle; it does not mean cutting the rhizome itself.
- Insert a garden fork several inches away from the clump and loosen the soil around it. Work around the plant instead of levering directly under one point, which can snap the rhizomes.
- Lift the clump from below, supporting the roots and rhizomes as they come free. If it is large, loosen it in sections rather than wrenching it upward by the leaves.
- Shake or brush away enough soil to see where the rhizomes connect. If necessary, rinse them gently so you can inspect their surfaces and root bases.
Set the lifted clump on a tarp in light shade while you work. Avoid leaving it exposed to scorching sun or drying wind. This is also a good time to inspect for pests, soft spots, and damaged leaves. If you see a larva, tunnel, or water-soaked rot, isolate that material rather than placing it beside clean divisions.
Choose healthy rhizome divisions
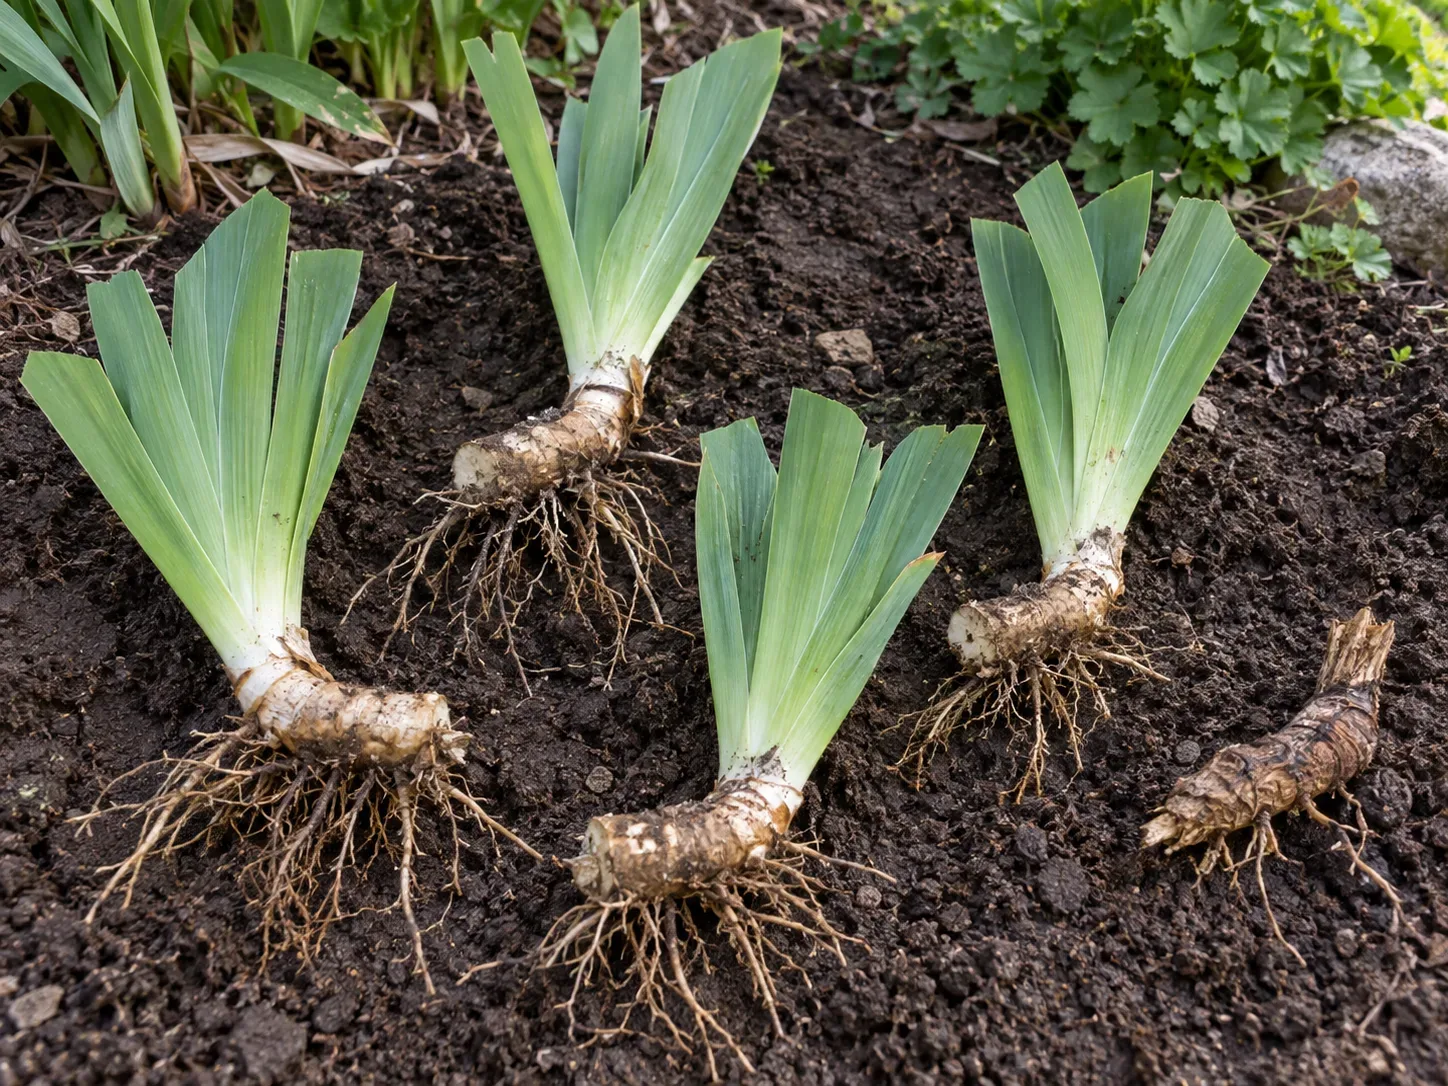
Select younger outer sections that are firm, plump, and connected to a healthy fan. A sound rhizome often feels solid—roughly thumb-thick is a practical visual cue—and has pale, firm cut tissue rather than a mushy, brown center. Keep several healthy roots attached and remove only broken or dead ones. Iowa State Extension’s bearded-iris guidance specifies a fan, a healthy rhizome, and several roots in each division. Larger pieces may have two fans, while tiny fragments without a viable growth point or adequate roots are less dependable.
Discard old sections that are shriveled, hollow, or bare with no active fan, along with pieces that are soft, foul-smelling, or badly damaged by insects. Iris borer feeding can leave tunnels and weakened tissue; do not replant a compromised segment just because it is large. Separate healthy and questionable material, and do not compost diseased or pest-infested rhizomes where the problem could persist. Follow local disposal guidance.
Keep each selected fan attached to its rhizome and roots. When the growth pattern is confusing, trace the connection before cutting: a rhizome may branch or form a chain of fans, and the natural narrow joints make good separation points. Set the pieces you intend to keep in one group and all rejected material in another so it is difficult to accidentally plant the wrong section.
How to split and trim the divisions
Use your fingers to separate rhizomes at a natural joint when they come apart cleanly. Otherwise, make a deliberate cut with a sharp, clean knife or pruning saw. Each retained piece should have a living fan, a firm section of rhizome, and several healthy roots. Don’t keep a diseased piece simply to maximize the number of plants; fewer sound divisions establish better than many weak fragments.
Trim the fan to about 4 to 6 inches, or shorten it by roughly one-third if the leaves are already that length. Cut the leaf blades in a simple fan or angled shape so rain sheds off; avoid hacking into the crown where the leaves emerge. This trimming reduces leverage on the new planting and makes the fan easier to manage, but the remaining leaves still support recovery. Remove dead, badly torn, or spotted foliage.
If you have several cultivars, label them as you work. A small tag beside the clump is more reliable than trying to remember flower color months later. Don’t leave the divisions in direct sun or allow their roots to dry while you finish preparing the bed. If a short pause is unavoidable, keep the roots lightly shaded and barely moist, not submerged in a bucket of water.
Replant the rhizomes at the right depth
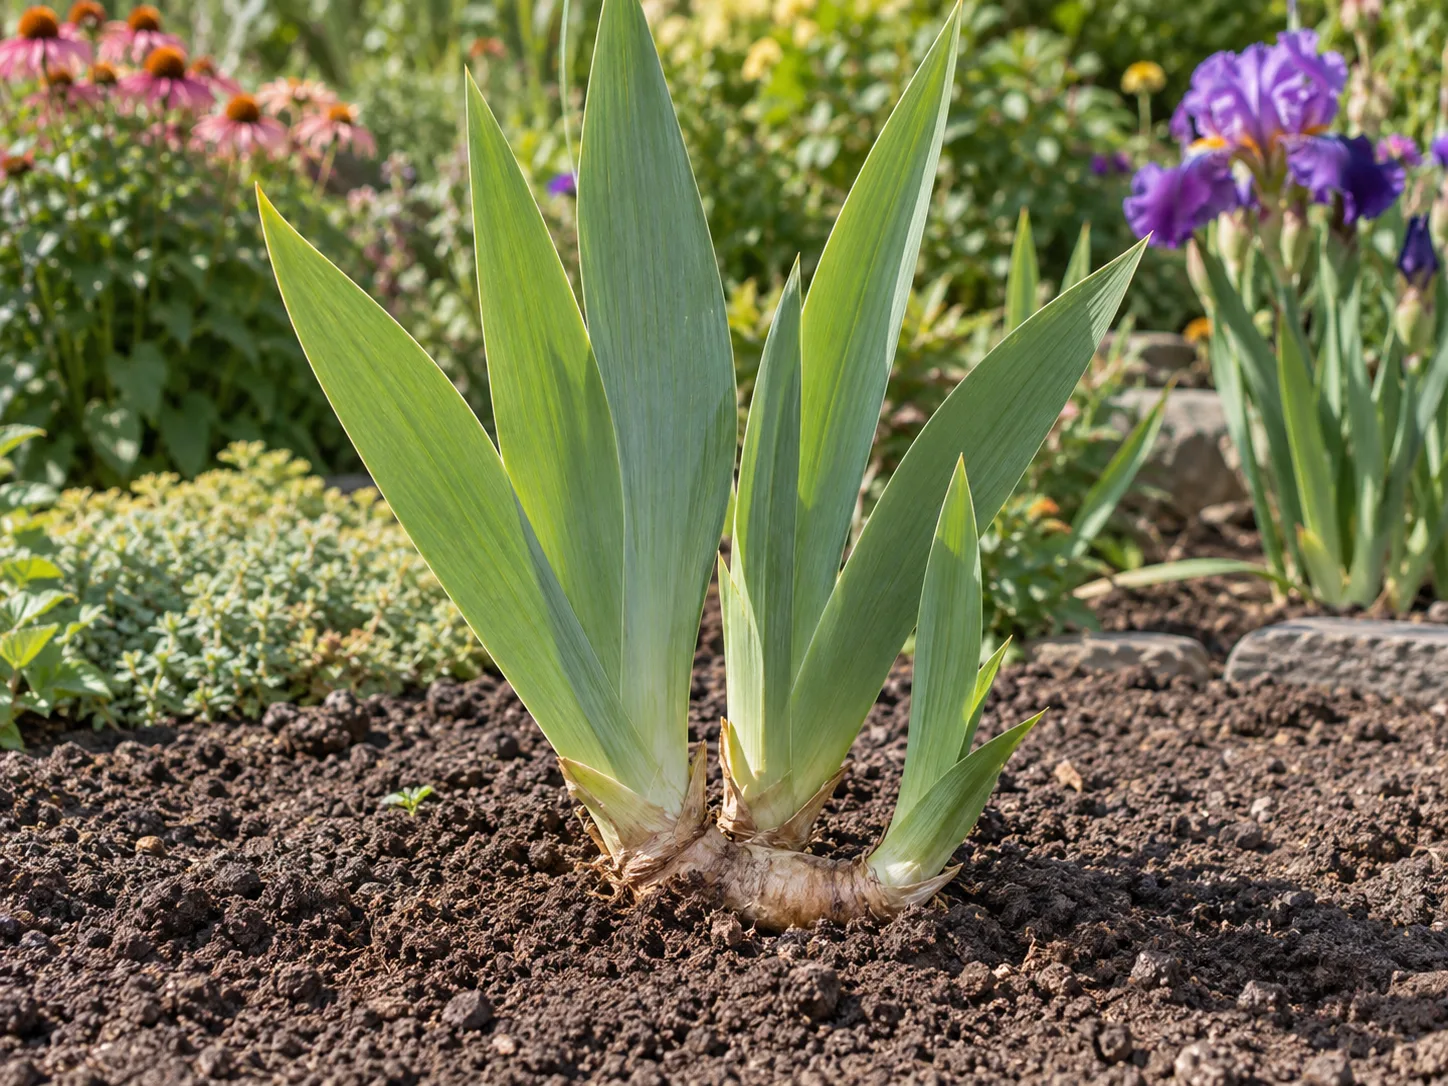
Make a low mound of soil in each planting position. Set the rhizome horizontally on top, spread its roots down both sides of the mound, then draw soil over the roots and firm it gently. The goal is a stable plant with roots protected below ground and the rhizome’s upper surface at soil level or only very lightly covered. The rhizome is a stem, not a bulb: burying it deeply can trap moisture and contribute to poor growth or rot.
Extension and horticulture sources describe the surface slightly differently, but all agree that the rhizome stays shallow. Iowa State Extension says the fleshy rhizome should sit just at or below the soil surface; NC State Extension describes it at soil level or lightly covered, while Clackamas County Master Gardeners advise a shallow mound with the rhizome top visible. The safe common rule is at grade or barely covered, never buried deeply. Follow local guidance if your climate has a specific recommendation, and do not cover bearded iris with several inches of soil or mulch.
Set the roots below the rhizome
Orient roots down and outward, not folded into a tight bundle beneath the rhizome. Backfill around them so there are no large air pockets, then press the soil just enough to hold the division upright. Leave the fan upright and point it toward the open space where the new growth can expand. If the division rocks when you tug gently on the leaves, firm the soil around the roots rather than pushing the rhizome deeper.
Space divisions for airflow and growth
Leave enough room for each fan and the rhizomes it will produce. Around 12 to 18 inches between divisions is a practical starting range for many garden bearded irises; vigorous cultivars or a low-maintenance bed may need more, while tighter spacing means dividing again sooner. Use the cultivar’s mature spread and local extension advice if available. Planting a cluster of three divisions can make a fuller display, but do not crowd their rhizomes into one buried bundle.
Watering and aftercare
Water after planting to settle soil around the roots. Then keep the root zone evenly moist while the division is establishing, allowing the surface to begin drying between waterings. How often depends on rainfall, soil texture, heat, and wind; a fixed daily schedule can overwater a heavy or poorly drained bed. Check the soil near the roots and water deeply when it is drying rather than sprinkling the leaves on a timer.
Do not leave the bed soggy, and avoid piling mulch over the rhizomes. In climates where mulch is useful for nearby plants, keep it pulled back from the iris rhizomes. Resume ordinary seasonal care once new roots and growth are established. Avoid a strong dose of nitrogen-rich fertilizer at transplanting; a soil test and local extension recommendation are better guides than guessing at a product.
Expect a modest first spring after dividing rather than an instant full display. Iowa State Extension notes that divided bearded irises typically bloom sparsely the following spring, then should be in full bloom by their second year. A small or late-planted division may take longer, so sparse bloom alone is not automatic failure. Keep the site sunny, maintain good drainage, and watch for fresh leaves. Remove weeds by hand so shallow rhizomes are not damaged, and check that soil has not washed over and buried the rhizome during heavy rain.
Common transplanting problems and fixes
The rhizome feels soft or smells bad. Remove it and the soil touching it, then inspect neighboring pieces. Soft rot is not a problem to bury and hope away. Improve drainage, avoid overhead soaking, and disinfect tools before cutting healthy tissue.
The plant has leaves but no flowers. Give a new division time to establish, then check sunlight, crowding, planting depth, and nitrogen. A deeply buried rhizome or a shaded bed may produce leaves without a strong bloom display. If the clump is newly planted, waiting through one growing cycle may be reasonable; if an established clump repeatedly fails, revisit the site and cultural conditions before dividing again.
A division tips over. Its roots may not be spread or firmed well enough. Reposition it with roots angled downward and press soil around the roots. Do not solve wobbling by burying the rhizome deeply.
The leaves yellow after transplanting. Some temporary stress is possible, especially in heat, but persistent decline can signal dry roots, waterlogged soil, or damaged rhizomes. Check moisture below the surface and inspect the crown if the plant is collapsing. Correct the cause rather than adding more water automatically.
A rhizome has holes or tunnels. Inspect for iris borer damage and remove affected tissue. Keep the bed clear of dead foliage and debris, and ask a local extension service about pest timing and management in your region. A photo or sample can help identify whether damage is insect-related or simply an old, exhausted rhizome.
Keep pets away from iris rhizomes
Iris plants are toxic to dogs, cats, and horses, and the ASPCA’s iris guidance says the highest concentration is in the rhizomes. Its listed clinical signs include salivation or drooling, vomiting, lethargy, and diarrhea. During division, keep the lifted clump, trimmed pieces, and discarded rhizomes out of reach; don’t leave them on a path or in an open yard-waste pile where an animal can chew them. Bag or contain scraps promptly, wash your hands and tools, and store any divisions where pets cannot get to them.
If you suspect a pet has chewed or swallowed any part of an iris, contact your veterinarian or an animal poison-control service promptly for individualized advice, even if symptoms have not appeared. Tell them the plant is iris and, if you can, estimate the amount and time of exposure. Do not wait for symptoms or try to induce vomiting unless a veterinary professional tells you to. The ASPCA page lists its Poison Control number as (888) 426-4435; its consultation fee may apply. A veterinarian can advise you on the appropriate next step for that animal.
Conclusion
The most reliable way to divide bearded iris is to confirm that you have the rhizomatous type, wait until flowering is over and local weather gives divisions time to establish, then keep only firm rhizomes with healthy roots and living fans. Replant them shallowly with roots below the soil and the rhizome at grade or barely covered. Sun, drainage, sensible spacing, and steady—not excessive—moisture matter as much as the cut itself.
Inspect the clump before you begin, prepare the new bed first, and label the divisions if the cultivar matters. If you are unsure whether your iris is bulbous or rhizomatous, identify it before dividing. And because rhizomes are the most concentrated toxic part for pets, keep every lifted or discarded piece secured and call a veterinarian or poison-control service promptly after suspected ingestion.



