How to Use Cardboard in the Garden
Learn how to use cardboard in the garden for sheet mulching, compost, seed starters, and collars—plus what to remove and when to skip it.
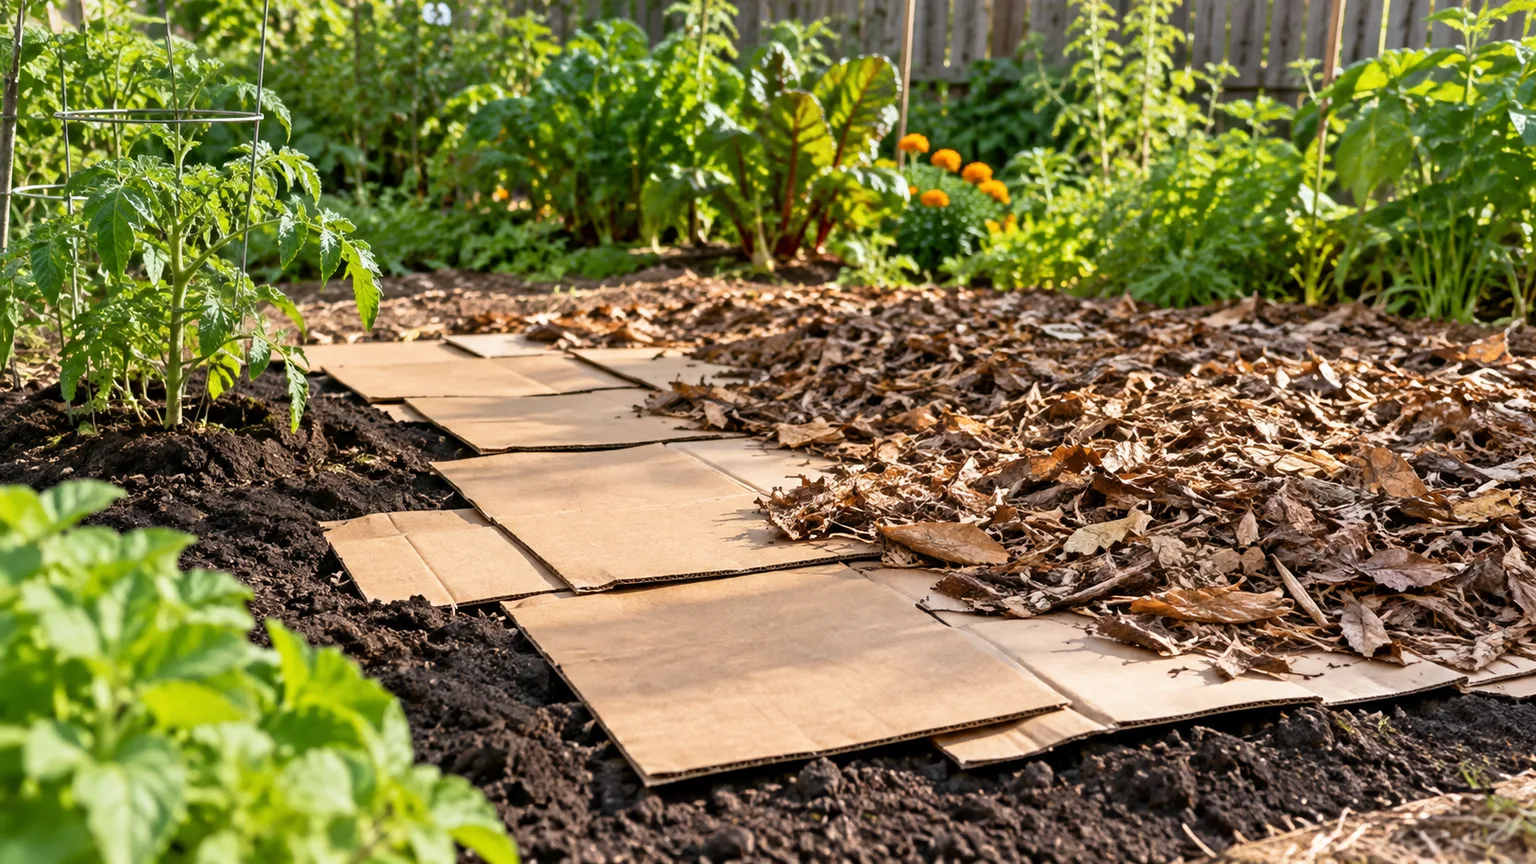
The best way to use cardboard in the garden is to give it one specific job: cover soil as a temporary weed barrier, add shredded fiber to compost, hold seed-starting mix, or protect a young stem. Plain brown corrugated cardboard is biodegradable, but that does not make every box, every layer depth, or every timing choice a good one.
For most home gardeners, the highest-value use is sheet mulching: lay clean cardboard over mown weeds or bare soil, overlap every seam, wet it, and cover it with a generous layer of organic mulch. The cardboard blocks light while it softens, and the mulch protects it from wind and sunlight. A new bed may need several months before it is ready; an established bed can use a shallower version when you need quick weed suppression.
The short answer: match cardboard to the job
Use large sheets when you want to suppress weeds or smother a lawn. Use small shredded pieces when you want a carbon-rich compost ingredient. Use cardboard tubes for short-lived seed pots or collars around vulnerable seedlings. Those forms are not interchangeable: a whole box can mat in compost, while a handful of shreds will not stop sunlight from reaching a bed.
Cardboard improves soil indirectly, not by acting like a fast fertilizer. As cellulose fibers decompose, they become part of the organic matter that can support soil structure and moisture-holding capacity. The useful result comes from the whole system—cardboard, moist soil, air, microbes, roots, and the organic material placed above it—not from the cardboard alone.
The practical decision is simple. If your problem is weeds over an area, sheet mulch. If your problem is a carbon-poor compost pile, shred it. If you are raising large seedlings, make tubes into pots. If a transplant is being severed at soil level, use a collar while you investigate the pest. If none of those problems exists, do not stockpile damp boxes just because they are free.
Choose the right cardboard before it reaches the soil
Choose clean, dry, plain matte brown corrugated cardboard whenever possible. Shipping boxes with their glossy labels removed are usually easier to assess than heavily printed food packaging. The safer rule is not “all brown things are harmless”; it is “use the simplest uncoated fiber you can identify, and keep questionable material out of direct contact with seedlings and edible beds.”
What to remove
Pull off plastic packing tape, string, staples, shipping labels, foam, and any plastic film before laying or shredding the cardboard. Tape is a persistent nuisance in compost, and staples can turn a simple soil job into a hand injury when you later plant through the mulch. The Extension Master Gardener guidance from Durham County specifically recommends removing tape and staples and avoiding glossy, non-brown cardboard that may contain unwanted inks or plastics.
Flatten boxes and cut away thick glued seams if they are saturated with adhesive. A small amount of ordinary glue is difficult to avoid, but you can remove obvious plastic windows, waxy panels, metallic coatings, and laminated surfaces. If the material bends like paperboard but has a shiny waterproof skin, route it to recycling according to local rules rather than burying it.
What to skip
Skip cardboard that is moldy, oily, chemical-smelling, waterlogged, wax-coated, or contaminated with pet waste, spilled cleaners, or unknown liquids. Do not use glossy gift boxes, laminated beverage cartons, heavily dyed packaging, or anything that still has a plastic layer attached. These materials are poor fits for soil contact and can make compost quality harder to judge.
When the source is uncertain, reserve it for neither the vegetable bed nor seed bench. Recycle it or use a clearly identified plain-fiber box instead. This small sorting step is more useful than trying to defend every piece of packaging as garden-safe.
Build a weed-suppressing sheet mulch
Sheet mulching is the cardboard trick most likely to improve a tired bed because it combines light exclusion with organic matter. Mow or cut existing vegetation short, water the ground, lay the cardboard so there are no open seams, wet it, and cover it with leaves, straw, compost, bark, or wood chips. The cover prevents the sheets from lifting and keeps the cardboard in contact with the soil.
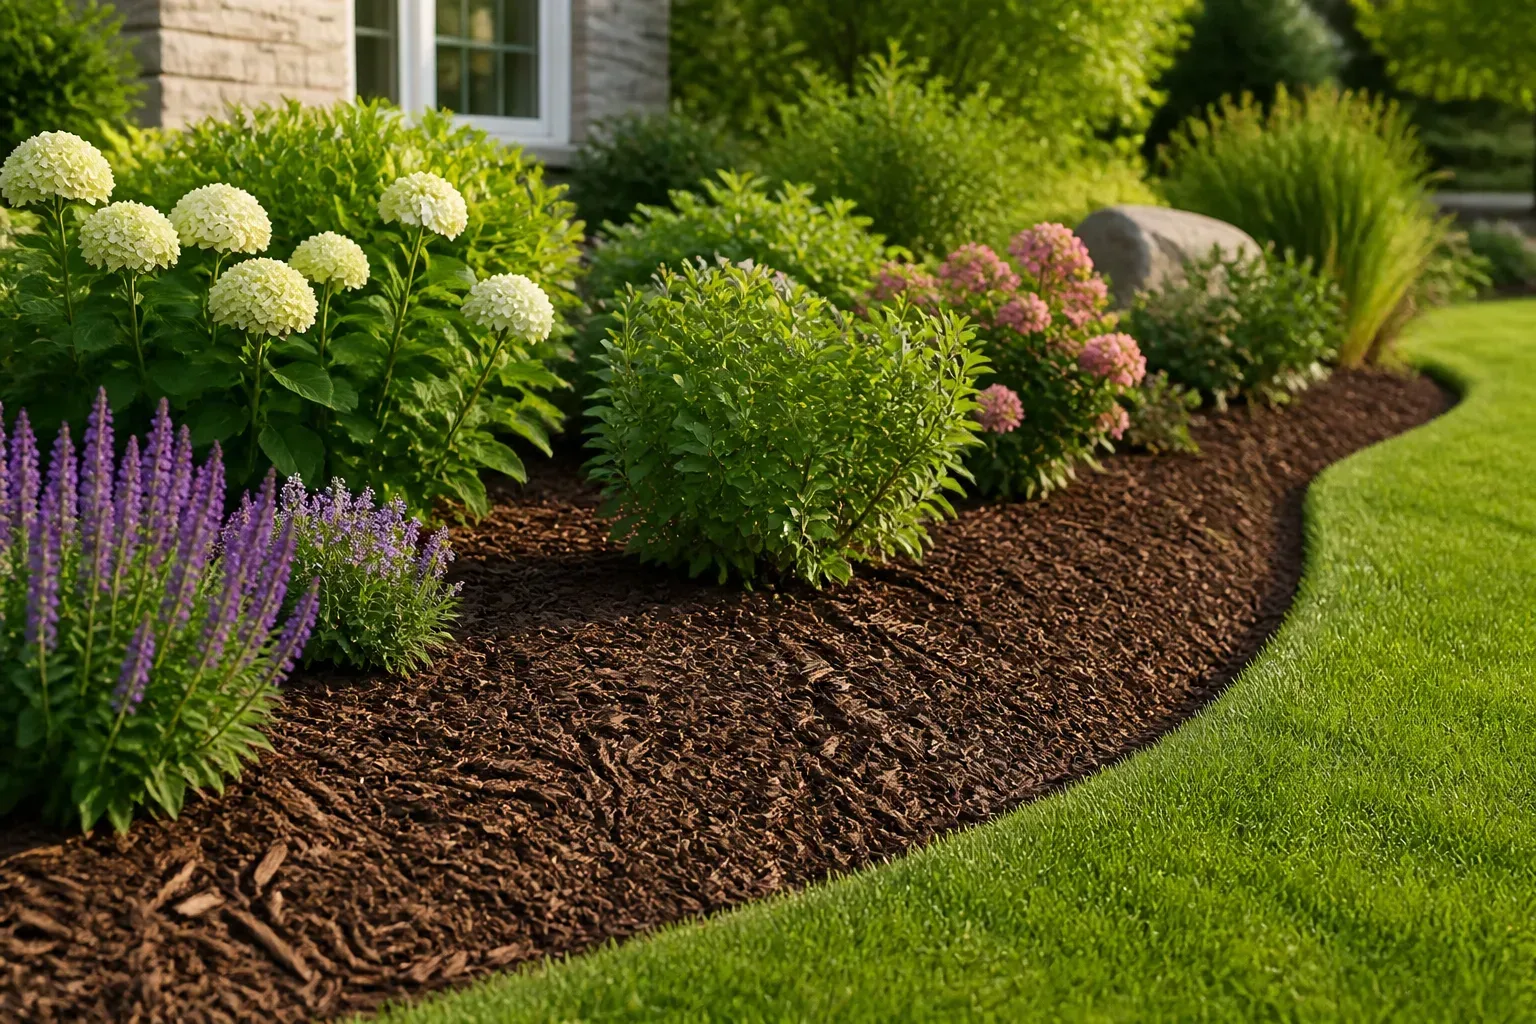
The exact build depends on your goal. Fine Gardening separates shallow sheet mulching for an existing planting area from deep sheet mulching that prepares a new bed over time. Penn State Extension likewise describes a four- to six-month rest period for a new bed made by smothering lawn with cardboard and mulch. That is why the “lay cardboard and plant tomorrow” version is often disappointing.
Shallow sheet mulch for existing beds
Use the shallow method around established shrubs, pathways between vegetable rows, or a bed you want to keep tidy through a hot season. Cut or pull the weeds first, especially anything with thick crowns or seed heads. Water the soil deeply, then cover the target area with one overlapping layer of cardboard. Overlap seams by at least 6 inches, and use more overlap on slopes or in places that receive runoff.
Wet the cardboard until it lies flat, then add about 2 to 4 inches of organic mulch. Leaves, straw, compost, and wood chips all work, but their texture changes how well they stay in place. Fine Gardening recommends 2 to 4 inches for the shallow method, while BBC Gardeners’ World advises applying mulch evenly and not burying plant stems. Keep a clear ring around stems and trunks so the base stays dry and visible.
This method is not a permanent weed guarantee. It suppresses light-loving annual weeds while the sheet is intact, but rhizomes, stolons, and weeds that emerge from the soil edge can return. Check the bed after heavy rain and after two or three weeks of hot weather. Patch exposed seams with more cardboard and cover them immediately; a tiny gap can become the easiest route for a determined weed.
Deep sheet mulch for a new bed
Use deep sheet mulching when you are converting lawn, compacted ground, or a neglected patch into a future vegetable or perennial bed. Mark the outline first and mow the area as short as possible. Penn State’s lawn-to-bed sequence also recommends defining the edge so the new bed does not gradually spread into the grass.
Lay cardboard with 8 to 10 inches of overlap when you are smothering turf, then wet it as you work. Add natural mulch to a total depth of roughly 4 to 6 inches for a basic bed. For a true lasagna-style build, alternate carbon-rich material such as dry leaves or straw with nitrogen-rich material such as fresh green plant matter, keeping each layer relatively thin rather than dumping a huge wet mass in one spot.
NC State Extension describes a deeper layered approach that can reach 1½ to 3 feet when the goal is to create a new planting area by composting in place. That is a different project from covering an existing bed. It needs patience, moisture, and enough room for the stack to settle. The same source says biodegradation takes about six months, while the Penn State video guidance recommends four to six months for a new bed. Treat those as planning windows, not promises: cold, dry, compacted, or poorly aerated layers take longer.
When the layers have collapsed into a dark, earthy-smelling mixture and the cardboard is no longer forming a continuous barrier, plant into the soil, not into a loose mulch cap. Scoop mulch aside, set the root ball at the correct depth, and pull the mulch back around the root zone without pressing it against the stem.
Keep cardboard sheet mulch working through summer
Summer is when sheet mulch can look successful on top and fail underneath. Dry cardboard becomes brittle and can lift at the edges; stormwater can wash mulch away and expose seams; excessive heat can dry the soil if the top cover is too thin. Check the bed once a week during the first month, then after strong wind or rain.
The cardboard should be damp enough to stay flexible, not floating in standing water. If the soil underneath is dry, water slowly at the bed surface so the moisture reaches the soil rather than running off the mulch. If the bed stays soggy, rake back a small test patch and check whether the mulch is compacted into a dense mat. Loosen the cover, reduce the depth, and restore airflow.
Do not bury the crowns of perennials or pile mulch against woody stems. A donut-shaped ring is safer than a volcano around a tree trunk. Cardboard under the mulch should block light, but the plant’s stem still needs air and a clear soil line. A neat edge is not just cosmetic: it makes it easier to spot weeds, rot, insect activity, and cardboard that needs replacing.
Add shredded cardboard to compost
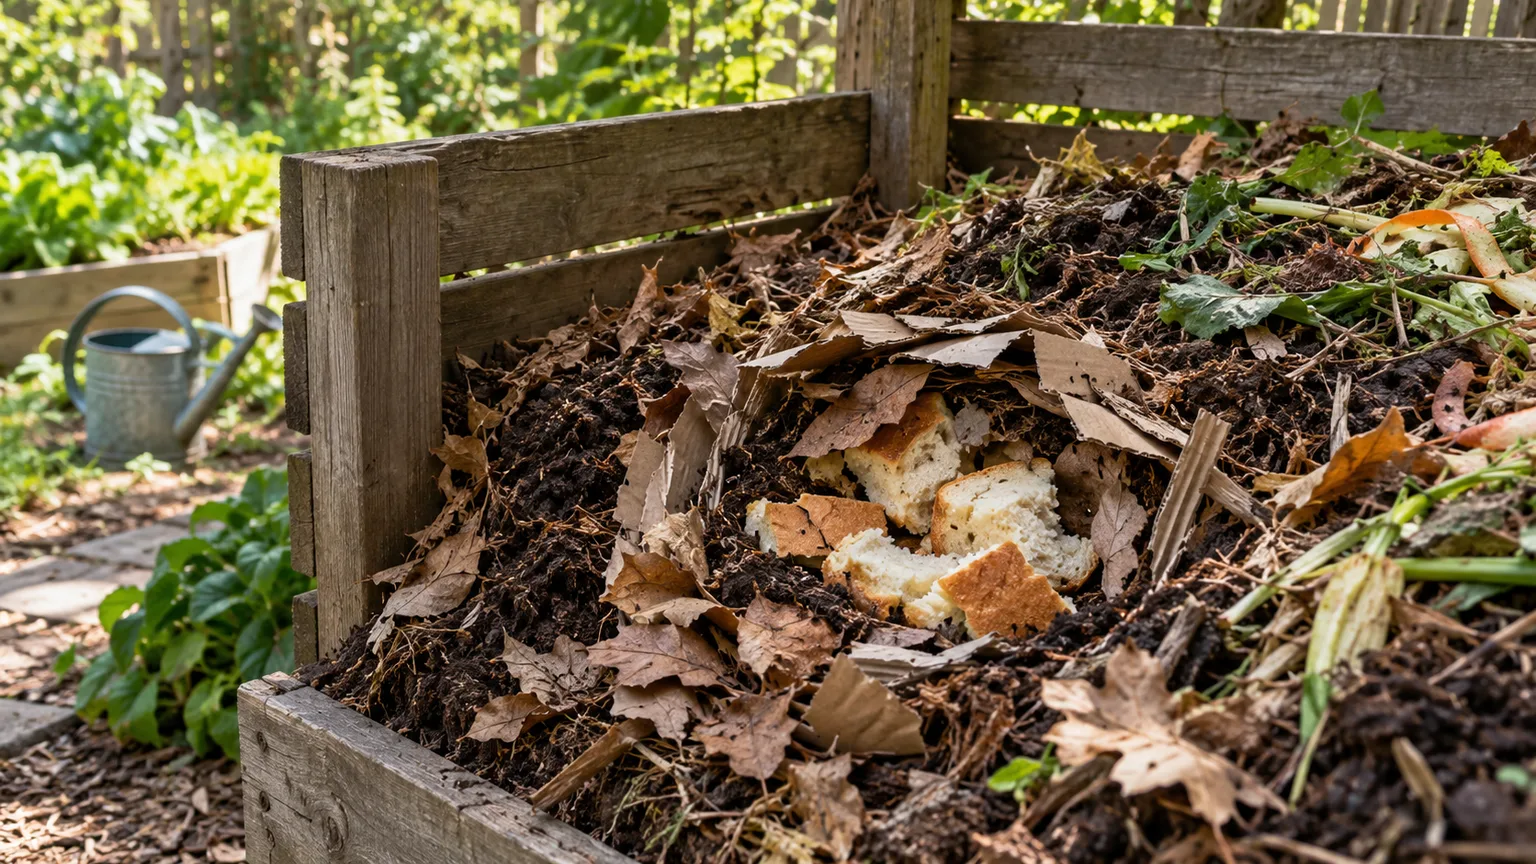
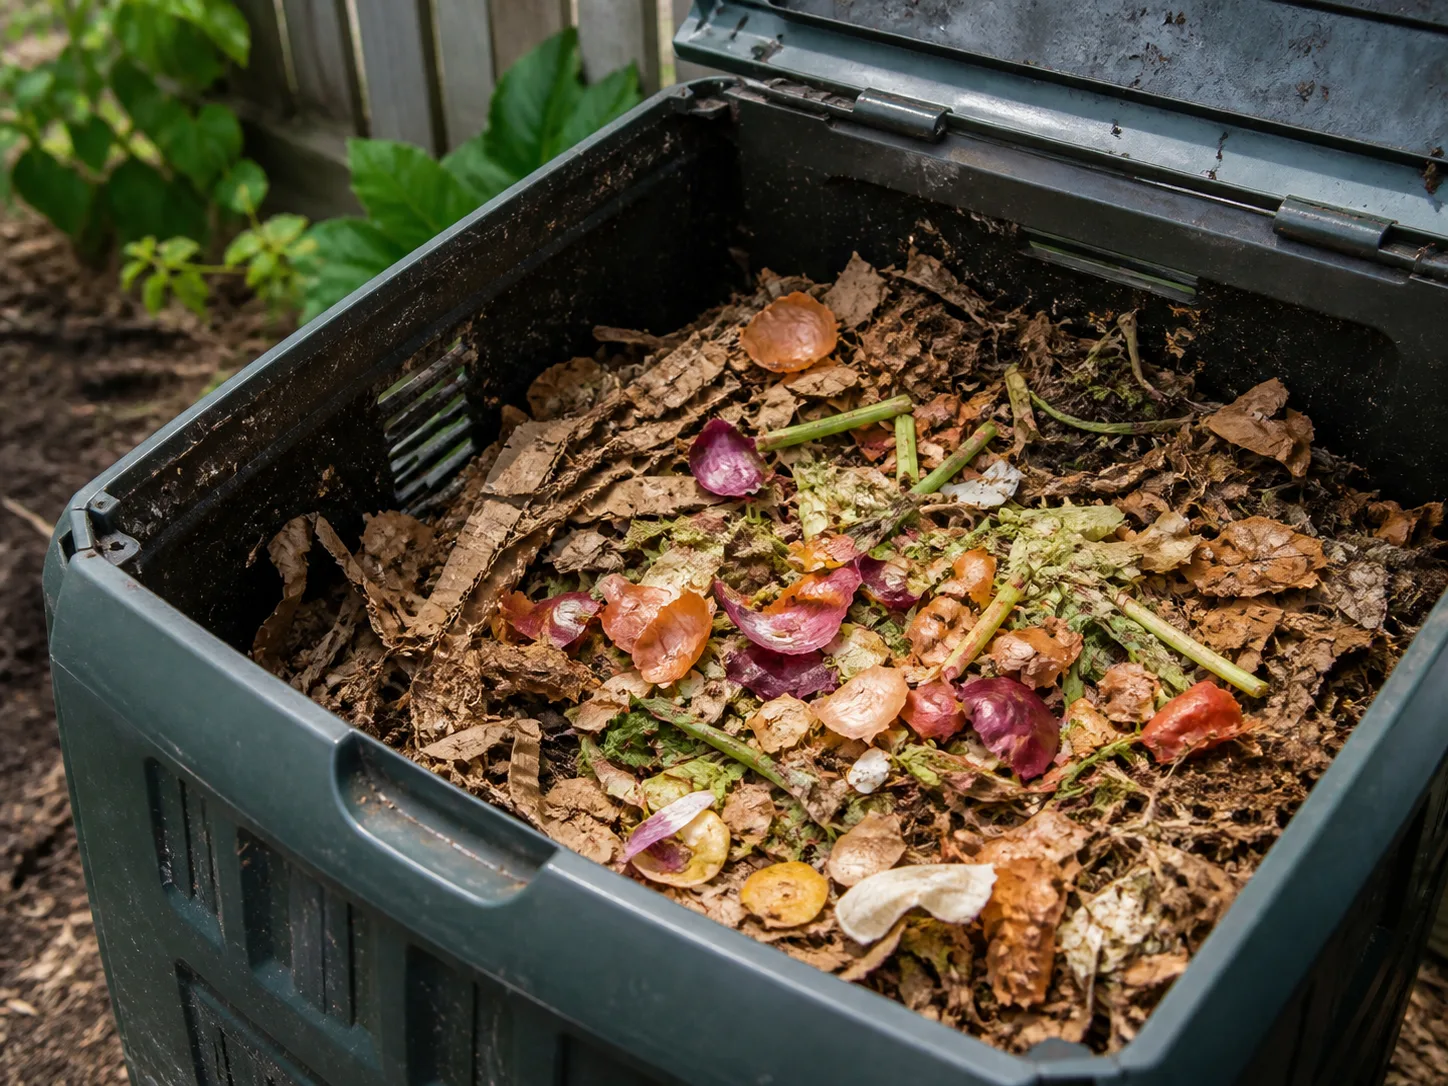
Cardboard belongs in compost as a brown, or carbon-rich, ingredient. It is most useful when your pile is rich in wet kitchen scraps, fresh grass, or green weeds and lacks dry structure. It is not a substitute for a complete compost recipe, and it should never be added as a stack of intact boxes that excludes air.
Shred it and balance it with greens
Tear cardboard into strips or run scissors through it until the pieces are small enough to mix easily. Smaller pieces expose more edges to microbes and reduce the chance of a soggy sheet forming. Add the shreds in a thin layer, then mix them through fresh greens, fruit and vegetable scraps, leaves, or grass clippings.
Penn State Extension’s home-composting guide describes a preferred compost carbon-to-nitrogen ratio of about 25–30 parts carbon to 1 part nitrogen, but home gardeners do not need to calculate every box. Use the ratio as a direction: cardboard is dry and carbon-heavy, so pair it with nitrogen-rich material and moisture rather than adding cardboard by itself. The goal is a pile that is moist like a damp, wrung-out cloth, with enough air spaces to keep decomposition aerobic.
RHS horticultural adviser Adrian Thorne recommends removing tape from cardboard and adding it when a compost pile needs more brown material. RHS also emphasizes that microbes and invertebrates need air and water, which is why a small amount of shredded cardboard mixed through a pile is more useful than a sealed cardboard blanket.
Fix a wet, dry, or cardboard-heavy pile
If the pile smells sour or feels slimy, it is too wet or too tightly packed. Add dry shredded cardboard and leaves, turn the pile to create air pockets, and protect it from additional rain without sealing it in plastic. If the pile is dry and unchanged, add water while turning until the material feels like a wrung-out sponge.
If you added too much cardboard, the pile may stay cool and unchanged because the microbes do not have enough nitrogen or moisture. Mix in thin layers of green material, wet the shreds, and turn the pile. If the cardboard has formed a dry pancake, pull it apart by hand or with a fork before adding anything else.
Do not compost cardboard that is visibly contaminated with disease-infected plant debris, oil, or chemicals. Keep persistent weeds and seed-filled plants out of a cool backyard pile. Finished compost should be dark, crumbly, and earthy-smelling, with no recognizable cardboard sheets. That final condition is a better readiness test than a calendar date.
Make seed-starting pots from tubes
Cardboard tubes are useful short-term seed pots for large seeds and seedlings that will be transplanted young. They are tall enough for crops such as cucumbers, squash, sunflowers, corn, and some flowers, but they are not automatically better than a plastic cell tray. A tube can dry unevenly, tip over, or soften if it stays constantly wet.
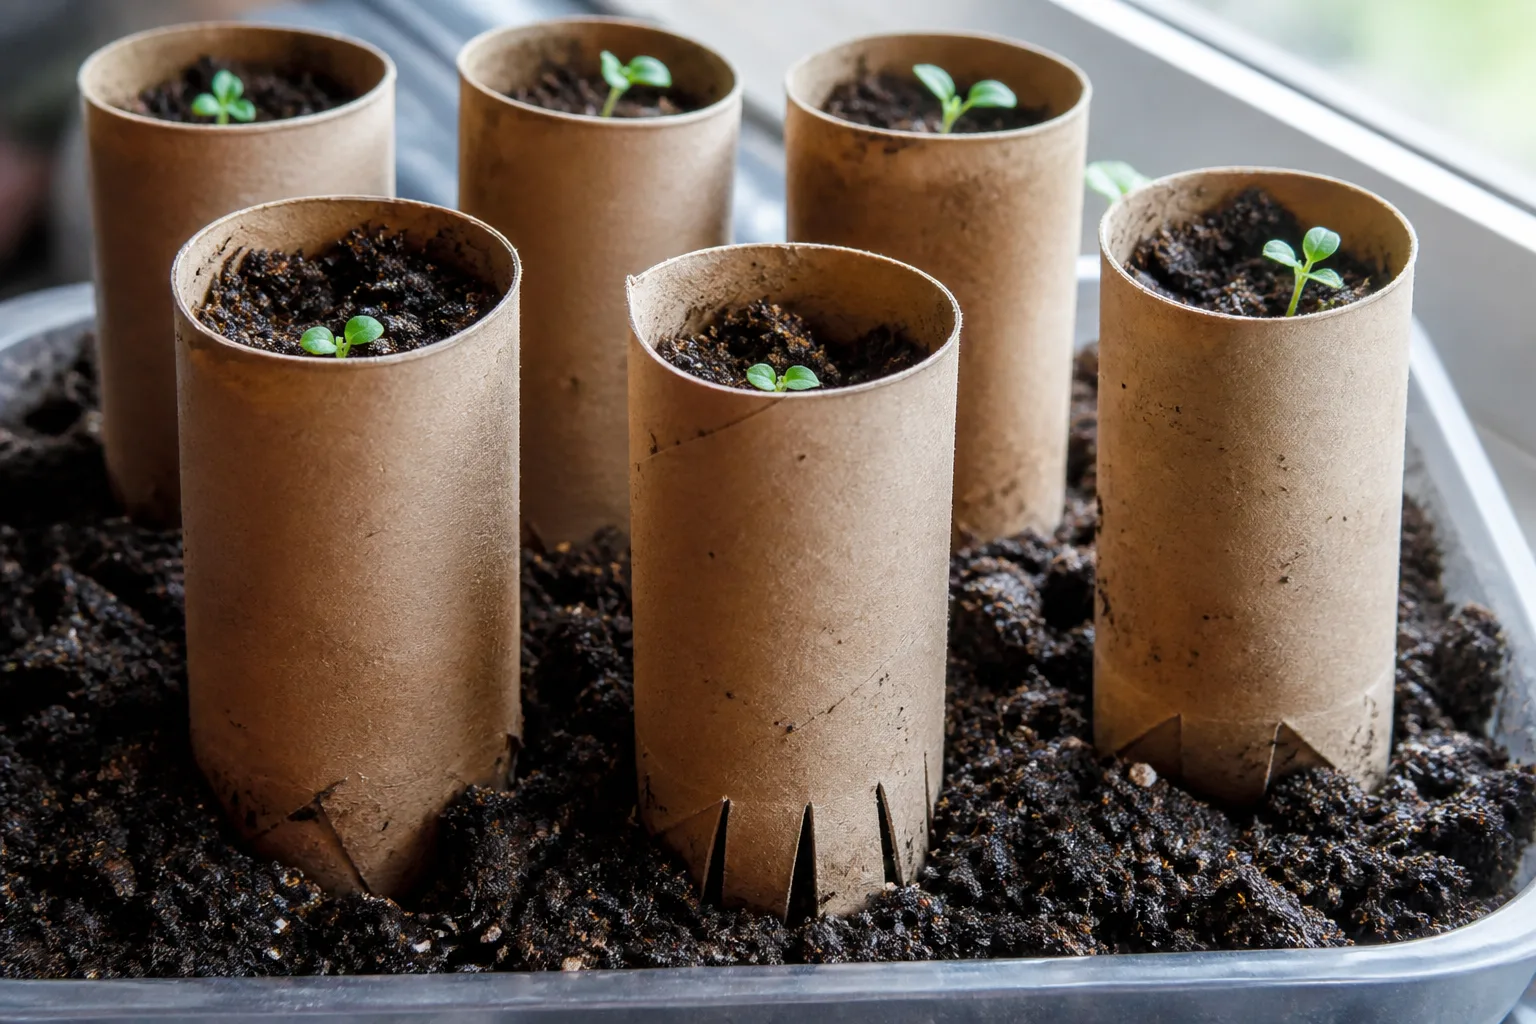
Cut a toilet-paper tube in half for small seedlings, or leave a paper-towel tube longer for a deeper cell. Make four short cuts up from one end, fold the flaps inward, and press them together to close the bottom. Stand the tubes shoulder to shoulder in a shallow waterproof tray so they support one another.
Fill with pre-moistened seed-starting mix, not dense garden soil. Sow at the depth on the seed packet and water from below when possible. The outside of the cardboard should be damp but not sitting in a deep reservoir. Give seedlings bright light and gentle airflow; a cardboard pot cannot compensate for weak light or saturated mix.
At transplant, use the whole tube for a crop that dislikes root disturbance only if the cardboard has softened and the rim will be buried. Peel away any stiff upper rim that sits above the soil line, because it can wick moisture away from the root ball. If the tube is still rigid after several weeks in cold, wet soil, score or remove it rather than expecting roots to push through a waterproof-looking sleeve.
Use cardboard collars around young plants
A short cardboard collar is a temporary physical barrier for a young stem being cut at soil level. It is most helpful when the damage pattern points to cutworms: a seedling is severed overnight, with the cut close to the ground and no chewing higher in the canopy. A collar does not stop rabbits, deer, leaf-chewing caterpillars, or a mower.
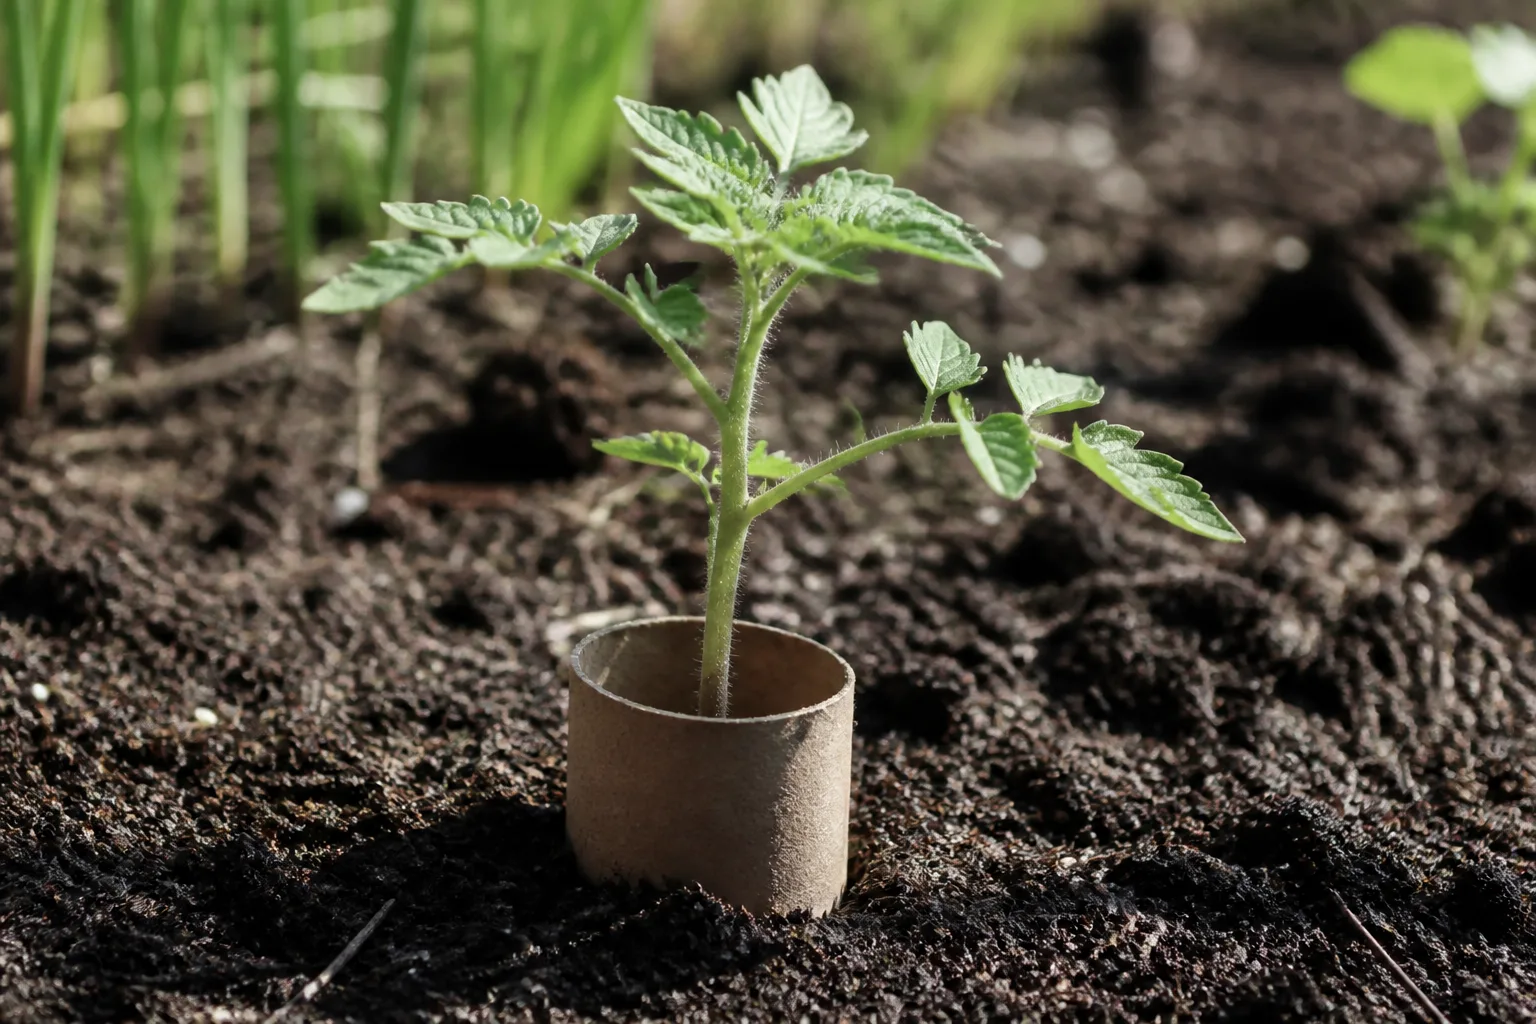
Cut a tube into a 2- to 3-inch section and place it around the seedling, leaving about 2 inches above the soil and pushing roughly 1 inch below the surface. The collar must touch the soil closely enough that a caterpillar cannot simply crawl under the edge. Do not press it against the stem; leave room for the stem to thicken and for water to reach the root zone.
Inspect the collar after rain. Soft cardboard can collapse, expose a gap, or hold too much moisture against the stem. Remove it once the plant has a thicker, tougher stem—usually after a few weeks—or sooner if the damage pattern changes. If leaves are being eaten above the collar, switch from a stem barrier to evening scouting and identify the actual pest before choosing a treatment.
Use damp cardboard as a pest-monitoring cover
Damp cardboard can reveal what is active at the soil surface, but it is a monitoring trick, not a blanket recommendation for improving soil. Place a small piece on bare ground near a vulnerable row overnight, then lift it early in the morning and inspect the underside. Slugs and other moisture-seeking creatures may use the cover, while earthworms and decomposers may also be present.
That lack of selectivity is the point. If you have a slug problem, leaving damp cardboard across the entire bed can create more shelter than you want. Use one small inspection piece, remove it promptly, and record what you find. Relocate beneficial organisms if appropriate, and manage damaging pests with the least disruptive method that fits the crop and local guidance.
Do not advertise cardboard as a way to “create healthy worms” while ignoring the animals that are eating seedlings. Earthworms are part of a functioning soil community, but not every worm-like or slimy visitor is beneficial in every situation. Watch the plant damage, the time of day, and the location of the pest before deciding what to do.
Use cardboard in containers, raised beds, and paths
Cardboard is most reliable on the ground where it can contact soil and be covered by mulch. In a raised bed, a clean sheet can help smother existing weeds before you top up the bed, but do not build a thick cardboard layer between the root zone and a new load of soil unless you have a specific reason. It can slow drainage and create a temporary boundary that roots eventually have to cross.
In a container, use only small amounts of shredded cardboard in a composted, finished amendment—not as a loose liner under potting mix. A whole sheet can block drainage, and a wet tube pot can collapse against neighboring seedlings. Containers already have limited air volume, so a material that mats outdoors can cause trouble faster in a pot.
For a garden path, cardboard under leaves or wood chips is a useful temporary weed barrier. Make the path wide enough that mulch does not spill into the planting bed, and expect to refresh the surface as cardboard and organic cover break down. If you need a long-lasting, accessible path, gravel, pavers, or a properly designed permanent surface may be a better match than repeatedly rebuilding a biodegradable layer.
When cardboard creates problems
Most cardboard failures are predictable. The fix starts by identifying whether the problem is material, moisture, coverage, timing, or the wrong pest diagnosis.
| Problem | Likely cause | First correction |
|---|---|---|
| Weeds appear in straight lines | Seams were not overlapped or mulch washed away | Patch with clean cardboard and restore the organic cover |
| Mulch smells sour | Layer is too deep, wet, or compacted | Thin it, turn the cover, and let air reach the surface |
| Plants look pale after sheet mulching | High-carbon material is decomposing at the soil boundary | Keep the cardboard on the surface, add finished compost around plants, and avoid mixing fresh cardboard into the root zone |
| Seed pots collapse | Too much top watering or poor tray support | Water from below, pack tubes tightly, or transplant sooner |
| Slugs increase | Damp cardboard is acting as shelter | Remove the cover after inspection and switch to targeted scouting |
| Grass returns through the bed | Rhizomes, stolons, or an uncut edge survived | Dig out persistent runners and rebuild with better overlap |
High-carbon material can temporarily reduce available nitrogen right where microbes are decomposing it. Durham Master Gardeners notes this localized effect for high-carbon mulches such as sawdust, bark, and straw. The practical response is not to dump fertilizer over every sheet; keep fresh cardboard on top, use finished compost where plants actually grow, and watch for sustained pale growth rather than reacting to one week of slow establishment.
Cardboard compared with landscape fabric and plastic
Cardboard is a good choice when you want a short- to medium-term weed barrier that becomes organic matter. It is inexpensive, easy to cut around an irregular bed, and simple to remove or incorporate once it has softened. Its weakness is durability: wind, rain, foot traffic, and perennial weeds can defeat it.
Landscape fabric lasts longer, but it can become difficult to remove once roots, mulch, and soil grow through it. Plastic sheeting can suppress weeds strongly, yet it also creates drainage and disposal concerns and does not feed the soil. BBC Gardeners’ World distinguishes organic mulches, which break down and can improve soil, from inorganic coverings that do not add nutrients and may interfere with water or air movement depending on the material.
Choose cardboard for a bed you plan to build, refresh, or replant, especially when you can keep it covered and inspect it. Choose a permanent path or hardscape when foot traffic is high. Choose a reusable fabric only after checking whether you are comfortable managing seams, planting holes, and eventual removal. The right barrier is the one whose lifespan matches the job.
A simple seasonal cardboard routine
In spring, save clean boxes for bed edges, paths, and small sheet-mulch repairs. Use tubes for seedlings only when the crop and transplant date make the extra watering worth it. Before planting, check that the cardboard has softened and that roots will reach real soil rather than a dry mulch cap.
In summer, use cardboard mainly for maintenance: patch exposed seams, protect a freshly cleared strip, or make one small damp monitoring square for slugs and other surface pests. Do not cover an entire bed with wet sheets and leave them unattended through hot, humid weather. The cover should support the garden, not become a hidden microclimate you never inspect.
In autumn, cardboard is especially useful for preparing a future bed. Mow vegetation short, define the edge, lay overlapping sheets, wet them, and cover them with leaves or wood chips. Add shredded scraps to compost as the pile needs brown structure, then turn and adjust moisture rather than trusting a fixed calendar.
In winter, let a new sheet-mulched area rest if your climate and planting schedule allow. Four to six months is a useful planning window for many lawn-to-bed projects, but inspect before planting. If the cardboard is still intact, open a generous planting hole and remove any remaining stiff layer from the root zone.
Conclusion
Cardboard earns a place in the garden when you use it as a timed tool, not a magic amendment. Plain brown sheets covered with organic mulch can suppress weeds while the bed changes; shredded pieces can balance a wet compost pile; tubes can hold seed-starting mix or shield a young stem for a few weeks.
The safest routine is consistent: remove tape and plastic, skip glossy or contaminated packaging, overlap sheets generously, wet them, cover them, and keep air and water moving. Inspect edges, stems, and pests through the season. If the cardboard is soggy, smelly, moldy, or simply solving no current problem, compost the clean fiber in small pieces or recycle it instead of forcing it into the soil.