What Your Orchid Roots Are Trying to Tell You
Learn what green, silver, white, brown, and mushy orchid roots mean. Diagnose watering stress, root rot, aerial roots, and the right next step.
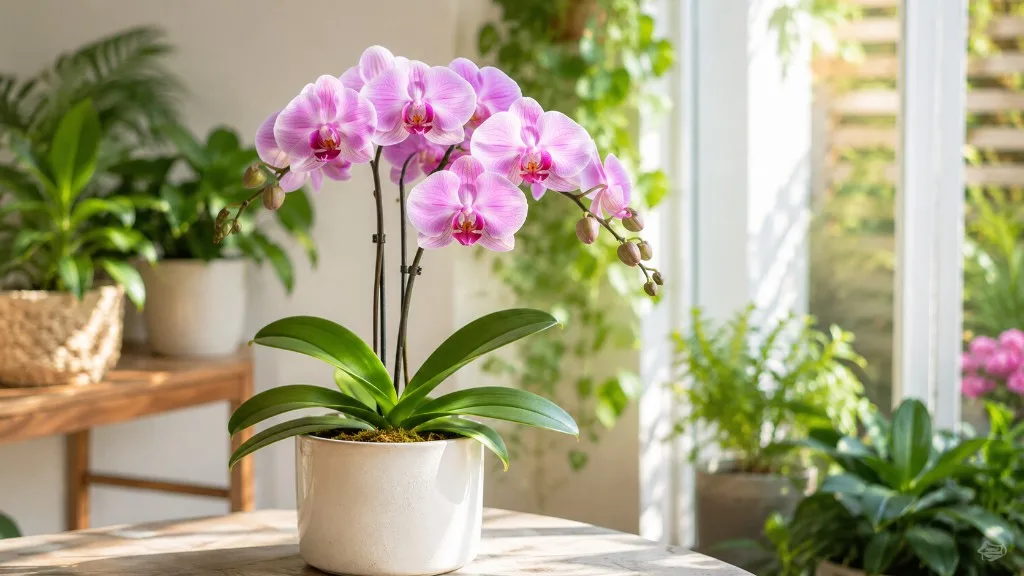
An orchid can look unhappy for several different reasons, but its roots often narrow the possibilities faster than its leaves do. A firm silver root may simply be dry and ready for water; a brown root that collapses when touched is a different problem entirely.
The useful habit is to read color, texture, location, and the potting medium together. This is especially important for the popular moth orchid, or Phalaenopsis, whose roots commonly sit in a clear pot and change appearance as the velamen covering fills with water. A root color by itself is a clue, not a diagnosis.
Start With Texture, Not Color
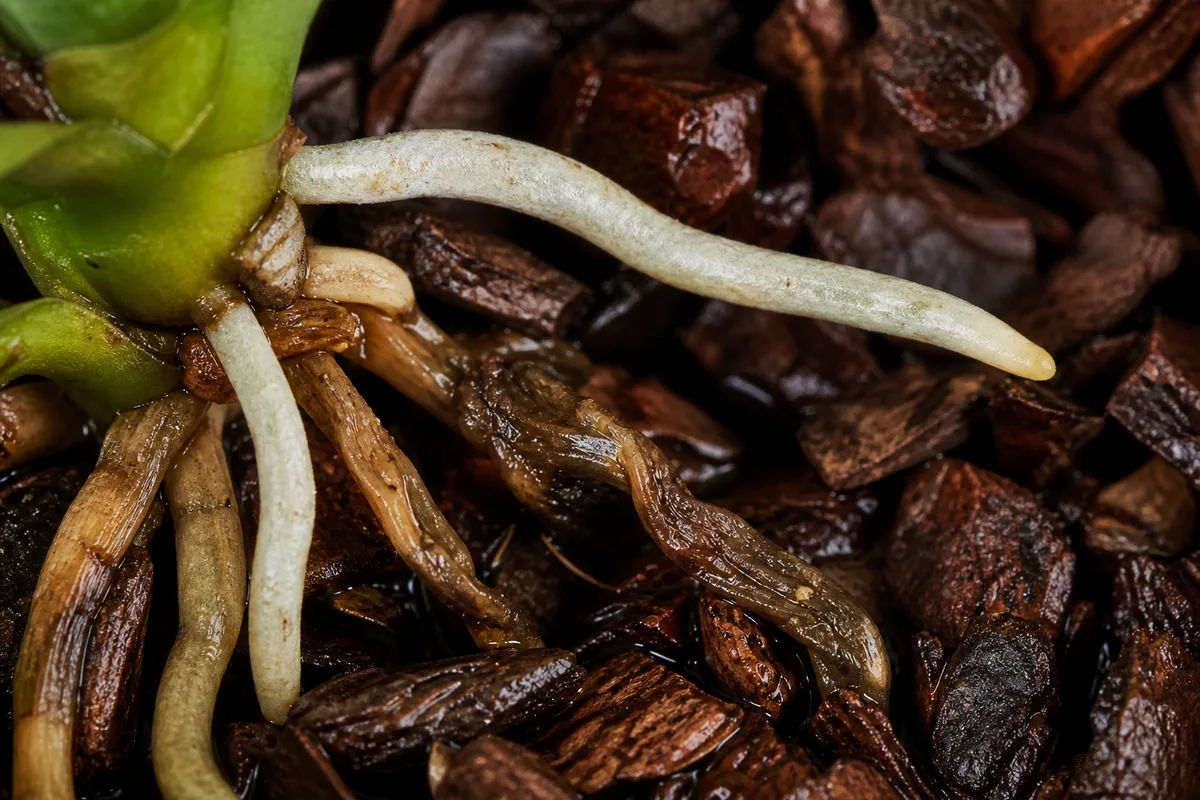
Healthy orchid roots are usually firm, plump, and resilient. They may be green, silver-gray, white, or yellow depending on whether they are wet, dry, exposed to light, or buried inside the pot. Press one gently between two fingers rather than squeezing hard: a viable root has substance, while a dead root often feels hollow, papery, flattened, or soft.
This texture-first rule prevents two common mistakes. You will not cut off a perfectly healthy white root just because it lacks green color, and you will not keep watering a brown root that is already mushy because the leaves look thirsty. The American Orchid Society’s guide to orchid roots describes the living root tip and the mature velamen as different parts of the same system, so the visible surface does not tell the whole story.
If the root is firm, leave it alone while you gather more evidence. If it is soft, hollow, leaking, or has a sour smell around it, move from observation to inspection. That distinction matters more than whether the root is pale or dark.
Why Orchid Roots Look Unusual
Most commonly grown orchids are epiphytes: in nature, they attach to branches or rough surfaces rather than growing with their roots buried in ordinary garden soil. Their roots have adapted to grab water quickly, hold some of it briefly, and then dry with access to air.
The sponge-like outer covering is called velamen. When it is dry, it can look silvery or gray; after it absorbs water, it becomes more transparent and the green inner tissue shows through. That is why a healthy root can appear silver before watering and green afterward without changing its health status.
The American Orchid Society’s anatomy explanation also makes an important distinction: the root tip is the active growing end, while older portions may be covered by mature velamen that is no longer green tissue. A fresh green tip is encouraging, but an older root does not have to stay green to be useful.
This biology explains why orchids do best in an airy, coarse medium such as bark-based orchid mix rather than dense potting soil. Roots need moisture, but they also need the air spaces that disappear when a mix stays saturated or decomposes into fine particles.
Read Orchid Root Colors Correctly
Use this quick interpretation as a starting point, then confirm it with touch and the condition of the medium:
| What you see | Most likely meaning | What to do next |
|---|---|---|
| Green and firm | Recently wet, living root | Do not water again just because it is green |
| Silver or gray and firm | Dry but potentially healthy velamen | Check the medium and pot weight before watering |
| White or yellow and firm | A shaded or buried root, often normal | Keep it; judge texture rather than pigment |
| Brown or black and mushy | Root death or active rot | Unpot and inspect the whole root system |
| Tan, thin, brittle, hollow | Dried or dead root | Remove only confirmed dead tissue |
| Green tip emerging from the stem | New root growth | Protect the tip and keep care steady |
The practical photo guide from Everyday Orchids makes the same useful distinction: a pale root can still be healthy when it is plump, while a brown or black root needs a texture check before you decide whether it is rot or old staining.
Green Roots After Watering
Bright green roots are often roots whose velamen has just absorbed water, especially when the plant is in a transparent pot. They are not a signal to keep watering; they are a signal that the root has recently been wet.
Green tips are a second, more growth-oriented signal. A rounded green tip extending from the base of the plant indicates an actively growing root. Do not mistake that tip for rot or poke it to test its firmness. It is delicate and can stop growing if it is scraped or repeatedly moved.
If every visible root stays green for many days and the medium remains dark, heavy, or sour-smelling, the issue is not “too much green.” It is slow drying. Improve drainage and airflow rather than waiting for a calendar date.
Silver or Gray Roots
Silver, gray, or silvery-white roots are commonly healthy roots with dry velamen. In a clear pot, this is often the visual cue that a Phalaenopsis is approaching its next watering, but it is not a command to water immediately.
Look through the pot at the bark or moss. If the center is still damp, the pot feels heavy, and condensation is lingering, wait even if the outer roots look silver. If the medium is nearly dry, the pot is noticeably lighter, and the roots are firm, water thoroughly and let the excess drain.
Silver roots above the pot are aerial roots. They can look gray because they dry faster than roots surrounded by medium. That is normal unless they are severely wrinkled, brittle, or shrinking while the plant is also losing turgor.
White or Yellow Roots Inside the Pot
Roots in the dark center of a pot may stay white, cream, or yellow because they receive little or no light. This is not the same as a thin, collapsing root whose outer covering has deteriorated. If a pale root is plump and firm, it is doing useful work and should remain attached.
A terracotta pot or an opaque cachepot can make more roots look white because less light reaches them. That does not mean the plant needs more water or that the roots should be exposed. Open the decorative cover when watering, then return the orchid only after the inner pot has drained completely.
Treat a yellow leaf as separate evidence. Natural aging, too much sun, low light, nutrient stress, and root loss can all change leaves. The root texture and medium condition are better evidence for a root diagnosis than leaf color alone.
Brown or Black Roots
Brown or black is concerning when it comes with a soft, mushy, flattened, slimy, or hollow texture. A dark stain on an otherwise firm root may be old damage or media staining, so test the root gently before cutting it. Do not remove every root that is not pale silver or green.
Active rot often has a boundary: the section nearest the stem may be firm while the outer section collapses, or the reverse may be true. A root that loses its velamen and leaves only a thin central strand is no longer a useful water-absorbing root. If several roots share that condition, unpot the orchid rather than trimming only what you can see through the container.
New Root Tips and Aerial Roots Are Different Signals
New growth and exposed growth can look strange if you expect all roots to stay below the bark. They are not automatically signs of a pot that is too small or a plant that needs immediate intervention.
New Root Tips
New roots begin as small, rounded nubs at the base of the stem and develop a bright green or reddish-green tip. The tip is the active growing zone; the portion behind it will gradually develop the protective velamen.
New tips usually mean the orchid has enough energy to invest in roots. Keep light bright but filtered, avoid moving the plant every day, and do not bury or bend the tip into the mix. If the tip dries and seals, review watering, humidity, and airflow rather than applying extra fertilizer.
Fertilizer cannot repair a dead root. Wait until the plant is hydrated and producing new growth before returning to a normal, dilute feeding routine. A stressed orchid with few roots has less capacity to use a strong fertilizer solution, and excess salts can make the recovery environment harsher.
Aerial Roots
Aerial roots grow above the medium, sometimes looping around the pot or reaching sideways toward light and moisture. On an epiphytic orchid, that is a normal growth habit, not a failure of the pot.
Do not cut a firm aerial root for appearance, and do not force it into the pot during repotting. Bending it sharply can crack the velamen, while a damaged root may then dry out or rot. Instead, let the root occupy the air around the plant; if it is blocking a window or catching on objects, move the orchid rather than pruning healthy tissue.
An aerial root that is gray and slightly wrinkled may be dry. Aerial roots that are brown, brittle, hollow, or collapsing are dead and can be removed with sterile snips, but confirm the texture first. Low room humidity can contribute to dry aerial roots, yet adding humidity does not compensate for a waterlogged pot or poor air movement.
Separate Dehydration From Root Rot
Underwatering and overwatering can produce similar leaves: limp, wrinkled, or yellowing foliage. The roots usually separate the two cases.
| Sign | Dehydration with living roots | Root loss from overwatering or rot |
|---|---|---|
| Root feel | Firm but dry, sometimes wrinkled | Soft, mushy, hollow, or collapsing |
| Common root color | Silver, gray, pale tan | Brown, black, translucent-brown |
| Potting medium | Dry and pulling from the pot | Wet too long, compacted, or sour-smelling |
| Response to water | Roots plump or green up after watering | More water worsens the root environment |
| First move | Rehydrate, then improve the schedule | Unpot, remove dead tissue, and repot |
The comparison is not perfect. A plant can be both dehydrated and overwatered if most roots have rotted and the few remaining roots are dry. That is why the safest diagnosis is not “the leaves are thirsty, so water more.” Inspect the root system when leaf symptoms persist despite a reasonable watering routine.
The Fairchild Tropical Botanic Garden orchid watering guide emphasizes that orchid roots need both water and air. If your medium stays wet for too long, the solution is not a smaller splash of water every few days; it is a root environment that can wet thoroughly and then dry on a predictable cycle.
What Leaves Can and Cannot Tell You
Leaves are useful for measuring the plant’s overall trend, but they are a lagging indicator. A wrinkled leaf can reflect current dehydration, previous root loss, or a plant that has been unable to replace water for weeks. A yellow lower leaf can be ordinary aging rather than a root emergency.
Look for combinations instead of isolated symptoms. Wrinkled leaves plus firm, dry roots point toward dehydration. Wrinkled leaves plus mushy roots point toward root loss. Yellowing leaves plus a constantly wet pot and a sour smell make an urgent inspection more sensible than adding fertilizer.
Flowering status changes the trade-off, not the diagnosis. A blooming orchid may drop flowers after a disruptive repot, but active rot can continue while you wait for the display to finish. Saving the root system is the priority when the plant is losing roots, even if it means sacrificing some flowers.
Inspect Roots Without Damaging Them
You do not need to unpot a healthy orchid every time you see an unfamiliar color. Start with the least disruptive checks:
- Lift the pot and note its weight compared with the day after watering.
- Look through the clear pot for condensation, dark bark, and roots pressed against the sides.
- Test the medium with a wooden skewer, chopstick, or fingertip where the pot allows it.
- Smell near the drainage holes. A sour or swampy odor is a reason to inspect more closely.
- Slide the inner pot out of its cover and confirm that no water is sitting beneath it.
If those checks conflict, unpot the orchid over a clean surface. Ease away old bark rather than pulling the roots free. Rinse gently with room-temperature water only if media is hiding the root surface; never scrub the velamen.
Healthy roots resist light handling. Dead roots may collapse, shed their outer layer, or feel empty. Use sterilized scissors for tissue that is clearly dead, and disinfect the tool between plants. Avoid cutting a root simply because it is green, silver, white, yellow, or aerial.
When to Water After the Inspection
There is no reliable universal schedule such as every seven days. The interval changes with orchid type, pot size, medium, light, temperature, humidity, and airflow. The American Orchid Society’s watering guidance recommends watering as the plant dries, with phalaenopsis generally watered just before complete dryness because it lacks the water-storage organs found in orchids with pseudobulbs.
Use a repeatable check instead of guessing:
- The pot feels lighter than it did when the medium was wet.
- A skewer or chopstick comes out nearly dry rather than carrying damp particles.
- Bark has dried through most of the pot, not only on the surface.
- Roots are silver and firm, while any remaining green roots are not sitting in wet medium.
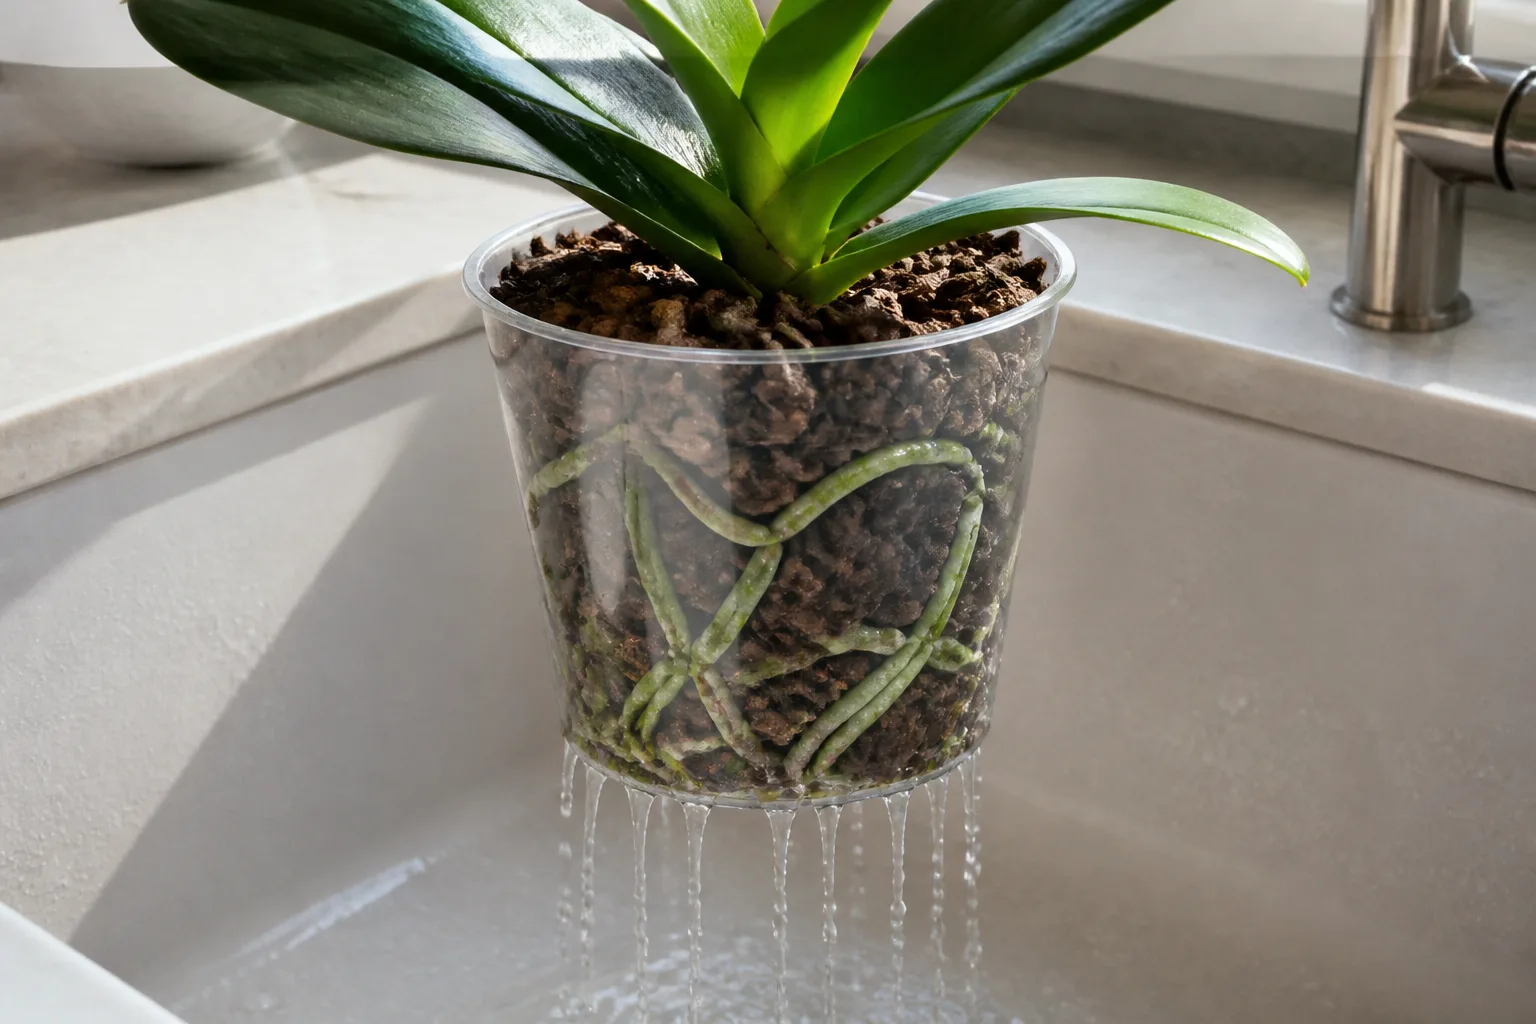
When you water, water thoroughly so the medium is saturated and water runs freely from the drainage holes. Then empty the saucer or decorative cover. A quick sip that wets only the top encourages an uneven root zone; standing water keeps the lower roots starved of air.
Do not put ice cubes on the roots. The plant needs a controlled wet-dry cycle, not a cold trickle that may fail to wet the medium evenly. Do not mist repeatedly as a substitute for watering a dry pot, either; surface moisture can make the crown and leaves stay wet while the root zone remains dry.
How to Rescue an Orchid With Damaged Roots
If rot is confirmed, act methodically rather than washing the plant and putting it back into the same wet bark. The goal is to preserve every firm root and remove only tissue that can no longer function.
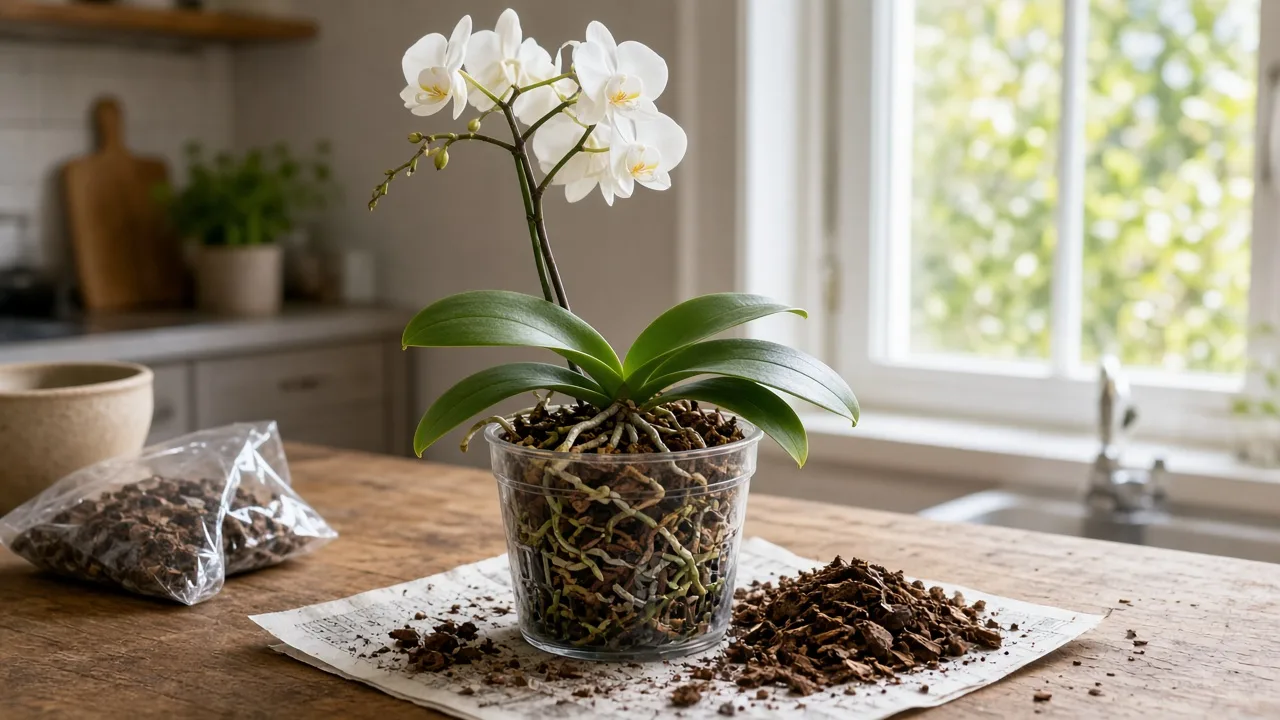
- Prepare a clean work surface, fresh orchid medium, a clean pot with generous drainage, and sterilized scissors.
- Remove the orchid from the old pot and tease away decomposed bark. Do not tug on roots that are attached to the stem.
- Separate firm roots from roots that are soft, hollow, slimy, or collapsing. Cut the dead section back to firm tissue, disinfecting the scissors as needed.
- Let freshly cut surfaces dry briefly in a clean, shaded place. Keep the crown and the spaces between leaves dry.
- Repot into fresh, airy medium in a pot sized for the remaining root mass. Do not bury the crown or pack the bark tightly.
- Give the plant bright filtered light, gentle airflow, and a slower watering rhythm while it rebuilds roots.
An orchid with few roots can be fragile. It may need more stable ambient humidity, but an enclosed recovery setup becomes dangerous if there is no airflow and the crown stays wet. A humid room is different from a sealed, dripping container. Check the plant regularly and allow the medium to dry according to the remaining roots and the pot.
Do not fertilize freshly cut roots with a strong solution, and do not apply household disinfectants, peroxide, or random fungicides without a product and plant-specific reason. The most important controls are sanitation, fresh medium, drainage, airflow, and a watering cycle that does not keep velamen saturated.
Repotting Choices That Support Recovery
Repot when roots are actively rotting, the medium has broken down into dense fine particles, water drains slowly, or the root mass no longer fits the container. Visible aerial roots alone are not a repotting deadline. Orchids can live with roots above the pot for a long time when the plant is stable.
Choose a pot that is only slightly larger than the healthy root mass. A dramatically oversized pot holds more wet medium than the roots can use and often lengthens the drying period. A clear plastic inner pot makes it easier to watch root color, condensation, and bark condition, while a decorative outer pot should never trap runoff.
Use fresh orchid medium appropriate to the species and your watering habits. Chunkier bark dries and breathes faster; moss holds more moisture and needs closer observation. The right choice is not the mix that sounds most moisture-retentive or most “free-draining” in isolation. It is the mix that lets you water fully, drain fully, and reach the next watering without the center staying stagnant.
The American Orchid Society’s watering article notes that a medium that will not accept water rapidly may be too dense and may be depriving roots of air. If water runs down the sides while the center remains dry, or if the mix has broken into fine debris, repotting is more useful than changing the watering calendar.
Common Root Mistakes to Stop Making
Cutting every aerial root. Firm exposed roots are normal on epiphytic orchids and can still absorb moisture. Remove only tissue that is demonstrably dead.
Treating silver as a crisis. Silver usually describes dry velamen, not a dead root. Check the pot and medium before watering.
Treating green as a schedule. Green means the root is wet or newly growing. It does not mean the pot needs more water.
Watering by the calendar. A seven-day interval may work in one room and keep another orchid constantly wet. Let the pot, medium, and plant tell you.
Repotting only because roots are visible. Aerial roots are part of the orchid’s structure. Repot for rot, decomposed medium, poor drainage, or genuine crowding.
Keeping a decorative cover full of runoff. The inner pot needs to drain freely, and the roots need air after watering. Empty the cover every time.
Using fertilizer to solve root loss. Fertilizer supports active growth; it does not replace roots or cure rot. Fix the root environment first.
Ignoring the crown during recovery. A root rescue can fail if water collects between the leaves. Keep the crown dry and provide enough airflow for surfaces to dry.
Conclusion
Your orchid’s roots are most useful when you read them as a set of signals. Green can mean recently wet, silver can mean dry but healthy, white or yellow can be normal in a shaded pot, and brown or black becomes urgent when the root is soft, hollow, or collapsing.
Start with texture, verify the potting medium, and only then decide whether to water, wait, repot, or trim. Preserve firm aerial roots and new green tips; remove only tissue that has clearly died. That slower, evidence-based approach protects the roots an orchid still has and gives new roots the airy, predictable environment they need to grow.