When and How to Harvest Dill for Fresher Flavor
Learn when to harvest dill leaves, flowers, and seeds, how to cut for regrowth, and the best ways to store fresh flavor.
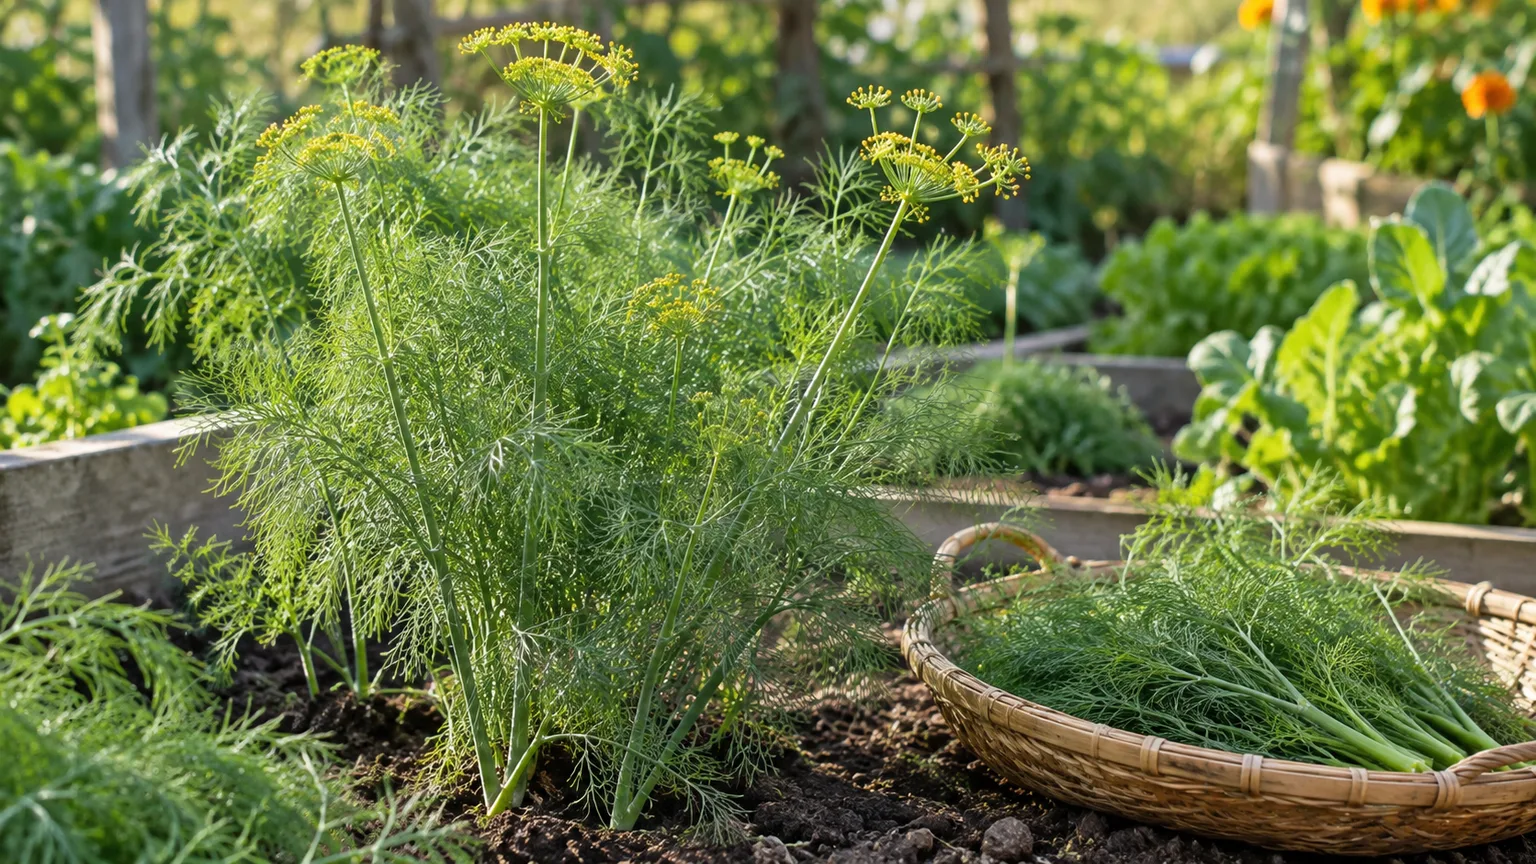
The best time to harvest dill depends on which part you want to eat. Pick leafy fronds before the plant invests heavily in flowers for the tenderest texture, cut flowers just as they open for pickling or arrangements, and wait for seed heads to dry and turn brown if you want a dependable supply of dill seed.
That means there is no single “harvest day” for dill. A healthy plant can give you several useful harvests in sequence, but each one asks you to make a different trade-off between fresh foliage, flowers, seed, and the plant’s remaining energy. The short version is simple: harvest leaves before flowering, flowers when they are newly open, green seed heads for immediate pickling, and dry brown heads for seed saving.
Make the harvest decision in one minute
Stand over the plant and decide what the kitchen needs before you reach for the scissors. If you need dill weed for a sauce, salad, potatoes, fish, eggs, or a garnish, choose a leafy stem with plenty of soft green fronds and no fully developed flower head. If you are making fermented or fresh-pack pickles, a young flower head or a green seed head may be more useful than a pile of leaves.
Use the table below as a fast field guide. It is more reliable than counting calendar days because sowing date, cultivar, temperature, and day length change how quickly a plant moves from foliage to seed.
| What you want | What to look for | What to do | Flavor and texture |
|---|---|---|---|
| Fresh dill weed | Leafy stems, roughly 6 inches or taller, before full flowering | Snip a few outer stems above a side shoot or leaf junction | Soft, bright, and delicate |
| Dill flowers | Yellow umbels just opening or newly open | Cut the flower stem long, or remove the umbel for cooking | Stronger, floral, and more structured |
| Green seed heads | Flowers have finished and seeds are plump and green | Cut the head with a short piece of stem | Fresh seed flavor and moisture for pickling |
| Dry dill seed | Umbels and seeds are brown, dry, and loosening | Bag the head before cutting and finish drying | Warm, concentrated spice; good for saving |
Utah State University Extension describes the stems, leaves, flowers, and seeds as edible and notes that dill generally takes about six weeks to reach harvest after sowing. Its peer-reviewed garden guide also recommends planting short rows repeatedly instead of expecting one plant to supply every harvest goal. Utah State University Extension’s dill guide is a useful reference for that stage-based approach.
Know the three useful dill harvest stages
Dill is often called “dill weed” when the feathery foliage is the ingredient and simply “dill” when the flowers or seeds are being used. Those names describe different parts of the same annual herb, not three different plants. Knowing which stage you are looking at prevents the common mistake of waiting for seeds when what you really wanted was tender foliage.
Leaf stage: soft fronds for everyday cooking
Leaf harvest begins while the plant is still building its leafy framework. A young dill plant does not need to reach a particular magic height, but waiting until it is about 6 inches tall and has several healthy frond-bearing stems gives it enough leaf area to recover from a light cut. Very small seedlings can be eaten, but removing them is closer to thinning than to a repeat harvest.
Before flower buds stretch above the foliage, the fronds are usually the most tender and easiest to use raw. Epic Gardening’s reviewed harvesting guide places the strongest dill-weed window just before flowering and advises taking no more than one-third of the plant at a time. Epic Gardening’s dill harvesting guide also recommends harvesting on a dry day after dew has evaporated, which reduces the amount of surface moisture you carry into storage.
Flower stage: umbels for pickling and garnish
Dill flowers appear in flat-topped yellow umbels on taller, more rigid stems. Pick them when the first tiny flowers are opening or when the umbel is newly open if you want a fresh, aromatic garnish or a flower head for pickling. At this point, you can still harvest leaves, but the plant is changing priorities and the foliage may become less tender as seed production advances.
Do not automatically pinch every flower. Flowers feed pollinators and beneficial insects, and dill can serve as a host plant for swallowtail caterpillars. If your goal is a seed harvest or a small wildlife-friendly herb patch, leave at least one strong plant to flower rather than treating every yellow umbel as a problem.
Seed stage: green or mature, depending on the job
Green seed heads are the right choice when you want the fresh, moist flavor associated with pickling. The flowers have faded, the seeds are visible and plump, and the head is still green rather than papery. Cut the head with enough stem to handle it without shaking seeds loose, then use it promptly or refrigerate it briefly.
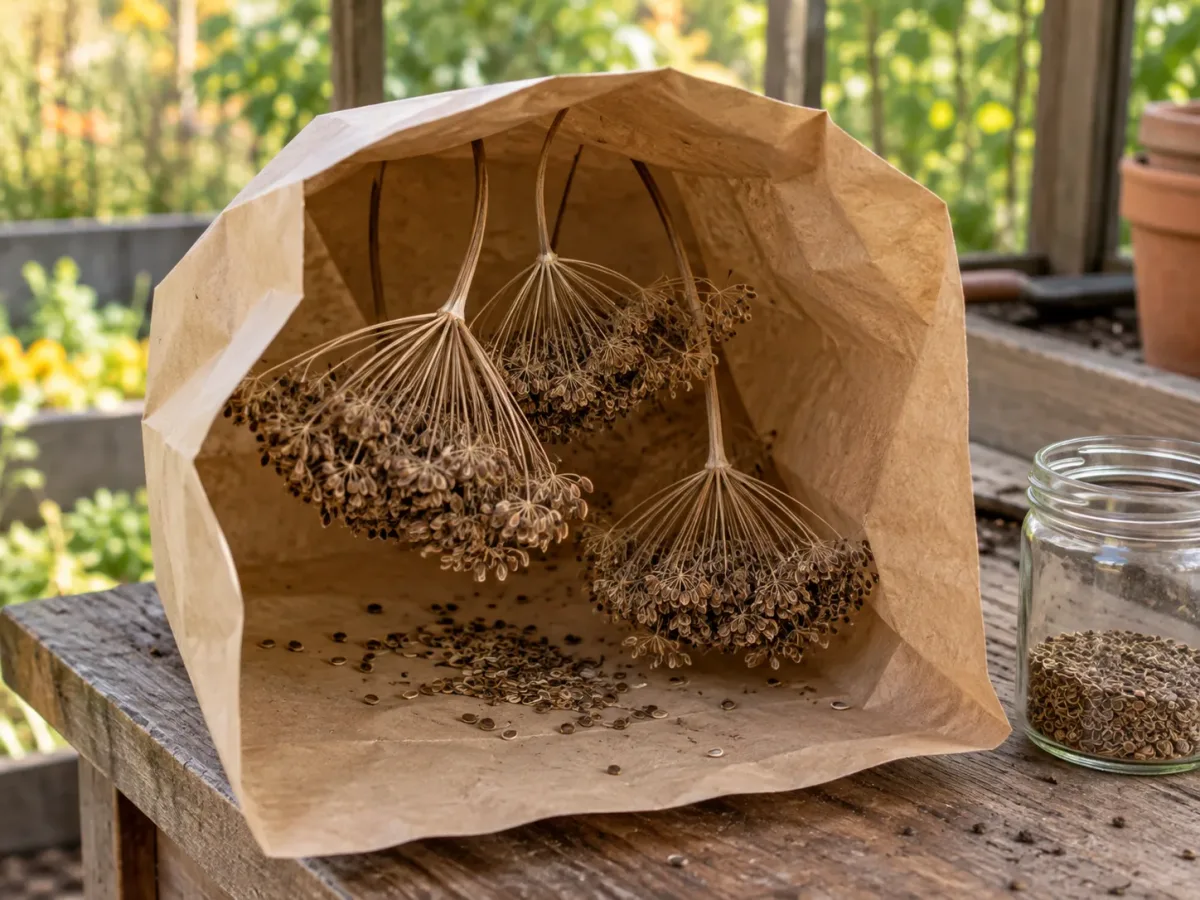
Mature seed is a different harvest. Wait until the head is brown and dry, and until individual seeds loosen when the umbel is touched. At that point the plant is at the end of its annual cycle, so cutting the entire seed-bearing stem is not sacrificing the leafy harvest you could have expected earlier. USU Extension recommends placing mature heads upside down in a paper bag so the seeds fall as they dry.
When dill leaves have the best flavor
Harvest leafy dill on a dry morning after the dew has dried and before the day becomes hot, especially if you plan to use it fresh. Morning harvest is a practical compromise: the plant is hydrated from the night, the foliage is not yet heat-stressed, and dry surfaces are less likely to turn slimy in a container. If the plant was just irrigated or rained on, wait until the fronds are dry rather than cutting wet greens for convenience.
The clearest visual cue is the flower transition. When the center of the plant begins sending up a tall stalk or you see tight flower buds rising above the fronds, harvest the leafy stems you want now. Savvy Gardening likewise identifies the preflower window as the peak period for dill leaves and notes that new leaf production slows once flowering and seed formation take over. Savvy Gardening’s stage-by-stage dill guide is especially useful for distinguishing leaf, flower, and seed timing.
There is one important nuance: “best flavor” is not an absolute rule. USU Extension notes that dill flavor is best when flowering begins, while several horticulture guides describe the leaves as strongest just before flowers open. That difference is not a reason to panic; taste the fronds from your plant. If you want a softer, greener herb for raw dishes, cut before the flower stalk dominates. If you want a more assertive dill note for cooked foods or pickling, a plant at the first-flower stage may suit you better.
How to harvest dill leaves without stunting regrowth
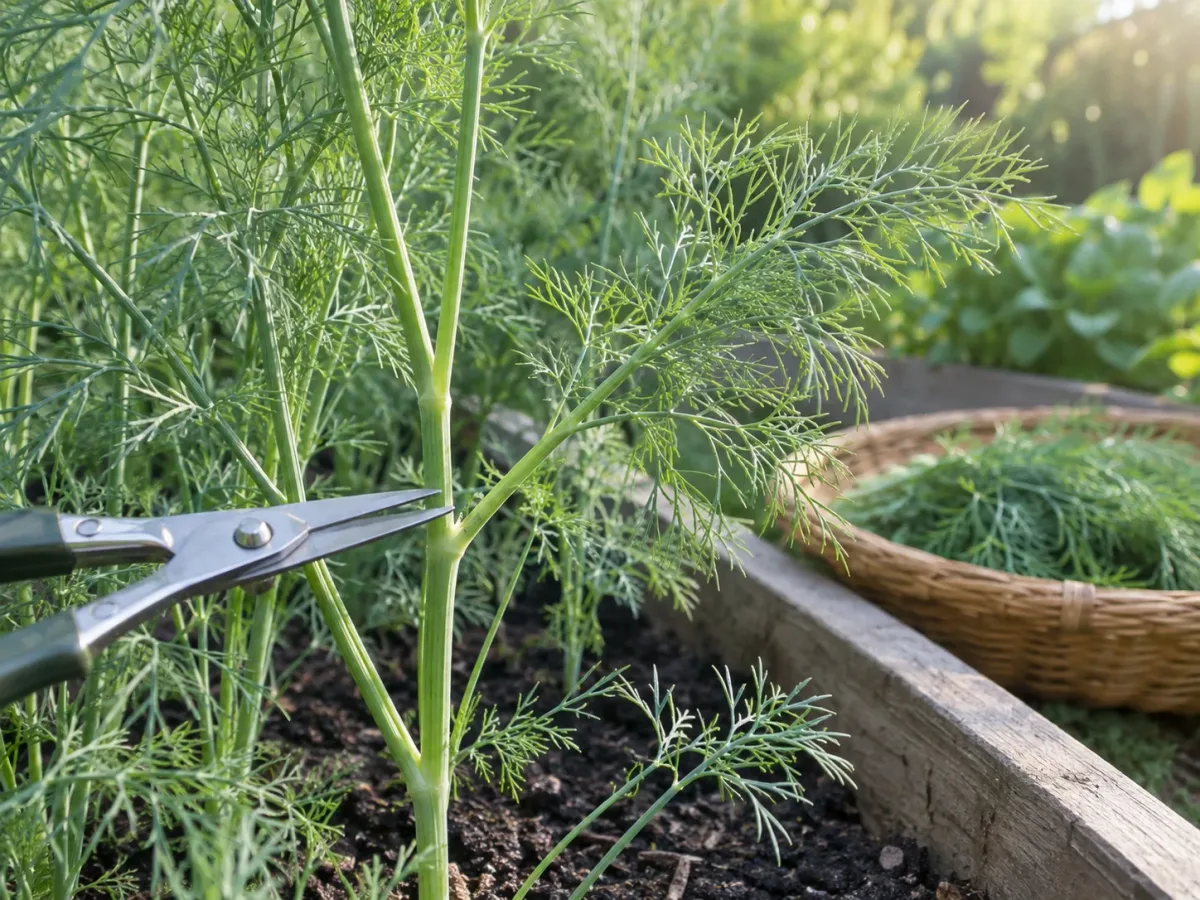
Use clean, sharp scissors or small garden snips. Dull blades crush hollow stems, and tearing the feathery foliage leaves ragged wounds that dry poorly. You do not need to sterilize the snips between every stem in a healthy home garden, but clean them before harvesting if you have just cut a diseased plant.
Choose the right stem and cutting point
Start with the older outer stems on a vigorous plant, leaving the newest central growth to keep expanding. Look for a junction where a side frond or new branch emerges from the main stem. Make one clean cut slightly above that growth point, leaving the junction intact rather than shearing the plant flat.
For a small harvest, remove individual leafy stems instead of taking the central stalk. For a recipe that needs a larger handful, cut several stems low enough to include usable foliage but leave plenty of green structure on the plant. The cut should be deliberate, not a handful pulled from the top.
Cut, sort, and let the plant recover
Take no more than about one-third of the leafy growth in one session. This is a conservative recovery rule, not a mathematical requirement for every enormous plant, but it protects small or heat-stressed dill from being stripped faster than it can replace leaves. If you need a large amount for a party or a batch of pickles, harvest from multiple plants rather than taking one plant down to bare stems.
Sort the cuttings as soon as they reach the kitchen. Remove thick, tough lower stems, yellow tissue, and any caterpillars or aphids. Rinse only when necessary, then dry the fronds thoroughly with a salad spinner or clean towel before refrigerating or freezing. Keeping the plant dry at harvest and the cuttings dry before storage does more for shelf life than wrapping a wet bunch in extra plastic.
What to do when dill bolts
Bolting is the shift from leaf production to flowering and seed production. Long, hot days and heat stress can accelerate it, but the timing also depends on the cultivar and how old the plant is. Bolting is not a disease and it does not mean the whole plant is useless; it means you should stop treating it as an unlimited source of tender leaf.
If flower buds are just forming and you want more dill weed, harvest the outer leafy stems first, then pinch or cut the developing flower stalk only if the plant is still strong and the weather is not relentlessly hot. This can buy time, but it cannot reverse a mature annual indefinitely. A plant already carrying open flowers and plumping seeds is better used for flowers, green seed heads, or mature seed.
In a hot climate, succession sowing is more dependable than repeatedly fighting bolting. Sow a small new patch every two to four weeks when local conditions allow, or follow the wider four- to six-week interval in USU Extension’s garden guidance. A new plant can be entering the leafy stage while the older plant supplies flowers or seed, giving you more total harvest without forcing one plant to do every job.
How to harvest dill flowers
Choose a dry morning or cool evening when the umbels are newly open and the stems are firm. For a vase or an edible garnish, cut the stem to the length you need. For pickling, a short stem is enough; remove the flower head from the thicker stalk if that makes it easier to fit into the jar or recipe.
Handle yellow umbels gently because the tiny flowers detach more easily than the leaves. Shake off insects outdoors, inspect the underside of the umbel, and avoid washing flower heads unless you can dry them completely. If you see swallowtail caterpillars, decide whether you can share some foliage before removing them; USU Extension identifies these caterpillars as butterfly larvae rather than garden pests to eliminate automatically.
Flowering plants can still be harvested for leaves, but expect the plant to slow its leafy regrowth. Leave one or two umbels if you want seed, pollinator value, or volunteer dill next season. Removing every flower and then wondering why no seed appears is a planning error, not a harvest failure.
How to harvest green dill seed heads for pickling
The green seed window sits between fresh flowers and dry spice. Wait until the yellow flowers have faded and you can see developing seeds, but cut before the head turns brown and brittle. The seeds should look full and green, and the head should still feel flexible rather than papery.
Cut below the umbel and carry it upright to your kitchen. Green heads contain more moisture and are not a shelf-stable product, so refrigerate them briefly in a breathable container or use them the same day. For pickles, the entire tender head and part of the stem can contribute flavor, but the correct preservation recipe and acidity process still matter; the harvest stage does not make an untested canning method safe.
If only a few heads are ready, do not cut every one. Pick the largest green umbels for the immediate recipe and leave the rest to mature for seed or beneficial insects. That staggered approach gives you more flexibility than harvesting the entire plant at the first sign of seed.
How to save mature dill seeds for cooking or sowing
Watch mature seed heads closely because ripe seeds can fall as soon as the head dries. When the umbel is brown, dry, and easy to shake, slip a clean paper bag over it before cutting. Snip the stem below the bag, keep the opening upright, and move the bag to a dry, ventilated place away from direct sun.
Leave the heads in the bag until the remaining plant material is fully dry. Rub the umbels gently between your fingers or shake the bag to release the seeds, then separate large stem pieces and chaff. Spread the seeds briefly on a clean plate if they feel soft; store only fully dry seed in a labeled airtight jar in a cool, dark cupboard.
Save seed from healthy plants that had the flavor, height, and bolting speed you wanted. If you grew more than one dill cultivar close together, the next generation may not be identical to the parent because cross-pollination is possible. For culinary seed, that matters less than for a gardener trying to preserve a particular compact or slow-bolting type.
Choose storage by how you will use the dill
Fresh dill is fragile because its fine leaves lose water quickly and its aroma fades with time. Choose storage based on the dish you have planned rather than trying to preserve every harvest in the same way. A refrigerator method protects texture for short-term raw use, freezing is practical for sauces and cooked dishes, and drying makes a different, more concentrated spice.
Keep sprigs fresh for a few days
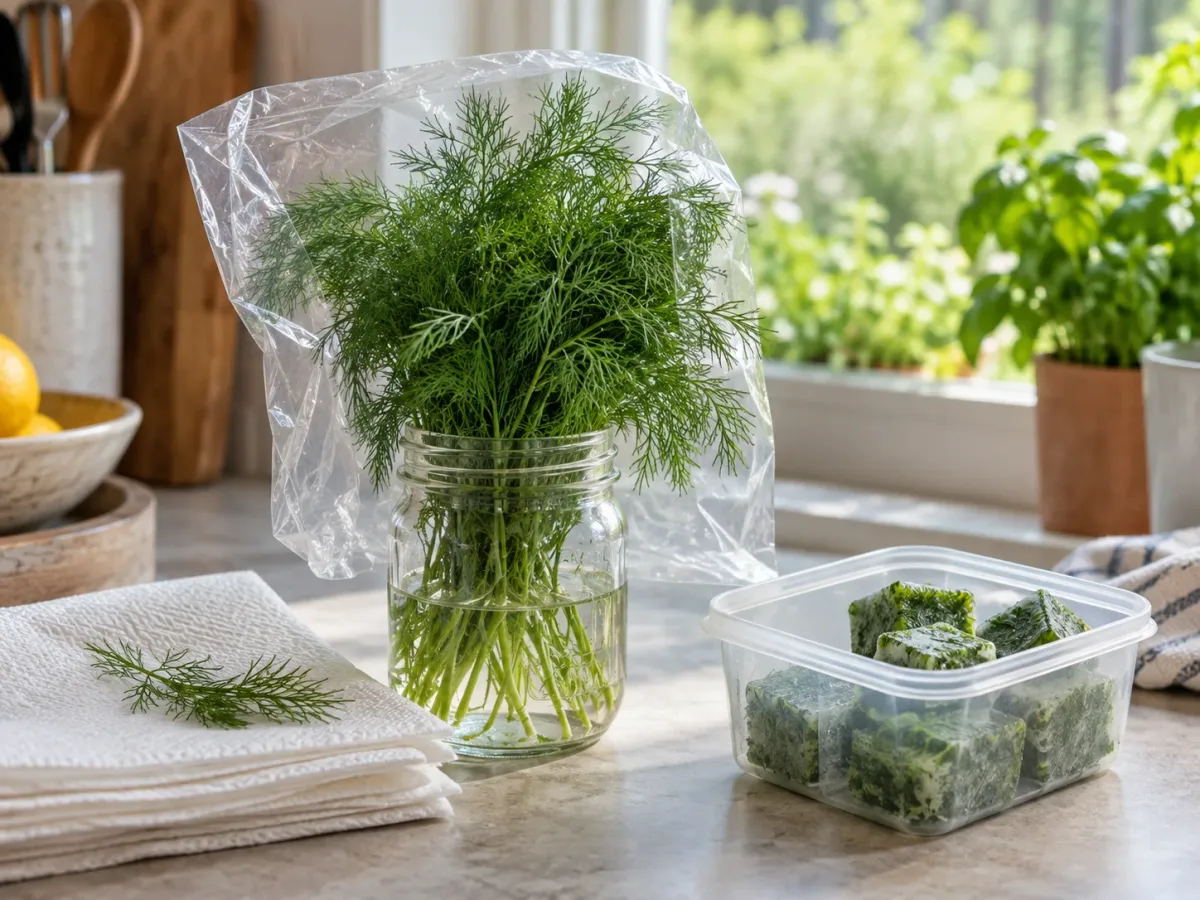
For a small bunch you will use within several days, trim the stem ends and stand the sprigs in about an inch of water in a jar. Cover the top loosely with a produce bag and refrigerate it; change the water when it becomes cloudy. This keeps the fronds hydrated without sealing a large amount of wet foliage against itself.
For a shorter, leaf-only harvest, wrap the dry fronds loosely in a slightly damp paper towel and place them in a container or bag in the crisper drawer. “Slightly damp” is the key: a dripping towel or wet leaf pile encourages decay, while a completely dry, unprotected bunch wilts quickly. Check the dill before cooking and discard any slimy or moldy pieces.
Freeze or dry a larger harvest
Freezing is usually the better long-term choice when you want dill’s fresh green aroma in soups, sauces, potatoes, eggs, or cooked fish. Wash and dry the fronds, chop them if you prefer, and freeze them in a thin layer or in small portions. Ice-cube portions with a little water or oil are convenient for cooked dishes, but frozen dill will soften, so it is not a substitute for a crisp garnish.
Drying is worthwhile when you want a pantry herb or have more dill than your freezer can hold, but it changes the flavor and texture. Air-dry small bunches in a dark, well-ventilated place, or use a dehydrator on a low setting; the leaves are ready when they crumble rather than bend. Store the dried herb in an airtight, opaque container away from heat and light, and use the leaves while their aroma is still strong.
Epic Gardening recommends keeping drying temperatures low and notes that dried dill is generally less flavorful than fresh or frozen dill. Savvy Gardening also recommends a cool, dark storage place for dried leaves and seeds. Those recommendations agree on the important point: drying is a useful preservation method, not the best way to imitate fresh dill.
How to keep dill producing for longer
The most effective way to extend the season is to manage age and timing, not to keep cutting one old plant harder. Direct-sow a few seeds in a new spot while the first planting is still productive. Dill dislikes root disturbance, so sowing where it will grow is often simpler than moving large seedlings, a point also reflected in the University of Minnesota Extension’s dill guidance.
Give young plants enough light, air movement, and water at the root zone. Avoid overwatering or crowding: USU Extension notes that overwatered dill is susceptible to powdery mildew, and crowded plants are harder to inspect and harvest cleanly. A well-drained bed with moderate fertility is usually more useful than repeated feeding that produces tall, floppy foliage.
Choose varieties according to the harvest you want. Fernleaf is compact and useful where space is limited, while Bouquet is known for long stems and bright flower heads. Tetra and Dukat are described by USU Extension as strong-flavored, bright green, slower-bolting choices. No cultivar is immune to heat, but a suitable variety can buy you a wider harvest window.
Common dill harvesting mistakes to avoid
Cutting a thin plant down to the soil: A seedling with only a few stems needs time to establish. Harvest lightly or wait until it has several healthy frond-bearing branches.
Taking the central growing point every time: Removing the newest center can slow the plant more than taking older outer stems. Leave some active growth whenever the plant is small.
Harvesting more than you can use while the plant is wet: Wet foliage wilts and spoils faster. Cut what you need, let the surface dry, and dry the harvest thoroughly before storage.
Pinching every flower automatically: If you want seed, pickles, pollinators, or swallowtail habitat, some flowers are part of the plan. Remove only the buds that conflict with your current harvest goal.
Expecting a bolted annual to become bushy again: A timely pinch can delay flowering, but a mature seed-setting plant has already shifted its resources. Start a succession planting instead of stripping it bare.
Letting a trap for seed become a weed patch: Dill self-seeds readily. Collect the heads deliberately or remove volunteers where they crowd slower herbs and vegetables.
Storing every part the same way: Fronds, flowers, green seed heads, and dry seeds have different moisture levels. Use fresh storage for tender leaves, immediate use for green heads, freezing for fresh flavor, and fully dry storage for mature seed.
Conclusion
Harvest dill by stage and purpose. Cut leafy fronds when the plant is established and still mostly vegetative, preferably before full flowering; gather newly opened umbels for flowers; take plump green heads for fresh pickling; and bag dry brown heads for seed.
Protect regrowth by using sharp snips, leaving the active growth points intact, and taking no more than about one-third of a small plant at once. When heat or age pushes the plant to bolt, do not treat that as wasted space: harvest the flowers or seeds, preserve the useful foliage, and sow another small patch for the next round of tender leaves.



