Why Are My Orchid Leaves Splitting? 5 Causes and Fixes
Why are your orchid leaves splitting? Learn how to separate watering stress, dry air, sun, injury, and root trouble—then save new leaves with a safer routine.
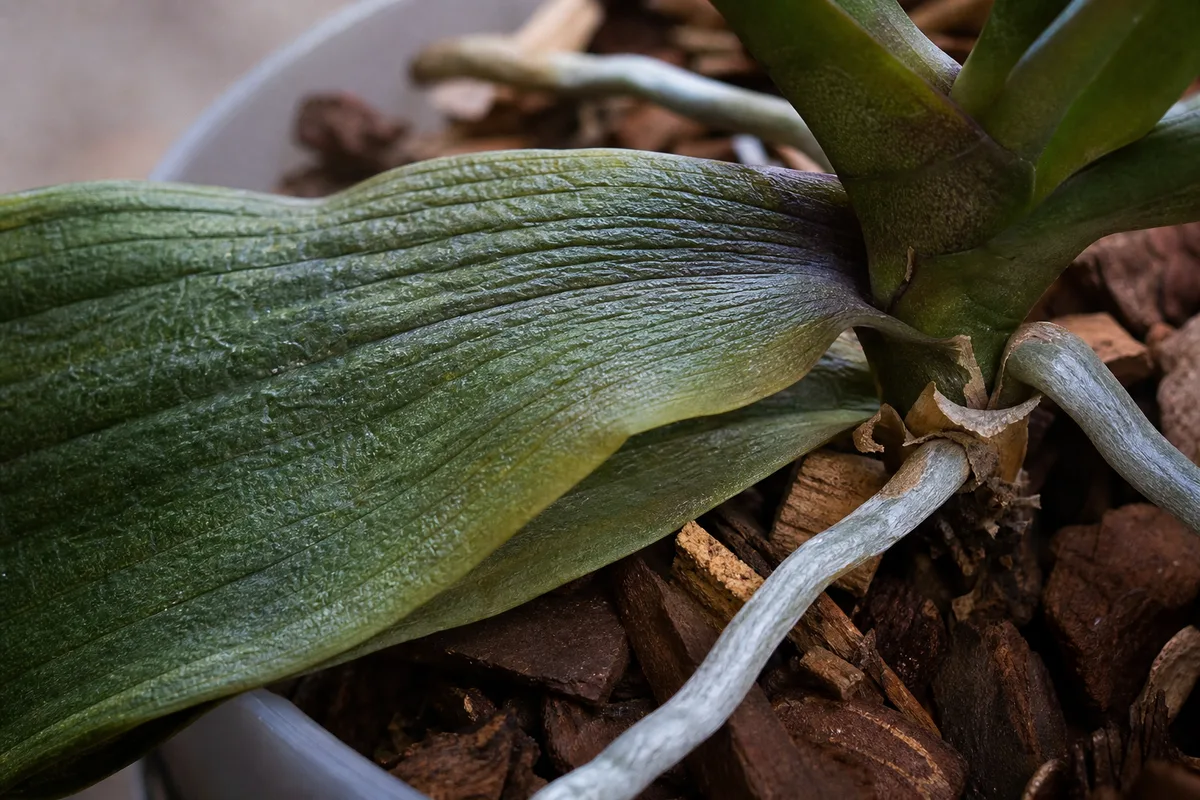
An orchid leaf can split and still be perfectly capable of feeding the plant. The tear is alarming because it often runs through the central vein, but one split does not automatically mean your orchid is dying or that you need to cut the leaf off today.
The useful question is not only “what caused the crack?” It is “is the damage old and dry, or is the leaf still being stressed by a wet root system, harsh light, dry air, cold, pests, or infection?” Use the shape of the split and the condition of the roots to answer that before you change several care habits at once.
What a Split Can Tell You Before You Change Care
Most grocery-store orchids are Phalaenopsis, or moth orchids, and their broad leaves respond quickly to changes in water balance. The American Orchid Society’s Phalaenopsis culture sheet describes these orchids as plants that need thorough watering followed by a nearly dry period, bright filtered light, moderate-to-high humidity, and moving air. That combination is more useful than a fixed instruction such as “water every Sunday.”
A vertical split through the midrib
A split that runs lengthwise from the tip toward the base, especially along the midrib, usually points to stress inside the leaf rather than a single bump. Long dry intervals, low humidity, hot sun, or roots that cannot move water can leave the leaf less flexible; a sudden change in water availability can then open the weakest line.
Look for supporting clues rather than treating the direction as a diagnosis. Wrinkled leaves and a very light pot support drought stress, while a wet mix, dark soft roots, and a sour smell point toward root loss from excess moisture. If the plant is firm, the medium is appropriately moist, and only one leaf is affected, the split may be an old injury or a one-time fluctuation.
A horizontal split or sharp crease
A crosswise tear is more often mechanical. A leaf can be creased when the plant is boxed, carried by the foliage, pressed against a window, crowded beside another plant, or knocked from a shelf. A new leaf that is still unfolding can also split if it is trapped against a stake, pot rim, or dry sheath.
Trace the tear to see whether the edges are dry and clean. A crisp line without discoloration usually needs protection and observation, not glue or a drastic rescue. Check the pot, shelf, pets, children, and recent transport history before blaming fertilizer or humidity for an accident.
A wet, dark, or spreading lesion is different
An isolated dry tear is not the same as a water-soaked spot that expands. The Connecticut Agricultural Experiment Station’s orchid disease guidance describes bacterial soft rot as a wet-looking lesion that can turn brown or black and progress rapidly, especially when the plant is warm and humidity is high. Foul odor, slimy tissue, a rapidly enlarging dark patch, or damage moving toward the crown deserves urgent isolation and sanitation.
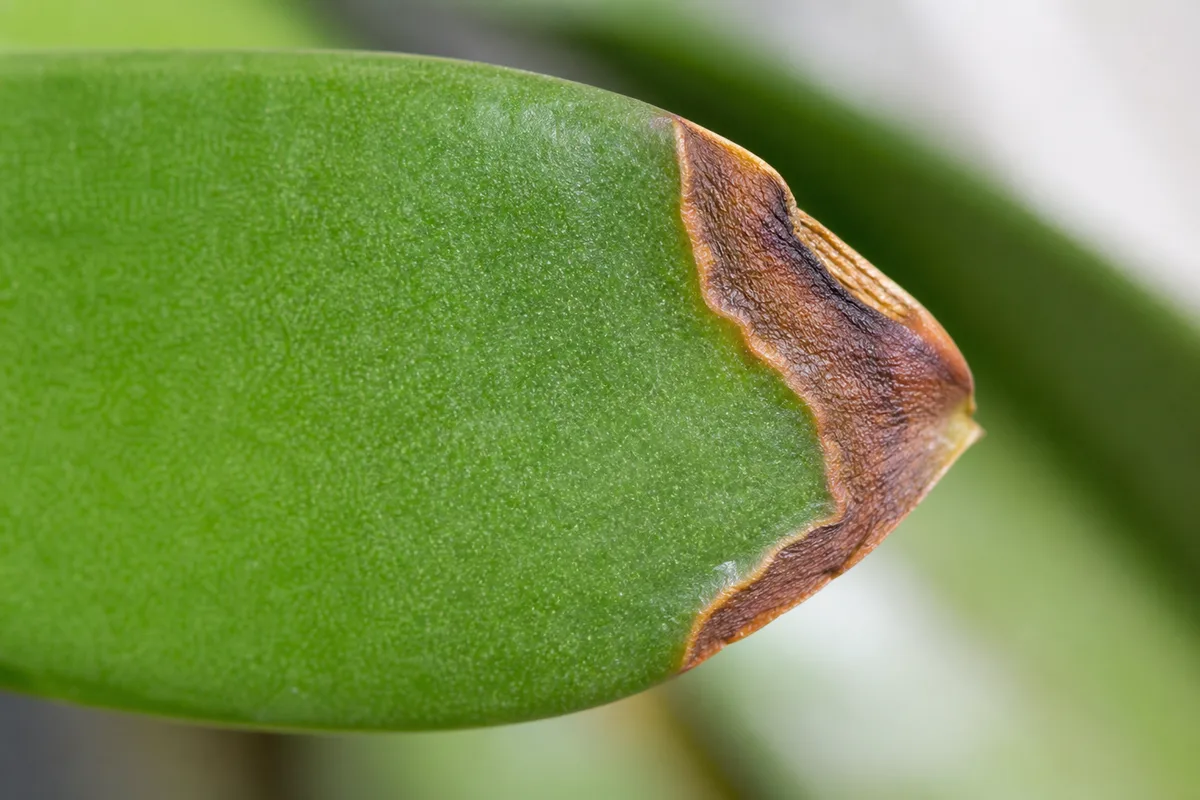
Do not mist a suspicious leaf, seal it with household glue, or share a soaking bucket with other orchids. Move the plant away from the collection, keep water off the foliage, clean tools between cuts, and use only a product whose label specifically permits the crop and indoor use if treatment becomes necessary.
1. Watering Swings Stress the Leaf and the Roots
Inconsistent watering is the most common starting point for a vertical orchid leaf split, but the phrase can hide two very different problems. The first is genuine drought: the bark or moss becomes dry, the roots lose their active growing tips, and the leaves become thin or wrinkled. The second is root damage from staying wet too long, which makes the canopy look thirsty because fewer living roots remain to transport water.
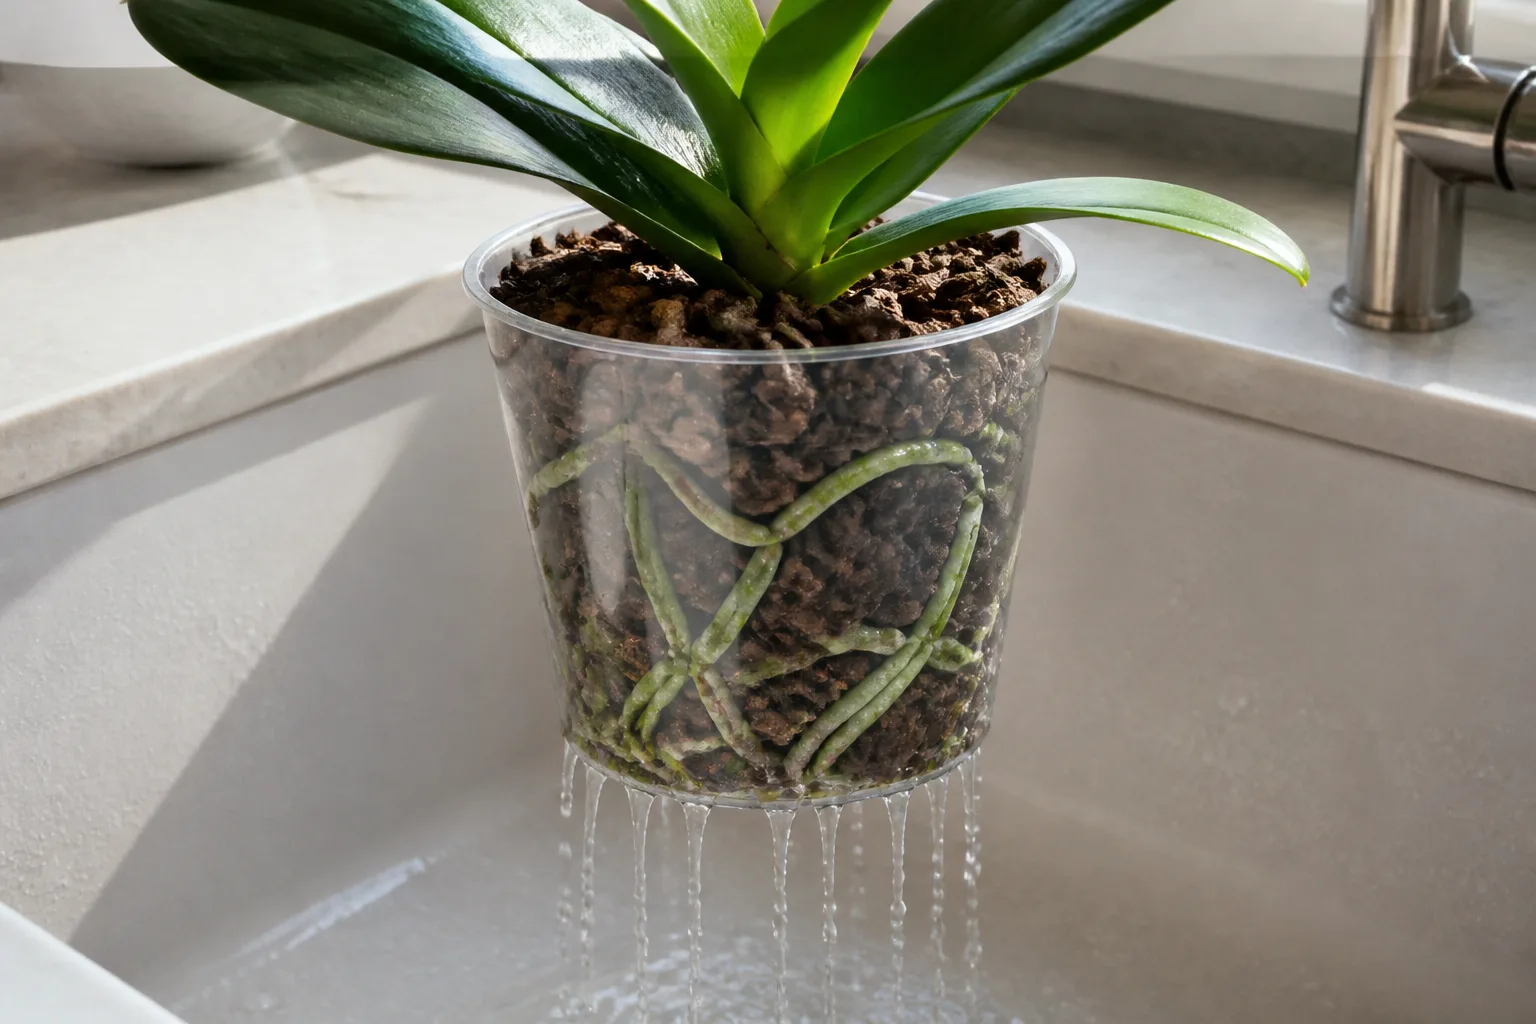
Orchid roots need both moisture and air. The American Orchid Society’s watering guide explains that the velamen, a spongy outer layer around many epiphytic roots, stores water but can suffocate when it stays wet for too long. Brown, mushy roots suggest rot; firm roots that are white or gray and dry suggest a plant that has been left too dry.
This is why pouring on more water is not always the rescue. If a thirsty-looking orchid is sitting in saturated, broken-down medium, extra water can destroy the remaining roots and create more leaf stress. Inspect the root zone before you decide whether the next action is a thorough drink or a repot.
For a healthy Phalaenopsis in a porous bark mix, water thoroughly when the medium is nearly dry, let water run freely from the drainage holes, and empty the outer pot or saucer. A wooden skewer, pot weight, visible root color in a clear pot, and the condition of the bark are better guides than the calendar. A small plant in a bright, warm room may dry in a few days; a moss-filled pot in a cool room may stay wet for much longer.
2. Low Humidity and Fast-Drying Air Leave Leaves Brittle
Dry air can make an orchid leaf lose water faster than the roots and leaf tissue can replace it. This is especially likely beside a heater, air-conditioning vent, ceiling fan, drafty window, or in a room where winter air is being heated and circulated. The leaf may develop a vertical crack, wrinkling, or brown edges, but low humidity is more convincing when several leaves show dry texture and the roots are not rotting.
The Gardening Know How guide to splitting houseplant leaves specifically connects middle-of-the-leaf splits in orchids with low humidity and recommends measuring the plant’s actual location rather than guessing from the room. The American Orchid Society gives a broad 50–80 percent humidity target for Phalaenopsis, but the number is not a license to make the plant constantly wet: air should move and foliage should dry after watering.
Measure humidity at leaf height with a small hygrometer for several days. If the reading is low, move the orchid away from the draft first, then consider grouping plants or using a humidifier that can maintain a stable range without blowing mist directly at the leaves. A correctly arranged pebble tray can modestly improve the immediate microclimate, but the pot must sit above the waterline and the tray must not turn the root zone into a reservoir.
Do not respond to dry air by misting repeatedly throughout the day. Frequent droplets that linger in the crown or along a fresh tear can increase disease risk, while a few minutes of surface dampness may do very little to raise the room’s overall humidity. Stable room moisture, proper watering, and airflow work together; any one of them alone is a weak fix.
3. Direct Sun, Heat, or Temperature Swings Damage Leaf Tissue
Phalaenopsis orchids like strong ambient light but usually dislike the hottest direct beam through glass. Sunburn can begin as a bleached, yellow, tan, or sharply brown area on the window-facing side of a leaf, and tissue that has been dried or scorched is more likely to crack. A plant moved from a dim store to a hot south or west window is particularly vulnerable because its leaves have not acclimated.
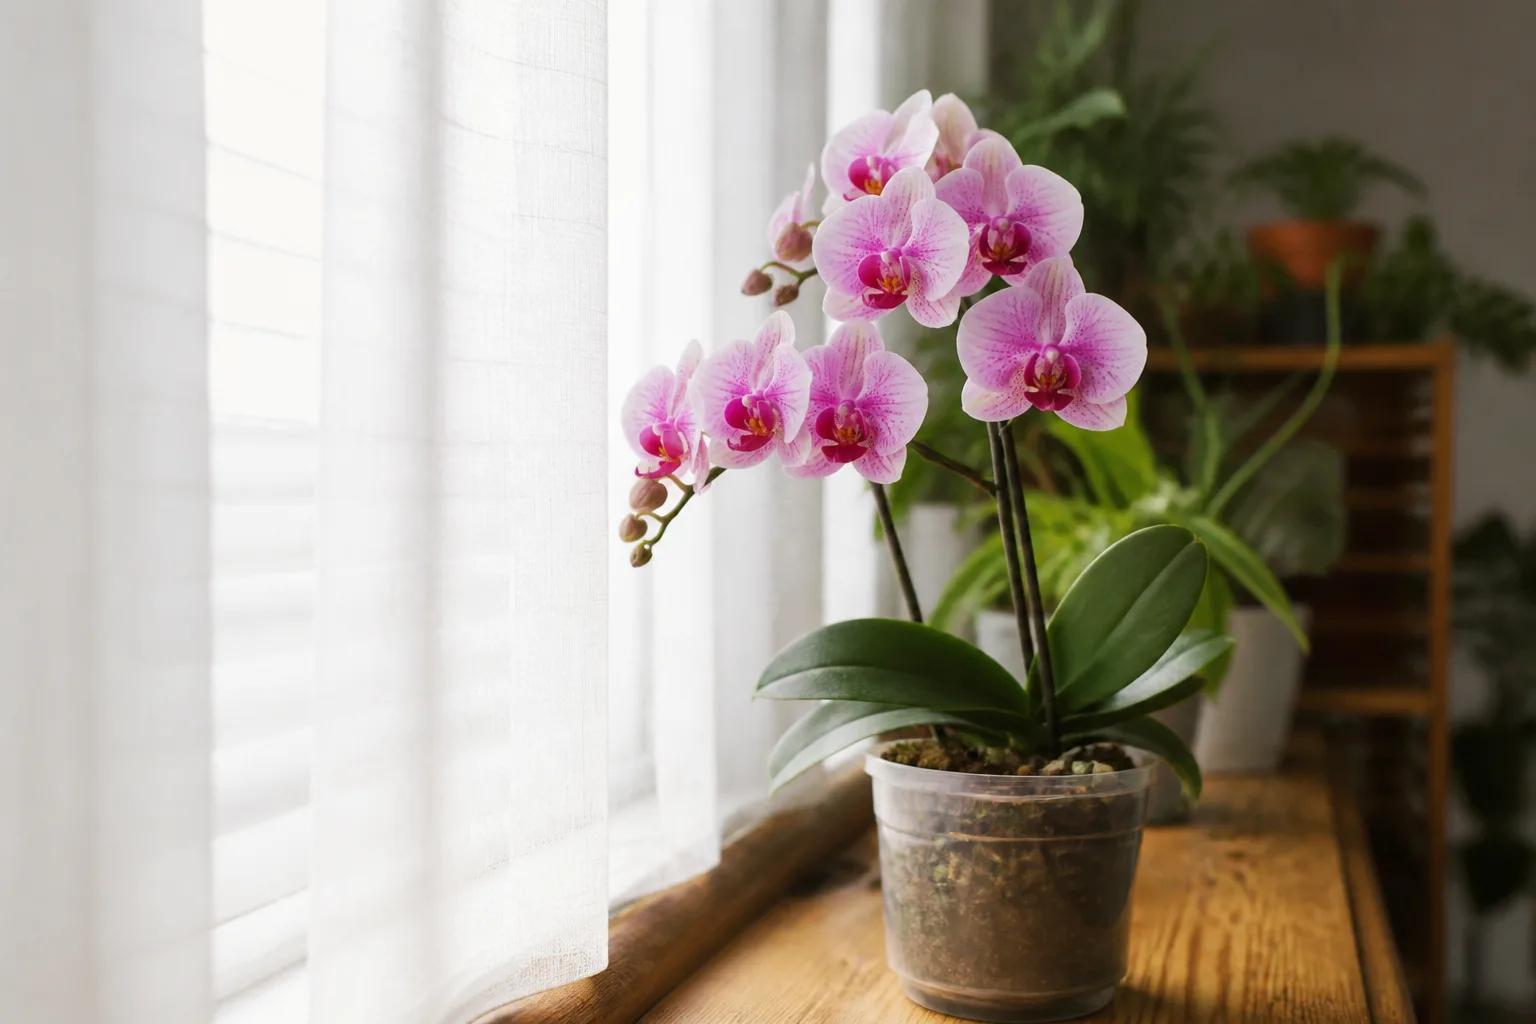
The American Orchid Society recommends a bright window with little or no direct sun for Phalaenopsis, with an east window as an easy indoor starting point. Use a sheer curtain or move the pot farther from the glass if the leaf becomes warm to the touch, develops pale patches, or shows damage concentrated on the sunny side. Dark green leaves and weak flowering can indicate insufficient light, but increasing light should be gradual rather than a sudden move into afternoon sun.
Temperature swings can add a second stress. Keep the orchid away from heating vents, air-conditioner blasts, cold glass, and doors that open onto freezing or very hot air. The goal is not a perfectly constant room; it is avoiding abrupt, repeated shifts that dry the leaves on one side while the root zone remains wet.
If a split appeared after a location change, do not make three more changes on the same day. Return the plant to bright filtered light, let the medium reach its normal drying point, and watch whether the next leaf grows cleanly. Existing scorch will not turn green, so new growth is the evidence that the correction is working.
4. Physical Damage Happens During Moving, Repotting, or Unfurling
A leaf does not need a disease or nutrient problem to tear. The broad, flexible foliage can crease when the pot tips, a flower stake presses against it, a shipping sleeve catches the tip, or someone lifts the orchid by the leaves instead of the container. A horizontal crack or a sharply folded section that appeared immediately after moving the plant is usually a record of that event.
New leaves deserve extra care because they emerge folded and soft. Do not force them open, wipe them hard, or push them through a crowded support clip. Give the plant enough room to unfurl, keep the pot stable, and handle the base or outer pot when you rotate it toward the light.
Physical damage can still become a route for infection, especially in a warm, wet room. Keep the torn edges dry after watering and watch for a change from a thin, sealed-looking line to a soft, wet, spreading patch. A clean, dry tear that stays the same size can remain on the plant for a long time without stopping it from growing.
5. Root Trouble, Old Medium, or Fertilizer Salts Reduce Leaf Strength
When the five obvious causes do not fit, inspect the root system and potting medium before reaching for a calcium supplement. A compacted or decomposed bark mix can hold too much water and too little air; a tightly packed moss pot can stay wet in the center even when its surface looks dry. Both conditions reduce root function, and weak roots can produce limp, wrinkled, or easily damaged leaves.
Fertilizer salts can also accumulate when an orchid is fed repeatedly without thorough plain-water flushing. You may see a crust on the medium or pot, damaged root tips, or new growth that is poor even though the plant is being watered. That does not prove a specific nutrient deficiency, and adding more fertilizer can make the root zone more hostile. Use an orchid fertilizer at the label rate, feed only when the plant is actively growing, and let the plant’s roots and new leaves—not a promise of faster blooms—guide the routine.
Do not repot solely because one old leaf split. Repot when the medium has broken down, drainage is poor, roots are rotting, the plant is unstable, or the container no longer supports a sensible drying cycle. A healthy orchid can be set back by an unnecessary root disturbance, so first confirm that the pot and medium are actually part of the problem.
Do This First: A 10-Minute Orchid Split-Leaf Triage
Before you water, fertilize, cut, or buy a humidifier, take ten minutes to record what is actually happening. Put the plant in good light and work through this order:
- Photograph the split and note its direction. A dry vertical line and a horizontal crease suggest different histories. Mark whether the tear is stable or visibly enlarging.
- Feel the leaf and inspect the crown. Firm green tissue with a dry edge is less urgent than a soft leaf base, a foul odor, or a dark patch moving into the center.
- Check the medium several inches down. Look at the pot’s weight, the color of bark or roots in a clear pot, and whether water drains rapidly or pools at the surface.
- Look for environmental triggers. Note direct afternoon sun, a vent, a cold window, recent transport, a new stake, or a change in watering.
- Inspect for pests. Check leaf undersides and the crown for scale, mealybugs, webbing, stippling, or sticky residue before you blame humidity.
Inspect the roots without guessing from the leaves
If the plant looks wrinkled while the pot is wet, or if the medium smells sour and stays saturated, slide the inner pot out and inspect the roots. Healthy roots are generally firm; the outer color can vary, but the tissue should not collapse when gently touched. Rotten roots are typically brown or black, soft, hollow, or slimy, while severely dehydrated roots are often dry, flattened, and gray or white.
Do not cut every dark root. Wet bark can stain a living root, and some roots naturally look darker than others. Remove only tissue that is clearly dead or mushy with clean, sharp tools, then repot into fresh, airy orchid medium in a container that fits the remaining root mass rather than jumping to a much larger pot.
Test moisture, drainage, and the potting medium
Water once and watch what happens. If water immediately runs around the sides and out the bottom while the inner bark stays dry, the medium may have shrunk away from the pot or become hydrophobic; rehydrate gradually and check again instead of flooding the plant for an hour. If water barely moves through the pot, the medium may be decomposed or compacted enough to starve roots of air.
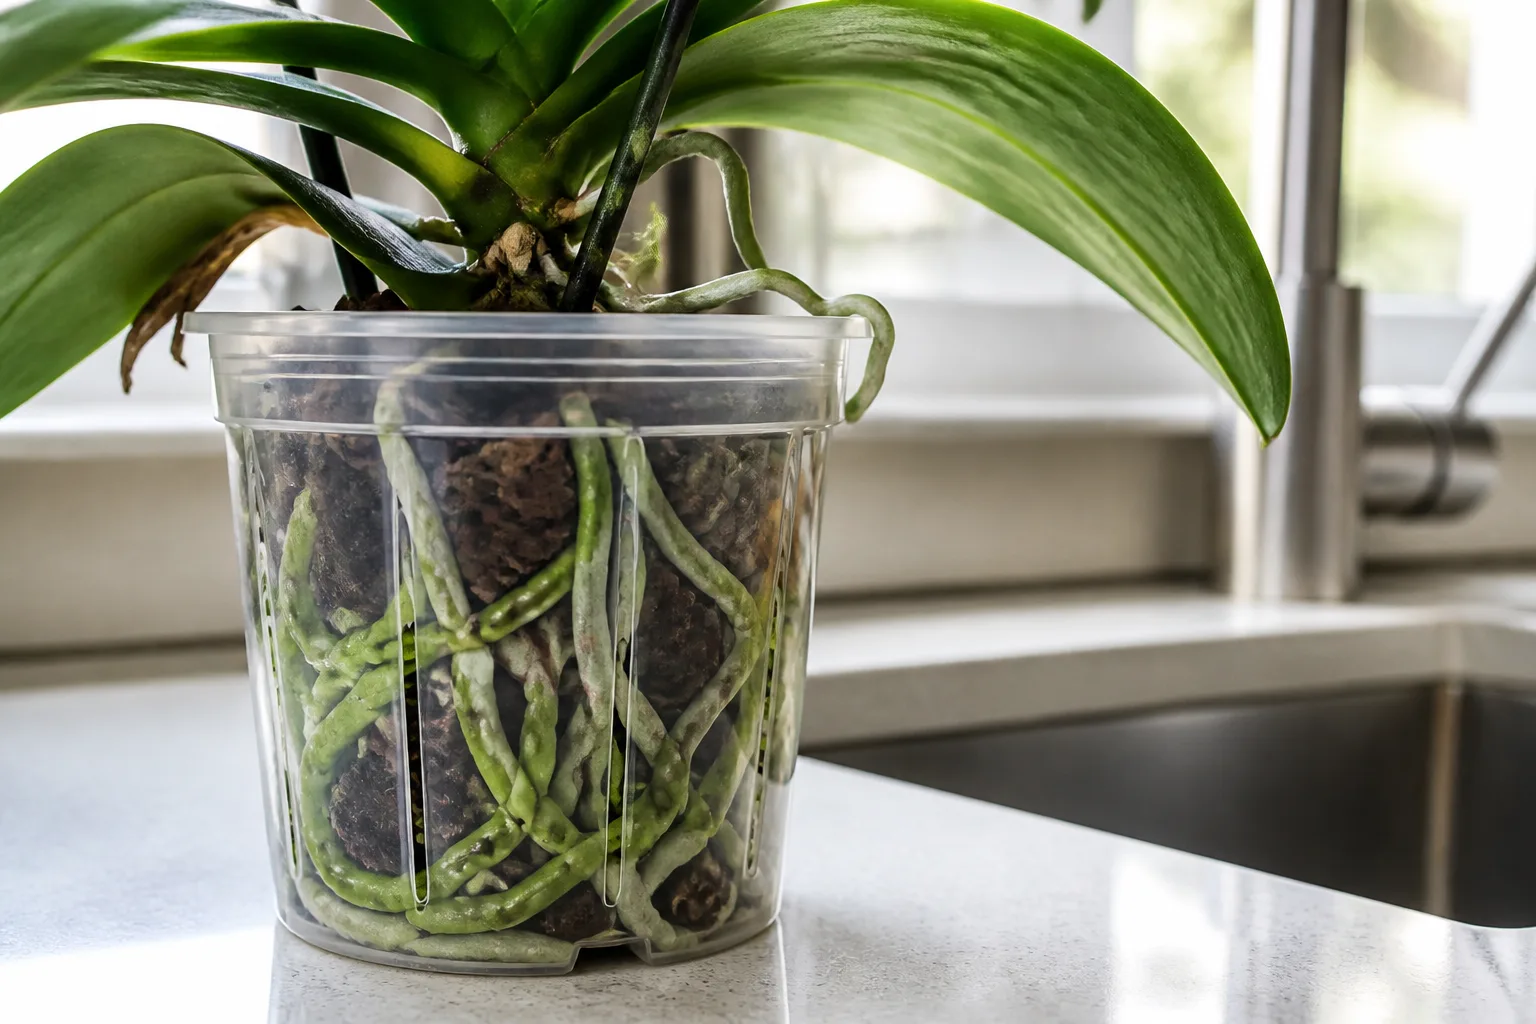
Clear pots are useful because they let you see drying and root condition, but they are not mandatory. The important features are drainage holes, a porous orchid medium, a snug fit, and a drying cycle that matches the plant’s light, temperature, humidity, and root mass. A decorative cover pot is fine only if you remove the inner pot for watering and do not leave runoff pooled underneath.
How to Save the Orchid and Stop New Splits
Once the triage points to a likely cause, make the smallest meaningful correction that addresses it. One stable change gives you useful feedback; changing water, pot, light, fertilizer, and humidity in one afternoon makes it impossible to know what helped and can add transplant shock to an already stressed plant.
Rebuild a watering rhythm based on the roots
For a dry but living Phalaenopsis, soak the bark thoroughly with room-temperature water until it drains freely, then let the pot finish draining before returning it to its cover. Do not let water sit in the crown, and water early enough in the day that accidental droplets on the foliage can evaporate. The next watering should be based on the medium being nearly dry, not on a seven-day promise.
For an overwatered orchid, pause routine watering and inspect the roots. If they are soft and decayed, remove the damaged tissue, use fresh medium and a clean pot, and give the recovering plant bright filtered light with good air movement. A plant with extensive root loss may still look thirsty for a while; watering more often cannot replace roots that no longer function.
Reset light, humidity, temperature, and airflow together
Move a sun-scorched orchid to bright filtered light, not a dark corner. Move a dry, draft-stressed orchid away from vents and cold glass, then use a hygrometer to decide whether the room needs more humidity. If you raise humidity, maintain enough air movement that the crown and leaf surfaces do not stay wet.
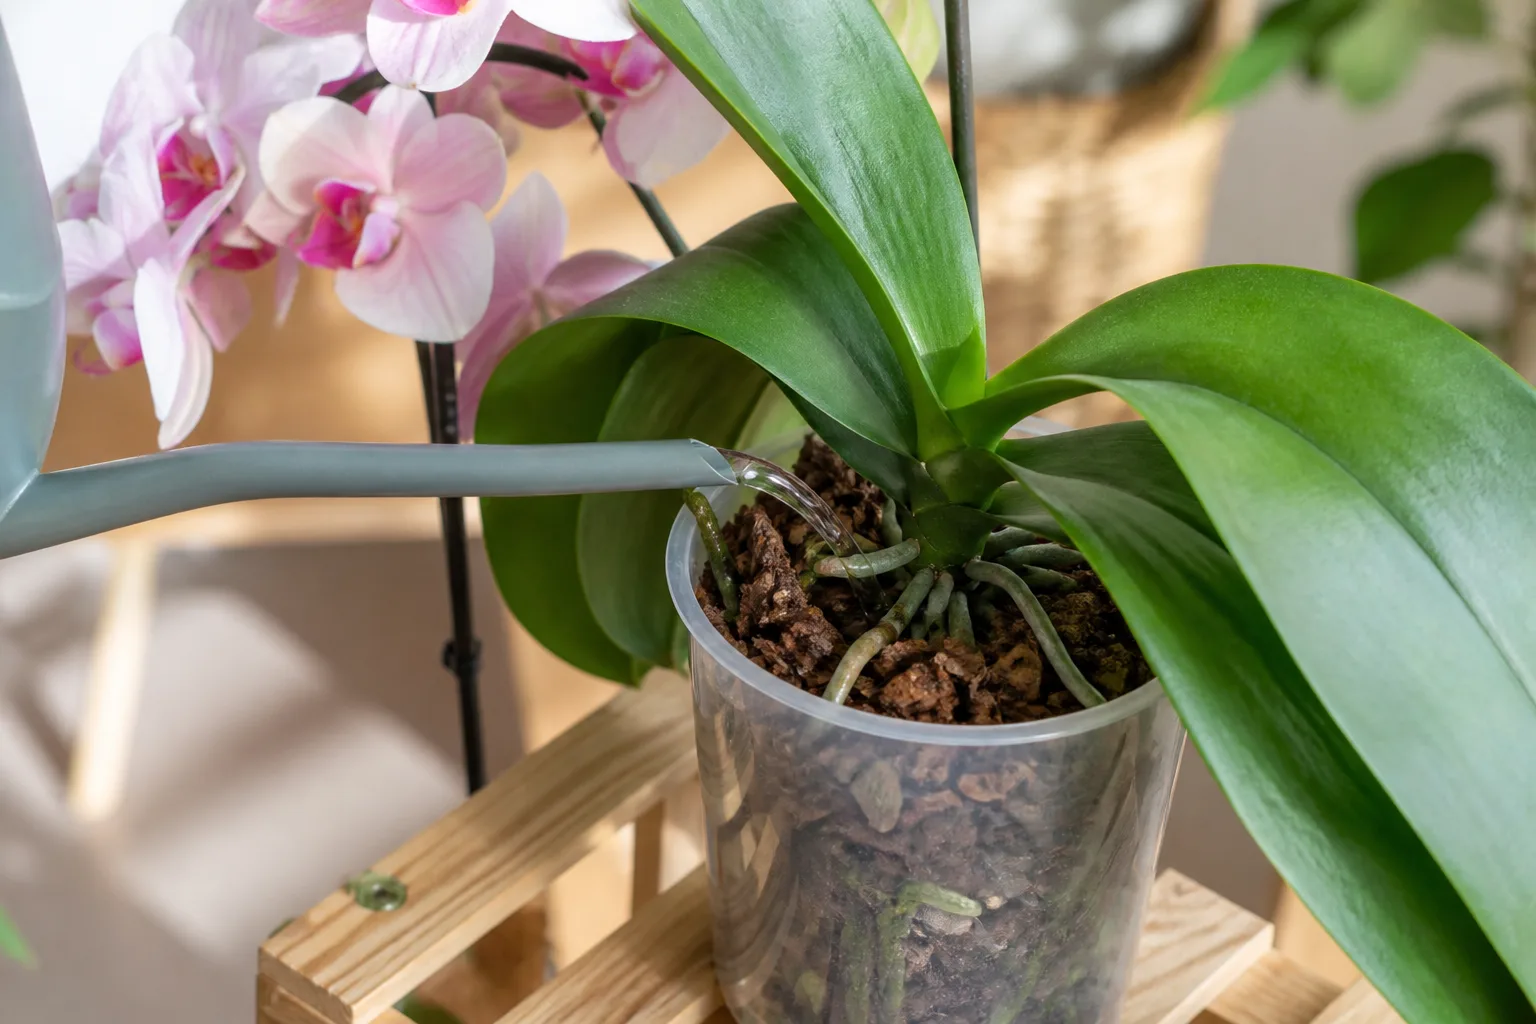
The best setup is usually boring: a stable shelf near an east window or a filtered bright window, a pot that drains freely, a room that is neither blasted by a vent nor trapped in stagnant air, and a watering rhythm that follows the medium. Orchids often recover because the grower removes the extreme condition, not because they add a complicated product.
Protect the damaged leaf while you monitor new growth
Keep a split leaf attached if most of it is green, firm, and dry. It can still photosynthesize and support the plant even though the tear will remain visible. Support the leaf loosely if its weight makes the split widen, but do not tape the surfaces together or coat the wound with household adhesives.
Track the next leaf, root tip, or crown growth instead of waiting for the old tear to disappear. A clean new leaf, firm roots, and a normal drying cycle show that the plant is recovering. If the split spreads, turns wet or black, smells foul, or approaches the crown, isolate the plant and reassess it as a possible disease problem rather than a cosmetic injury.
Can You Repair or Remove a Split Orchid Leaf?
You cannot make an established split leaf grow back into one piece. The Plant Index guide to orchid leaf splitting makes the practical distinction clearly: the existing leaf will not revert, but the conditions that caused future damage can be corrected. A healed-looking edge may dry and seal, but the tissue will still carry the old line.
Leave the leaf when it is mostly green, firm, and not spreading. Remove it only when it is fully dead, diseased, collapsing, or so badly damaged that it no longer contributes much to the plant. If you must cut, sterilize a sharp blade, make the fewest cuts possible, and avoid slicing into the crown or healthy neighboring leaves.
Do not automatically dust a fresh cut with kitchen cinnamon or spray a fungicide. Products differ in safety and effectiveness, and powders can cake into wet tissue. Clean tools, dry foliage, isolation, sanitation, and correcting the cause are the safest first measures; use a labeled treatment only when the symptom and product actually match.
Prevent Splitting With a Simple Weekly Check
Once a week, lift the pot and look through the leaves before you water. Check whether the medium is nearly dry, whether roots are firm and active, whether the crown is dry, and whether the plant is still receiving bright filtered light. This takes less time than recovering from a root system that has been kept wet by an automatic calendar.
Keep a short note of the interval between watering and the conditions that changed it. A warm bright week, fresh bark, a moss-heavy pot, winter heating, a moved plant, or a new flower spike can all alter how quickly the orchid uses water. After a few cycles, you will have a plant-specific range rather than a generic schedule.
Handle the plant by its pot, leave space for leaves to unfold, and keep it away from pets, traffic, vents, and hot glass. When watering, wet the root medium thoroughly, drain it completely, keep water out of the crown, and allow enough air movement for surfaces to dry. These small habits address the most common pathways to new splits without turning the plant into a daily project.
Conclusion
Orchid leaves usually split because the plant has been pushed through a rapid change in water balance, humidity, light, temperature, or handling—not because one cracked leaf proves the plant is doomed. Start with the split’s direction and texture, then confirm the story at the roots and in the potting medium.
Correct the underlying condition, leave a healthy damaged leaf in place, and judge recovery by firm roots and clean new growth. If tissue becomes wet, dark, foul-smelling, or rapidly expands toward the crown, isolate the orchid and treat it as a possible disease problem. A stable watering rhythm, bright filtered light, moderate humidity with airflow, and gentle handling will do more for the next leaf than any quick cosmetic fix.



