14 Useful Wooden Pallet Garden Ideas for Your Backyard
Turn a clean pallet into a garden bed, compost bay, herb wall, or potting bench. Compare 14 projects, then learn how to check stamps, drainage, and stability.
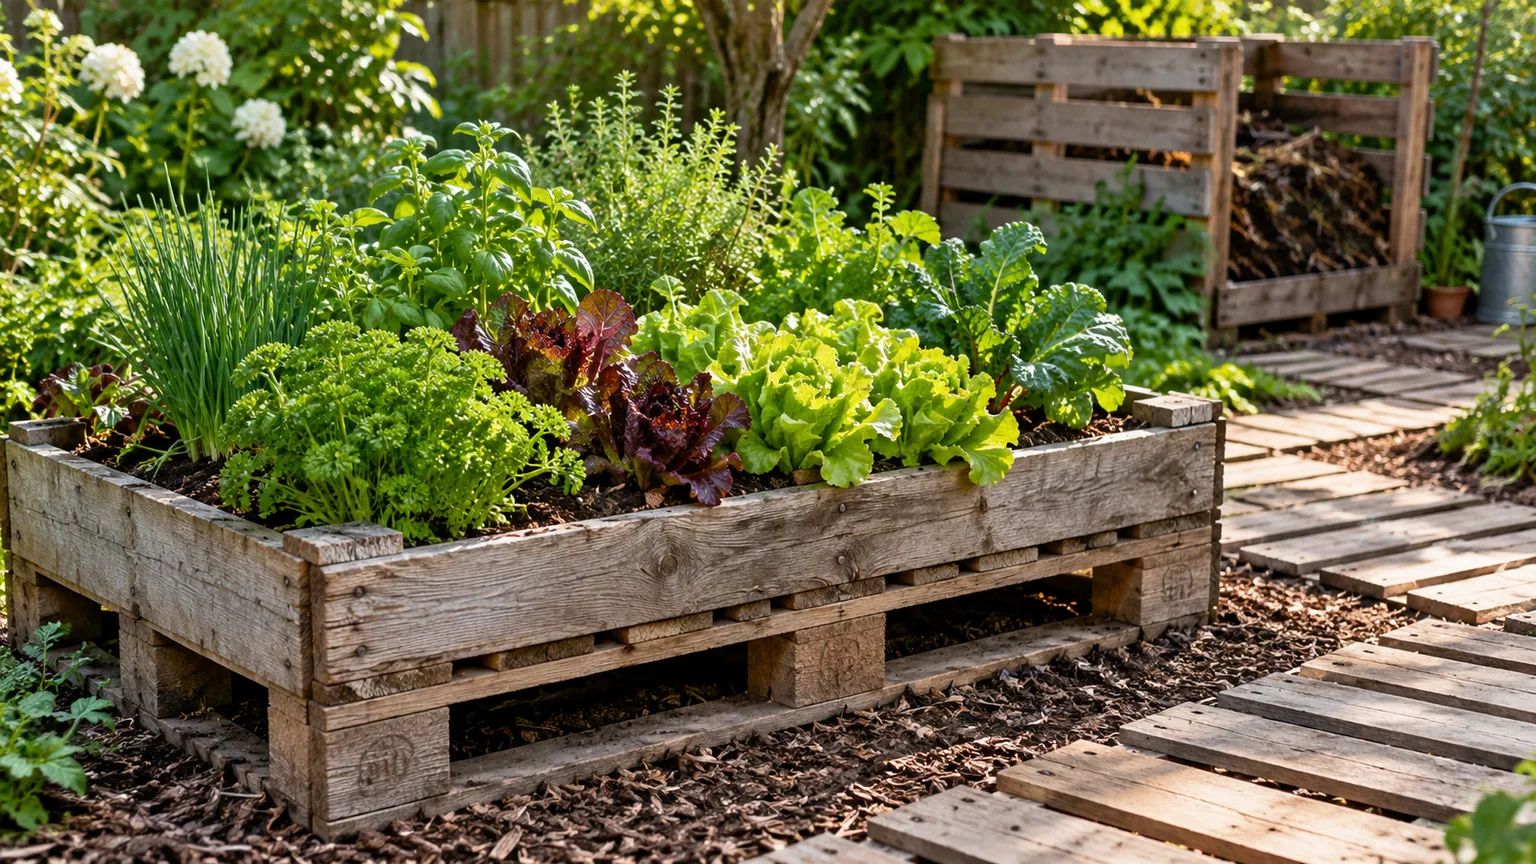
A sound, clean wooden pallet can become a useful garden structure, but the best project depends on what the pallet has been exposed to and how much weight the finished build must carry. Before you cut, choose whether you need a simple path, a soil-holding planter, a storage station, or a sturdy piece of furniture; each asks different things of the wood.
The easiest wins are usually a compost bay, a low-traffic slat path, or a freestanding herb rack. Raised beds and deep planters can also work, but they need stronger joinery, drainage, and a plan for wet soil. A pallet stamp helps with one part of the decision, while the pallet’s source and condition answer another.
Before You Cut: Match the Pallet to the Project
First decide what the build needs to do. A whole pallet is handy when you want a ready-made frame or a vertical surface; dismantled boards are more flexible for boxes, benches, and window planters. If you only have one pallet and limited tools, start with a project that uses its existing dimensions rather than forcing it into a complicated shape.
| If you want… | A good first choice | Main constraint |
|---|---|---|
| A fast garden structure | Compost bay or plant rack | Check the pallet’s history and stability |
| More growing room | Raised bed or deep planter | Wet soil is heavy; reinforce the corners and base |
| A small-space display | Herb ladder or strawberry planter | Top pockets dry faster and need frequent checks |
| A place to work | Potting bench | Add legs and bracing; do not trust a pallet deck alone |
Think about the location before building. A vertical garden on a sunny wall may dry quickly, while a planter against a damp fence can trap moisture and shorten the wood’s life. If your garden is exposed to strong wind, treat tall panels and screens as structures that need secure posts or anchoring, not as lightweight decorations.
Cost is only one part of the decision. A free pallet can still require a pry bar, replacement boards, screws, a liner, and time to remove nails; if you need a precise size or a smooth, finished surface, buying new boards may be faster and less wasteful. The most successful upcycle is the one that solves a real garden problem without asking damaged wood to do a job it was never designed for.
For layout inspiration, One Kindesign’s gallery shows how pallets can be used upright, horizontally, or flat on the ground; treat the pictures as design prompts rather than plans for structure or anchoring. That distinction matters most for a tall planter or a piece of furniture, where a polished photo cannot tell you whether a joint will carry wet soil or a person. (One Kindesign pallet-garden gallery)
Prep the Pallet: Check the Mark, Wood, and Fasteners
Look for an intact stamp on a pallet used for international shipping. HT identifies heat treatment under the ISPM 15 wood-packaging standard; MB identifies methyl-bromide fumigation. USDA APHIS describes heat treatment as bringing the wood core to at least 56°C (133°F) for 30 minutes and says the official mark indicates compliance with importing-country requirements. The International Plant Protection Convention says ISPM 15 reduces quarantine-pest risk in international wood packaging and is not meant to protect against later contamination. The stamp is therefore a narrow pest-treatment record, not a history of the pallet’s cargo or a blanket guarantee that the wood is suitable for food growing. (APHIS wood-packaging treatment guidance, APHIS inspection guidance, International Plant Protection Convention standard)
Avoid a pallet stamped MB, and pass on wood with oily patches, chemical odors, paint or spills of unknown origin, soft rot, deep cracks, pest holes, or a source that makes you uneasy. An unmarked pallet does not let you verify its treatment, so choose a known, clean source for a project that will hold edible plants or touch potting mix. A stamp is useful, but it cannot tell you whether the pallet carried pesticide, oil, or another contaminant.
For any accepted pallet, brush away dirt, inspect every board, and remove loose nails before lifting or turning it. Wear eye protection and work gloves when prying boards apart; pull fasteners fully rather than hammering them through where a person or plant can meet the sharp end later. Sand splinter-prone edges, pre-drill near board ends to reduce splitting, and use exterior-rated screws or brackets where rain can reach the joints. If the wood is questionable, do not cut or sand it to make it seem safer; use different material.
1. Lay a Low-Traffic Garden Walkway
Pallet slats can make a simple stepping path between beds, a greenhouse, or a potting area. Dismantle the pallet, select boards of similar thickness, and lay them across a firm, level base of compacted gravel so water can drain beneath them. Set the boards with small gaps for drainage and leave enough room to sweep out leaves and soil.
This is a light-duty surface, not a deck or an accessible ramp. Use it where people walk slowly and where the boards will not need to carry wheelbarrows, loaded carts, or heavy equipment. Wet algae, mud, and frost can make rough boards slick, so keep the path low and inspect it after rain; replace any board that rocks, splinters, or begins to rot.
2. Build a Fixed Garden Bench
A pallet bench can turn a bare corner into a place to take off muddy gloves, but do not assume that a shipping pallet is already a safe seat. Pallets are designed for particular loads distributed in particular ways; age, missing blocks, damaged boards, and how you connect the pieces all change what the finished bench can hold. Dismantle the pallet and use sound boards for the seat and back, then add proper legs, cross-bracing, and exterior fasteners.
Keep the bench low, square, and supported at several points. Test it gradually before regular use, and do not use it as a step ladder or platform. A coat of paint or outdoor finish can make the bench easier to clean, but follow the product label and do not apply a finish to wood that will touch food crops or growing mix unless the product is approved for that use. Store cushions indoors so they do not hold moisture against the wood.
3. Make a Raised-Bed Frame From Pallet Boards
Disassembled pallet boards can form a short frame for a small vegetable or flower bed. Build a rectangle with corner stakes or posts on the inside, fasten the boards into those supports, and set the frame on level ground. A simple frame keeps the growing area visually contained and makes it easier to add compost or a top layer of soil, but it is not the same as a tall, load-bearing raised bed.
Use boards with known, clean history for edible beds, and avoid relying on thin slats to resist a deep column of wet soil. If the walls are more than a single board high, reinforce the corners and long sides; soil pressure can push a lightly joined frame outward. A pallet-frame bed is most useful for shallow-rooted crops, herbs, and flowers. If you want deep soil for root crops, build a properly supported box from suitable lumber rather than stacking pallet frames and hoping they stay square. Amanda Seghetti’s pallet-bed tutorial offers a visual example of adapting the boards, but your own frame still needs corner support sized for its soil depth and dimensions. (Amanda Seghetti’s pallet raised-bed tutorial)
4. Assemble a One-Bay or Three-Bay Compost Bin
Three whole pallets joined in a U shape make a quick compost bay with built-in airflow through the slats. Secure the corners with sturdy brackets or posts, place the open side where you can reach it with a fork, and add removable front boards if you want to keep material from spilling out. Set the bin on bare soil so liquid can drain and soil organisms can move into the pile.
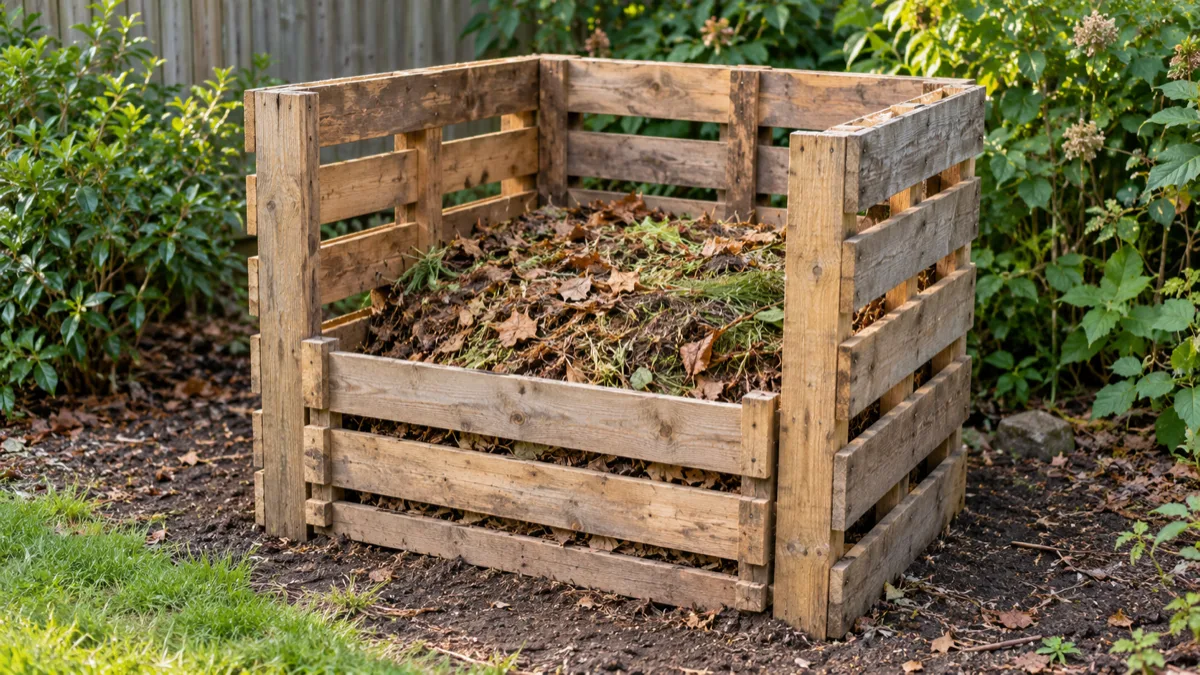
A single bay suits a small yard and a steady supply of leaves and kitchen scraps. A three-bay system is more useful if you want to move material through fresh, active, and finished stages without repeatedly emptying one pile. Lovely Greens’ pallet-bin tutorial shows the basic reuse approach; the practical improvement is to plan the front opening before you fasten the sides so turning the pile remains easy. (Lovely Greens pallet compost-bin tutorial)
5. Mount a Vertical Planter Against a Fence
An upright pallet can act as a frame for separate pots, planter boxes, or fabric pockets. Using individual containers keeps each plant’s root zone contained and makes replacement easier than packing soil directly into every gap. Attach the pallet to solid posts or a structural wall with hardware suited to the surface, and let the bottom rest on the ground or a supported rail when possible.
Water changes the weight substantially, and the pallet’s slats are not a reliable mounting system by themselves. Secure the frame at several points, check that the fence can carry the load, and avoid attaching a heavy, soil-filled pallet to thin fence boards. Choose compact herbs, annual flowers, or greens that match the wall’s light; a hot, exposed wall can overheat pots and dry them between checks.
6. Create a Freestanding Herb-Garden Ladder
If you cannot drill into a fence, make a leaning herb display from one pallet and two sturdy rear braces. Stand it with the base wider than the top, add a brace to prevent it from folding or sliding, then fit separate containers into the openings. This keeps the unit movable while reducing the risk of a tall, loaded pallet tipping forward.
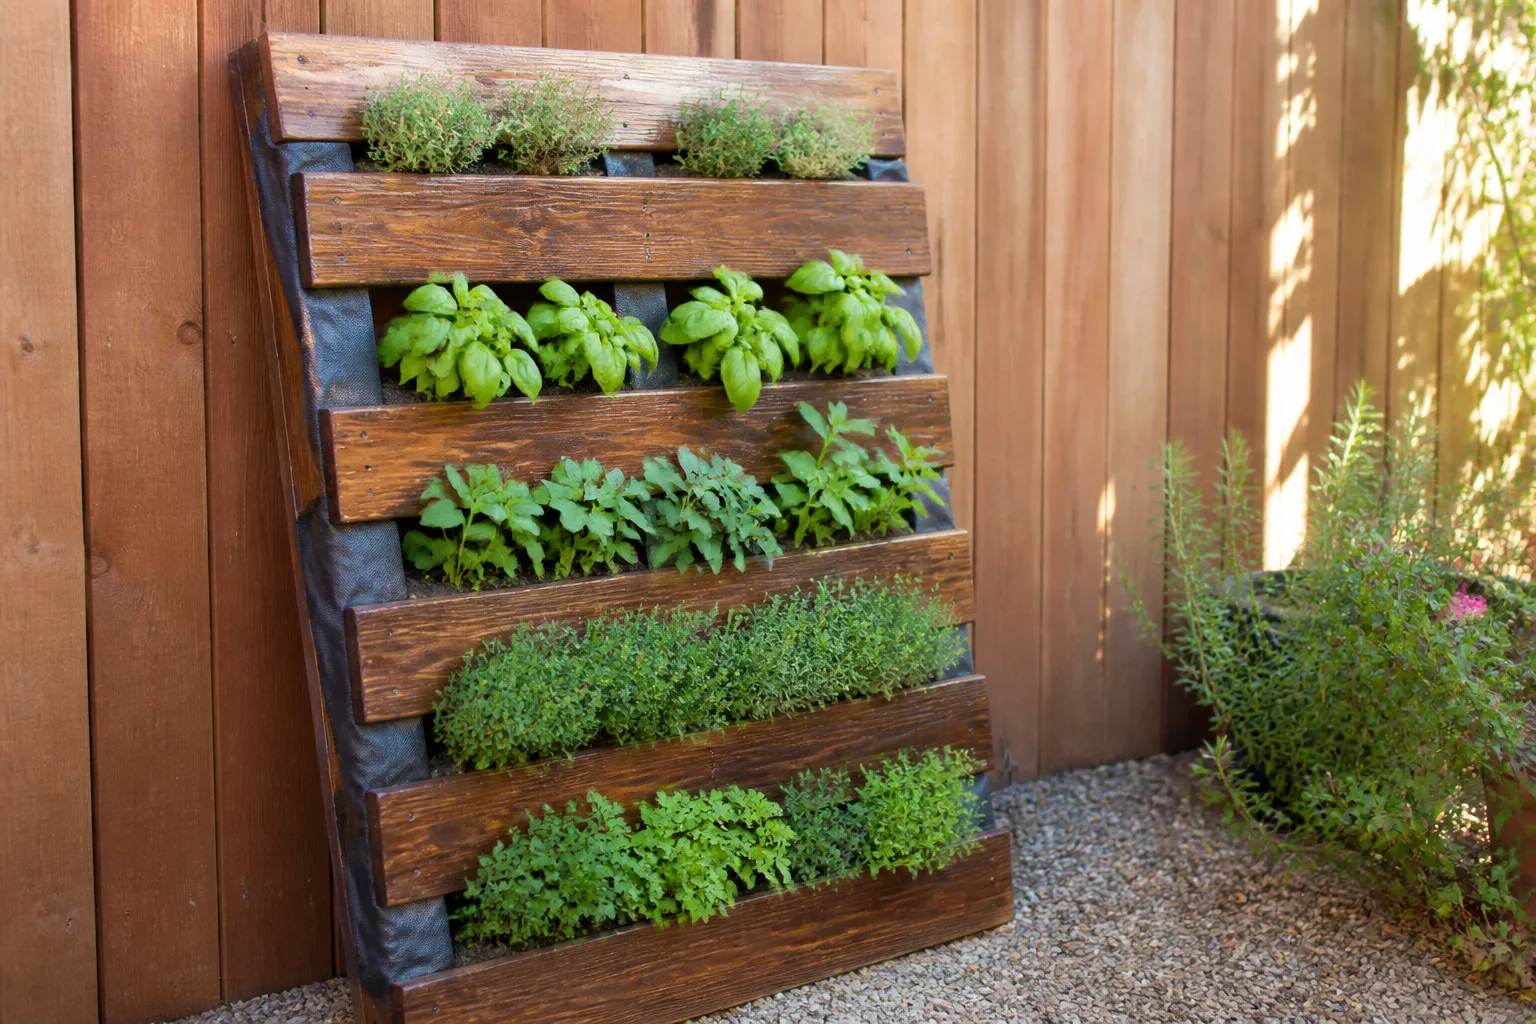
Group herbs by water needs instead of arranging them only by color. Rosemary, thyme, and oregano prefer faster drainage than basil or parsley, so plant them in separate pots that can be watered independently. Put taller or thirstier herbs where they will not shade every pocket below, and avoid filling the entire structure with soil: containers drain better, weigh less, and are easier to replace when a plant outgrows its space.
7. Build a Deep Planter Box
A deep pallet planter is a better home for larger crops than narrow vertical slots because roots have more continuous soil volume. One practical approach is to dismantle the pallet and use the boards as cladding over a sturdy frame, with thicker corner posts carrying the weight. Add a supported bottom, drainage openings, and a liner that holds the growing mix without sealing water inside.
Decide where the planter will live before filling it. Even a modest box becomes difficult to move after wet mix is added, and putting it against a wall can trap dampness where the back cannot dry. The Lovely Greens planter tutorial demonstrates how boards can be reassembled into a freestanding container; for a larger box, add a stronger frame and check the base rather than scaling thin boards up unchanged. (Lovely Greens pallet planter instructions)
8. Make a Strawberry Planter With Planting Pockets
Strawberries suit a vertical pallet because their leaves and fruit can spill over the edges rather than taking up a broad patch of ground. Fit planting pockets or narrow troughs across the slats and make sure each pocket has drainage. Use a light container mix, and leave enough depth for roots; tiny gaps packed with garden soil dry out fast and can wash onto the patio.
Place the planter where the plants receive the sun they need without baking against a south- or west-facing wall in very hot weather. Water from the top slowly and check lower pockets too, since runoff can leave them either too wet or unexpectedly dry depending on the pocket design. If harvesting fruit is the main goal, a horizontal bed or ordinary pots may be easier to maintain than a tall wall.
9. Turn Pallet Boards Into a Window Box
Short pallet boards can be cut into a narrow window box for seasonal flowers or compact herbs. Assemble the box with end supports and a solid bottom, drill several drainage holes, and set it on brackets intended for the window or railing where it will hang. Water must escape without running down a wall or into a neighbor’s space, so consider a removable drip tray only if it will not hold standing water around roots.
The important check is the mounting, not the charm of the wood. Wet soil, the box, and mature plants add weight, while wind can pull outward on a box projecting from the building. Follow the building or bracket maker’s load instructions and fasten into suitable structure; if the mounting is uncertain, keep the box on a railing shelf or a stable deck ledge instead.
10. Make a Rolling Container Garden
A pallet platform with locking casters can move lightweight pots into sun, shade, or shelter. Use boards that are sound and evenly supported, attach casters at reinforced corners, and keep the pots centered over the wheelbase. This works best as a plant display or small container caddy rather than a cart for hauling soil, stone, or a person.
Before adding plants, roll the empty platform over the actual surface and see whether the wheels catch on cracks or gravel. Lock all casters before watering or pruning, and avoid ramps or sloped paving where the unit could drift away. For a heavy grouping of containers, use a commercially rated plant dolly or build a framed base with load-rated wheels instead of asking a pallet deck to carry more than it was designed for.
11. Build a Garden Tool and Pot Rack
Stand a pallet against a shed wall or fence to organize long-handled tools, empty pots, and light accessories. Add hooks or simple brackets to the solid blocks or a reinforced frame, and keep sharp tool heads pointed down or covered. A lower shelf can hold empty containers, while the open slats make it easy to see what is stored.
This is a good use for a pallet with cosmetic wear that is still structurally sound and free of contamination. It is also a convenient way to keep tools off damp soil, but it should not become an improvised ladder or a rack for heavy bags. If it stands freely, brace the back and secure it against tipping; if it attaches to a wall, fasten into framing or masonry rather than thin siding.
12. Use a Pallet as a Bean or Cucumber Trellis
A pallet can serve as a broad support panel for peas, pole beans, or compact cucumbers when it is fixed to sturdy posts. Set the posts before planting, attach the pallet securely, and guide young vines through the openings while stems are still flexible. The spaces provide multiple tie points and make harvesting easier than a dense tangle on the ground.
Do not assume every pallet is strong enough to support a mature vine loaded with wet foliage and fruit. Add posts at the sides, check the panel after wind, and support heavy cucumbers with slings if the stems are straining. Large squash vines or very heavy crops may need a purpose-built trellis with stronger members and deeper anchoring.
13. Add a Low Garden Border or Screen
Short sections of pallet boards can separate a path from a planting bed or hide an untidy compost corner. Use the pallet as a decorative screen, not as a security fence or a barrier expected to stop deer, livestock, or determined pets. For a low border, set short stakes behind the boards and leave the lower edge slightly above persistently wet ground so it can dry.
If you want a taller screen, add posts that carry the wind load and anchor them appropriately for your soil and local conditions. A broad, lightweight pallet panel can act like a sail in a gust, especially when it is covered with climbing plants. Keep the design open enough for airflow, and do not fasten a tall panel to a weak fence and assume the existing fence will suddenly be stronger.
14. Make a Potting Bench and Seedling Station
Pallet boards make useful shelves and work surfaces for potting up seedlings, dividing plants, and storing empty pots. Build a framed bench at a comfortable working height, add a lower shelf for bulky containers, and keep the top simple enough to sweep clean. A narrow rail with hooks can hold a trowel and pruners, while a shallow tray catches loose mix before it reaches the patio.
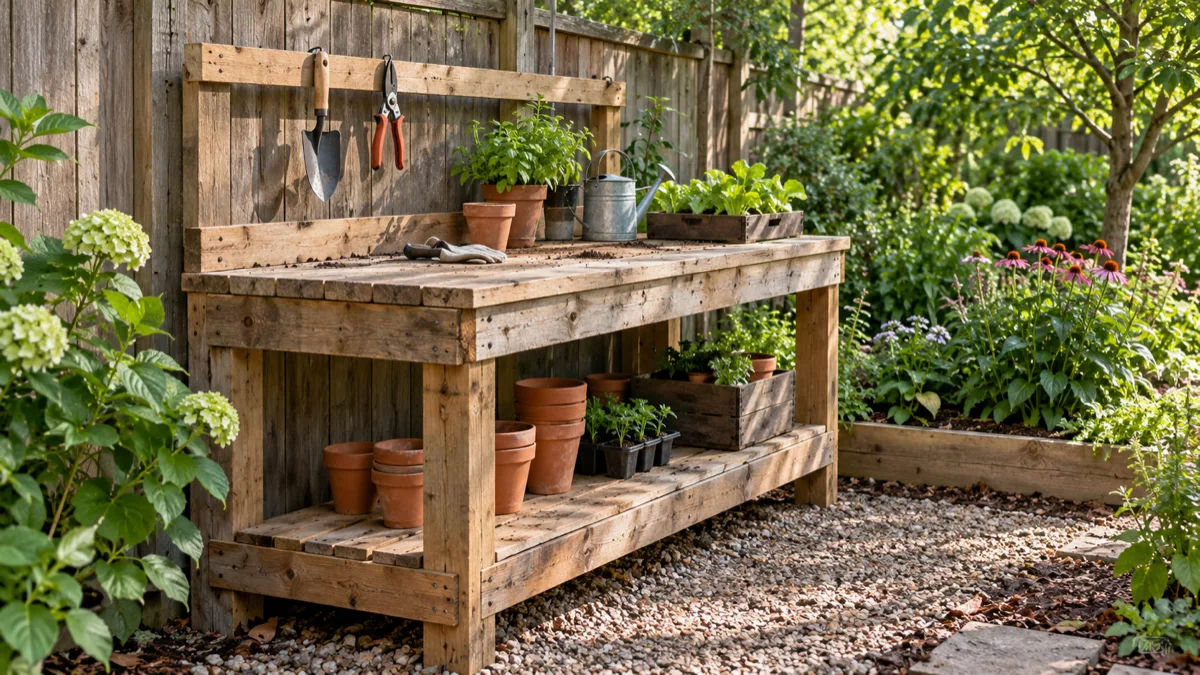
Give the legs and joints more support than a stack of pallets would provide. The bench should not wobble when you press down on one corner, and it should sit on level ground so pots do not slide off. If you plan to use it for food preparation as well as gardening, choose a smooth, cleanable surface intended for that purpose rather than assuming reclaimed wood is sanitary.
Planting and Finishing: Drainage, Sun, and Water
Any enclosed pallet planter needs a clear path for excess water to leave. Use a liner only where it keeps mix from escaping; add drainage openings at the low points and make sure the planter does not sit in a puddle. A liner cannot turn questionable wood into suitable growing material, and a waterproof coating can trap moisture or create a new problem if it is not intended for this use.
Match plants to the volume and exposure of the container. Shallow pockets are best for compact herbs, greens, and annual flowers; a deep, well-supported box can hold larger plants with bigger root systems. Plants in small containers can need water more often than plants in the ground, and the top of a vertical arrangement often dries before the bottom, so check the mix rather than watering every level on a fixed schedule.
Finally, inspect the wood and joints at the start of each growing season and after severe weather. Tighten loose hardware, replace soft boards, clear blocked drainage, and move or rebuild a planter before rot undermines a support. If a project must hold people, a high window box, or a heavy wall of wet soil, choose purpose-built materials and hardware with a known load capacity instead of relying on a pallet’s shipping history.
If the planter is exposed to summer heat, observe it through a full warm day before deciding how often to water. A narrow box against masonry can heat from the wall as well as the sun, while a shaded corner may stay wet long after rain; both conditions change which plants will thrive. A simple moisture check at root depth is more useful than assuming a pallet garden needs the same schedule as an in-ground bed.
Conclusion
Wooden pallets can become practical garden paths, planters, compost bays, trellises, storage, and work surfaces when the project matches the wood and the structure is reinforced for its job. Start with a clean, traceable pallet, treat the stamp as one clue rather than a safety certificate, and plan for drainage, wet weight, and anchoring before you build. If the pallet’s history is unknown or the design must carry a serious load, new material is the better bargain.



