Coconut Tree Repotting Guide
Coconut Tree Repotting Guide
Coconut Tree Repotting Guide
Coconut tree repotting is really two jobs that share one non-negotiable rule: protect the root–shoot interface and never bury the stem “deeper for stability.” Cocos nucifera is a solitary coastal palm that can become a 15–30 m landscape tree outdoors, while a nursery seedling in a terrace tub is usually a temporary, warm-climate foliage specimen. Missouri Botanical Garden places the species in USDA zones 10–12 with best growth in full sun and moist, well-drained soil; UF/IFAS similarly limits planting to warm bands such as zones 10B–11 in Florida.
This guide covers when a potted coconut needs a bigger container, how deep to set the plant, what mix to use, how to move a young palm into open ground in frost-free tropical gardens (including much of coastal and southern India), and when you should stop upsizing and only refresh the surface. Pair it with the Coconut Tree watering guide and Coconut Tree soil guide once the plant is settled, because aftercare mistakes undo a careful move faster than a slightly tight pot does.
Coconut Tree repotting: the quick answer
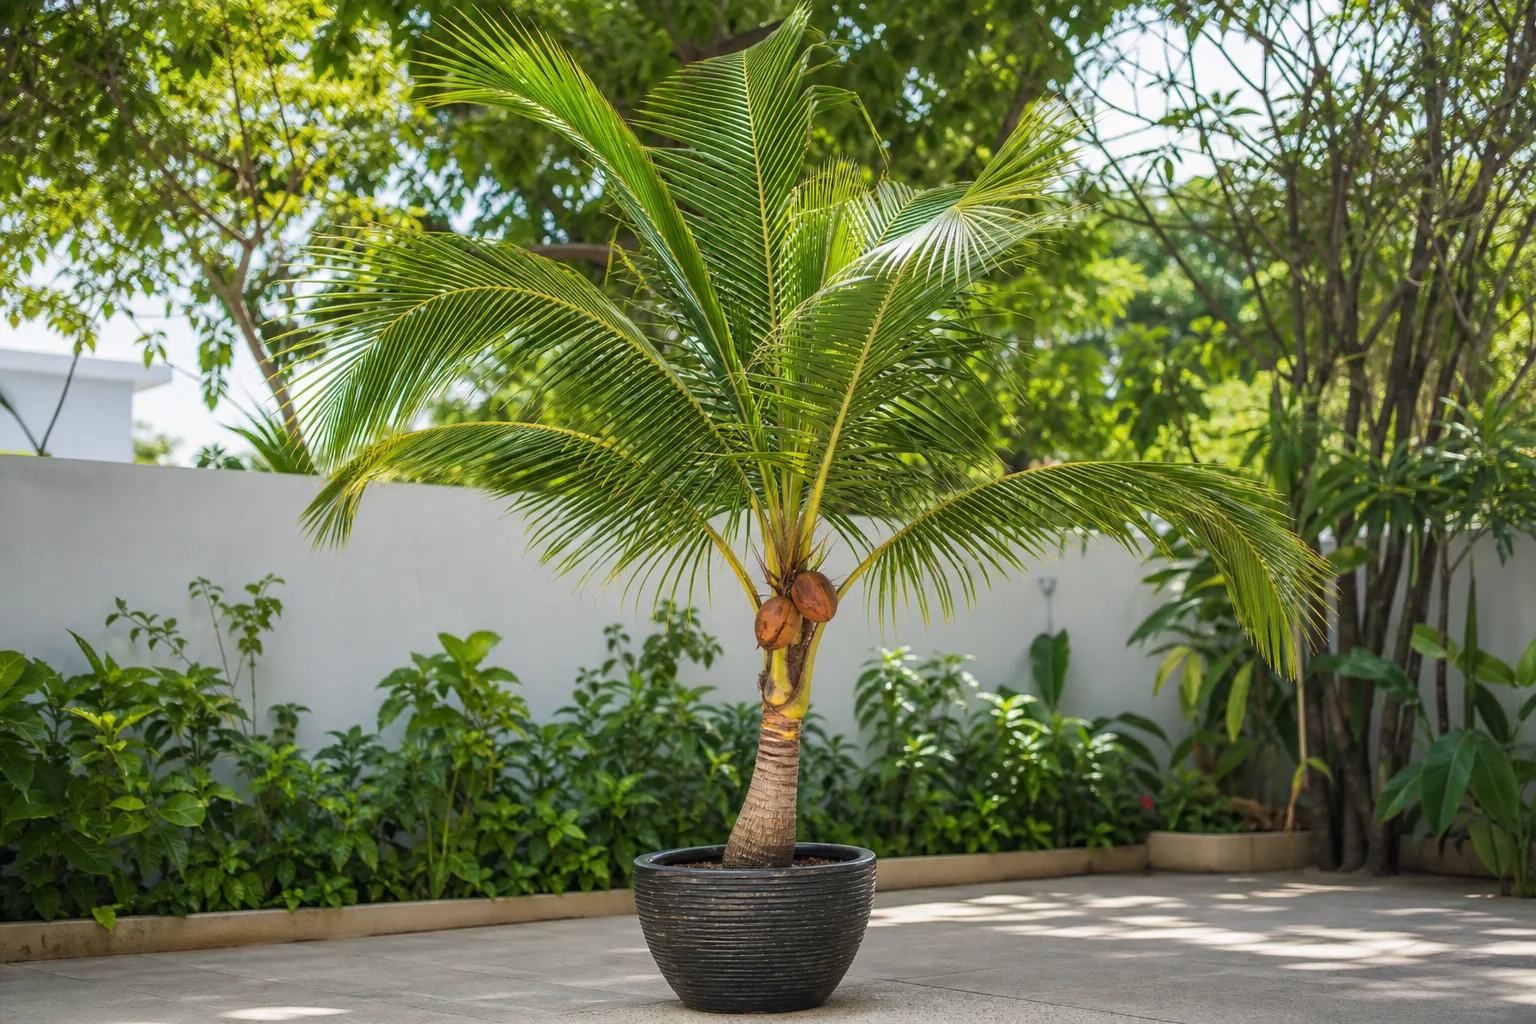
Repot a young container coconut every 1–2 years while roots still fill the pot, ideally at the start of warm active growth. Step up only one sensible pot size, use a free-draining soil-based mix with grit or sand, and set the plant so the root–shoot interface sits about 2.5 cm (1 inch) below the finished soil surface for container-grown palms, matching UF/IFAS transplant guidance to plant about one inch below the surface and water immediately.
Once the palm is in a large, stable tub you can actually move and water evenly, stop chasing bigger pots. Refresh the top few centimetres of mix, keep drainage open, and plan a final landscape planting only where winters stay frost-free and full sun is realistic. Do not dig a deep hole and bury trunk to stop rocking—use a heavier pot or temporary support instead.
Why coconut palms repot differently from leafy houseplants
A coconut is not a woody shrub with a few thick lateral roots that circle forever. Palm roots are adventitious: many relatively fine roots keep emerging from a specialized zone at the base of the trunk called the root-initiation zone. UF/IFAS transplant research explains that this architecture is why palms often handle moving better than similar-sized broadleaf trees, provided planting depth and moisture are managed carefully (Transplanting Palms in the Landscape).
That still does not mean coconut is “indestructible.” A seedling’s early roots can pack a nursery pot hard, organic mix can settle so the initiation zone sits proud of the surface, and a tall crown in a light plastic pot becomes a sail. Indoors or on a shaded balcony, the same plant also has less evaporative demand, so an oversized, peat-heavy container stays wet long after a tropical outdoor plant would have dried. Repotting has to solve oxygen and stability as much as “more room.”
Adventitious roots and why cut-root survival matters
Species differ when roots are severed. In Broschat and Donselman’s work summarized by UF/IFAS, cut roots of Cocos nucifera had roughly half surviving and branching whether stubs were short or longer, while few replacement roots were forced from the initiation zone compared with palms like sabal. Practically, that means coconut transplant success leans on preserving existing live roots in a coherent ball, not on shredding the root system and hoping a wave of new initials rescues the plant.
For container moves, you usually keep the ball intact and do not need the aggressive circling-root surgery used on some dicot trees. For field digs, UF/IFAS notes the coconut rootball need not be enormous relative to some other palms because stub length did not strongly change survival of cut coconut roots—still, keep the ball moist, shaded, and planted promptly.
Signs your coconut tree needs repotting
Use several clues together. Penn State’s houseplant guidance still maps well here: roots escaping drainage holes, growth stalling in the active season, mix drying unusually fast, or a dense circling mass around the ball are classic pot-bound indicators. A coconut that becomes tippy after every windy afternoon, or that lifts the pot’s rim with a rising root mass, is asking for a wider, heavier base more than for fertilizer.
Repot when two or more of these show up:
- Firm, healthy roots packed against the pot wall or pouring from drainage holes
- The container dries within a day in warm weather despite a thorough soak
- Growth stalls even with full sun, warmth, and sensible feeding
- The palm rocks or leans because the root–shoot interface sits too high after mix settlement
- Water pools or the mix smells sour because drainage failed—fix that with a soil and watering review, not only a bigger pot
One yellow older frond is not a repotting alarm by itself. Persistent yellowing in a heavy, wet mix points first to aeration and irrigation problems covered in the Coconut Tree watering and soil guides.
Best season to repot or transplant a coconut
Time the move to warm weather when roots are active. UF/IFAS recommends planting coconut during the warm, rainy months when possible, while noting they can be planted anytime in suitable climates if aftercare is serious. In much of India and similar monsoon tropics, late spring into the early rainy season often works if the new pot or planting hole drains freely and you can shelter a container from continuous flooding.
Avoid cool, dim weeks for routine upsizing of indoor or conservatory plants. Root growth slows when nights chill and light drops, so a freshly disturbed ball sits wet longer and recovers slower. Emergency moves—rotting mix, cracked pot, no drainage—are exceptions; then inspect roots, trim only soft tissue, and use a smaller or same-size pot with a leaner mix rather than celebrating with a huge upgrade.
Choose pot size, drainage, and material
For a young coconut, increase diameter by about 5–8 cm (2–3 inches)—one normal nursery step—not a jump from a 20 cm pot into a half-barrel. An oversized volume of unused mix stays saturated, and Clemson Extension’s container logic applies: roots need both water and oxygen. Multiple open drainage holes are mandatory; empty saucers after watering.
Choose a wide, stable container that counters the sail effect of long fronds. Heavy terracotta, concrete, or a broad resin tub with ballast is safer on balconies than a tall, narrow plastic grower pot. If the display pot has no holes, keep the palm in a draining nursery pot nested inside and never leave the inner pot sitting in runoff.
When to stop upsizing and refresh the top mix
Cocos nucifera does not stay a cute houseplant forever. Kew and horticultural references treat it as a large tropical palm; Missouri Botanical Garden notes mature heights of 50–100 feet outdoors with fruiting needing sustained warmth around 18°C (64°F) nights. Once a terrace plant fills a large tub you can still move, top-dress the upper mix annually or when the surface crusts, rather than forcing perpetual upsizing that the building cannot support.
Plan landscape planting only where frost is absent, full sun is available, and falling nuts will not endanger people or roofs. Indoor specimens are usually short-lived foliage projects; treat a final large tub as the end of the container career, not a waiting room for indoor fruit.
Potting mix that keeps coconut roots moist but aerated
Missouri Botanical Garden recommends a soil-based potting mixture with grit or sand for container culture, alongside moist but well-drained, moderately fertile soil outdoors. A practical DIY blend for pots is about 50% quality potting mix or loam-based compost, 25% coarse sand or grit, and 25% fine bark or coir—close to the LeafyPixels coconut soil profile and compatible with the Coconut Tree soil guidance.
The mix should hold even moisture for a coastal palm without becoming a sour sponge. In humid monsoon rooms, lean harder on grit and bark; in hot dry wind, keep enough organic matter that the ball does not repel water. Do not pack garden clay into indoor pots. Pre-moisten dry ingredients so water wets the whole column on the first soak.
How to repot a container coconut step by step
Water lightly the day before so the ball holds together without being sodden. Tip the pot on its side, support the root ball—not the fragile spear—and slide the plant out. If roots form a dense mat, loosen only the outer centimetre gently; you do not need to carve a dicot-style X through the base of a coconut the way some woody houseplants require.
Set a layer of fresh mix in the new pot, centre the ball, and backfill around the sides while tapping to close air gaps. Water once until drainage runs clear, then park the palm in bright light out of harsh midday blast for a few days if it came from a shaded nursery aisle. Keep the spear and crown dry of stagnant water; moisture belongs in the root zone, not pooled in the bud.
Planting depth: about one inch, not “bury for stability”
Depth errors kill more palms slowly than a slightly snug pot does. For container-grown palms, UF/IFAS advises planting so the top of the root–shoot interface is about one inch below the finished soil surface, because nursery mix often settles and leaves the initiation zone too high. For field-grown palms moved into the landscape, plant at the same depth they grew before—deeper planting is linked to nutrient problems, poor growth, and secondary decline in palm transplant research (EP001).
If an established coconut already sits too high and rocks, mound soil to cover exposed root initials rather than digging a deeper hole around a settled trunk. Never nail braces into the trunk; any trunk wound is permanent on a palm.
Moving a nursery coconut into the ground
Choose a full-sun, frost-free site with room for a tall single trunk and a crown that will eventually shed fronds and nuts. Dig a hole roughly twice the rootball diameter and no deeper than the ball, then set the plant with the correct soil line. UF/IFAS recommends watering immediately, applying a few inches of surface mulch (kept off the stem), and giving about 2.5 cm (1 inch) of water weekly from rain or irrigation during the first year of transplanting.
Backfill with the native soil if it drains; heavy clay sites need raised beds or grit improvement more than peat dumped in the hole. Research summarized by UF/IFAS found little benefit from fancy organic hole amendments for palms compared with correct depth and moisture. In coastal India, prioritize wind exposure you can live with, distance from buildings, and drainage during peak monsoon—not a decorative deep planting pocket.
Aftercare for the first weeks and the first year
For the first several weeks, keep the original rootball evenly moist but never stagnant. Container palms moved outdoors still dry faster in their old organic ball than the surrounding earth does, which is why UF/IFAS suggests a shallow berm just outside the ball so irrigation soaks the roots that matter. Skip hard fertilizer burns on a stressed plant; once new spears push in warmth, follow the Coconut Tree fertilizer guide rather than dumping high salts into a wounded root zone.
Expect a pause in canopy expansion while roots explore. Brown tips from dry wind are different from a collapsing spear in soggy soil—diagnose with finger tests and pot weight before adding more water. Bright light after a nursery move should increase gradually if the plant was shaded; sudden full coastal sun on soft tissue can scorch fronds even when roots are fine—see the Coconut Tree light guide.
When not to repot a coconut tree
Skip routine repotting when the plant is already in a large, workable tub with open mix, steady moisture cycling, and firm anchorage. Do not upsize during cool indoor dormancy-like lulls, during a pest outbreak you have not identified, or the week before a predicted cyclone if you cannot stake or move the container to shelter.
Do not repot solely because lower fronds yellowed once, or because a social-media tip said “spring equals bigger pot.” If the mix smells anaerobic or the crown softens, prioritize drainage correction and root inspection over decorative ceramic upgrades. Seedlings started from nuts belong in progressive containers only while juvenile; endless indoor upsizing will not create a fruiting living-room tree.
Common mistakes and what recovery looks like
Deep planting to “stop wobble,” oversized wet pots, and moving in cold shade are the usual failures. Recovery starts by correcting depth or moisture: for a shallow-planted rocker, mound soil over exposed initials; for a drowned pot, unpot, trim mushy roots, and reset into a leaner, draining mix at the proper line. New root activity and a firm emerging spear are better success signs than forcing a flush of soft leaves with constant misting.
If a landscape transplant declines for months with chronic chlorosis after deep planting, the prognosis is guarded—palm literature links deep setting to long-term poor performance. Focus remaining effort on drainage, correct nutrition once roots function, and patience rather than another traumatic dig.
When to use this page vs other Coconut Tree guides
Use this page for timing, pot sizing, planting depth, container-to-ground moves, and post-repot establishment. Use the Coconut Tree overview for climate honesty and whether you should grow this palm at all. Switch to watering when the question is soak frequency and wet/dry diagnosis, soil when the mix itself is wrong, light when etiolation or scorch is the issue, fertilizer once roots are established, and propagation when you are starting from a nut rather than moving an existing plant.
Related Coconut Tree guides
- Coconut Tree care overview — climate fit, size, and expectations
- Coconut Tree watering — moisture checks after a move
- Coconut Tree soil — mix recipes and drainage fixes
- Coconut Tree light — full-sun needs and indoor limits
- Coconut Tree fertilizer — feeding once established
- Coconut Tree hub — profile, tools, and cluster entry point
Conclusion
Repot Cocos nucifera when roots, drying speed, or instability say the container is finished—not when the calendar alone demands a larger ceramic. Keep steps modest, use a gritty moisture-holding mix, set the root–shoot interface correctly, and give warm-season aftercare with steady moisture and open drainage. In frost-free tropical gardens, treat the final move into the ground as a one-way establishment project with mulch and first-year irrigation; on a terrace, accept that a large stable tub plus occasional top-dressing is the honest endgame for a palm that wants to become a coastal tree.