Garlic Propagation: Plant Cloves Step by Step
Garlic Propagation: Plant Cloves Step by Step
Garlic Propagation: Plant Cloves Step by Step
Garlic propagation is a clove-planting job, not a stem-cutting or houseplant division project. Culinary garlic—Allium sativum, the lahsun in Indian kitchens—forms new heads when a single clove sits in loose, well-drained soil through a cool season and then grows through spring. NC State Extension describes separating cloves from the bulb and planting them 6–8 inches (15–20 cm) apart and about 2–3 inches (5–7.5 cm) deep for a typical home harvest (NC State Extension).
If you want more plants for a balcony trough, raised bed, or next year’s seed stock, choose a variety matched to your winter, plant cloves point-up in their final deep container, and keep cold wet mix away from dormant cloves. Pair this page with garlic soil, garlic watering, and garlic light once shoots emerge—propagation only succeeds if the young crop can live in the same sunny, well-drained culture the parent bulb needed.
Why garlic multiplies from cloves, not seed
Home and market growers propagate garlic by planting bulb segments (cloves). Each clove is a clone of the mother bulb and swells into a new head over many months. The RHS plant profile states plainly that garlic is propagated by dividing the bulb into cloves and that plants need a period of cold for good bulb development when planted in late autumn or early winter (RHS plant profile).
Hardneck vs softneck propagation choices
Hardneck types (A. sativum var. ophioscorodon) suit many cold-winter gardens: fewer, larger cloves, stiff central stalks, and edible scapes in spring. Softneck types (var. sativum) pack more cloves per head, braid easily after harvest, and often store longer—traits that matter when you are propagating stock you hope to replant next season (NC State Extension). Match the type to your chill pattern before you buy seed garlic; a hardneck meant for snowy winters may disappoint on a warm coastal terrace without a deliberate low-chill plan.
Why true seed is not the home-garden path
Garlic can produce flowers, bulbils on scapes, and occasionally seed under controlled conditions, but named kitchen garlic is not started from seed packets the way tomatoes or methi are. Bulbils and true seed take extra years and selection work to reach full-size bulbs. For patio growers, clove planting remains the fast, predictable route the RHS and extension guides assume (RHS grow-your-own garlic).
Choosing seed garlic and preparing cloves
Propagation quality starts with the stock bulb, not the planting hole.
Seed garlic vs grocery bulbs
Seed garlic—disease-screened cloves sold for planting—gives the most reliable results. The RHS advises buying named varieties from garden suppliers rather than supermarket bulbs, which may be treated to suppress sprouting or come from climates unlike yours (RHS grow-your-own garlic). Organic grocery garlic sometimes sprouts, but it is still a gamble for variety, chill requirement, and disease carryover. When you want predictable lahsun for the kitchen garden, order regionally adapted seed garlic once and save your best heads for next year’s cloves.
How to break apart bulbs without damaging cloves
Split bulbs gently a day or two before planting. Keep the papery tunic on each clove; naked cloves dry out and rot faster. Discard soft, moldy, or insect-damaged segments. Plant the flat basal plate down and the pointed tip up—upside-down cloves struggle to orient roots and shoots. Wear gloves if your skin reacts to allium juices; NC State notes contact dermatitis is possible when handling garlic (NC State Extension).
Timing garlic propagation for India and cool winters
Garlic needs seasonal cues—especially cool soil after planting—so cloves divide into multiple segments instead of swelling into a single round “snow” bulb.
Cool-hill and northern planting windows
In cool-winter regions (Himalayan foothills, North Indian plains with frost, or any climate with a real cold season), autumn planting is standard. NC State recommends individual cloves from late October through November in North Carolina, with cloves establishing at least four to six weeks before the ground freezes (NC State Extension). The RHS notes most varieties need about one to two months at roughly 0–10°C (32–50°F) for good bulb formation (RHS grow-your-own garlic). On a sunny patio, plant before your coldest stretch so roots anchor while tops stay low.
Plains, coast, and low-chill strategies
Where winters stay mild—coastal Karnataka, Kerala terraces, or warm lowlands—choose softneck or locally sold low-chill cultivars and follow supplier timing instead of copying a Punjab calendar. Some growers pre-chill seed cloves in a refrigerator for several weeks before cool-season planting when natural winter chill is weak; Epic Gardening describes that approach for frost-free regions, then planting during the cool months (Epic Gardening). Do not store unknown cloves in the fridge without a plan: excess moisture and ethylene from fruit nearby can spoil planting stock.
Step-by-step: propagate garlic in containers
Treat garlic as a root crop in a deep pot, not a shallow herb bowl.
Container depth, spacing, and drainage
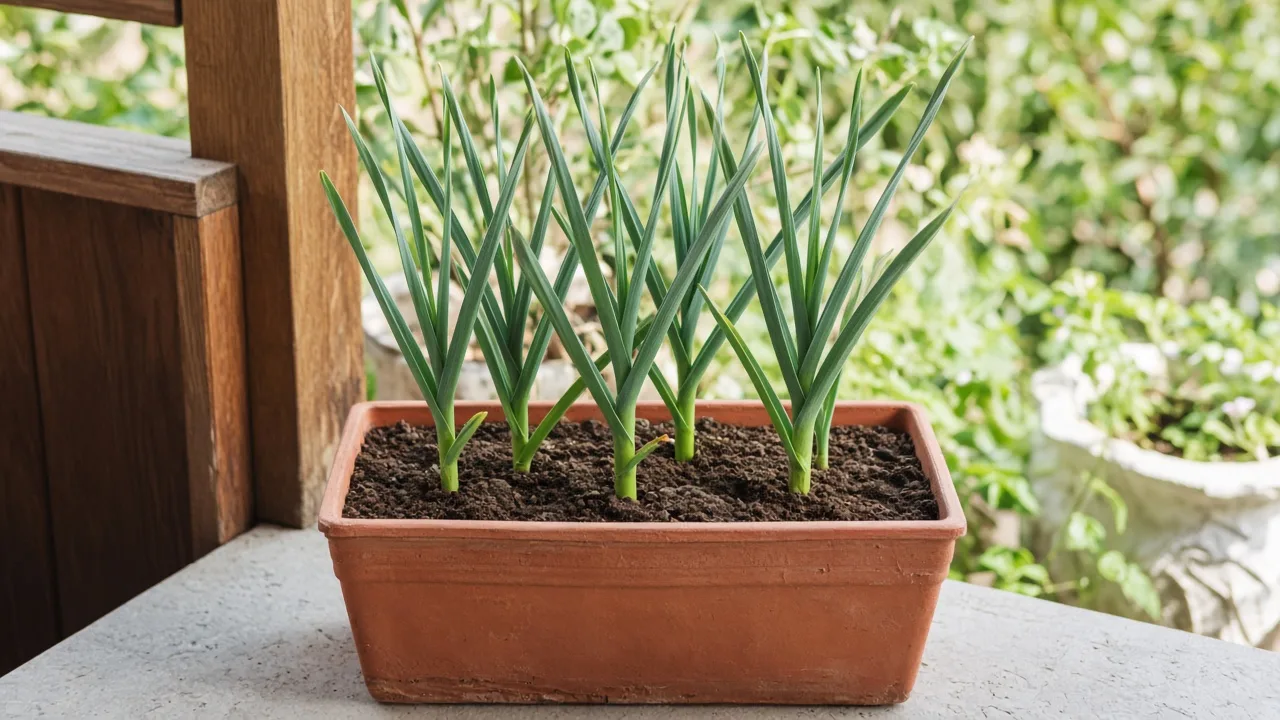
Use planters at least about 25–30 cm deep with open drainage holes. Epic Gardening recommends containers eight inches (20 cm) or deeper so roots have room (Epic Gardening); the RHS suggests at least 25 cm (10 in) for container culture (RHS grow-your-own garlic). Space cloves about 10–15 cm (4–6 in) apart—matching NC State’s 6–8 in bed spacing scaled to pots (NC State Extension). Fill with loose mix per the garlic soil guide; saturated cold mix is the main enemy at planting time.
Planting depth, orientation, and first watering
Bury each clove with the tip about 2.5–5 cm (1–2 in) below the surface—NC State’s 2–3 in and the RHS’s 2.5 cm (1 in) tip depth bracket most home plantings (NC State Extension). In very light mix you may plant slightly deeper; in heavy wet mix, stay shallower. Water once to settle mix, then keep barely moist until roots form—avoid soaking dormant cloves. A thin mulch of straw or dry leaves moderates temperature swings on exposed balconies.
Secondary methods: bulbils and rounds
Hardneck scapes can produce small aerial bulbils if you leave them on the plant. Bulbils are edible and can be planted like tiny cloves, but they often need two seasons to reach full bulb size—fine for experimentation, not for a quick kitchen harvest. If you plant too late or skip adequate chill, a clove may swell into a single round bulb without separating; it still tastes like garlic but does not multiply the way segmented heads do (Epic Gardening). For most growers, reserve scapes for the kitchen and put energy into underground cloves—see garlic pruning for scape timing.
Aftercare from sprout to harvest
Once green shoots appear, move pots to full sun (see garlic light) and shift to the deeper watering rhythm in garlic watering. Feed lightly during active leaf growth if mix was lean (garlic fertilizer); extra nitrogen cannot fix wrong variety or missing chill. Garlic stays in the same container from planting to harvest—there is no mid-season repot. Planters only need intervention if drainage fails; see garlic repotting for when to restart in fresh mix. Expect roughly eight to nine months from fall planting to summer lift in many varieties (Epic Gardening).
Save your largest, healthiest heads in a cool, dry place for next year’s propagation stock. Label variety and planting date so you learn which clones perform on your terrace.
Common reasons garlic propagation fails
Soft cloves at planting usually mean wet cold mix, damaged tunics, or diseased stock. No bulb division often traces to insufficient chill, wrong cultivar, or planting too late. Small heads follow weak winter sun, overcrowding, or leaving hardneck scapes on too long. Birds or squirrels may pull freshly planted cloves; cover pots with mesh until roots anchor (RHS grow-your-own garlic). Garlic is toxic to cats and dogs if eaten in quantity (ASPCA)—keep propagated pots and curing bundles away from pets when storing cloves indoors.
When to use this page vs other Garlic guides
Use this page when you are starting new plants from cloves—choosing stock, timing, depth, and container layout. For day-to-day moisture checks after establishment, read garlic watering. For mix recipes and pH, garlic soil. For window and sun exposure, garlic light. For the full life-cycle picture and variety notes, start at the garlic overview hub.
Related Garlic guides
- Garlic overview — growth habit, hardneck vs softneck, and harvest cues
- Garlic soil — drainage and mix for clove health
- Garlic watering — moisture through leaf growth and dry-down before harvest
- Garlic light — sun hours once shoots emerge
- Garlic pruning — scape removal on hardneck types
Conclusion
Propagating garlic means planting firm, tunic-covered cloves from adapted stock into deep, well-drained containers, giving them a cool season to divide, then carrying the crop through a sunny spring with steady care. Choose hardneck or softneck for your winter, plant point-up at the right depth, and keep planting mix from staying soggy while cloves are dormant. When lower leaves brown and bulbs size up, you will have both a harvest and—if you save the best heads—next season’s propagation material without buying new seed every year.