Yellow Seedlings on Marble Queen Pothos: Causes, Checks &
Quick answer
Yellow seedlings on Marble Queen Pothos are almost never true seedlings: this cultivar is propagated from stem cuttings, so yellowing on young plants usually means wet mix suffocating new roots or light too dim for white-variegated tissue. First step: uncover the tray, let the top 2–3 cm dry, and check that each cutting still has a firm node with a pale new root tip.
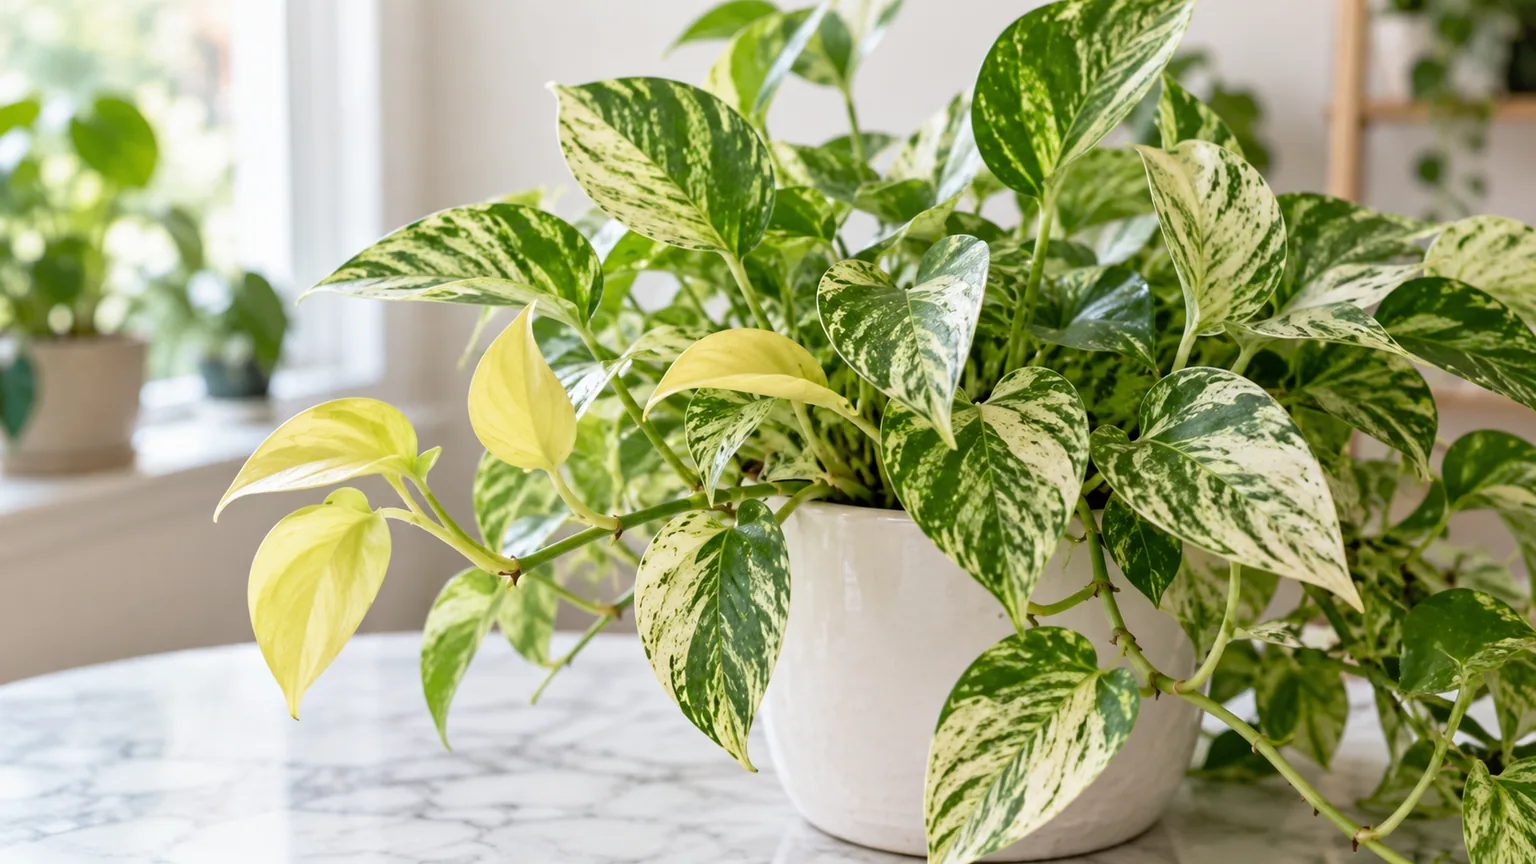
Yellow Seedlings on Marble Queen Pothos: Causes, Checks & Fixes
This guide covers yellow seedlings on Marble Queen Pothos. See also the general Yellow Seedlings guide, watering, and light pages for this plant.
Yellow Seedlings on Marble Queen Pothos: Causes, Checks & Fixes
Quick answer
Yellow young leaves on Marble Queen Pothos (Epipremnum aureum ‘Marble Queen’) look alarming, but the label “seedlings” is misleading on this plant. Indoor Marble Queen almost never grows from true seed — it is multiplied from stem cuttings with at least one node, so what you are seeing is a young rooted cutting or nursery plantlet losing color. The two usual drivers are mix that stays wet around brand-new roots, and light too dim for tissue that already carries little chlorophyll. First step: remove any humidity dome or cover, let the top 2–3 cm of mix dry, and check that each node is still firm with a pale root tip. For the cultivar baseline behind every decision below, see the Marble Queen overview.
What yellow seedlings look like on Marble Queen Pothos
On a healthy batch of young Marble Queen cuttings, new leaves unfurl small, heart-shaped, and marbled in green and cream. When establishment fails, the smallest leaves turn pale yellow first — sometimes the whole baby leaf, sometimes starting at the edges of the white sectors. Unlike mature yellow leaves on Marble Queen, which usually strike older lower foliage on a long vine, seedling-stage yellowing hits the newest, tiniest growth while the parent vine (if still attached) looks fine.
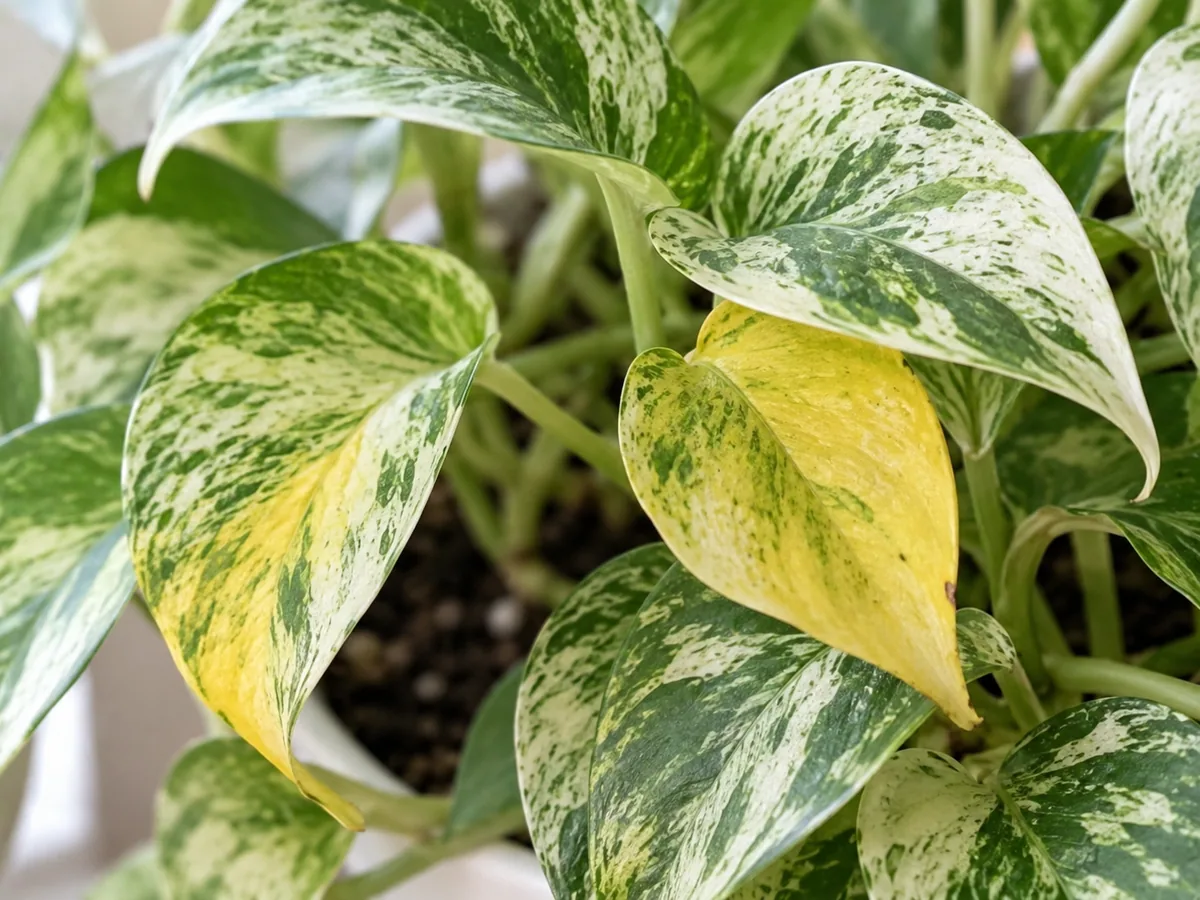
Pale yellowing on a young Marble Queen cutting — compare the washed-out baby leaf with firmer marbled tissue at the node.
Touch tells you as much as color. A thirsty or light-starved young leaf feels thin and papery but the node beneath stays firm. A rotting cutting feels soft or translucent at the stem base, and the mix smells sour when you lift the pot. Because Marble Queen grows more slowly than solid-green pothos, a stalled cutting that sits yellow for two weeks without new marbled growth is already signaling that roots never established — not that it needs more time in the same wet tray.
Why Marble Queen almost never has true seedlings
This section would be nonsense on a tomato or basil page, and it matters here: Marble Queen Pothos is a variegated cultivar of Epipremnum aureum that is propagated vegetatively to preserve its marbling. Vines easily root in water from node cuttings, and commercial batches are bulked up from cuttings or tissue culture — not from seed trays. Indoor plants essentially never flower, so there is no true seedling stage with seed leaves to diagnose.
That reframes the whole problem. “Yellow seedlings” on this plant means one of three things: fresh node cuttings yellowing while rooting, water-rooted cuttings yellowing after transfer into soil, or tiny nursery plantlets yellowing in the weeks after you bring them home. Each has a different fix, and none of them is solved with seed-starting fertilizer or germination mats. If your plant arrived as a 5 cm pot of small marbled leaves from a garden center, treat it as a young cutting batch and work through the checks below.
Why young Marble Queen cuttings turn yellow
New roots are the bottleneck. A cutting with one node and a 2 cm water root has almost no ability to regulate uptake — keep the mix saturated and the tender root suffocates within days. Root rots, with symptoms of brown or nonexistent roots, are most often due to overwatering on pothos, and young cuttings cross that line far faster than an established vine in a 15 cm pot. For how chronic wet mix damages roots in general, see our overwatering guide. On Marble Queen the pattern usually shows up as whole-tray yellowing of the smallest leaves while the mix surface looks dark and stays cool to the touch.
Light is the second driver, and it hits this cultivar harder than greener pothos. The white sectors of each leaf contain little photosynthetic tissue, so only the green parts of the leaves can make energy for the plant — a cutting parked in a dim corner cannot feed its own new growth and yellows instead of rooting. Clemson HGIC notes that Marble Queen requires more light than other pothos varieties, and low light can result in loss of variegation even on established plants. On cuttings the sequence is predictable: pale all-green or yellow baby leaves, then stalled nodes, then stem-base softening if wet soil persists.
Transfer shock is the third cause, unique to water-propagated batches. The vines root in water or vermiculite within 3 to 4 weeks, but water roots are brittle and adapted to zero resistance. Move a cutting with 10 cm water roots into dense peat, drown it “to settle the soil,” and the leaves yellow within a week as damaged roots fail. Young Marble Queen tissue, already low in chlorophyll, has thinner energy reserves to regrow those roots than a Golden Pothos cutting of the same size.
How to confirm the cause on tiny plants
Work cutting by cutting — a tray often holds mixed batches at different stages.
- Mix moisture at root depth — Press a fingertip 2–3 cm into the mix beside (not through) the cutting. Cool, dark, clinging mix on a heavy pot means too wet; pale, weightless mix means too dry. Seedling-stage roots live entirely in this top band.
- Node firmness — Roll the stem base gently between finger and thumb. A firm green node with a pale root nub is alive even if its baby leaf is yellow. A brown, mushy, or translucent node is rot — that cutting will not recover in place.
- Root tip color — Ease one suspect cutting from the mix and rinse. White or cream firm tips mean the roots work and the problem is light or brief dryness. Brown, slimy, or absent roots confirm overwatering; see root rot on Marble Queen if the stem base is involved.
- Light reading — If nodes are firm, roots are pale, yet every new leaf opens yellow-green and small, the tray is too dim. Compare with the light guide — cuttings want the same bright indirect light as adult Marble Queen, never a dark shelf “until they grow.”
- Transfer history — Yellowing that starts 5–10 days after moving water-rooted cuttings into soil, with firm nodes but wilted baby leaves, is transfer shock rather than disease. Dense or oversized pots confirm it; compare against the soil guide and repotting stress on Marble Queen.
- Spread pattern — One yellow cutting among firm green siblings is a weak node — remove it. Every cutting yellowing together within days of the same watering points to the tray environment, not individual genetics.
First fix for Marble Queen Pothos
Do one thing first based on what you confirmed — young cuttings cannot absorb a bundle of corrections the way an established vine can.
If the mix is wet and nodes are still firm
Remove any dome, lid, or plastic cover and let the top 2–3 cm dry before the next drink. That single change restores air to new roots and stops most early yellowing within a week. Keep the tray in bright indirect light so the small root zone actually dries. Do not fertilize, do not repot, and do not mist the leaves — each adds moisture the cuttings cannot use yet. Full wet-soil workflow: overwatering on Marble Queen.
If nodes are mushy or the mix smells sour
Lift out every cutting with a soft brown stem base and discard the rotted ones — they will not reroot from mush. Rinse survivors with firm nodes, trim brown root tissue with clean scissors, and restart them in fresh standard potting mix with 20–30% perlite in a small container with drainage. Water once lightly, then wait for the surface to dry. If gnats hover over the tray, treat it as a wet-soil signal per mold on soil on Marble Queen.
If the mix is dry and nodes are firm
Soak gently from the top until a little water exits the drainage holes, empty the saucer, and return the tray to bright indirect light. Dry-stage yellowing on cuttings recovers faster than rot — baby leaves rehydrate within a day — but resume the dry-top-layer rhythm from the watering guide rather than keeping the tray constantly damp “because they are babies.”
If cuttings yellowed right after water-to-soil transfer
Leave the survivors alone in barely moist, airy mix and give them humidity through a nearby pebble tray rather than a sealed dome. Do not pull them up to “check roots” daily — each tug breaks the soil roots now forming. New marbled growth, not the old yellow leaves, is the recovery signal.
Lookalike symptoms to rule out
| Pattern | Baby leaf look | Node and roots | Likely cause | Next step |
|---|---|---|---|---|
| Whole tray pales after heavy watering | Soft yellow small leaves | Firm nodes, pale roots, soggy mix | Too-wet establishment mix | Dry the top layer → overwatering |
| Yellowing with stem-base mush | Translucent stems | Brown mushy node, sour smell | Cutting rot / damping-off | Discard rotted, restart firm nodes → root rot |
| Pale all-green tiny leaves, no white | Yellow-green, small | Firm nodes, slow rooting | Too dim for variegated tissue | Brighten placement → light guide |
| Yellowing 5–10 days after potting water roots | Wilted yellow baby leaves | Firm nodes, brittle water roots | Transfer shock | Leave undisturbed in airy mix → repotting stress |
| One yellow cutting among healthy siblings | Single pale cutting | Soft isolated node | Weak cutting | Remove it; keep tray routine |
| Yellowing plus webbing or sticky dots | Stippled yellow flecks | Any condition | Early pests | Inspect and treat → spider mites |
Recovery timeline for young cuttings
| Phase | What to expect | Success signal |
|---|---|---|
| Days 1–3 | No new yellowing after uncovering and drying the surface | Mix surface visibly lighter; pot weight dropping |
| Week 1–2 | Firm nodes hold; palest baby leaves may drop | Newest leaf tip stays green instead of yellowing |
| Weeks 2–4 | Fresh leaf unfurls with green-and-cream marbling | Marbling crisp on the newest leaf, not washed out |
| Weeks 4–6 | Cutting anchors when tugged very gently; vine tip extends | Resistance at the node; internodes compact in good light |
| Permanent | Old fully yellow baby leaves never re-green | Judge by new marbled growth, not rescued old leaves |
Worsening signs: yellowing climbs from baby leaves into the first mature-size leaf, several nodes soften within a week, white marbling vanishes from every new leaf, or sour smell persists after one full dry-down — restart healthy nodes as fresh cuttings rather than nursing the tray.
What not to do with yellow young plants
Do not fertilize yellow cuttings to “green them up” — salts burn tender new roots faster than on established vines, and feeding never fixes wet mix or dim light. Do not seal the tray under a dome for weeks; stagnant humidity on Marble Queen invites stem-base rot exactly where the cutting is most vulnerable. Do not pot tiny cuttings into a large decorative container — the unused soil stays wet for days around 3 cm roots. And do not move a struggling tray into direct midday sun; direct sun will lead to the yellowing of leaves by scorching pale tissue that is already stressed.
Keep chewed or fallen leaves away from pets while you work: all Epipremnum aureum cultivars are toxic to cats and dogs, so a low tray of cuttings belongs well above curious animals.
How to prevent it on the next batch of cuttings
Take stem cuttings during the growing season from spring through summer, each with at least one node and preferably two leaves — variegation carries through because cuttings are clones, so choose marbled parent stems, not reverted green ones. Root in water or moist perlite, then move to soil once roots reach 3–5 cm rather than letting long brittle water roots circle the jar. Plant several rooted cuttings together in one small pot with drainage, using the same perlite-rich mix from the soil guide, and water when the soil is dry at the top layer instead of on a calendar. Give the pot bright indirect light from day one — cuttings root fastest where an adult Marble Queen holds its variegation — and ventilate humidity rather than sealing it in. Full routine: Marble Queen watering.
When to worry
Act the same day when:
- Stem bases turn translucent or mushy at the node
- Yellowing spreads across most of a tray within a few days
- Sour or rotten smell rises from the mix
- Baby leaves collapse while the mix is still wet
- Newest growth opens pure white and then browns (no chlorophyll to sustain it)
A single yellow baby leaf on an otherwise firm cutting with pale roots and drying mix is not urgent — trim it once new marbled growth appears.
Related Marble Queen problems
Use this page for yellowing on young cuttings and plantlets; follow the link that matches what you confirmed:
- Marble Queen overview — cultivar baseline: slow variegated growth and Golden Pothos differences
- Yellow leaves on Marble Queen — yellowing on established vines rather than young cuttings
- Root rot on Marble Queen — mushy roots and stem-base salvage on any size plant
- Overwatering on Marble Queen — wet-soil mechanics and dry-down method
- Marble Queen watering — top-layer dryness rhythm through the seasons
- Marble Queen light — holding white variegation without scorching pale tissue
- Marble Queen soil — perlite-rich mix and drainage for small root zones
- Repotting stress on Marble Queen — water-to-soil transfer shock and recovery
- Mold on soil on Marble Queen — surface fungus as a wet-mix early warning
Conclusion
Yellow “seedlings” on Marble Queen Pothos are young cuttings telling you the establishment setup is off — usually mix that stays wet around 3 cm roots, or light too dim for white-marbled tissue to feed itself. Uncover the tray, dry the top layer, verify firm nodes with pale root tips, and apply only the fix that matches. Judge success by the next leaf opening with crisp green-and-white marbling, not by old yellow baby leaves recovering. Root the next batch from marbled nodes in spring, transfer to soil while roots are short, and keep the pot small, airy, and bright.
How we wrote and verified this guide: Recommendations were checked against Clemson HGIC, Penn State Extension, UW Extension, NC State Extension, Missouri Botanical Garden, and Gardening Know How references cited inline. Author: sai-ananth. Reviewer: LeafyPixels Review Board. Methodology: plant problem guidance is reviewed against botanical references, extension resources, and LeafyPixels plant-care data before publication. Claims validation: claims-validator-v1 pass with inline external links documented below. Last reviewed: 2026-09-08.
When to use this page vs other Marble Queen Pothos guides
- Marble Queen Pothos watering guide — Use for routine moisture checks on established vines before assuming a seedling-stage problem.
- Marble Queen Pothos problems hub — Browse all common issues on this species when the diagnosis is still open.
- Yellow leaves on Marble Queen Pothos — Different entry point when yellowing affects mature vines rather than young cuttings.
- Root rot on Marble Queen Pothos — Different entry point when roots are mushy and stems soften at the base.
- Not enough light on Marble Queen Pothos — Different entry point when reversion and dim placement dominate the picture.