Moringa Repotting: When, Pot Size & Soil Mix
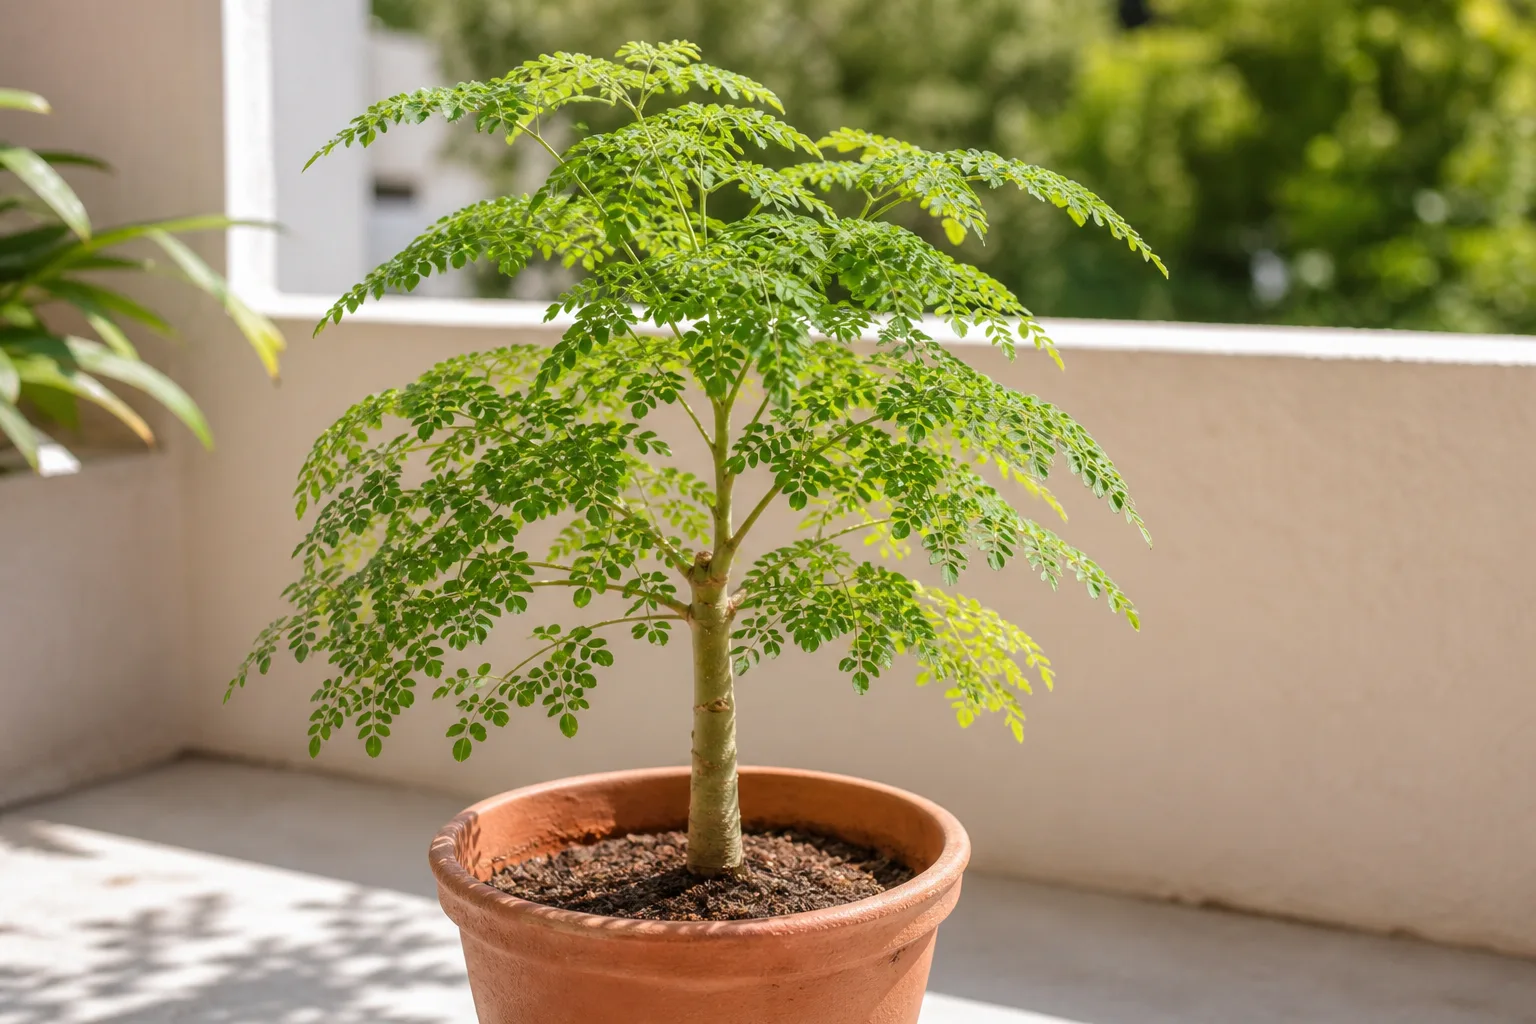
Moringa Repotting: When, Pot Size & Soil Mix
Moringa Repotting: When, Pot Size & Soil Mix
A Moringa that drinks the pot dry within a day of watering, tips in terrace wind, or pushes thick white roots through every drainage hole is not asking for more fertilizer. It is asking for a reset of the root zone. Repotting fixes crowded roots and failed mix—but only if you treat Moringa oleifera as a fast, sun-loving, drought-smart drumstick tree with a deep root habit that fails in waterlogged soil, not as a soft foliage houseplant that thrives in oversized, constantly moist pots.
Moringa—also called drumstick tree, Sahjan, horseradish tree, or Malunggay—is a short, slender tropical tree in the family Moringaceae. Purdue’s crop profile describes a deciduous perennial that can reach about 10 m outdoors, with brittle branches and a thick main root, and notes that it grows best on dry sandy soil and is drought resistant (Purdue University — Moringa oleifera). Winrock’s home-garden profile adds that the tree tends to be deeply rooted, does best in well-drained loam to clay loam, and does not withstand prolonged waterlogging (Winrock International — Moringa oleifera). That biology drives every pot decision: depth over width, sharp drainage, modest upsizing, spring timing in India, and a soak-and-dry watering rhythm after the move. For the full care picture—sun, watering, and pruning for harvest height—start from the Moringa overview.
Why Container Moringa Needs a Different Repotting Mindset
Most indoor foliage plants forgive a random spring pot upgrade. Moringa does not. ECHO’s technical note on the species is blunt: the tree prefers well-drained sandy or loam soil, will tolerate some clay, but not water logging, and is set back when the water table sits near the surface for long periods (ECHO — The Moringa Tree). In a pot, that means the danger after repotting is usually too much wet unused mix, not too little root room.
Young balcony Moringa grows extremely fast in warm sun—Winrock notes seedlings can reach 5 m in one year when sheltered and watered (Winrock International — Moringa oleifera). Soft wood snaps in wind, so a top-heavy canopy in a shallow nursery pot is both a horticultural and a physical hazard. Pair this page with Moringa soil and Moringa watering—the new pot only works if the mix and watering match the species.
How Often to Repot Moringa
For most home growers, every 1–2 years is a practical rhythm while the tree is young and still filling pots quickly. Vigorous seedlings on a hot Indian balcony may need a move sooner if roots jam the holes and the mix dries within a day. Once the plant sits in a large final container (roughly 45–60 cm deep for a managed patio tree, or a large fabric grow bag on a terrace), you can often switch to a same-size soil refresh instead of endless upsizing—container volume already limits height toward the 1.5–3 m harvestable range with hard pruning.
Do not repot on a calendar alone. If drainage is still sharp, new compound leaves are steady, and roots are not circling, leave the plant alone. A newly purchased Moringa usually needs two to three weeks of quarantine and observation before any pot change unless the mix is already sour or waterlogged. Seedlings go up in small steps as they outgrow starter cups; mature specimens you keep bushy with Moringa pruning may stay in the same deep pot with a root tease and fresh sandy mix.
Clear Signs Your Moringa Needs a New Pot
Penn State Extension’s pot-bound checklist maps cleanly onto container Moringa: mix that dries unusually fast, roots through drainage holes, and stalled top growth despite decent light and season (Penn State Extension — Repotting Houseplants). Watch for these Moringa-specific signals.
- Roots circling the pot wall or poking from drainage holes. A few tips are a warning; a solid root mat with little soil left means the taproot and laterals have run out of usable volume.
- Soil dry within a day of a thorough soak in weather that used to take several days—classic “more root than soil.”
- Top-heavy canopy in a shallow pot that tips in wind or leans after watering—soft wood makes this more dangerous than with stiff-trunked trees.
- Water racing down the sides without wetting the core, often after the root ball shrinks from the pot wall.
- Sour, swampy smell or soft roots with yellowing leaflets—failed drainage, not a fertilizer deficit. Winrock’s waterlogging warning applies as much in a clogged pot as in a flooded field (Winrock International — Moringa oleifera).
- Stunted shoots despite full sun through an entire warm season—exhausted or compacted mix is a prime suspect.
Any one sign can justify a refresh. Two or more usually mean you are overdue. Act before the canopy becomes a bare stick with leaves only at the tip; recovery is slower once the root zone has failed.
Best Season to Repot Moringa
Timing decides how fast new roots colonize fresh mix. Repot when the plant is about to push growth; avoid routine moves when cool weather keeps soil wet for days.
Spring in India—default window
Spring—as new growth begins—is the default window across much of India. Roots wake as days lengthen and heat returns, so the plant can occupy new sandy mix before peak summer demand. Extension guidance for houseplants likewise favors spring, when roots actively grow into fresh media (Penn State Extension — Repotting Houseplants). In frost-prone North India, wait until nights reliably stay above cool-stress levels and growth has clearly restarted. ECHO places a practical comfort band around 25–35°C (77–95°F) and notes that light frost may kill top growth back to the roots while hard freezes can kill the plant (ECHO — The Moringa Tree). Work in the morning or late afternoon on a mild day, not under harsh midday terrace heat. Keep the plant in full sun after settling; Moringa is light-demanding—see Moringa light.
When an emergency move overrides the calendar
Two situations beat the calendar. Active root rot—mushy dark roots, foul smell, collapsing soft growth—needs immediate unpotting, trim of dead tissue, and a same-size or modestly larger pot of lean sandy mix. A cracked pot, blocked holes, or monsoon-soaked peat brick that will not dry also warrants an emergency refresh. In both cases, expect slower recovery in cool or cloudy weather: water lightly, protect from cold snaps, and skip fertilizer until firm new shoots appear.
Choosing Pot Size, Depth, and Material
The container is a growth regulator as much as a home. Moringa in a pot becomes a managed balcony tree; the pot wall is what keeps it off field size while the taproot still needs vertical room.
One size up—and deep enough for the taproot
Move up one pot size—about 5 cm (2 inches) wider in diameter—unless you are jumping a seedling from a tiny nursery cup into a first real pot. Penn State advises a container only slightly larger than the current one; oversized pots leave unused wet mix around a small root system (Penn State Extension — Repotting Houseplants). That unused wet zone is especially dangerous for Moringa. Prefer a deeper pot than a wide shallow bowl so the thick main root and laterals have vertical room—aim for at least 45–50 cm depth once the plant leaves the starter stage. Drainage holes are non-negotiable; decorative cachepots without holes are for hiding a drained nursery pot, not for direct planting.
Terracotta dries faster and suits growers who overwater; plastic or resin holds moisture longer on scorching roofs; fabric grow bags air-prune roots and dump excess water well if you water carefully. Heavy stone resists tipping for tall specimens but stays cooler and wetter—match material to your climate and watering habits. Shelter soft new wood from strong gusts after the move; Winrock notes the wood is relatively soft and susceptible to breakage in high winds (Winrock International — Moringa oleifera).
Soil Mix to Use When You Repot
Do not dump Moringa into moisture-control peat blend. Use a loose sandy or loamy mix with sharp drainage. A practical recipe aligned with how LeafyPixels profiles this species:
- 50% garden soil or quality potting mix
- 30% well-rotted compost
- 20% coarse sand or perlite
Target roughly pH 6.0–7.5 as a preferred band. Purdue reports a wide tolerance of about 4.5–8, and ECHO notes growth into alkaline conditions up to about pH 9 (Purdue University — Moringa oleifera; ECHO — The Moringa Tree). The mix should feel gritty, not spongy, and shed excess water from holes within minutes. Skip gravel “drainage layers” at the pot bottom—they create a perched water table. Full mix details live in the Moringa soil guide; this page only needs the blend ready before you unpot.
Prepare the Plant the Day Before
Water lightly the day before if the mix is bone dry so the root ball holds together without snapping fine roots. Do not soak immediately before the move unless you are breaking apart a hydrophobic, salt-crusted mass. Clean the new pot; if reusing an old one, scrub and sanitize so salts and pathogens do not ride along (Penn State Extension — Repotting Houseplants). Premoisten the sandy mix so it accepts water evenly after planting. Stage tools: clean knife or scissors for dead roots only, chopsticks for settling mix, and room-temperature water. Decide whether this is an upsize or a same-size refresh before you open the root ball—changing pot size, placement, and hard pruning on the same day stacks stress.
Step-by-Step: How to Repot Moringa
Work outdoors or over a tarp. Moringa stems can be brittle if top-heavy; support the trunk while you tip the pot.
- Tip the plant sideways, tap the pot, and slide the root ball out. If stuck, run a knife around the inner rim—do not yank the soft trunk.
- Inspect roots. Firm pale roots are keepers. Soft, black, or foul-smelling roots get cut back to healthy tissue. Gently loosen circling outer roots so they can explore new mix.
- Protect the main downward root. Avoid aggressive taproot cutting for convenience; fold a long tip carefully into a deeper pot rather than severing a healthy leader unless rot forces it. ECHO’s illustrations of young taproots are a reminder that this species invests early in a thick central root (ECHO — The Moringa Tree).
- Add a base layer of fresh mix so the old soil line sits about 2–3 cm below the new rim, leaving watering headspace.
- Center the plant, backfill with sandy mix, and firm lightly—never stamp the mix into concrete. Fill voids with a chopstick, then water until clear drainage runs from the holes.
- Return the pot to its brightest outdoor spot once water has drained. Empty the saucer so the tree never sits in runoff.
Optional light tip-pruning can reduce wind sail after a big move, but save heavy coppicing for a separate day unless the canopy is already unmanageable—see Moringa pruning.
Aftercare for the First Two to Four Weeks
Hold fertilizer for at least three to four weeks. Water only when the top 5–7 cm of mix feels dry, then soak until water drains freely—young pots still need moisture through their first hot season, but the new volume must not stay swampy. Mild leaflet yellowing or a short pause in new flush for one to two weeks can be normal while roots reestablish in warm bright conditions. Soft stems, sour-smelling soil, or progressive collapse are not normal—improve drainage and dry-down immediately. Keep the plant in full sun; dim holding spots slow drying and invite rot. Resume light feeding only after firm new compound leaves appear—details live in the Moringa fertilizer guide.
When Not to Repot Moringa
Skip routine repotting when nights are cold, growth has stalled for winter, or the plant is already recovering from pests, transplant shock, or a recent hard prune. Do not upsize a healthy plant into a giant decorative pot “for the look”—unused wet mix is the fastest way to lose a drought-smart tree. Avoid day-one repotting of a newly purchased plant unless the nursery mix is failing. If the only problem is lanky height with leaves at the tip, start with pruning and light, not a bigger wet pot.
Seed-Grown vs Cutting-Grown Roots in Pots
Seed-grown Moringa typically develops a deeper taproot and benefits most from deep containers and careful unpotting. Cutting-grown plants often root faster and stay shallower, which can make them slightly more forgiving in mid-depth pots—but they still need sharp drainage and still fail if waterlogged. Winrock notes establishment by seed or cutting is easy, with seed sowable in containers and no special seed treatment required (Winrock International — Moringa oleifera). If you are raising new plants while you refresh adults, use the Moringa propagation guide for timing and aftercare of starters.
When to use this page vs other Moringa guides
Use this page when the question is pot size, timing, root inspection, or post-repot recovery. Use Moringa soil when you need the full mix recipe and drainage troubleshooting without a full transplant. Use Moringa watering when the pot volume is fine but dry-down timing is wrong. Use Moringa light when pale, leggy growth is really a sun problem. Use Moringa pruning when height and harvest access matter more than container volume. Use Moringa propagation when you want new plants rather than a bigger pot for the parent.
Related Moringa guides
- Moringa overview — placement, size goals, and species basics before you change the pot
- Moringa soil — sandy mix ratios, pH band, and drainage failures
- Moringa watering — finger-test depth and seasonal dry-down after repotting
- Moringa light — full-sun placement that keeps new mix drying predictably
- Moringa pruning — coppicing and tip-pruning to keep container trees harvestable
- Moringa propagation — seed and cutting methods when you want extras instead of one giant pot
Conclusion
Repot Moringa when roots crowd the pot or the mix fails—not on a rigid calendar. Choose a slightly larger, deeper container, fill it with fast-draining sandy or loamy mix, protect the thick main root, and time routine moves for spring growth. After the move, keep full sun, water only when the upper mix dries, and hold fertilizer until new shoots prove the roots are working. Treat waterlogging as the primary enemy, and container Moringa will stay a productive drumstick tree instead of a soft trunk in a swampy pot.