Low Humidity on Norfolk Island Pine: Causes, Checks & Fixes
Quick answer
Low humidity on Norfolk Island Pine shows as brown needle tips, slowed growth, and spider mite outbreaks in heated winter rooms. First step: move the tree away from vents and radiators, then raise ambient humidity to 50% or higher at canopy level.
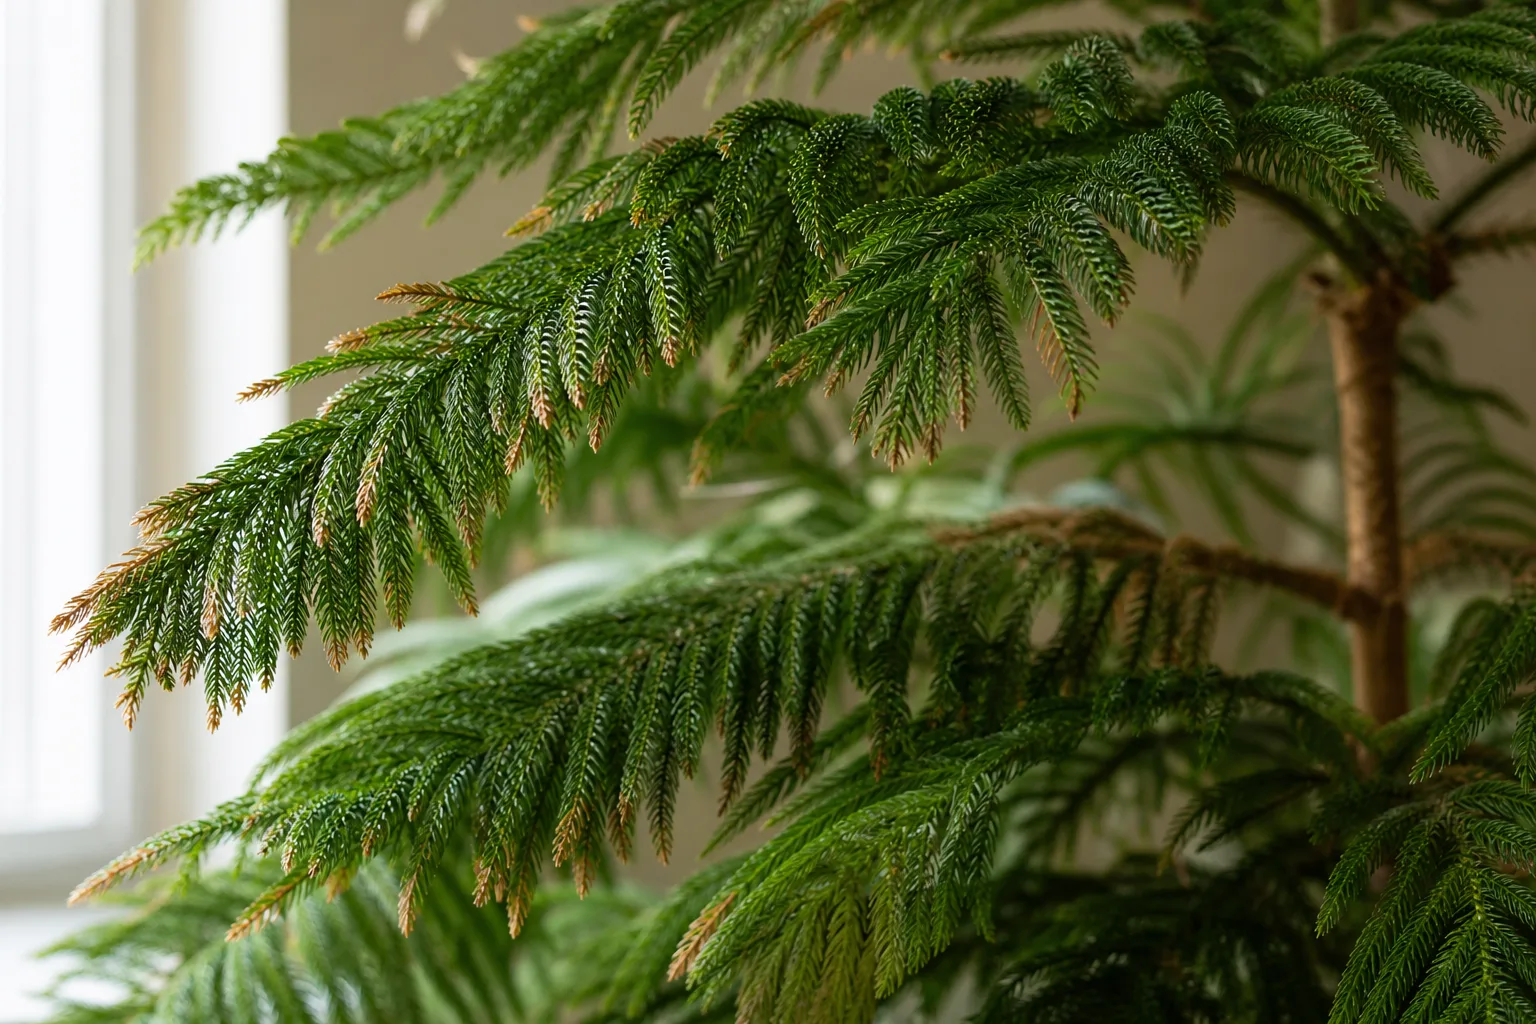
Low Humidity on Norfolk Island Pine: Causes, Checks & Fixes
This guide covers low humidity on Norfolk Island Pine. See also the general Low Humidity guide, watering, and light pages for this plant.
Low Humidity on Norfolk Island Pine: Causes, Checks & Fixes
Quick answer
Low humidity on Norfolk Island Pine (Araucaria heterophylla) is one of the most common reasons holiday trees and long-term house specimens develop brown needle tips, slow whorl growth, and spider mite flare-ups once furnaces or air conditioning dry the room. This subtropical conifer evolved on humid coastal cliffs-not in the hot, dry air near a radiator.
First step: move the tree away from heating vents, radiators, fireplaces, and direct AC output. Dry forced air strips moisture from soft awl-shaped needles faster than roots can compensate. After relocation, check humidity at branch height with a hygrometer and aim for 50% or higher before adding other fixes.
What low humidity looks like on Norfolk Island Pine
Dry air damage on Norfolk Island Pine overview is usually patterned, not random. Because Norfolk Island Pine grows in symmetrical horizontal whorls of soft, needle-like leaves, stress often shows on the outermost or uppermost needles first-the tissue closest to dry drafts and window heat.
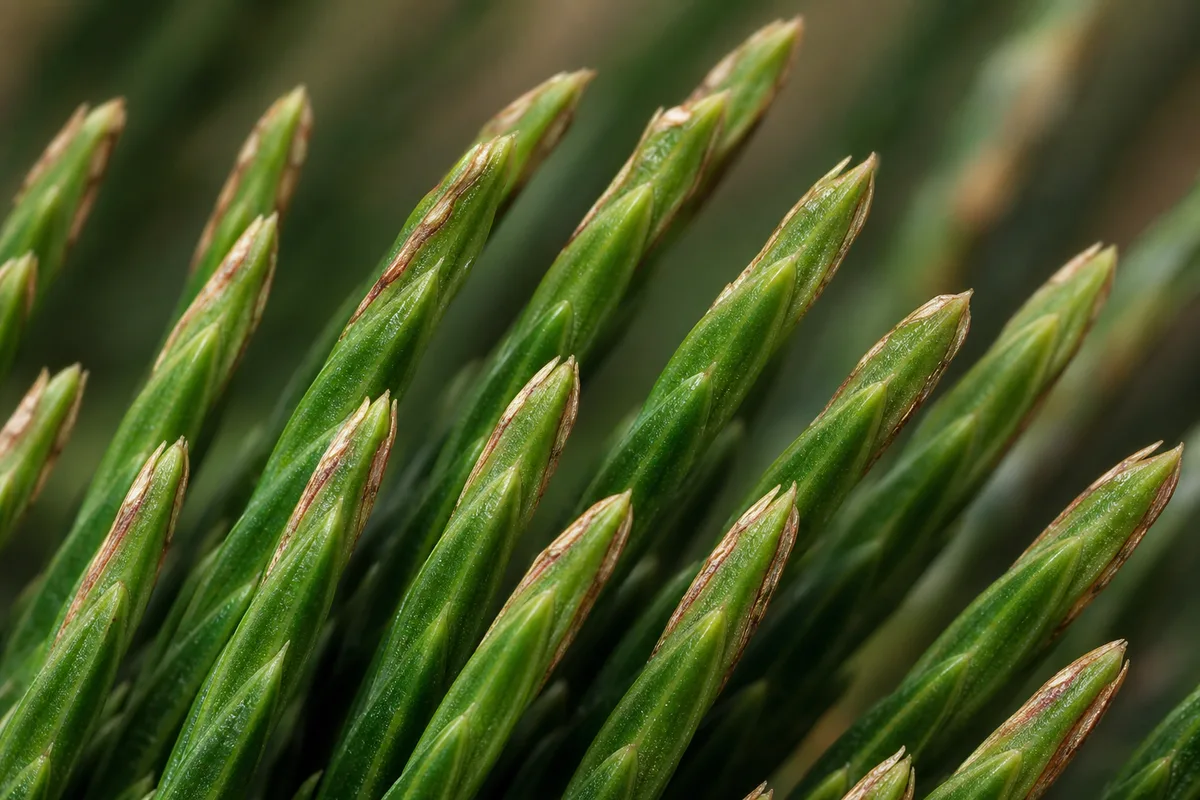
Low Humidity symptoms on Norfolk Island Pine - compare with healthy tissue on the same plant.
Typical signs include:
- Brown or tan tips on soft juvenile needles, sometimes progressing inward along the branch
- Dull, gray-green needles that feel papery instead of plump
- Slowed or stalled new whorls at the growing tip while lower branches look unchanged
- Lower branch yellowing or drop when dry air combines with underwatering-needle drop from environmental stress is a documented problem on this species
- Fine webbing and stippling on needle undersides when spider mites exploit dry conditions
Norfolk Island Pine is not a true pine. Its needles are soft when young and lack the waxy toughness of outdoor Pinus species, so they show humidity stress quickly indoors. A few lowest branches browning slowly in dim light can be normal aging; widespread tip burn on active growth in winter heat is not.
Why Norfolk Island Pine struggles in dry air
In native habitat on Norfolk Island, this tree grows in coastal, humid conditions with steady onshore moisture-not the 20–30% relative humidity many heated homes reach in winter. Illinois Extension notes that homes tend to be dry in winter and that needle drop often follows exposure to dry air or dry soil on Norfolk Island pines.
Several indoor factors stack against the plant:
- Winter heating removes moisture from room air just when the tree is growing slowly and cannot replace lost leaf water quickly
- Summer air conditioning creates the same dry zone near vents and cold blow paths
- Hot, sunny windows raise leaf temperature and transpiration while the room air stays dry
- Large specimen size means outer needles sit in the driest air layer near the ceiling and away from pebble-tray evaporation
North Carolina Extension describes Norfolk Island pine as adapting to the warm, dry atmosphere of most homes-but also recommends misting in heated rooms during winter and lists dry indoor atmosphere as a condition the plant tolerates yet still needs management around. Missouri Botanical Garden flags spider mites as a common problem indoors; dry air makes mite outbreaks more likely because mites thrive when humidity drops.
This plant also prefers cool, bright rooms-roughly 55–65°F (13–18°C) according to NC State-or the 16–24°C comfort range in typical home care. Hot dry air from vents is worse than cool dry air because both humidity and temperature stress hit at once.
How to confirm the cause
Work through these checks before Norfolk Island Pine repotting guide, fertilizing, or spraying:
- Hygrometer at canopy height - Hold a meter near the top whorls, not on the floor. Below 40% with active tip browning strongly supports low humidity. Many tropical houseplants prefer 40–50% or higher; this tree does best around 50–60%.
- Placement audit - Is the pot within 1–2 m of a heat vent, radiator, fireplace, or AC louvers? Is one side of the tree closer to the source than the other? Asymmetric browning fits a draft pattern.
- Soil moisture at 2–3 cm depth - Dry mix with crispy needles suggests underwatering may overlap. Wet mix with brown tips near a vent points to air stress, not rot-unless lower branches are collapsing.
- Season timing - Did tips brown within weeks of turning on central heat or after moving the tree to a holiday display away from windows? Seasonal timing fits dry air.
- Pest inspection - Tap a branch over white paper or use a hand lens on needle undersides. Spider mites in dry heat produce stippling and webbing; treat pests after you stabilize humidity, not instead of fixing the environment.
- Salt and fertilizer check - White crust on the soil surface plus tip burn can mimic humidity damage. Flush only if you have been feeding heavily; do not fertilize a stressed tree to “green it up.”
If humidity reads adequate, the tree sits away from vents, soil moisture is balanced, and tips still brown, look next at underwatering, salt buildup, or sudden light change-not humidity alone.
First fix for Norfolk Island Pine
Move the tree out of the path of heating vents, radiators, fireplaces, and AC output.
Pull it back until no forced air hits the foliage directly. If it has been sitting on a holiday mantel or in a foyer with a furnace register below, treat that placement as the primary cause until proven otherwise. Give the tree Norfolk Island Pine light guide with some morning sun in the new spot-do not trade one stress for another by moving it to a dark corner.
Once relocated, raise ambient humidity to 50% or higher at canopy height. The most reliable tool is a cool-mist or evaporative humidifier running several hours daily in the same room. Illinois Extension recommends pebble trays (saucer of rocks and water with the pot above the water line) for a local microclimate, and grouping houseplants so combined transpiration lifts humidity. Pebble trays help at the base of a tall tree but rarely reach upper whorls on their own-pair them with a humidifier for specimens over 90 cm.
Hold off on repotting, pruning entire tiers, or feeding until the tree holds stable in the new environment for two to three weeks.
Step-by-step recovery
After the first fix, work through recovery in order:
- Run the humidifier daily while heating or AC is active. Target 50–60% at branch height; adjust output until the hygrometer stays in range for full days, not just mornings.
- Group plants if space allows-ferns, pothos, or other transpiring neighbors raise local humidity without wetting Norfolk needles directly.
- Water on soil dryness, not calendar - Allow the top 2–3 cm to dry, then soak until a little water exits the drainage hole and discard saucer runoff within 15 minutes. Dry air increases transpiration; underwatering on top of low humidity accelerates tip burn.
- Inspect for spider mites weekly - If webbing appears, rinse needle undersides with a gentle shower or sink spray, then treat with insecticidal soap or horticultural oil on a labeled schedule if populations persist. Fix humidity first so mites do not rebound immediately.
- Trim only fully dead branches - Snip brown, brittle tiers back to live tissue with clean pruners. Partial tip browning can stay until new growth looks healthy; those tips will not revert to green.
- Rotate the pot monthly if light comes from one window so whorls stay symmetrical as recovery begins.
Do not mist heavily on cool evenings. NC State’s winter guidance mentions misting in heated rooms, but brief misting alone does not sustain humidity for hours and can leave needles damp overnight in a cool room. Humidifiers and grouping work better for all-day moisture.
Recovery timeline and what improvement looks like
Humidity fixes are slow but predictable. Expect:
- Week 1–2: No further spread of brown tips after relocation and humidifier use; soil moisture stays more consistent
- Week 3–6: New growth at branch tips looks greener and fuller; spider mite activity drops if humidity holds
- Month 2+: Fresh whorls extend normally; old browned needle tips remain cosmetic unless you trim them
Damaged needle tissue does not heal backward-recovery shows only in new whorls and stable lower branches. If the central leader stays green and firm and new tiers emerge evenly, the tree is responding. If entire whorls brown from the trunk outward while soil stays soggy, suspect overwatering or root problems instead of dry air alone.
Lookalike symptoms and causes to rule out
| What you see | Often confused with low humidity | How to tell them apart |
|---|---|---|
| Brown needle tips | Underwatering | Dry mix throughout the pot; pot feels light; tips brown after you skipped several waterings |
| Lower branch drop | Overwatering / root stress | Mix wet for days; sour smell; soft lower stems despite “dry air” theory |
| Yellow then brown needles | Too little light | Long, droopy branches; tree far from windows; humidity normal |
| White crust + tip burn | Salt / fertilizer burn | Heavy feeding history; crust on soil surface |
| Sudden one-side browning | Heat vent or window scorch | Damage maps to vent, radiator, or hot glass side |
Normal slow loss of the lowest branches on an older indoor tree in moderate light can occur without a humidity crisis. Worry when active upper growth browns during heating season or when mites and tips fail together.
Mistakes to avoid
- Misting once daily instead of raising room humidity - Brief surface moisture does not replace 40–50%+ ambient humidity for hours
- Leaving the tree on a holiday display far from light and next to a heat source after December
- Overwatering to “compensate” for dry air - Soggy roots plus dry needles is a common double stress; check soil before adding water
- Fertilizing a browning tree - Feed only after new growth looks stable in spring and summer
- Pruning the central leader to remove brown tips - Never cut the top growing point unless it is fully dead; structure depends on that leader
- Placing a humidifier on the floor only - Upper whorls on tall trees stay dry unless humidity circulates or the unit runs nearby at canopy height
How to prevent low humidity damage next time
Before heating season, set up humidity monitoring at branch height and keep the tree several feet from vents year-round. Run a humidifier whenever indoor relative humidity drops below 50% near the canopy. Grouping plants and using pebble trays adds backup at the pot level.
When buying or receiving a holiday Norfolk Island Pine, plan permanent placement in bright light with humidity support-not a two-week spot near a fireplace. Acclimate gradually if you move rooms; avoid bouncing between hot dry zones and cold drafts.
During summer AC season, keep cold blow paths from hitting foliage. If you move the tree outdoors for warm months, transition slowly to shade outdoors and back indoors before nights drop into the 50s °F-humidity outdoors is rarely the winter problem, but sunburn and wind can mimic tip damage.
When to worry
Low humidity alone rarely kills a established Norfolk Island Pine quickly, but combined stress can:
- Trigger spider mite outbreaks that defoliate tiers if ignored
- Cause repeated whorl loss that leaves a lopsided silhouette over months
- Mask root rot on Norfolk Island Pine if you overwater while chasing humidity
Seek a harder diagnosis if multiple tiers collapse within days, the trunk softens at the base, or brown needles appear while soil stays waterlogged. Those signs point beyond dry air. For tip burn alone with firm wood and green leaders, humidity correction is the right first line-not repotting on day one.
When to use this page vs other Norfolk Island Pine guides
- Norfolk Island Pine watering guide - Use for routine moisture checks before assuming low humidity is the main issue.
- Norfolk Island Pine problems hub - Browse all 4 common issues on this species.
- Brown Tips on Norfolk Island Pine - Different entry point when symptoms overlap with low humidity.