How to Propagate Potatoes from Seed Potatoes
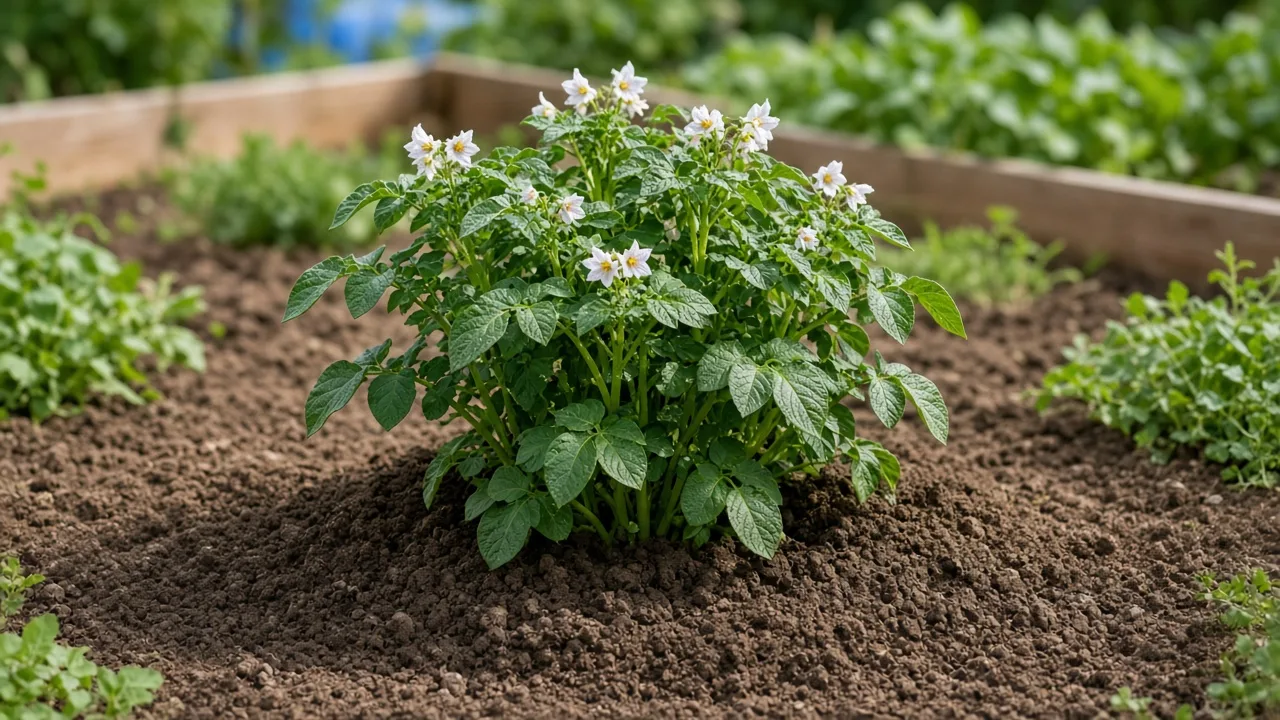
How to Propagate Potatoes from Seed Potatoes
How to Propagate Potatoes from Seed Potatoes
Potato (Solanum tuberosum) is propagated almost exclusively from tubers, not from leafy cuttings or divisions like many ornamentals. Home growers plant small “seed potatoes”—certified tubers or pieces cut from them—so each eye (bud) sprouts into a genetically identical plant that forms new tubers on underground stolons. That vegetative route is faster and more predictable than growing from botanical seed, which is why extension guides treat tuber planting as the default.
Your first job is to source disease-free seed potatoes, decide whether to chit them for an earlier start, and plant into cool, bright conditions with depth for later hilling. Get those three right and the rest of the season is mostly moisture, soil acidity, and keeping tubers buried—topics the potato overview and sibling guides cover in detail.
Potato propagation at a glance
Propagation here means starting a new crop from seed potatoes: whole small tubers or cut pieces with eyes facing up, planted in spring or your local cool window, then mounded as stems grow. NC State Extension describes potatoes as most often grown from seed potatoes, with certified stock helping limit problems such as late blight. The RHS potato guide likewise recommends specially prepared, virus-free seed tubers rather than kitchen leftovers.
New plants emerge from sprouts on the tuber piece; roots and stolons develop below while foliage expands above. “New” potatoes can be lifted roughly 7–8 weeks after planting, often around flowering, while mature storage crops commonly need about three to four months before tops yellow or die back—timelines NC State notes for home harvest planning.
Best propagation method for Solanum tuberosum
Seed potatoes are the home standard
Vegetative propagation from seed potatoes is the reliable method for terraces, raised beds, and grow bags. Each planted piece is a clone of the parent variety, so ‘Yukon Gold’ planted from certified stock yields ‘Yukon Gold’ tubers, assuming disease has not intervened. Penn State PlantVillage states that the crop is typically propagated from seed potatoes planted in soil, with true seed noted as a less common alternative.
Seed pieces should carry enough energy and buds to push shoots before soil microbes attack cut surfaces. Extension guidance commonly recommends at least one eye per piece, with NC State advising at least two eyes when you divide larger tubers, then letting cuts scab over for about a day outdoors before planting.
True potato seed is a separate path
Botanical true potato seed (TPS) from potato berries can produce new plants, but offspring are genetically variable and the path is slow compared with tubers. PlantVillage mentions TPS as uncommon for growers; patient gardeners may experiment for breeding interest, not for a predictable kitchen crop. If your goal is a known cultivar and a full harvest this season, stay with certified seed potatoes.
Why grocery-store potatoes are unreliable stock
Supermarket potatoes are bred and stored for eating, not planting. Many are treated with sprout inhibitors that keep eyes dormant on the shelf, which makes them poor propagation stock even when they look fine. The Spruce warns against using grocery potatoes and notes that even organic tubers may carry over diseases from the field. NC State adds that store potatoes may not sprout reliably for those reasons.
Disease carryover is the deeper risk. Tubers infected with viruses, bacterial wilt, or late blight can introduce problems into your soil and compost for seasons. Certified seed potatoes are inspected and sold for planting; they cost more than a bag of eating potatoes because that traceability matters. If you must test a store tuber, treat it as an experiment in an isolated container—not as stock for your main bed.
When to propagate potatoes
Potatoes are a cool-season crop in hot lowlands: they need bright days and moderate temperatures while tubers form, and they struggle when heat and drought stress coincide with bulking. In much of India, that aligns with the Rabi window on plains terraces when nights are milder; hill gardens may follow a different calendar. Foliage tolerates light frost in many regions, but tuber quality drops when soil stays hot and dry.
Cool-season windows in India and the tropics
Work backward from when you can keep soil cool enough, moist enough, and deep enough for three to four months if you want storage potatoes, or roughly two months for small new potatoes. Avoid planting into waterlogged monsoon soil or into the peak of pre-monsoon heat unless you can shade containers and irrigate steadily. Match early vs maincrop types to how long your cool window lasts—early varieties finish faster and suit shorter seasons and containers, as the RHS notes for first earlies.
Soil temperature matters at planting. PlantVillage suggests planting when soil has warmed to roughly 10–15°C (50–59°F) and after the last frost date in frost-prone regions. In frost-free areas, use local night temperatures and your own moisture checks rather than a fixed calendar month.
Chitting seed potatoes (optional but useful)
Chitting means sprouting tubers in cool, bright conditions before they go in the ground. The RHS describes standing seed potatoes with buds upward in egg boxes or trays, in a frost-free bright spot, until shoots reach about 5 cm (2 in) over roughly four to six weeks. Chitting is most worthwhile for early varieties that you want to harvest sooner; maincrops gain less because they already have a long season.
Do not chit in a dark cupboard—long pale sprouts break easily at planting. A cool porch, bright garage, or indoor shelf with strong indirect light produces stocky green shoots. If planting is delayed, move tubers to a cooler place to slow growth, but avoid dehydration and shriveling. Many gardeners skip chitting and still get a crop; they simply wait a bit longer for emergence.
Prepare seed potato pieces
Inspect every tuber before cutting. Discard soft, bruised, or moldy stock. For large seed potatoes, use a clean sharp knife to cut 2-inch (about 5 cm) squares with at least one eye each, as The Spruce planting guide recommends—or follow NC State’s two-eyes-per-piece rule for extra insurance on marginal stock. Pieces smaller than a ping-pong ball are often planted whole to avoid cutting away too much food reserve.
Cutting tubers and callusing the wounds
Fresh cuts leak moisture and invite rot in cold, wet soil. Lay cut pieces cut-side up in a dry, airy place for one to two days so the wound calluses before planting. NC State’s “rest outside for a day” guidance matches what many growers call healing or callusing. Plant with the cut side down and eyes or sprouts up so shoots reach light quickly.
If disease has been a problem in your garden, some growers dust cut surfaces with sulfur before planting; prioritize rotation and certified seed first, because no dust replaces clean stock.
Plant seed potatoes step by step
- Choose the final site — full sun and acidic, well-drained soil per the potato light and potato soil guides. Heavy, soggy mixes cause tuber rot before plants establish.
- Work the bed or fill containers — loosen soil and add compost if needed; containers need depth, not just width.
- Plant at the right depth — trenches about 15 cm (6 in) deep are common in RHS guidance; PlantVillage cites 10–15 cm planting depth with eyes up.
- Cover lightly at first — bury sprouts without snapping them; water in to settle soil.
- Plan for hilling — you will add soil as stems grow; propagation is not finished at the first covering.
Beds, trenches, and spacing
In rows, place seed potatoes along the trench base with sprouts upward. The RHS suggests 30 cm (1 ft) apart in rows 60 cm (2 ft) apart for earlies, and slightly wider spacing for maincrops. NC State’s toolbox text mentions 5–6 inches (13–15 cm) apart in close plantings—tighter spacing suits small “new” potato harvests; wider spacing supports larger tubers per plant.
Cover with several inches of soil initially, then earth up as plants grow. Tubers that see light turn green and build solanine; NC State warns that green skin and plant foliage are toxic. Hilling is therefore part of successful propagation, not a separate chore—you are burying the stems that will form stolons.
Grow bags and deep containers
Containers work when they are deep enough and large enough to hill repeatedly. NC State recommends containers or grow bags at least about 60 cm (2 ft) deep and roughly 115 L (30 gallons) for a productive crop. Fill partway, plant seed pieces, then top up mix as stems lengthen—the same logic as the potato repotting guide, which treats “repotting” as topping up rather than transplanting mid-season.
Use free-draining mix rich in organic matter, and keep moisture even through sprouting. A bag that dries to dust one day and floods the next produces knobby or aborted tubers. Pair container propagation with the potato watering checks once shoots are up.
Hilling after planting (part of propagation success)
Once stems reach roughly 30 cm (1 ft), mound soil, compost, or mulch around the base and repeat once or twice through the season, as NC State describes. Hilling protects early shoots from light frost in some climates, supports more tuber-bearing stem length underground, and blocks light from developing potatoes. Skipping hilling after a good planting is a common reason propagation “succeeds” at sprouting but fails at harvest.
If you grow in bags, unroll the sides and add mix instead of digging from between rows. The potato pruning guide covers removing flowers or damaged tops when you want energy directed to tubers—not for creating new plants.
Aftercare from sprout to harvest stage
Steady moisture matters from the first sprout through tuber bulking. PlantVillage notes potatoes need consistent water, especially during flowering and tuber formation, with good drainage to prevent waterlogging. Hold off on heavy nitrogen until plants are established; excess early nitrogen can favor foliage over tubers, a balance the potato fertilizer guide explains.
You can harvest small new potatoes when plants begin flowering—often 7–8 weeks from planting—or wait until foliage yellows for mature tubers. Cure sound storage potatoes in a cool, dark, airy place; discard any green or damaged tubers rather than saving them as next year’s seed unless you are deliberately selecting disease-free stock.
Common propagation failures and first fixes
Seed pieces rotted without sprouting: soil was cold, saturated, or both at planting. Wait for workable moisture, improve drainage, callus cuts longer, and use whole small tubers in wet seasons.
Weak or no sprouts from store tubers: sprout inhibitors or old stock. Buy certified seed; chit in bright cool light to confirm vigor before planting.
Plants emerged but few tubers: soil too warm, too dry during bulking, or never hilled. Hill promptly and align watering with the potato watering guide.
Disease appeared early: infected seed or rotation skipped. Destroy affected plants, do not compost diseased tubers, and restart next season with certified stock in a fresh mix or bed.
Green tubers at harvest: light reached developing potatoes. Hill higher or top up containers; peel or discard green portions before cooking.
When to use this page vs other Potato guides
Use this propagation guide for seed potato selection, chitting, cutting, planting depth, spacing, and first hilling. Use the potato overview for crop identity, toxicity around pets, and how early vs maincrop types fit your season. After plants are growing, shift to watering, soil, light, fertilizer, repotting (topping up containers), and pruning for ongoing care—not for starting the crop.
Related Potato guides
- Potato care overview — growth habit, harvest stages, and pet safety around foliage
- Potato light needs — full sun for sturdy tops and better tuber set
- Potato watering — even moisture from sprout through bulking
- Potato soil — acidity, drainage, and scab-aware mixes
- Potato fertilizer — feeding after propagation establishes plants
- Potato repotting — topping up grow bags instead of mid-season transplant
Conclusion
Propagate potatoes by planting certified seed potatoes—whole or callused pieces with healthy eyes—in cool, bright weather and deep, well-drained soil. Chit early varieties if you want a head start, never rely on inhibitor-treated grocery tubers for serious crops, and plan to hill as soon as stems gain height. Propagation ends when sprouts are buried, supported, and on their way to forming stolons; keep moisture steady and tubers dark until you harvest at the stage you want.
Related tool
Try the Propagation Success Calculator with potato pre-selected to estimate needs for your setup.