Ridge Gourd Pruning Guide: Trellis Training, Tip Pinches &
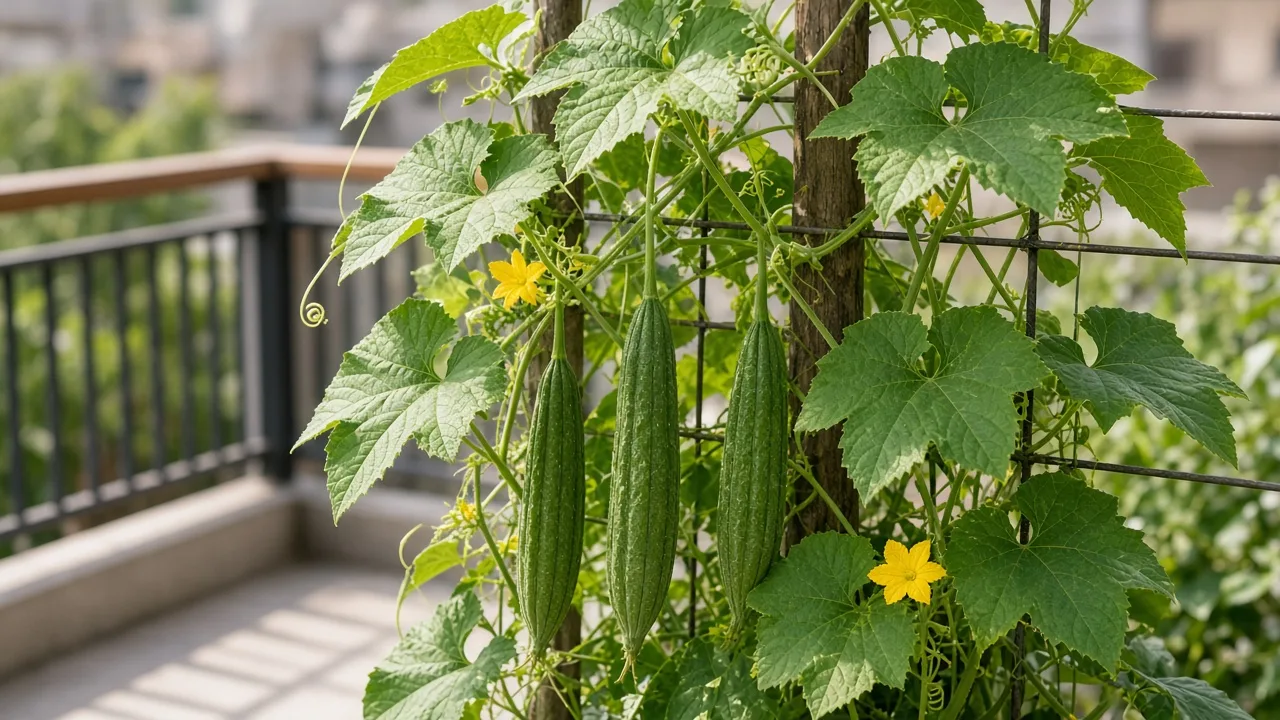
Ridge Gourd Pruning Guide: Trellis Training, Tip Pinches & Harvest Cuts
Ridge Gourd Pruning Guide: Trellis Training, Tip Pinches & Harvest Cuts
First, cut off only dead, yellow, or clearly diseased leaves—and any stung, cracked, or rotting fruit—with clean scissors or bypass pruners. Work from the bottom of the vine upward, bagging damaged gourds instead of composting them when fruit fly is active. Do not pinch the main growing tip or thin healthy laterals until that cleanup is finished and the stem is secured to its trellis.
Ridge gourd (Luffa acutangula—turai, angled luffa, ribbed loofah) is a fast annual climber in the cucumber family. USDA PLANTS lists it as the ridged-fruited luffa widely grown as a vegetable across tropical Asia. Home “pruning” is really vine training plus harvest and sanitation: you guide one strong main stem up a support, open the canopy for air and pollinators, pinch or shorten shoots that sprawl on soil, and pick young fruit before fibres toughen. For sowing seasons, pot size, and whole-plant habits, start with the Ridge gourd overview.
Quick answer
After removing failing leaves and fruit, tie the main stem to a sturdy trellis and let most kitchen harvest form on side branches spreading along the support. UF/IFAS HS1285 notes that a trellis is needed for optimum fruit production and straighter angled-luffa fruits, with vertical supports commonly about 1.8 m (6 ft) tall. When the leader reaches the top wire, pinch or cut the tip just above a node to slow upward sprinting and encourage lateral shoots. Pick tender gourds at roughly 15–25 cm on a short cycle—that ongoing harvest is as important as any scissors work. Pruning cannot fix shade, drought during bloom, or poor pollination; stabilise ridge gourd light and watering before expecting a stripped vine to refill with fruit.
What pruning does for ridge gourd
Unlike woody shrubs, ridge gourd does not need rejuvenation cuts on old wood—the whole plant finishes in one warm season. What growers call pruning usually covers four jobs:
Sanitation removes yellow leaves, mildewed foliage, and fruit fly–stung gourds before pests and rot spread. Training directs the main stem vertically and keeps laterals on the trellis instead of the terrace floor. Canopy thinning opens dense tangles so air moves and bees reach yellow male and female flowers. Harvest cuts take young fruit at the stem, which redirects energy to new flowers.
NC State Extension describes close cousin sponge gourd (Luffa aegyptiaca) as a trellised annual vine that needs full sun, even moisture, and good air circulation—the same priorities apply to angled luffa on Indian balconies. UF/IFAS HS1285 adds that stems can run many metres when unchecked, so unmanaged sprawls shade their own leaves and leave fruit on damp soil where rot risk rises.
Training vs harvest vs emergency cuts
| Goal | What you cut | Where | Season |
|---|---|---|---|
| Disease or pest cleanup | Yellow, mildewed, or torn leaves; rotting fruit | Leaf petiole base; fruit stem | Anytime you spot damage |
| Trellis establishment | None at first—tie, do not chop | Soft ties on main stem | When vine is 60–90 cm and tendrils active |
| Lateral encouragement | Growing tip of main stem after it tops trellis | Just above a leaf node | Warm, dry morning during active growth |
| Kitchen harvest | Young tender gourds | Fruit stalk, leave vine intact | Every few days once fruit sizes up |
| End of season | Spent vines (optional) | Whole plant at soil line | After seed save or frost |
When to prune or train ridge gourd
Best window for tip pinches and thinning
Schedule structural pinches when nights stay warm and the vine is actively pushing new tendrils—typically summer and monsoon plantings on Indian plains (February–March or June–July sowings described in the overview). UF/IFAS Gardening Solutions treats luffa as a warm-season crop sown in full sun with well-drained soil; pruning judgments follow that same active-growth window.
Work in the cooler part of the day on a dry morning so cut surfaces dry quickly. Avoid heavy thinning when soil is waterlogged, when plants are wilting from midday heat, or within a few days of repotting a young seedling—stacked stresses slow flowering on cucurbits.
What you can remove anytime
Fully yellow leaves, powdery mildew patches, and fruit that is clearly stung, cracked, or mushy can be removed whenever you see them. That is maintenance, not optional decoration—angled luffa sets many fruits on lateral branches, and one rotting gourd can attract more fruit fly. If only a few leaves look pale while the rest of the vine is deep green, check moisture before blaming age; chronic underwatering shows up as flower drop on the watering guide.
What to check before you cut
Spend a minute on the whole plant:
- Trellis attachment — Is the main stem tied every 30–45 cm without crushing the vine? A loose plant snaps in wind before you ever need a pinch.
- Node spacing — Long gaps between leaves on a pale vine often mean weak light; improve sun exposure before tipping a stretched leader.
- Flower mix — Plenty of yellow male blooms but no swelling ovaries on females points to pollination, not pruning. Hand-pollinate if bees are scarce.
- Fruit age — Skin should yield to a fingernail and ridges should feel tender at harvest size; woody, bloated fruit will not soften with more cutting.
- Soil moisture — Luffa culture needs high moisture with drainage (UF/IFAS HS1285); drought during flowering drops buds even on a perfectly pruned vine.
The first cut to make
After sanitation, your first intentional training step is usually not a cut—it is securing the lowest 60 cm of main stem to the trellis with soft ties, letting tendrils grab mesh where they can. Once the leader is stable and roughly at or above the top bar, pinch or snip the terminal growing tip just above a healthy node on a dry morning. That single tip removal redirects energy into side shoots along the trellis face, where most turai for the kitchen forms.
Wait five to seven days before a second thinning pass. You want to see new lateral buds breaking, not a shocked vine sitting bare in heat.
How to prune and train ridge gourd step by step
- Sanitize tools — Wipe bypass pruners with 70% isopropyl alcohol before you start and between plants if mildew is present.
- Remove failing tissue — Cut yellow leaves at the petiole base. Twist off stung fruit; do not leave hollow shells on the vine.
- Train the leader — Guide one main stem upward; gently redirect, do not snap, tendrils onto the trellis. Remove only tendrils that wrap other stems tightly enough to girdle them.
- Top the trellis — When the stem reaches the upper support, cut or pinch ¼ inch above a node at the top wire. Two healthy leaves should remain below the cut.
- Thin overcrowded laterals — Shorten side shoots that dangle to the floor or cross through the canopy. Keep the strongest laterals spaced along the trellis.
- Harvest on schedule — Cut young gourds at 15–25 cm with a short fruit stalk. Regular picking is the main way to keep the vine flowering.
- Tidy through the season — Every two to three weeks, repeat light sanitation and re-tie climbing sections.
How much you can safely remove
There is no hard extension percentage for angled luffa, but cucurbit vines respond poorly to being stripped bare. Use a practical ceiling: in one session, remove no more than about one-third of the total leafy vine length on a plant, and never remove the only functioning lateral that is carrying set fruit unless it is diseased.
If the vine is already sparse—few leaves, no flowers—do not compensate with harder pruning. Feed and water steadily per the fertilizer and watering guides, improve pollination, and let new growth build before another pinch.
Where to cut
Ridge gourd, like other cucurbits, branches from nodes—the joints where leaves and tendrils attach. Make tip pinches and lateral shortenings just above a node, angling the blade so you do not crush the stem. For harvest, slice the fruit stalk without nicking the vine behind it.
Avoid shaving leaves in half; torn foliage dies back and invites mildew in humid monsoon canopies. Do not cut into the crown at soil level unless the whole plant is finished for the season.
What not to cut
- The only main stem before a trellis is ready—without a leader, you delay height and flower timing.
- Every lateral at once—fruit forms on side shoots; over-thinning ends your harvest wave.
- Female flowers or young set fruit unless damaged—those are your next turai.
- Healthy tendrils that are actively holding the trellis—release and redirect instead of chopping blindly.
- Vines you plan to save for seed or dry luffa fibre until those fruits mature—harvest cuts and sponge harvest are different endgames (UF/IFAS HS1285 notes immature fruit is edible; mature fruit becomes fibrous).
Pruning for airflow and fruit quality
Dense, ground-hugging growth is the main reason to thin. Fruit that rests on wet soil or crowded leaves is more prone to rot—extension guidance for trellised luffa emphasises vertical training partly to keep produce off the ground (UF/IFAS HS1285; NC State Extension). On a balcony, lift every lateral back to the mesh and remove the lowest leaves that touch the pot rim if they stay damp.
Aftercare after pruning
Water deeply after a moderate trim if soil is dry, then return to the even moisture rhythm from the watering guide. Hold off on strong fertiliser for three to five days so cut stems can callus; a sudden nitrogen spike right after pinching can push leaves at the expense of flowers.
Watch for new yellow blooms within a week in warm weather. If wilting appears while soil stays wet, pause further cuts and check drainage in the soil mix. Bag and discard heavily infested trimmings rather than composting them on small terraces.
Recovery timeline and signs pruning worked
In active heat with good care, new lateral shoots and flower buds often show within 7–14 days after a trellis-top pinch. Signs you timed it well include:
- Tendrils re-grabbing the trellis within a few days
- A second flush of male flowers followed by swelling female fruit
- Steady harvest size on new laterals without increasing bitterness
Signs you went too hard or too early include persistent wilt, blossom drop with no new buds, and pale new leaves that stay small—back off, stabilise water and light, and wait before the next cut.
Mistakes to avoid
- Pruning before tying the main stem, then breaking the vine in the next storm
- Letting fruit oversize on the vine—over-mature gourds turn fibrous and slow new set (UF/IFAS HS1285)
- Stripping leaves to “let sun in” while roots are dry—flower drop follows drought, not shade alone
- Composting fruit fly–infested gourds next to clean plants
- Using dull blades that crush stems and invite disease
- Expecting a autumn vine to behave like a new sowing—start propagation seed for the next warm window instead of heavy rejuvenation cuts
When not to prune
Skip tip pinches and lateral thinning when seedlings are still rooting in, soil is saturated after heavy rain, or the plant is recovering from transplant wilt. Remove only diseased tissue in those moments.
Also delay cosmetic thinning if you are within a week of a major heat spike and cannot irrigate—cucurbit vines shed flowers under combined heat and water stress. Finish the season by cutting the whole plant at the base once you have harvested or saved seed; there is no perennial framework to maintain through winter.
Related Ridge Gourd guides
- Ridge gourd overview — sowing windows, turai harvest size, and trellis planning
- Ridge gourd light — full sun needs for flower and fruit set
- Ridge gourd watering — even moisture during bloom
- Ridge gourd soil — drainage and fertility that support recovery
- Ridge gourd fertilizer — feeding after establishment, not as a prune reflex
- Ridge gourd propagation — succession sowing when vines decline
- Ridge gourd repotting — final pot and trellis before major training cuts