Shankhpushpi Repotting: When, Pot Size & Soil
Shankhpushpi Repotting: When, Pot Size & Soil
Shankhpushpi Repotting: When, Pot Size & Soil
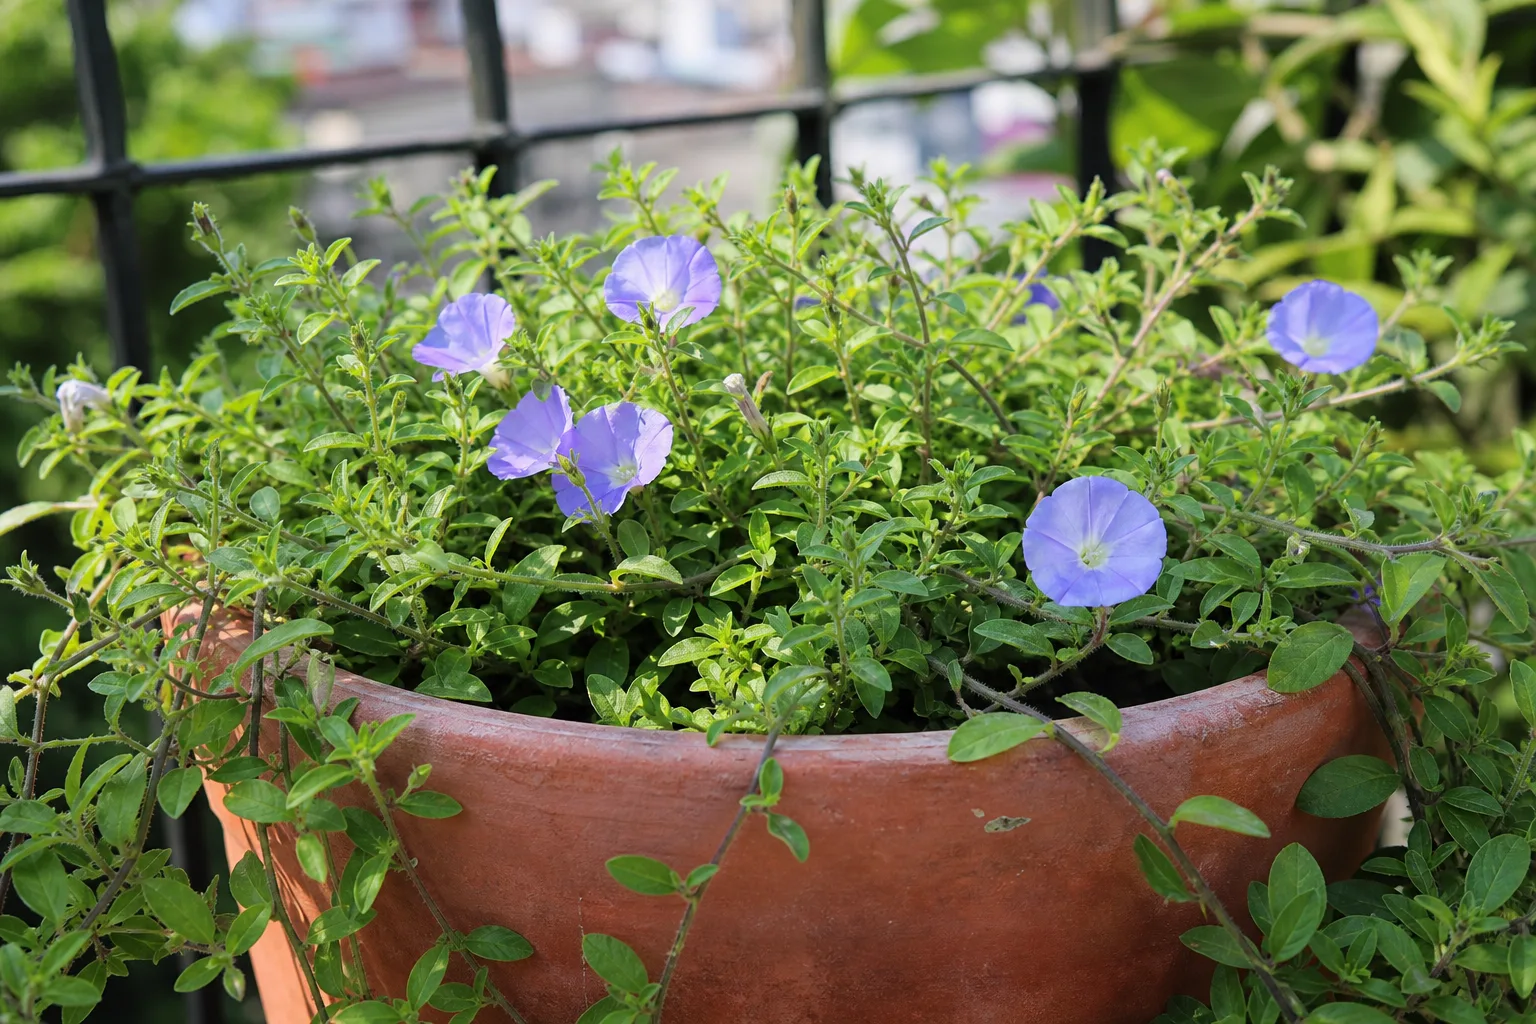
Shankhpushpi (Convolvulus pluricaulis, accepted by Kew as Convolvulus prostratus) is a low, hairy, prostrate Ayurvedic creeper grown for its conch-shaped flowers and spreading mat—not for height. That habit changes every repotting decision. If you treat it like a thirsty tropical foliage plant—jumping into a huge decorative bowl, packing peat-heavy mix, and watering on a calendar—you recreate the one condition this dry-land herb cannot forgive: wet feet around a shallow crown.
Kew Plants of the World Online places the accepted species as a subshrub of desert or dry shrubland biomes from Cape Verde to north-western India. Pharmacognosy sources describe wild C. pluricaulis as a prostrate perennial on sandy or rocky ground under xerophytic conditions in northern India. In a pot, that biology means airy sandy mix and modest containers beat “generous” upsizing every time. Pair this page with the Shankhpushpi watering guide and Shankhpushpi soil guide once the plant is back in place.
Why Shankhpushpi Repotting Is About Drainage, Not Bigger Pots
Shankhpushpi sprawls across the soil surface. Roots and soft crowns sit close to the mix, so oxygen loss from waterlogged media hits fast. A same-size soil refresh—fresh lean mix in the same pot—often helps more than a dramatic upsizing when compost has slumped but the mat is not yet circling hard. RHS guidance on container plants notes that compost breaks down over time, reducing air spaces and drainage even when a plant is not fully pot-bound.
Judge success by firm hairy stems, steady new trailing tips in warm weather, and a pot that feels light again between drinks—not by packing the plant into the biggest bowl on the balcony.
How Often to Repot Shankhpushpi in Containers
For most balcony and patio growers in India, every 1–2 years is enough, or sooner when the mat fills the pot surface and roots crowd the rim. A vigorous plant in full summer sun can outgrow a 12–15 cm starter pot in one warm season; a slower plant in cooler light may wait closer to two seasons.
Do not repot on a fixed calendar date if the mix still drains well and new shoots keep extending. Skip day-one repotting for a newly purchased plant unless the nursery mix stays soggy, pests are obvious, or crowns are already soft. Quarantine, learn how fast the sandy pot dries in your light, and change one variable at a time—details that also belong in the Shankhpushpi overview.
Signs Your Shankhpushpi Needs a New Pot
Look for patterns, not a single yellow leaf. Clear signals include:
- Stems matting over the rim with little free soil left on the surface
- Roots circling under the surface or poking through drainage holes
- A pot that dries within a day of watering in warm weather
- Mix that stays heavy and sour for days even in strong sun
- Stalled sprawling growth despite warmth and correct Shankhpushpi light
Penn State Extension lists similar pot-bound cues for houseplants: watering frequency that jumps oddly, roots at drainage holes, and slowed top growth even in the growing season. For Shankhpushpi, add the opposite failure mode—mix that never dries—because this species is more sensitive to waterlogging than many foliage plants.
Any one strong signal justifies a root check. Two or more means you should plan a spring move or an emergency refresh if rot is active.
Best Season to Repot Shankhpushpi
Why spring to early monsoon works best
Spring to early monsoon (roughly March–June in much of India) is the default window. Roots can colonize fresh sandy mix as days warm and the plant pushes new trailing shoots. Penn State Extension recommends spring because roots grow into new mix while the plant produces foliage. RHS similarly prefers spring as plants start into growth, and warns that late-season moves leave fresh compost sitting wet when growth slows.
Aim for mild nights and the first strong flush of tip growth—not the coldest week of winter and not the wettest week of peak rains.
When winter or peak monsoon moves are unavoidable
Override the calendar for active crown or root rot, a cracked pot that exposes roots, or soil that smells sour and will not dry. Waiting for spring can cost the plant. Move into fresh, lightly moist sandy mix, trim soft brown roots, and accept slower recovery if light and warmth are limited.
Routine winter upsizing for convenience is a mistake. Disturbed roots plus cool, short days plus wet fresh mix is how Shankhpushpi loses firm tissue at the crown. During heavy monsoon weeks outdoors, prefer a same-size refresh under cover rather than a much larger pot that holds rainwater.
Choosing Pot Size, Shape, and Material
The one-size-up rule
Move up only one pot size—about 2.5–5 cm (1–2 inches) wider in diameter than the current container. For pots under about 25 cm, RHS advice is to choose a container roughly that much deeper and wider; anything larger risks overpotting, where unused mix stays saturated around a small root ball.
Shankhpushpi’s dislike of wet feet makes overpotting especially costly. A 12 cm mat dropped into a 25 cm bowl looks generous and often softens at the crown within weeks if you keep watering as before.
Wide shallow pots for a prostrate mat
Because the plant creeps sideways, prefer a wider, moderately shallow pot with a real drainage hole over a deep “tree” container that leaves a wet column of unused mix. Terracotta suits growers who overwater because it breathes and dries faster; plastic holds moisture longer and suits hot, windy balconies where pots bake dry in hours. Glazed ceramic works only with a real hole and a habit of emptying the saucer.
Never plant directly into a cachepot without holes—Penn State stresses that containers need drainage so mix does not stay waterlogged. Use a nursery pot inside, then empty standing water after every soak.
Soil Mix to Use When You Repot
Match the dryland habit, not a generic “indoor plant” bag. A practical container blend is:
- 50% sandy loam or quality potting mix
- 30% coarse sand or perlite
- 20% compost or vermicompost
Target roughly pH 6.0–7.5. The finished mix should feel crumbly, drain within a minute or two of watering, and never stay heavy and cold for days in full sun. Avoid pure garden clay, dense peat-only media, and “moisture control” mixes that hold water against this plant’s drought-leaning habit. See the full Shankhpushpi soil page for mix variations and wrong-soil signs.
Do not rely on a gravel layer at the bottom for drainage—that often creates a perched water table. Drainage comes from mix texture plus a real hole.
Step-by-Step: How to Repot Shankhpushpi
- Water lightly the day before if the mix is bone dry and stuck; slightly moist soil slides out cleaner than rock-hard dust or mud.
- Prep the new pot: clean it, cover the hole with a scrap of mesh if needed, and add a base layer of moist sandy mix so the crown will sit about 1–2 cm below the rim.
- Tip the plant out by supporting the mat near the crown and easing the pot away. Do not yank by soft trailing tips.
- Inspect roots. Firm, pale-to-tan roots are fine. Soft, black, or foul-smelling roots should be trimmed with clean shears back to healthy tissue. Tease circling roots gently so they can explore new mix.
- Set the plant at the same depth it grew before. Burying the crown deeper invites stem and crown rot.
- Backfill with the sandy blend, firm lightly—never pack like concrete—and leave headspace for watering.
- Water once until excess exits the hole, then empty the saucer. Return the plant to its brightest safe spot.
Shankhpushpi is in the morning-glory family (Convolvulaceae). It is not listed separately by ASPCA, but ASPCA lists related morning glories (Ipomoea) as toxic to cats, dogs, and horses. Keep pots out of reach of pets that chew foliage during and after the mess of repotting. This is a handling caution, not medical advice.
Aftercare: First Two Weeks After Repotting
Keep care boring. Place Shankhpushpi back in full sun to bright partial sun as soon as it is stable—shade slows drying and raises rot risk. Water only when the top 2–3 cm of mix are dry, following the same restraint as the Shankhpushpi watering guide. Mild tip droop or a short pause in sprawling for several days to two weeks is normal transplant stress; soft stems at the crown are not.
Skip fertilizer for 3–4 weeks. Fresh mix plus root wounds do not need salts yet. Resume light feeding only after you see new trailing tips and the plant is drinking on a predictable cycle—details live on the Shankhpushpi fertilizer page.
Missouri Botanical Garden overwatering guidance explains why wet roots fail: roots need oxygen, and waterlogged soil kills them before the top growth always shows it. If the pot stays heavy, improve light and airflow before you add more water.
When Not to Repot Shankhpushpi
Do not repot if the plant is newly home and still adjusting, if it is flowering heavily and you only want a cosmetic pot upgrade, or if the only complaint is a single older leaf yellowing in otherwise firm growth. Do not upsize during cool dormancy “to get ahead of spring.” Do not repot, fertilize, and hard-prune on the same day—stacking stressors makes recovery harder.
If the plant is lean but draining well in a slightly snug pot under strong sun, leave it. Slightly root-firm Shankhpushpi often grows better than an overpotted one.
Common Mistakes That Cause Crown Rot or Shock
Oversizing the pot is the most common failure. Peat-heavy mix that stays wet is a close second. Other frequent errors: watering on a fixed schedule after the move, burying the crown deeper than before, blocking drainage holes, leaving the pot in a saucer of water, and parking the plant in shade “to rest.” Kew’s dry-shrubland placement and the plant’s sandy-ground habit both point the same way after transplant: drainage and light matter more than kindness with the watering can.
If yellowing and soft crowns appear after a move, unpot and check roots rather than adding more water or fertilizer. If you are dividing a crowded mat while you have it out of the pot, follow the Shankhpushpi propagation guide for cuttings and aftercare rather than treating every piece like a finished transplant.
When to use this page vs other Shankhpushpi guides
Use this page when the question is timing, pot size, soil refresh, or transplant technique. Use the Shankhpushpi overview for identity, placement, and full-care summary. Use watering when the mix dry-down rhythm is the issue. Use soil when you need mix recipes and drainage diagnostics without a full pot change. Use light when pale, sparse trailing points to shade. Use propagation when you are starting seed or cuttings rather than moving an established mat. Use fertilizer only after roots have recovered. Use pruning when you want to tidy stems after flowering, not when roots need a new pot.
Related Shankhpushpi guides
- Shankhpushpi care overview — hub for placement, toxicity notes, and cluster navigation
- Shankhpushpi watering — dry-down checks that prevent post-repot rot
- Shankhpushpi soil — sandy mix ratios and wrong-soil signs
- Shankhpushpi light — full-sun placement that helps pots dry on time
- Shankhpushpi fertilizer — when to resume feeding after a move
- Shankhpushpi propagation — seed and cutting starts that may need their own pot-ups
- Shankhpushpi pruning — light tip work after a flush of flowers
Conclusion
Repot Shankhpushpi when the mat crowds the rim, roots circle, or the mix fails to drain—ideally in spring to early monsoon, one size up, into lean sandy mix. Protect the shallow crown from wet feet, return the plant to strong light, and water only after the top few centimeters dry. Do that, and the transplant restores air around the roots of this dryland creeper instead of drowning them in unused soil.