Shankhpushpi Soil Requirements: Mix, Drainage & pH
Shankhpushpi Soil Requirements: Mix, Drainage & pH
Shankhpushpi Soil Requirements: Mix, Drainage & pH
Shankhpushpi soil is not a rich, always-damp houseplant blend. Convolvulus pluricaulis—also sold as Shankhapushpi, Sankhahuli, or Sankhvel, and treated by Kew as a synonym of Convolvulus prostratus—is a low, hairy, prostrate Ayurvedic creeper that evolved for air around the roots, not a peat sponge. Kew Plants of the World Online places the accepted species in desert or dry shrubland habitats from Cape Verde across to north-western India. That biome is the soil brief in one line: sandy, lean, free-draining ground that never sits waterlogged.
If your balcony mat sits in moisture-control bag mix that stays cold and dark for a week after every drink, the plant is fighting its substrate—not “asking for more fertilizer.” This guide covers the best soil for Shankhpushpi in pots and beds, a workable DIY ratio, pH targets, drainage checks, India monsoon realities, and the first fixes when soil goes wrong. Pair every soil choice with Shankhpushpi watering and Shankhpushpi light—wet mix in weak light is the fastest way to soften the crown.
What Shankhpushpi soil should do for Convolvulus pluricaulis
Shankhpushpi soil has one primary job: let water leave the root zone quickly while still holding a modest reserve after a deep soak. Secondary jobs are aeration between drinks and a chemistry near mildly acid to neutral, where this dry-land Convolvulaceae creeper is comfortable. Grower notes for C. prostratus consistently prefer sandy or loamy, well-draining soil and warn that the plant dislikes wet feet—standing water quickly invites crown and root decline.
Think of soil as the partner to watering, not a separate hobby. A lean sandy mix that drains in hours makes a soak-and-dry rhythm easy. A compacted clay or peat sponge makes every watering a gamble, even if you follow a careful calendar. For habitat, size, and full-care priorities, start from the Shankhpushpi overview.
Dry-shrubland roots, not tropical sponge mix
In habitat and traditional Indian collections, Shankhpushpi shows up on rocky and fallow land, not permanently wet marsh edges. Planet Ayurveda’s species notes describe a perennial with a small woody rootstock that spreads on the ground and appears naturally on rocky and fallow sites in the rainy season (Planet Ayurveda — Shankhpushpi). That biology explains why terrace growers lose mats after monsoon weeks or winter overwatering: foliage may still look grey-green while the crown has already softened.
NC State’s Extension Gardener Handbook on soils explains why this matters in a pot: an ideal root zone needs roughly half pore space so air and water can share the volume. Compaction and poor drainage push air out, and roots that cannot absorb oxygen begin to fail. Sand-heavy blends resist compaction better than fine clay or sticky peat—exactly what a dry-shrubland creeper wants in a container.
Ideal mix for container Shankhpushpi
For pots on Indian terraces and balconies, aim for a sandy, lean, free-draining mix with a modest compost fraction—enough organic matter for structure, not a peat sponge. A practical starting formula that matches how LeafyPixels profiles this species is:
- 50% sandy loam or clean potting mix (screened of stones and plastic)
- 30% coarse sand, grit, or perlite
- 20% compost or vermicompost
The mix should feel gritty when squeezed, not sticky or spongy. After a thorough watering, excess should run from drainage holes within minutes, and the upper few centimetres should begin to dry within a few days in warm bright weather—not stay dark and cold for a week. If you buy a commercial “potting mix,” open the bag: if it looks like fine black peat with a few white flecks, amend it heavily with coarse sand or perlite before planting Shankhpushpi, or blend roughly half-and-half with sandy garden soil.
A practical DIY recipe that drains fast
Build the DIY mix in a tub so you can see texture. Moisten lightly while combining so dust settles and particles coat evenly. Avoid fine builder’s sand that packs like cement; use coarse river sand or horticultural grit. Perlite or pumice works well when sand quality is poor. Keep compost at a supporting role—Shankhpushpi evolved on lean sandy soils, and excess organic matter holds water this prostrate Convolvulus does not want around its crown.
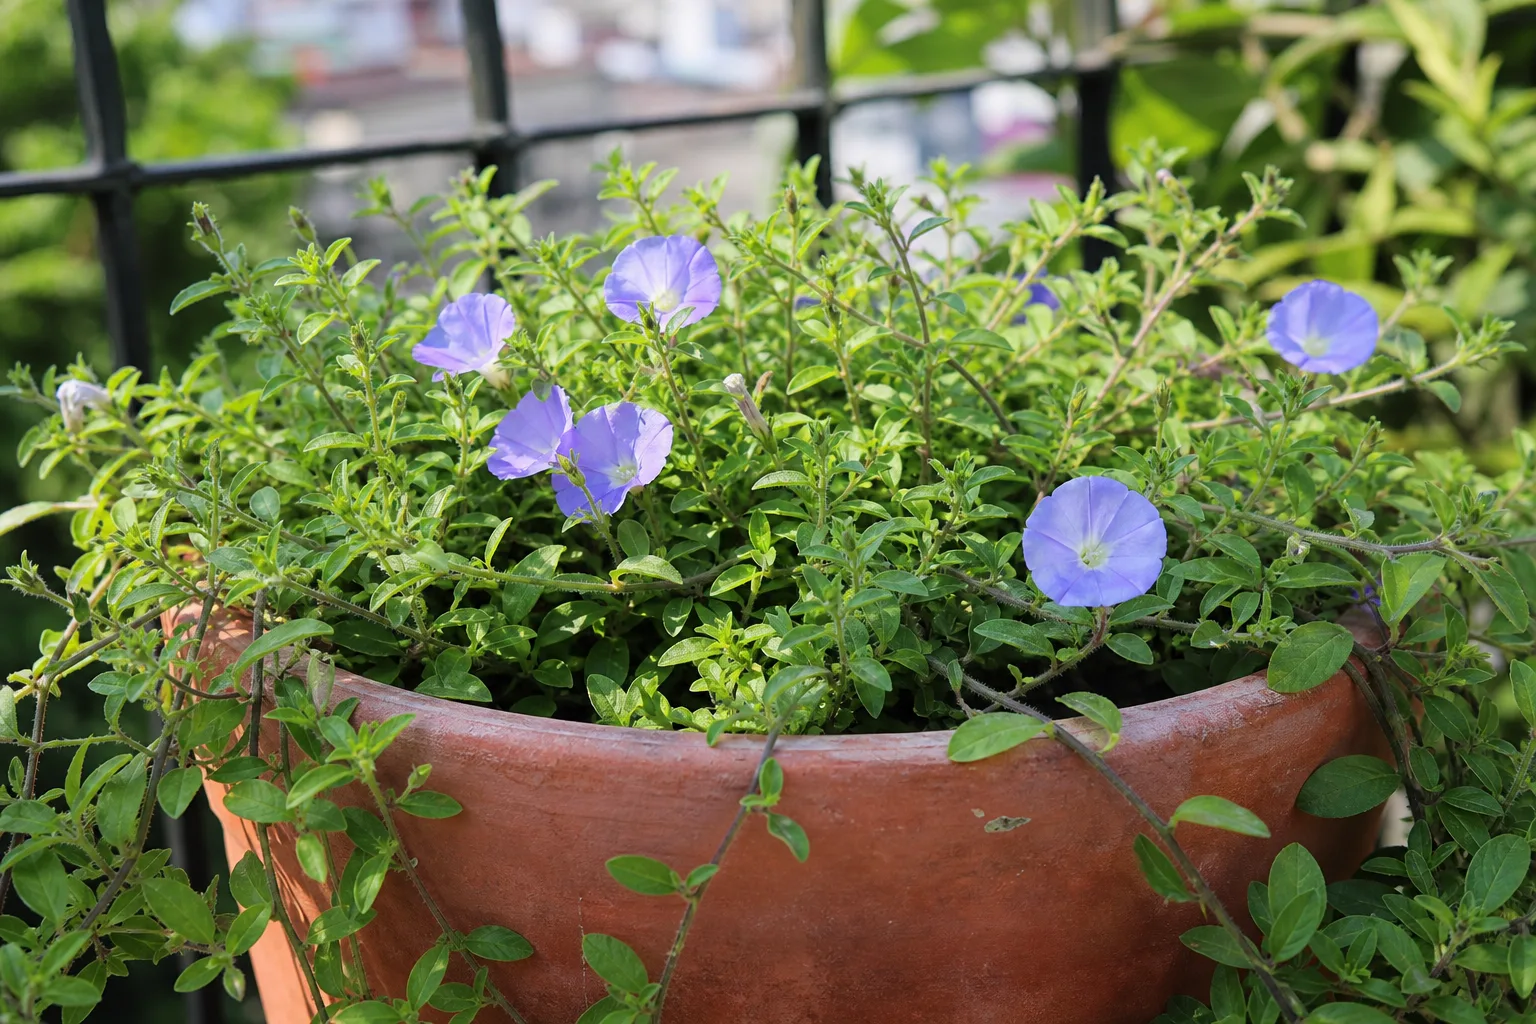
Once mixed, fill a pot with drainage holes, settle gently without compressing, and water once to confirm free outflow before planting. Seedlings and cuttings prefer an even sandier start; aftercare belongs with Shankhpushpi propagation. Confirm you have true Convolvulus pluricaulis / C. prostratus—white to pale blue or light purple funnel (“conch”) flowers on a low hairy creeper—because Evolvulus alsinoides, Clitoria ternatea, and other herbs are often sold under the same common name (Ancient Science of Life — Shankapushpi varieties).
What to avoid in bagged potting mixes
Skip moisture-control blends, African violet mixes, and any bag marketed to stay damp for tropical foliage. Skip pure clay from a building site and undrained decorative cachepots. Skip planting Shankhpushpi in a huge empty pot filled with wet compost “so roots have room”—oversized volumes of organic mix stay anaerobic long after the roots need air again. If you already used a wrong bag, plan a soil refresh at the next Shankhpushpi repotting window rather than drowning the plant with fertilizer to “fix” yellow leaves.
Soil pH for Shankhpushpi
Target a preferred band around 6.0–7.5 [Flagged: no authoritative source found for this claim]. Many grower references for C. prostratus cite a slightly acidic to neutral window near 6.0–7.0 [Flagged: no authoritative source found for this claim]; LeafyPixels’ species profile widens that slightly to 6.0–7.5 to cover sandy loam-plus-compost mixes used on Indian balconies. Shankhpushpi tolerates a wider pH band better than it tolerates waterlogging.
In practice, most sandy loam-plus-compost mixes land near this window without special chemistry unless your local water or compost is strongly acidic. Extremely peat-heavy acidic mixes often fail for a different reason: they stay wet and cold. If growth stalls despite sun and drainage, a simple home soil pH kit on a moist sample is enough for a home grower—then correct by refreshing the mix rather than stacking multiple amendments. Feeding belongs in the Shankhpushpi fertilizer guide; soil structure still comes first.
In-ground beds vs terrace pots
In the ground across dry and semi-arid belts of north-western India and similar climates, Shankhpushpi often thrives in sandy loam or rocky fallow soil with little fuss, provided the site does not pond during monsoons. Raised beds or planting on a slight mound help in clay belts. Field mats develop broader root systems and more drought buffering than pot plants—useful if you grow for aerial herb harvest after flower flushes.
Containers reverse the risk profile. Pot volume is small, summer sun can dry a sandy mix in days, and monsoon shade or winter cool can lock moisture in for a week. Choose a pot with large drainage holes, a sandy lean mix, and a size only one step up from the current root ball. Never leave a saucer of standing water under a Shankhpushpi pot for more than a brief drain period. Wide, shallow bowls suit the prostrate habit better than deep, narrow cylinders filled with unused wet mix.
Drainage, pots, and the wet-feet problem
Waterlogging is the non-negotiable failure mode. When soil stays saturated, root cells lose oxygen, tissue softens, and opportunistic decay follows—the same overwatering pathway extension gardeners describe across many ornamentals (Missouri Botanical Garden — Overwatering). MOBOT notes that roots in waterlogged soil may die because they cannot absorb oxygen, that damaged roots invite rot organisms, and that soil left too long without oxygen often smells sour or rotten.
Use terracotta or fabric pots if you tend to overwater; plastic is fine if the mix is gritty and you check dryness. Elevate pots on feet so holes stay open. Mesh over holes keeps mix in without blocking flow. Do not “improve drainage” with a thick gravel layer under dense soil—that can create a perched water table. Fix the mix itself instead. NC State’s soils chapter also notes that compaction inhibits water, air, and root movement—another reason not to pack Shankhpushpi mix into a hard plug.
How to test if your mix drains well enough
Water until runoff starts. Time how long free water exits, then check the pot weight and finger-test depth the next day. In warm, sunny conditions, the top 2–3 cm should be approaching dry within a few days for established container Shankhpushpi—matching the dryness cue used in Shankhpushpi watering. If the pot still feels heavy and cool after four or five days in heat, amend or repot. If it dries rock-hard in one day and sheds water, you may have too little organic matter or hydrophobic peat—remix with a bit more compost and coarse sand rather than daily sipping.
Warning signs the soil is wrong
Wrong soil announces itself through patterns, not one yellow leaflet. Watch for a sour or swampy smell after watering, mix that stays dark and sticky, fungus gnats breeding in perpetual damp, yellowing or translucent leaves with soft stems at the crown, and stalled sprawling growth despite warm weather. New shoot tips may look sparse even when you fertilize. In advanced cases, roots turn brown and mushy instead of firm and pale—classic wet-root decline.
Also watch for the opposite failure: mix that sheds water instantly, pulls away from pot walls, and leaves the plant crispy at the tips during peak summer—often degraded peat or ultra-fine sand that compacted into a brick. Refresh the substrate; do not respond with daily shallow cups of water that only wet the crust. Soft crowns and mushy stems are emergencies; firm, hairy foliage with a pot that lightens on schedule is what you want.
Clay, compaction, and India monsoon pots
Heavy clay holds water and seals air pores. Shankhpushpi may survive in clay landscape soils if the site slopes and the dry season is long, but container clay is a poor choice. During monsoon months, move pots under a roof edge where rain cannot refill the pot daily, empty saucers, and confirm drainage holes are not clogged with roots or snails. If a pot sits in a flooded tray for days, treat it as an emergency: tip out standing water, check roots, and plan a mix refresh when the plant is stable.
In cooler Indian winters, cool nights slow water use. The same sandy mix that dried in three summer days may take seven to ten days to dry—so soil choice still matters, but watering interval must stretch. Soil cannot fix frost risk; protect frost-tender pots as described in the Shankhpushpi overview. Compacted beds outdoors benefit from coarse sand and compost worked into the top layer before planting, not from a one-time “wet the clay harder” approach.
When to refresh or replace Shankhpushpi soil
Young container Shankhpushpi often fills pots within a season of strong sun as stems mat over the rim. Refresh or repot about every 1–2 years, or sooner if the mix smells foul, drains poorly, or roots circle under the surface. Spring to early monsoon (roughly March–June in much of India) is the usual window so roots can reclaim the new mix in rising warmth—details live in Shankhpushpi repotting. When starting seed or cuttings, use a sandier seedling mix and avoid waterlogged trays.
Do not reuse old, sour, anaerobic mix on a stressed plant. Discard failed soil, wash the pot, and start fresh with the sandy lean recipe. A light spring top-dress of compost can help an otherwise healthy mix without burying the crown in wet organic matter. If you grow for flowering mats, keep the mix lean enough that crowns stay firm through each flush.
When to use this page vs other Shankhpushpi guides
Use this page when you are choosing, mixing, diagnosing, or refreshing substrate and drainage. Switch to Shankhpushpi watering for how often to soak and how to read dryness. Use Shankhpushpi light when pale or stalled growth tracks shade more than mix—weak light keeps sandy pots wet longer than the calendar expects. Use Shankhpushpi fertilizer only after drainage and sun are sound. Use Shankhpushpi repotting for pot size and timing, and Shankhpushpi propagation when you need sandy starts for seed or cuttings.
Related Shankhpushpi guides
- Shankhpushpi overview — habitat, size, and full-care priorities
- Shankhpushpi watering — soak-and-dry rhythm that matches sandy mix
- Shankhpushpi light — full sun that helps pots dry predictably
- Shankhpushpi fertilizer — lean feeding after soil and sun are right
- Shankhpushpi repotting — when and how to replace failing mix
- Shankhpushpi propagation — sandy starts for seed and cuttings
Conclusion
Shankhpushpi succeeds in soil that behaves like sandy, lean dry-shrubland ground with a little compost, not like a moisture-retentive tropical bag. Build a lean DIY mix, insist on open drainage, keep pH near 6.0–7.5, and treat waterlogging as an emergency. Get the root zone right and Shankhpushpi watering becomes straightforward; get it wrong and no calendar can save the crown.