Shankhpushpi Propagation: Seeds, Cuttings & Timing
Shankhpushpi Propagation: Seeds, Cuttings & Timing
Shankhpushpi Propagation: Seeds, Cuttings & Timing
Propagating Shankhpushpi (Convolvulus pluricaulis, accepted by Kew as Convolvulus prostratus) works when you treat it like a sun-loving dry-shrubland creeper—not like a moisture-loving tropical cutting in a sealed wet dome. Kew Plants of the World Online describes C. prostratus as a subshrub of the desert or dry shrubland biome, native from Cape Verde to north-western India, and lists C. pluricaulis among its synonyms. (Kew POWO)
This guide covers seed sowing, soft stem cuttings in warm sandy mix, India-season timing, seedling aftercare, and the failures that usually track cool wet media or shade. Use it when you want more plants. For everyday watering, light, and soil once a young mat is established, switch to those sibling guides instead of stretching this page into a full care manual.
Confirm You Have True Shankhpushpi Before You Multiply It
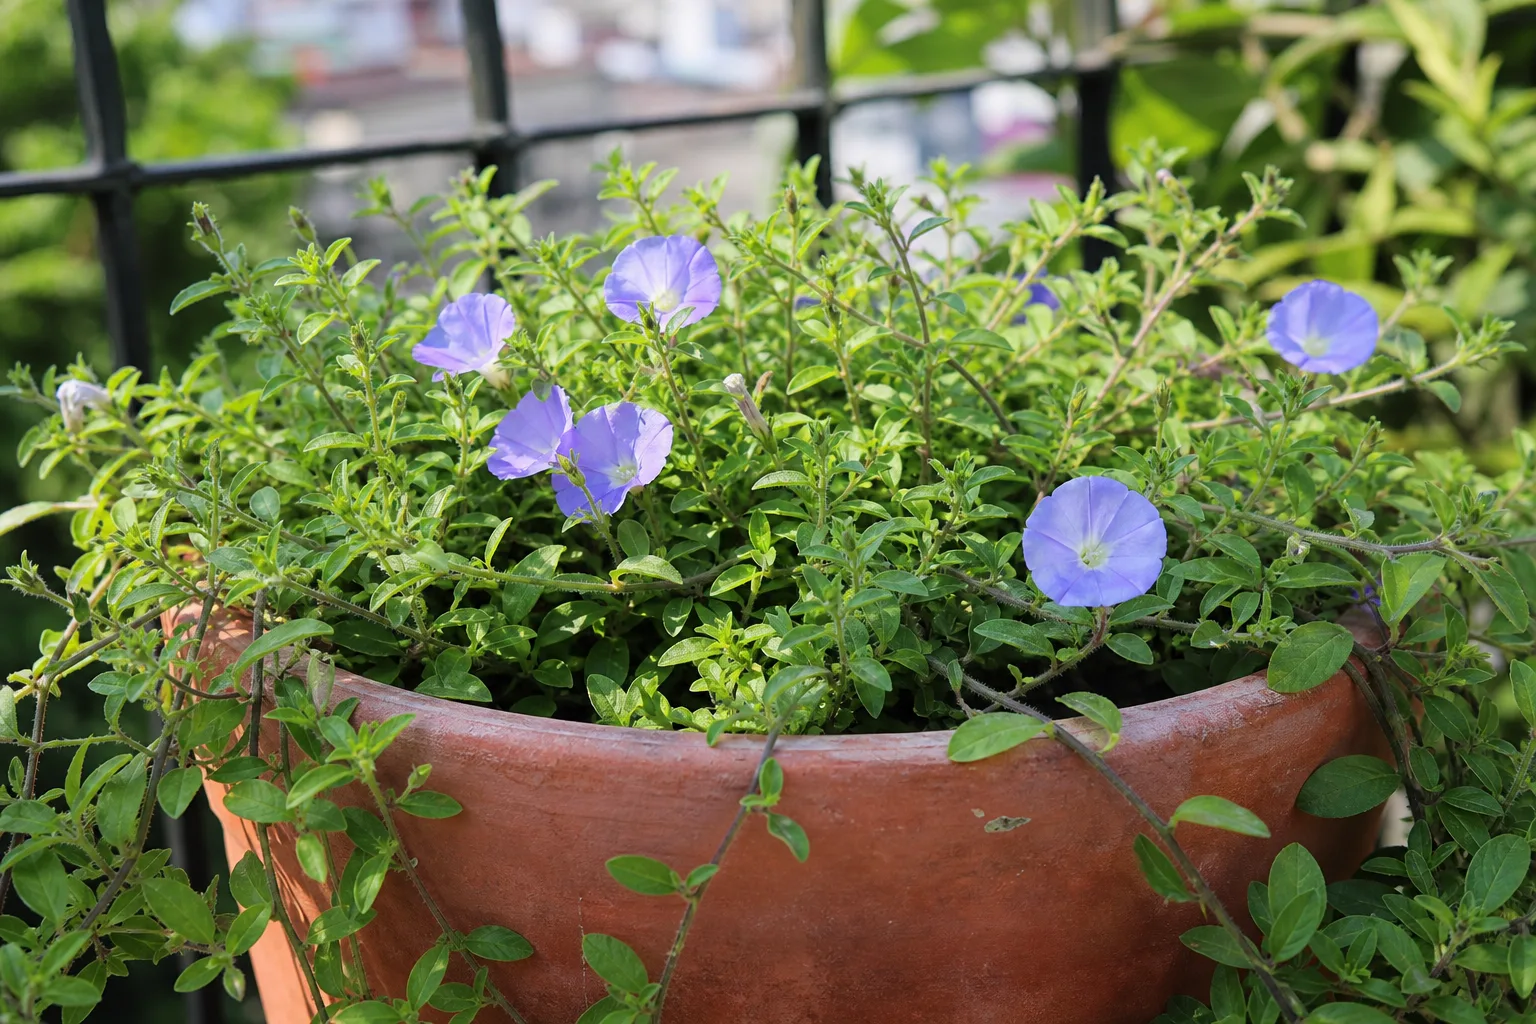
Several herbs are sold as “Shankhpushpi” in nurseries and Ayurvedic shops, including Evolvulus alsinoides and Clitoria ternatea. True Convolvulus pluricaulis / C. prostratus is a low, hairy, prostrate mat with small oblong leaves and white to pale blue or light purple funnel (“conch”) flowers—not a tall vine or a blue pea flower on upright stems.
Propagating the wrong plant wastes a season and confuses care advice. Check flower shape and growth habit on the parent before you cut or sow. If the plant is already soft at the crown or sitting in sour wet mix, fix drainage and watering first; cuttings from a rotting parent rarely recover.
Why This Dry-Land Creeper Needs a Warm, Sandy Start
Shankhpushpi sprawls as a low mat rather than climbing. In practice, the care checkpoint that decides propagation success is the same one that keeps adults healthy: full sun to bright partial sun paired with lean, fast-draining sandy loam. Wet peat bricks and sealed humidity tents keep crowns soft and invite stem collapse at the soil line.
That biology decides your media choice. Warmth speeds germination and rooting. An open sandy medium lets excess water leave before fungi attack soft stems. Shade stalls growth and keeps trays wet longer, so the same “keep it moist forever” habit that works for some tropical cuttings fails here. Match the start to adult light and soil needs, then keep aftercare boring until new shoots are firm.
Choose Seed or Soft Stem Cuttings for Your Goal
Pick the method that matches your goal before you open a seed packet or cut a stem. Seed is the default for most home growers starting a medicinal herb bed. Soft stem cuttings clone a known parent when you already have authentic flowering stock.
When seed is the better path
Choose seed when you want many plants for balcony troughs, terrace beds, or sharing starts, or when you do not yet have a healthy parent to cut. Seed also fits India balcony starts where you can keep trays warm and bright from roughly late winter into the early monsoon window. Expect some natural variation between seedlings—normal for an open-pollinated herb—and select the firmest, sunniest mats rather than babying every weak stem.
Seed is slower to a full groundcover mat than a successful cutting clone, but it scales better and avoids taking too much material from a small parent pot.
When soft stem cuttings make sense
Choose soft stem cuttings when you want a genetic copy of a compact, disease-free parent with confirmed flowers, when seed is unavailable, or when you are sharing starts from one proven plant. Soft tip or nodal pieces root in warm sandy mix when the parent is actively growing. Missouri Botanical Garden’s cuttings guidance favors cutting just below a node, stripping lower leaves and flowers, and sticking into a pre-moistened soilless medium; sand or perlite helps cuttings that need drainage and may rot if kept too wet. Optional rooting hormone can speed rooting but is not magic in soggy mix. (Missouri Botanical Garden)
Cuttings fail faster than seed if you seal them in stagnant humidity over a wet peat brick. Use them as a clone tool, not as a workaround for cold, shade, or poor drainage.
Best Season and Timing in India
Propagate when nights stay mild and daytime warmth is reliable. For most of India that means roughly late winter through early monsoon (about February–June in many regions), adjusting earlier in the far south and later where North Indian nights still dip hard. Take cuttings in the same warm window while the parent pushes soft new growth—not during cool dormancy or after a cold, wet spell.
In peak May heat, protect soft trays from midday scorch while keeping the medium only lightly moist. Heat plus wet feet is worse than heat alone. In frost-prone hill or North Indian winters, move parent pots under cover and wait rather than starting new trays into cold, wet media. Adult plants prefer roughly 18–35°C [Flagged: no authoritative source found for this claim]; treat new trays as even less forgiving of cold wetness.
How to Propagate Shankhpushpi From Seed
Seed is a reliable home path when temperature and drainage are right. Work clean, sow on or near the surface of a sandy mix, and resist the urge to keep the tray permanently wet.
Collect or buy viable seed
Collect ripe seed capsules from a parent that has already shown authentic funnel flowers. Dry them fully, discard soft moldy material, and store cool and dry until sowing. Packet seed works when it is labeled Convolvulus pluricaulis or C. prostratus—not a generic “Shankhpushpi” blend that may be a different species. If germination is patchy, sow a second small tray rather than drowning the first.
Sow depth, warmth, and first weeks
Use a sandy seed mix that mirrors adult Shankhpushpi soil—for example roughly half sandy loam or potting mix, a generous share of coarse sand or perlite, and modest compost—not a water-holding peat brick. Sow thinly so seedlings are not crowded. Crowding raises humidity at the soil line and invites damping-off fungi such as Pythium and Rhizoctonia, which rot stems at or below the surface and leave collapsed patches in trays. (NC State Extension — Damping-off; Penn State Extension)
Press seed lightly into the surface or cover with a thin skim of sand so light and air reach the germinating seed. Keep the surface lightly moist for germination, then shift toward a dry-down rhythm as soon as true leaves expand—the same logic as adult watering. Place trays in bright light from day one; deep shade keeps media wet and stretches pale, weak seedlings.
Germination is often within about one to three weeks in warm conditions when drainage is good, though cool nights stretch the wait [Flagged: no authoritative source found for this claim]. If nothing emerges after three weeks with known-viable seed, check temperature and wetness before assuming the packet is empty. Sanitize trays between batches; NC State emphasizes clean flats and avoiding recontamination of media once damping-off starts. (NC State Extension — Damping-off)
How to Root Soft Stem Cuttings
Cuttings copy a strong parent in warm weather. Expect moderate success when the medium is sandy and the cutting never sits in stagnant water.
Cutting selection and sticking steps
Take 8–12 cm soft tip or nodal cuttings from healthy, non-flowering growth when possible. Cut just below a node, strip lower leaves so buried tissue is bare, and remove flower buds. Missouri Botanical Garden notes that roots form most readily from the node and that a stub of stem left below the node often rots. Dip the basal end in rooting hormone if you use it—pour a small amount into a separate cup so you do not contaminate the bottle—then stick into pre-moistened sandy soilless mix of sand, perlite, or a lean sandy blend. (Missouri Botanical Garden)
Firm gently and place in bright light without harsh midday burn. Keep humidity moderate with airflow. A lightly inflated bag can help for a few days if your room is very dry, but do not leave leaves pressed against plastic film, and vent daily—this species is not a sealed-dome wetland cutting. Water only enough to prevent total dry-out. Gentle resistance when you tug after two to four weeks usually means roots have formed; pot on into the same free-draining style mix used for adult plants, then harden into full sun.
Skip water jars for Shankhpushpi stems. Soft tissue in standing water often softens into basal rot before useful roots form, especially in warm Indian rooms with poor airflow. MOBOT also notes that many cuttings develop a better root system in soilless mix than in water. (Missouri Botanical Garden)
Aftercare Until Young Mats Settle
Once seedlings have several true leaves, or cuttings show firm new tip growth, treat them like small adults. Give the brightest balcony or terrace light you can, then ease into full sun over several days so soft tissue does not scorch. Water when the top 2–3 cm dry. Do not feed heavily until plants are sprawling steadily—lean sandy culture suits this herb better than rich wet mix.
Upsize pots only when roots fill the cell or small pot, or when stems mat over the rim. For container growers, spring to early monsoon is the calmest window to move into a larger pot; see the repotting guide when circling roots or chronically wet mix show up. Keep new plants out of reach of pets that chew foliage—Shankhpushpi is in Convolvulaceae, and ASPCA lists related morning glories (Ipomoea) as toxic to cats, dogs, and horses. (ASPCA)
Common Propagation Failures and Fixes
Empty trays after cool sowing usually mean temperature or chronic wetness, not “dead seed forever.” Wait for mild nights and sow again in sandier mix under brighter light. Collapsed seedlings at the soil line with wet media point to damping-off—sanitize trays, thin stands, improve airflow and light, and keep the mix less wet. (NC State Extension — Damping-off; Penn State Extension)
Cuttings that blacken at the base were almost always too wet, too shaded, or sealed without airflow. Restart in sandier mix with brighter light. Leggy pale seedlings need more sun and less crowding, not more fertilizer. Soft crowns on established starts after overwatering are the same drainage failure adults show—fix watering and soil before you propagate again.
If the parent never flowers with the classic funnel bloom, pause and re-identify the plant before multiplying a lookalike sold under the same common name.
When to use this page vs other Shankhpushpi guides
Use this page when you are multiplying Shankhpushpi—sowing seed, rooting soft cuttings, or nursing trays through the first weeks. Use the overview when you need species identity, size, and a care summary. Use light, watering, and soil once plants are established and you are tuning placement or moisture. Use repotting when an established mat outgrows its pot, not as a substitute for learning how to sow or stick cuttings. Use fertilizer only after young plants are actively sprawling.
Related Shankhpushpi guides
- Shankhpushpi overview — identity, habit, and full-care summary
- Shankhpushpi light — sun needs for dense mats and flowering
- Shankhpushpi watering — dry-down rhythm that protects crowns
- Shankhpushpi soil — sandy loam mixes for adults and starts
- Shankhpushpi repotting — when a mat fills the pot surface
- Shankhpushpi fertilizer — light feeding after establishment
- Shankhpushpi pruning — light tip cuts after flower flushes
Conclusion
Shankhpushpi multiplies cleanly when you copy its dry-land preferences into the tray: warm weather, bright light, and a lean sandy medium that never stays soggy. Seed scales well for beds and balconies; soft stem cuttings clone a confirmed flowering parent. Confirm true Convolvulus pluricaulis / C. prostratus before you invest a season, keep airflow around soft tissue, and shift young mats onto adult watering and light routines as soon as roots hold. That sequence produces denser mats faster than forcing tropical humidity onto a desert-biome creeper.