Low Humidity on Spider Plant: Causes, Checks & Fixes
Quick answer
Spider Plant prefers medium air humidity and often shows brown crispy tips when heated indoor air stays too dry. Move the basket away from vents first, then raise ambient humidity with a humidifier or pebble tray-not extra watering.
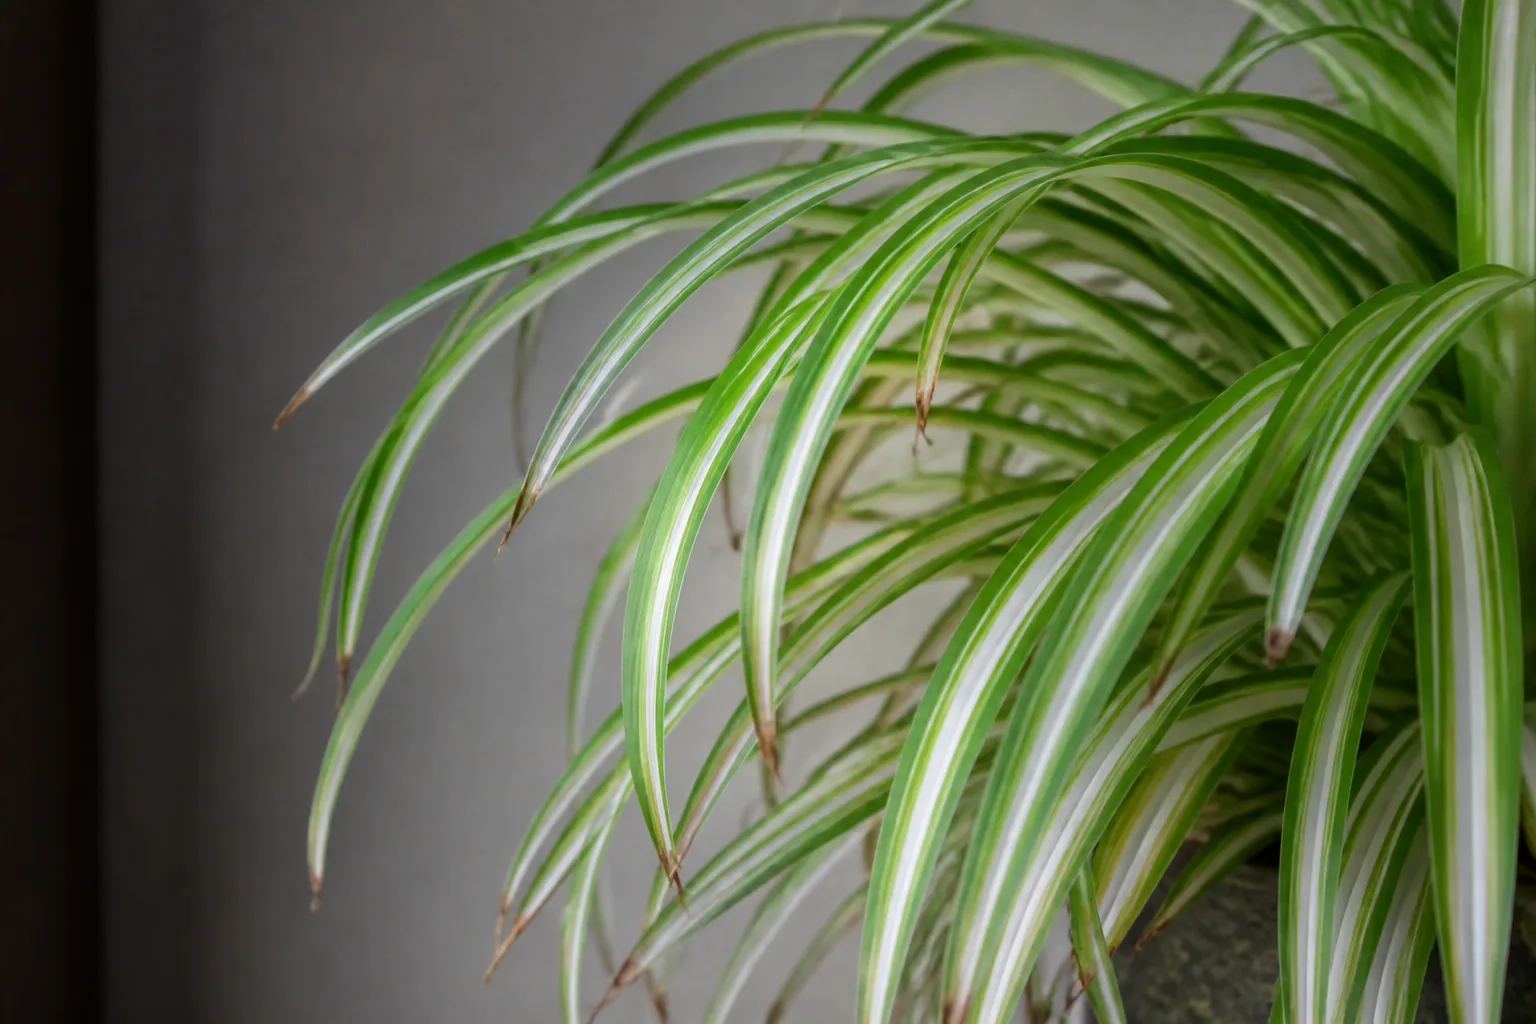
Low Humidity on Spider Plant: Causes, Checks & Fixes
This guide covers low humidity on Spider Plant. See also the general Low Humidity guide, watering, and light pages for this plant.
Low Humidity on Spider Plant: Causes, Checks & Fixes
Quick answer
Low humidity on Spider Plant is an environmental stress issue, not a disease. Chlorophytum comosum grows best in medium air humidity and tolerates average home conditions when placement is stable-but forced-air heat and winter dryness pull moisture from its long, strappy leaves faster than thick tuberous roots can replace it at the tips. The first fix is to move the pot or hanging basket away from heat vents, radiators, and ceiling registers, then raise ambient humidity with a room humidifier or pebble tray. Do not respond by watering more often; wet soil in dry air still invites root problems on a plant that prefers to dry slightly between thorough waterings.
Why Spider Plant suffers in dry air
Spider Plant is one of the most forgiving houseplants, which makes dry-air damage easy to underestimate. NC State notes it is tolerant of drought and dry soil at the root zone-those fleshy tubers evolved to store water through inconsistent watering. That resilience does not protect the leaf margins. Each arching blade transpires along its full length, and the narrow tips are the first tissue to desiccate when relative humidity drops.
Most homes run furnaces from late fall through spring. Humidity levels are low inside during winter, often falling to 20–30% while thermostats hold comfortable room temperatures. Spider plants in hanging baskets suffer disproportionately because warm air rises and blows across foliage mounted near ceiling vents. A basket that looked perfect in summer can develop widespread tip burn within weeks of the first heating cycle.
Summer air conditioning creates a similar pattern-cold, dry airflow across cascading leaves dries tips even when the rest of the room feels fine. Wisconsin Extension lists low humidity among causes of brown leaf tips alongside dry soil, salt buildup, and chemicals in tap water. On Spider Plant, those causes often overlap, which is why diagnosis matters before you change multiple variables at once.
Dry air also weakens the plant’s defenses against pests. Clemson HGIC lists spider mites among common indoor pests on spider plants. Mites thrive in warm, dry microclimates-the same conditions that crisp leaf edges.
What low humidity looks like on Spider Plant
On Spider Plant, dry air usually announces itself at leaf tips and margins before the whole plant fails. Watch for these patterns:
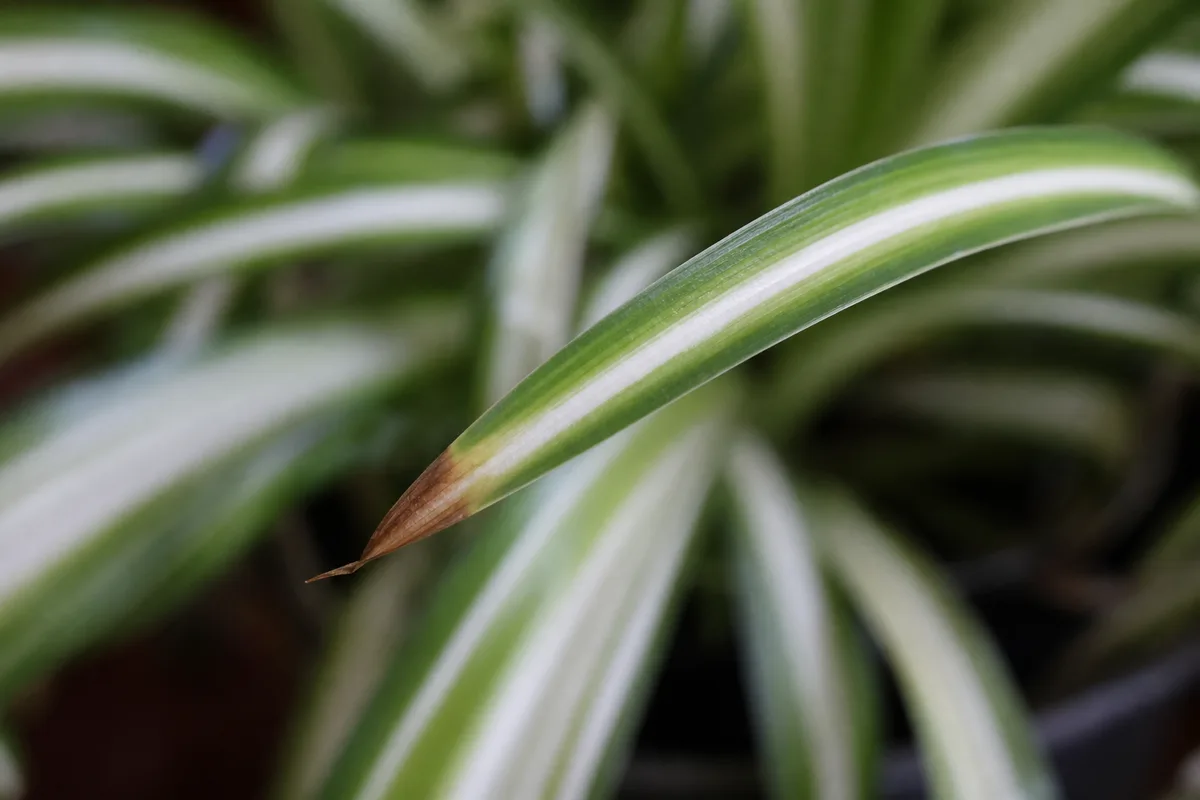
Low Humidity symptoms on Spider Plant - compare with healthy tissue on the same plant.
- Brown or tan crispy tips on individual arching leaves, often starting on the longest outer blades
- Parallel brown streaks along leaf margins when dryness persists for weeks
- Tips that feel papery and break when bent, while the mid-leaf tissue still feels firm
- Spiderettes with tip burn on trailing stolons, even when the mother rosette looks mostly green
- Slowed or fewer plantlets during a dry winter, though short-day timing also controls spiderette formation
Damage tends to appear gradually after an environmental shift-heat turning on, a basket moved closer to a vent, or AC blowing directly on a windowsill display. A single brown tip after Spider Plant repotting guide may be shock or salt, not humidity. A cluster of leaves crisping at the edges after the furnace runs, with a hygrometer reading below 40% beside the pot, fits low humidity much better.
Spider Plant tip burn from fluoride in city water can look nearly identical. MSU Extension notes that spider plant is among monocots susceptible to fluoride toxicity, with necrosis at tips and along margins. When humidity is adequate but every new leaf burns, suspect water chemistry before buying another humidifier.
How to confirm the cause
Separate dry air from lookalikes that copy the same browning before you buy equipment or change water habits.
Check ambient humidity. Place a hygrometer at foliage height beside the pot. Spider Plant performs best with roughly 40–60% relative humidity-medium air moisture that matches stable indoor growth. Readings below 35% for more than a few days explain most winter tip burn in heated rooms.
Map heat and airflow. Note whether the basket hangs below a ceiling register, beside a radiator, or in the path of a space heater. Only the leaves facing the dry airflow may brown first-that localized pattern confirms environment over root failure.
Test soil moisture separately. Stick a finger into the top 5 cm of mix. Spider plants should dry out briefly between waterings. If soil is soggy while tips are crisp, overwatering or salt buildup may share blame. If the pot feels light, soil is dusty throughout, and whole leaves wilt softly before edges brown, underwatering is more likely than dry air alone.
Compare new vs old leaves. Humidity stress often hits the longest, most exposed blades first. Fluoride burn frequently appears on fresh growth and spiderettes even when older leaves stay clean.
Inspect for spider mites. Tap a leaf over white paper and look for moving specks, or check for stippling and fine webbing on undersides. Mites in dry rooms often arrive alongside humidity stress-not instead of it.
Review your water source. NC State recommends avoiding tap water with chlorine and fluorides because they cause leaf tip burn on Spider Plant overview. If tips burn in a humid room with balanced watering, switch to filtered or rainwater for a month before blaming humidity alone.
If humidity is low, placement is harsh, roots are firm with neutral-smelling soil, and no mites are spreading, treat low humidity as confirmed.
First fix for Spider Plant
Make one environmental change before stacking other treatments.
Move the pot or basket away from dry-air sources. Pull it back from heat vents, radiators, hot window glass, and ceiling registers. Even 60–90 cm of distance can stop active tip burn on cascading foliage. Keep bright to medium indirect light-Spider Plant tolerates deep shade but grows best with steady indirect light-but avoid the hottest afternoon sun through glass, which compounds drying.
That single placement fix is the first action. Once the plant is out of the worst airflow, add humidity support:
- Room humidifier set to maintain roughly 40–50% near the foliage-the most reliable fix in dry winters
- Pebble tray under the pot: NC State suggests placing the container on a tray of pebbles with water below the stone surface so evaporation humidifies the immediate air without soaking tuberous roots
- Grouping with other houseplants to create a shared humid microclimate, as UMN Extension recommends for humidity-loving plants in dry seasons
Do not increase watering frequency to compensate for dry air. Extra water in a warm, dry room raises root-rot risk without rehydrating already-dead tip tissue.
Step-by-step recovery
After the first fix, support recovery in this order:
- Trim only fully dead tips with clean scissors, cutting at an angle to follow the natural leaf curve. Partial brown edges can stay until new growth looks healthy.
- Run the humidifier daily through heating season, or keep the pebble tray filled.
- Switch to filtered or rainwater if margins burn on new leaves despite adequate humidity-fluoride sensitivity is common on this species.
- Hold fertilizer until new leaves emerge without fresh tip burn. Wisconsin Extension notes that excessive fertilizer may lead to tip browning and can reduce spiderette formation.
- Rinse foliage with lukewarm water in the shower if dust or mites are present; let leaves dry the same day.
- Monitor weekly with the hygrometer through the first month.
If spider mites are confirmed, isolate the plant, rinse undersides thoroughly, and treat with insecticidal soap per label directions-but fix humidity at the same time or mites often return.
Recovery timeline
Spider Plant recovers at a moderate pace. Existing brown tip tissue will not turn green again. Judge progress by new growth and spiderette health, not old damage.
- Within 1–2 weeks: Tip burn should stop spreading once humidity rises and heat exposure drops
- Within 2–4 weeks: New arching leaves and plantlets should show cleaner margins if conditions stay stable
- After 4–8 weeks: Heavily crisped outer leaves can be trimmed for appearance; the rosette should look fuller from the center
If the plant stops producing spiderettes entirely, leaves collapse despite moist soil, or mite webbing covers most of the foliage, stress has gone beyond simple dry air-recheck roots and pest load before assuming humidity alone will save it. Low humidity alone rarely kills a mature Spider Plant with healthy tuberous roots.
Lookalike symptoms
Several Spider Plant problems copy low-humidity browning:
- Fluoride or chlorine in tap water burns tips and margins on new growth even in humid rooms. Sensitive plants irrigated with fluoridated city water show necrosis that trimming alone cannot fix until the water source changes.
- Underwatering makes the whole pot light and leaves wilt softly before edges crisp. Dry soil through most of the root ball points here, not dry air alone.
- Overwatering and root rot on Spider Plant yellow lower leaves while soil stays wet and may smell sour. Thick roots should feel firm; mushy tubers mean rot, not humidity.
- Fertilizer or salt buildup causes tip burn with possible white crust on the pot rim. Clemson HGIC lists too much fertilizer or high-soluble-salt water as leaf tip burn causes. Flush the soil if salts are suspected.
- Direct sun scorch bleaches or browns patches on leaves facing the window, not just tips on the longest blades.
When in doubt, humidity damage is gradual and margin-focused after a heating or AC change; watering failures usually affect whole leaves or the lower rosette first.
Mistakes to avoid
- Misting as the only fix. Light misting wets leaf surfaces briefly but barely changes room humidity-and wet crowns overnight can invite fungal issues.
- Watering more because tips are brown. Wet soil plus dry air is a common path to root stress on Spider Plant.
- Placing the humidifier across the room. Target 40–50% at foliage height, not just at the thermostat.
- Ignoring fluoride sensitivity. This species is notoriously reactive to fluoridated tap water; humidity fixes alone will not help if water chemistry is the real trigger.
- Repotting immediately when winter damage shows. Stabilize humidity and watering first unless the mix is clearly failing or root-bound.
- Trimming every brown tip before fixing the environment. Cosmetic pruning is fine, but new leaves will burn again until air moisture or water quality improves.
How to prevent
Keep Spider Plant in stable, moderately humid conditions year-round:
- Run a humidifier from late fall through early spring in heated homes
- Keep hanging baskets away from ceiling vents and space heaters
- Use a pebble tray or group plants during dry spells
- Check a hygrometer monthly-catch drops before tips burn
- Water with filtered or rainwater if your municipality fluoridates tap water
- Match watering to soil dry-down (top 5 cm drying before the next soak), independent of humidity fixes
- Maintain daytime temperatures around 65–75°F with cooler nights near 50–55°F when possible
Spider Plant can thrive for years in average homes when winter air moisture stays above the driest lows. Treat humidity as part of its basic care-not an optional upgrade-and you will spend less time wondering why another arching leaf developed another brown tip.
When to use this page vs other Spider Plant guides
- Spider Plant watering guide - Use for routine moisture checks before assuming low humidity is the main issue.
- Spider Plant problems hub - Browse all 4 common issues on this species.
- Brown Tips on Spider Plant - Different entry point when symptoms overlap with low humidity.