Tomato Fertilizer: What to Feed at Each Stage
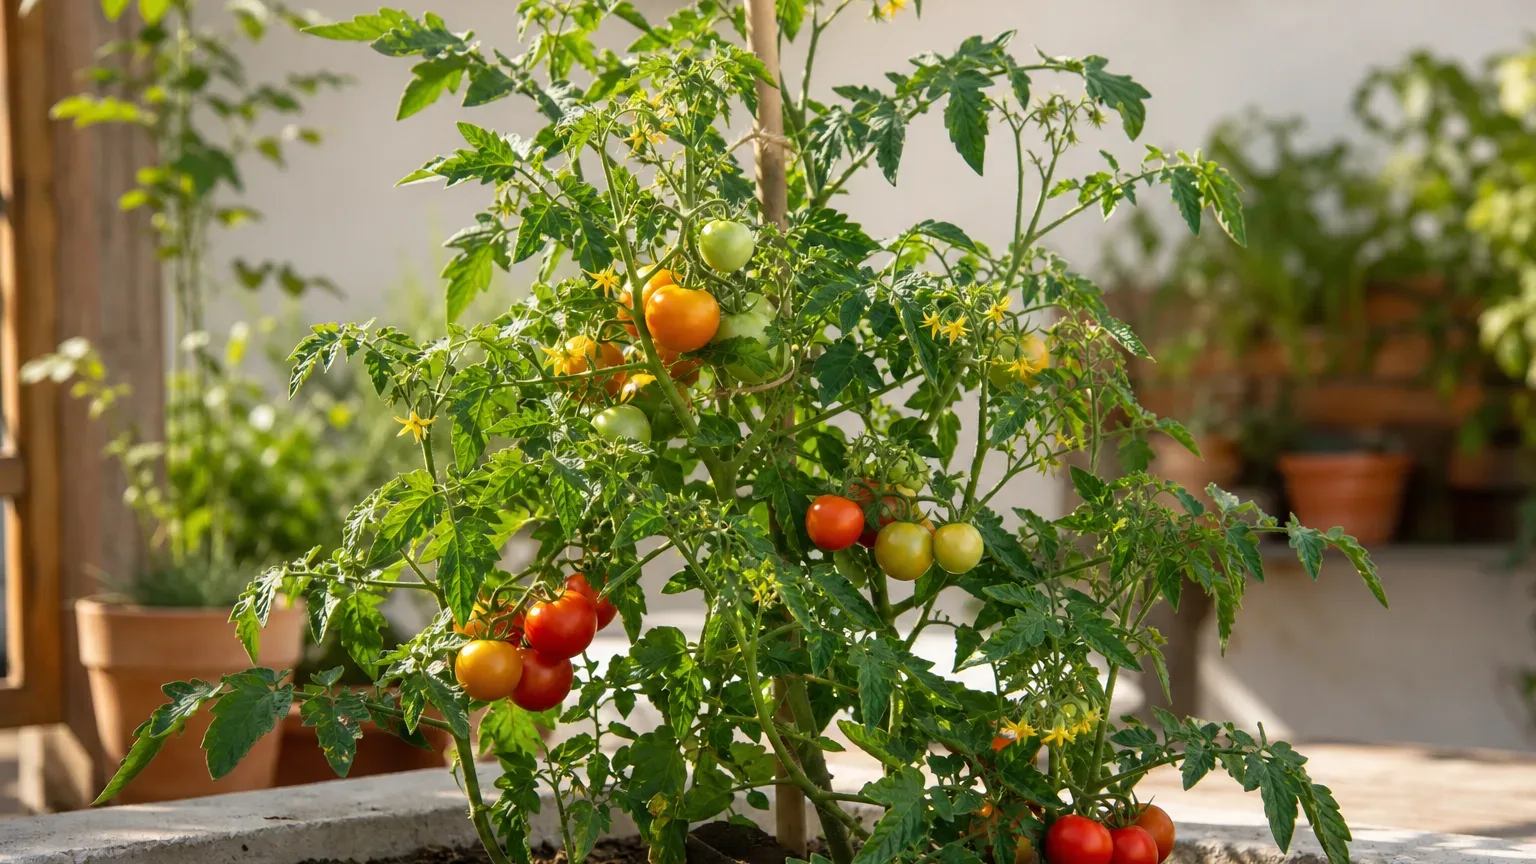
Tomato Fertilizer: What to Feed at Each Stage
Tomato Fertilizer: What to Feed at Each Stage
Tomatoes do not need the same fertilizer treatment from transplanting to harvest. A young Solanum lycopersicum plant is establishing roots, a rapidly growing plant is building its canopy, and a fruit-laden plant is supporting a crop; feeding should follow those changing demands rather than a rigid weekly ritual.
The safest first step is to identify where the plant is growing, what nutrients are already present, and which stage it has reached. That approach prevents two common mistakes: applying more nitrogen to a plant that is already all leaves, and adding fertilizer to a wilted plant whose real problem is dry, waterlogged, overheated, or damaged roots.
The quick answer
For an in-ground tomato, use a soil test where possible, prepare the bed with only the nutrients it calls for, and make later applications according to plant growth and the fertilizer label. For a container tomato, use a complete fertilizer formulated for vegetables or tomatoes, then follow the product’s container rate because pot volume, formulation, and irrigation determine how quickly nutrients are used or washed out.
At transplanting, keep feeding modest and protect new roots from concentrated fertilizer. During vegetative growth, avoid pushing dark, lush foliage with unnecessary nitrogen; from flowering through fruit set, maintain a steady supply rather than trying to trigger blooms with a large corrective dose.
Start with the soil, not a fertilizer number
No single NPK ratio or spoonful-per-plant dose fits every tomato. Soil, compost, irrigation water, previous crops, container mix, cultivar, climate, fertilizer concentration, and expected yield all change the requirement; the USDA therefore treats testing, source, rate, method, and timing as linked parts of site-specific nutrient management.
Test open-ground soil before planting if that service is available, especially where beds receive manure, compost, or fertilizer every season. A test can reveal that phosphorus or potassium is already sufficient, making a “more is better” application wasteful; University of Georgia Extension likewise describes soil sampling before planting as the best way to know what a tomato bed needs.
Container mix is different because it holds a limited nutrient reserve and is repeatedly watered. Check whether the mix contains starter or controlled-release fertilizer, note how long the label says it lasts, and count that contribution before adding another product.
What nitrogen, phosphorus, and potassium do
The three numbers on a fertilizer label state its nitrogen, phosphorus, and potassium analysis. Nitrogen supports chlorophyll and leafy growth, phosphorus is associated with root development, and potassium supports reproductive growth; the RHS summarizes N-P-K as “shoots, roots, fruits” and notes that tomato feeds commonly contain proportionally more potassium.
That shorthand does not mean tomatoes should receive almost no nitrogen once buds appear, or that phosphorus alone creates more flowers. All three remain part of complete nutrition, while their useful amounts depend on what the root zone already supplies and how actively the crop is growing.
Choose a fertilizer by evidence, not “bloom booster” claims
A complete vegetable or tomato fertilizer is a practical default when no test identifies a specific shortage. Read the guaranteed analysis and directions: two products sold for tomatoes may differ greatly in nutrient concentration, release speed, and dose, so copying a tablespoon recommendation from another label can overfeed the plant.
Do not assume the highest middle number is automatically best. California’s tomato nutrient guidance reports that soils already high in phosphorus may show no yield benefit from starter phosphorus, while excessive phosphorus can interfere with iron and zinc uptake.
Choose controlled-release granules when you want nutrients released over an extended label-defined period, or a soluble product when closer adjustment suits a frequently watered container. Neither form excuses overapplication, and combining both without counting their shared nutrients can double-feed the crop.
Transplant stage: establish roots without forcing soft growth
Set a tomato into moist, prepared soil and let it recover from transplanting before adding an optional follow-up feed. If the bed or potting mix was already amended, the plant may need no immediate extra fertilizer; concentrated granules against the stem or root ball can injure tender roots.
A starter fertilizer is a modest, early application rather than permission to saturate the planting hole. Penn State Extension recommends avoiding excess or high-nitrogen fertilizer because it can produce luxuriant foliage but delayed flowering and fruiting, and any starter product should be diluted and placed exactly as its label directs.
Judge establishment by new growth and a root zone that drains yet stays evenly moist. A transplant that remains wilted should first be checked for dry mix, saturation, heat, stem injury, and poor root-soil contact; fertilizer cannot repair those conditions.
Vegetative stage: build a useful canopy, not a thicket
During active vegetative growth, the aim is a sturdy canopy large enough to power fruit without burying the plant in soft foliage. Pale older leaves combined with slow growth can fit nitrogen deficiency, but uniformly yellow leaves also occur when roots cannot function in saturated soil or when pH limits nutrient availability.
True nitrogen deficiency in tomato tends to begin on older leaves as uniform light green to yellow coloration and reduced growth. By contrast, excessive nitrogen produces dark green, lush plants and delays maturity according to the California tomato fertilization guidelines.
Do not keep adding nitrogen merely because an indeterminate cultivar continues extending stems. Its growth habit is genetic, so the useful evidence is leaf color, internode length, flowering, crop load, soil history, and—where the diagnosis matters commercially or repeatedly—soil or tissue analysis.
Flowering stage: keep nutrition steady
When flower clusters appear, avoid abrupt swings from underfeeding to a large dose. Continue a complete feed only at the relevant label interval, taking account of earlier granules, compost, and bed fertilizer; the goal is steady availability, not a one-time bloom surge.
Poor fruit set is not proof of phosphorus deficiency. Temperature extremes, insufficient light, water stress, and weak pollination can all interfere, so inspect the whole growing environment before changing NPK; this is where the Tomato light guide and Tomato watering guide are more useful than another scoop of feed.
Fruiting stage: match feeding to crop demand
Nutrient demand rises as plants set and enlarge fruit, but that does not justify unlimited fertilizer. Research-based California guidance places most seasonal tomato growth and nitrogen uptake between early fruit set and the early red-fruit stage, which supports well-timed, split applications rather than one heavy preplant dose.
For a home garden, translate that principle conservatively: if the label permits repeat feeding, reassess when the first fruits are developing and apply only the stated rate. Oklahoma State Extension also times later side-dressing to crop development rather than advising that all fertilizer be supplied at planting, with applications spaced through fruiting.
As harvest advances and the plant stops making healthy new flowers or fruit, reduce or stop routine feeding. In warm Indian and tropical gardens this pause may follow extreme heat, monsoon waterlogging, disease decline, or the end of a determinate crop rather than a winter calendar; fertilizer is useful only while roots and shoots are actively functioning.
Feeding tomatoes in open ground and raised beds
In a bed, mix only soil-test-supported amendments into the root zone before planting. Later fertilizer can be side-dressed on moist soil at the distance and rate stated on the product label, kept off stems and leaves, then watered into the active root zone.
Raised beds can behave more like containers when they are shallow, very free-draining, or filled largely with soilless mix. Track all inputs—including manure, compost, complete fertilizer, and soluble feeds—because their nutrients add together even when the packages use different marketing terms.
Feeding tomatoes in containers and grow bags
Potted tomatoes have less soil for roots to explore and frequent watering can carry soluble nutrients out of drainage holes. The RHS notes that restricted root volume makes container plants need more feeding and watering than plants in open ground, but frequency still depends on product formulation and irrigation.
Use a properly drained container with enough root volume for the cultivar, then choose one primary feeding program. Clemson Extension recommends a balanced timed-release fertilizer at planting and label-directed intervals, or a water-soluble alternative, for container-grown tomatoes; do not run both programs at full rate unless the labels explicitly account for the combination.
If a grow bag dries quickly in hot weather, restore even moisture before feeding. Fertilizing a bone-dry root ball creates a concentrated solution around stressed roots, while repeatedly feeding and then watering heavily can waste nutrients through leaching.
Compost and organic fertilizer
Finished compost improves soil structure, water handling, and biological activity while contributing nutrients, but its analysis is variable. Treat it as part of the fertility budget rather than assuming it either replaces every fertilizer or contributes nothing.
Manures and concentrated organic fertilizers can also overfeed tomatoes, and some release nitrogen long after application as microbes break them down. Use mature materials, follow local guidance and the product label, and avoid piling manure or concentrated amendments into the planting hole where salts or ammonia can contact roots.
How to apply fertilizer safely
Read the product label from start to finish and calculate for the actual bed area or container volume. Measure with a dedicated dry scoop, keep fertilizer off foliage and stems, apply to moist—not saturated—soil, and water in only as the label instructs.
Never improvise a home dose from NPK ratio alone. A 4-4-4 and a 12-12-12 have the same proportions but very different nutrient concentrations, while liquids, coated granules, and soluble powders release nutrients differently.
Store fertilizer dry, in its original labelled container, away from children, pets, drains, ponds, and food tools. Skip application immediately before intense rain, because poorly timed nutrients can leave the root zone; USDA guidance specifically warns that fertilizer before heavy rainfall can contribute to nutrient runoff.
Nutrient deficiency signs—and their lookalikes
Slow growth and older leaves fading evenly from green to yellow can indicate nitrogen shortage. Purple coloration with stunting can fit poor phosphorus uptake, especially in cool roots, while marginal scorching or interveinal yellowing may involve other nutrients—but leaf appearance alone is not a reliable prescription.
First check moisture, drainage, pH, root health, temperature, light, pests, and whether the symptom is confined to old or new leaves. Dry soil can contain nutrients that roots cannot absorb, and damaged or oxygen-starved roots cannot use fertilizer efficiently; correct the root-zone problem before adding nutrients.
Blossom-end rot is especially easy to misread as a request for more calcium fertilizer. It is a calcium-related fruit disorder strongly influenced by irregular water supply, so use the Tomato soil guide and watering guide to stabilize the root zone before adding calcium that a soil test has not shown to be lacking.
Overfeeding and fertilizer burn
Dark green, rank foliage with delayed flowers or ripening points toward excess nitrogen rather than hunger. White crust on a container surface, browned root tips, sudden marginal leaf scorch after feeding, or wilting despite moist mix can indicate excessive soluble salts, although drought and root disease can look similar.
Stop feeding while you investigate. Remove visible loose granules, make sure drainage holes are open, and flush a container gradually with clean water only if the plant is not waterlogged and the pot can drain freely; a saturated or root-rotted plant needs drainage and root assessment, not more water.
Do not answer one excess by adding another nutrient. The RHS warns that overly frequent high-potassium tomato feed can suppress magnesium uptake and cause secondary magnesium deficiency, an example of why balanced diagnosis matters more than chasing each discoloured leaf.
A troubleshooting decision path
First, pause fertilizer and inspect the root zone. If soil is dry, water appropriately; if saturated, restore drainage; if the plant was recently transplanted, allow establishment; and if the container is packed with roots, use the Tomato repotting guide before assuming a nutrient shortage.
Second, identify the growth stage and review every recent input. Count compost, manure, pre-charged potting mix, controlled-release pellets, liquid feed, and foliar products, then compare dates and quantities with each label.
Third, use evidence. A soil test is the best basis for bed amendments, a careful label-led program suits most containers, and persistent unexplained symptoms may justify professional soil or tissue analysis rather than repeated trial doses.
When to use this page vs other Tomato guides
Use this page to choose, time, and troubleshoot tomato fertilizer. Use the Tomato overview for the whole growing system, the light guide when stems are weak or flowers fail under shade, and the watering guide when wilting or blossom-end rot makes nutrient uptake uncertain.
The Tomato soil guide covers pH, drainage, organic matter, and mix structure in depth. The repotting guide handles restricted roots and moving seedlings to their final container, while the Tomato pruning guide explains how determinate and indeterminate growth habits change shoot management rather than fertilizer needs.
Related Tomato guides
- Tomato care overview — combine feeding with light, moisture, support, and cultivar choice.
- Tomato watering — keep nutrients available without cycling roots between drought and saturation.
- Tomato soil — build the well-drained, biologically active root zone that makes fertilizer usable.
- Tomato light — diagnose weak growth or poor flowering that extra fertilizer cannot correct.
- Tomato repotting — give container roots enough volume before increasing feed.
- Tomato propagation — raise seedlings and cuttings without treating young roots like mature fruiting plants.
Conclusion
Good tomato feeding is a sequence of decisions, not a single “best” formula. Begin with soil or mix knowledge, feed modestly at transplanting, prevent excess nitrogen during vegetative growth, maintain balanced nutrition through flowering and fruit development, and taper when the crop is no longer actively growing.
When a plant looks wrong, check water, drainage, roots, light, temperature, growth stage, and recent inputs before reaching for fertilizer. That restraint protects roots, avoids waste, and gives Solanum lycopersicum the nutrients it can actually use.