Can You Divide Shasta Daisies in Fall? When and How
Yes, Shasta daisies can be divided in fall when blooms fade and soil is workable. Learn when spring is safer and how to replant strong divisions.
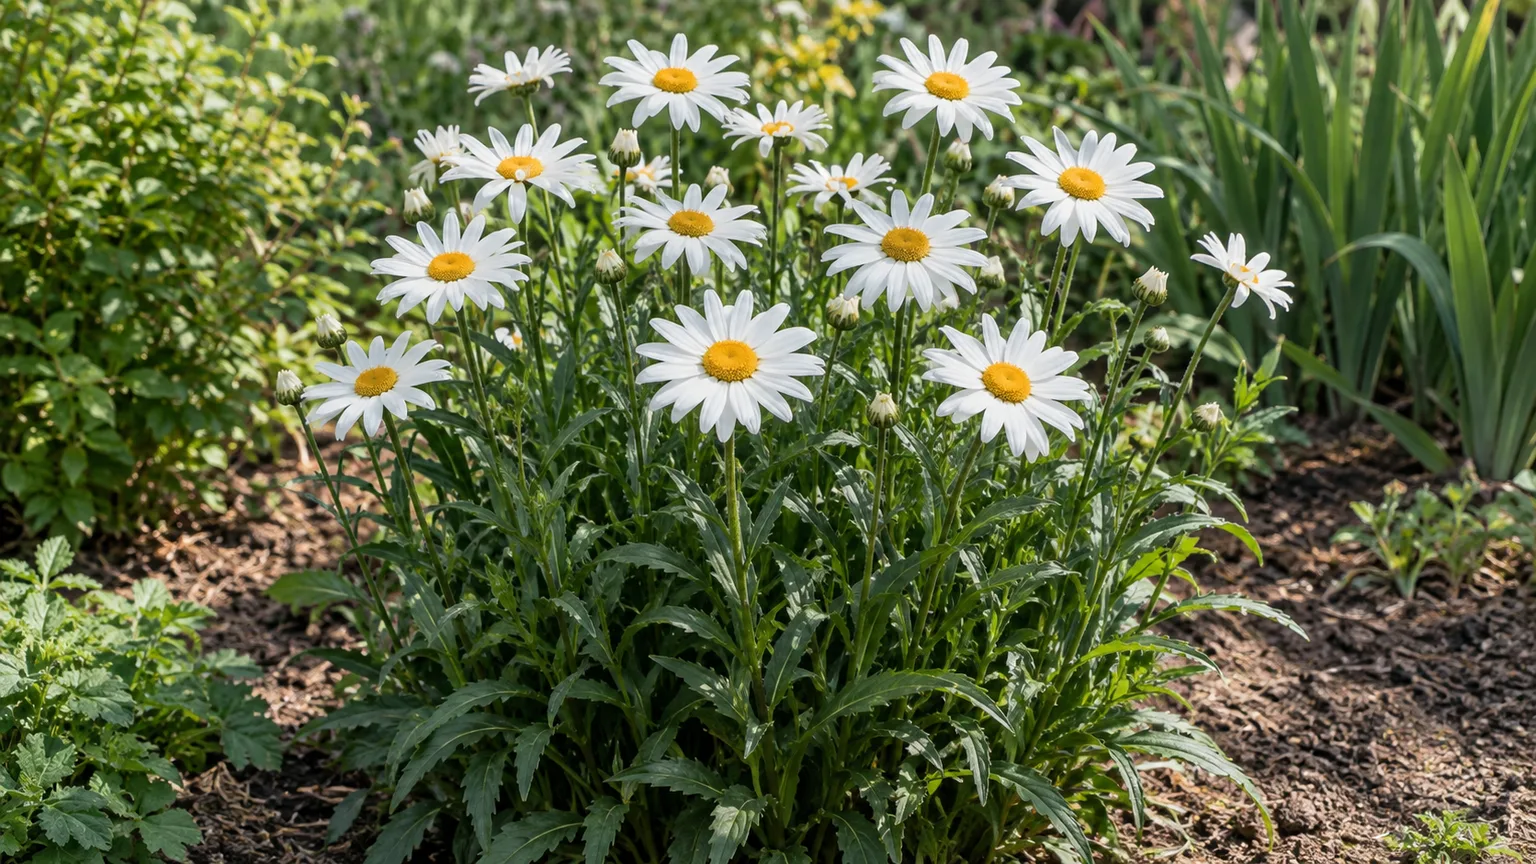
Yes, you can divide Shasta daisies in fall, and late summer or early autumn is a sensible time for many established clumps after their main flush of flowers has faded. The important qualifier is that the plant should be slowing down, the soil should be workable and well drained, and the divisions need enough mild weather to settle before the ground freezes. If your autumn is short, rainy, or already turning cold, early spring is a sound alternative—not a failure of timing.
Shasta daisies (Leucanthemum × superbum) are clump-forming herbaceous perennials. Their centers can become woody or thin as a planting matures, while the outer growth remains stronger. Division lets you remove the tired center, reduce crowding, and create new plants from sections of the original clump. The best result comes from dividing because the plant needs it, not because a fixed number of years has elapsed.
The short answer: yes, if the plant and soil are ready
For an established Shasta daisy, fall division works when flowering has finished and temperatures are moderate. The RHS species profile lists early spring or late summer as suitable division windows, while its broader perennial guide says summer-flowering perennials can be divided in spring or autumn when the ground is dry enough to work. Gardening Know How also recommends fall for these spring-and-summer bloomers after flowering. Those recommendations overlap, but they do not make fall mandatory. (RHS plant profile, RHS perennial division guide, Gardening Know How)
Think of fall as a good opportunity, not a countdown to a single date. A recently divided plant has fewer roots to supply its leaves, so cool weather and a still-warm, open soil give it a better chance to establish. You do not need to divide a healthy clump just to make more plants, and a struggling plant in saturated ground may be safer left undisturbed until conditions improve.
Fall or spring? Make the call from your local conditions
Choose fall if the daisies have finished blooming, daytime weather has cooled, the soil is neither baked hard nor waterlogged, and your local forecast shows a meaningful stretch of mild weather ahead. A gardener in a long, gentle autumn may have a much larger planting window than someone facing an early hard freeze. Your frost date is useful context, but it cannot account for a cold pocket, a wet bed, or a sudden temperature swing.
Choose spring if fall soil stays soggy, your garden freezes early, the clump is still actively flowering, or you missed the moderate-weather window. The RHS specifically advises delaying division until spring in wet autumn conditions and notes that spring can be better for plants that are somewhat tender. For Shasta daisies, its plant profile gives both spring and late summer as suitable times. (RHS perennial division guide, RHS plant profile)
There is no universal rule that every gardener must finish exactly one month before the first frost. That interval can serve as a conservative planning reminder, but local conditions matter more: the ground should remain workable, roots should not dry out, and new growth should have a chance to settle before persistent freezing. If you cannot confidently meet those conditions, mark the plant for spring and leave it in place over winter.
Signs your Shasta daisy is ready for division
Look at the whole clump rather than its bloom count on one particular week. A mature Shasta daisy may benefit from division when the center is bare or woody, the outer ring is spreading into neighboring plants, flowering has declined despite adequate sun and drainage, or the crown is so dense that air and light barely reach the middle. A patchy center can be part of normal aging; it does not automatically mean the entire plant is diseased.
Age alone is a rough guide. Missouri Botanical Garden says clumps can be divided as needed, roughly every two to three years, to maintain vigor, while some practical growing guides use a three-to-five-year interval. Treat those intervals as check-in points rather than deadlines. If your plant is still flowering strongly, has a healthy center, and fits its space, leave it alone. (Missouri Botanical Garden Plant Finder, Gardeners’ World)
Before digging, rule out conditions that division will not fix. A Shasta daisy in deep shade may stretch and flower poorly; a plant in winter-wet soil may decline because its roots and crown remain too wet. If leaves are yellowing, wilting, or dying across the whole plant, consider drought, root damage, or disease instead of assuming crowding is the only cause. The University of Arkansas Cooperative Extension notes that Verticillium wilt can cause yellowing and wilting; a local extension office can help diagnose a persistent decline rather than asking you to propagate a sick plant. (University of Arkansas Cooperative Extension)
Make sure it is a Shasta daisy, not just a daisy
“Daisy” is a common name shared by many plants. The steps here apply to the garden hybrid Leucanthemum × superbum, usually sold as Shasta daisy. It forms a perennial crown and clump. Oxeye daisy and other wild or naturalized daisies are different plants with different growth and management considerations, so check the plant label or a reliable identification source before moving them around.
Cultivars also vary. Some have single flowers, some have double or frilled blooms, and plant height and mature spread can differ substantially. A division will retain the original cultivar when it comes from that clump, but its size and bloom performance still depend on growing conditions. Use the plant label to guide spacing rather than assuming every Shasta daisy matures to the same height or width. The RHS describes the species as a robust, clump-forming perennial with single or double flower forms. (RHS plant profile)
Prepare the plant, bed, and tools first
Pick a cool, cloudy day if you can, or work early when the sun is not drying exposed roots. Water the clump the previous day if the soil is dry; the goal is moist, friable soil, not mud. Have a clean spade or garden fork, sharp pruners, a clean knife for a dense crown, a tarp or tray, and water ready so divisions are not left on the ground while you look for supplies.
Choose the new site before lifting the clump. Shasta daisies bloom best with ample light and need soil that drains well. Missouri Botanical Garden lists full sun and average to dry-to-medium, well-drained soil for the species, and warns that winter-wet soil can be fatal. If the intended bed is persistently soggy, improve drainage or choose a different spot; adding a small amount of compost is not a substitute for correcting standing water. (Missouri Botanical Garden Plant Finder)
If flowering has finished, trim the stems to a manageable height—about 6 inches is useful for handling, but it is not a magic measurement. Removing long top growth makes the clump easier to lift and reduces the amount of foliage the reduced root system must support. Do not cut healthy foliage down simply because a calendar says fall if the plant is still actively flowering or the leaves are still feeding it.
How to lift and divide the clump
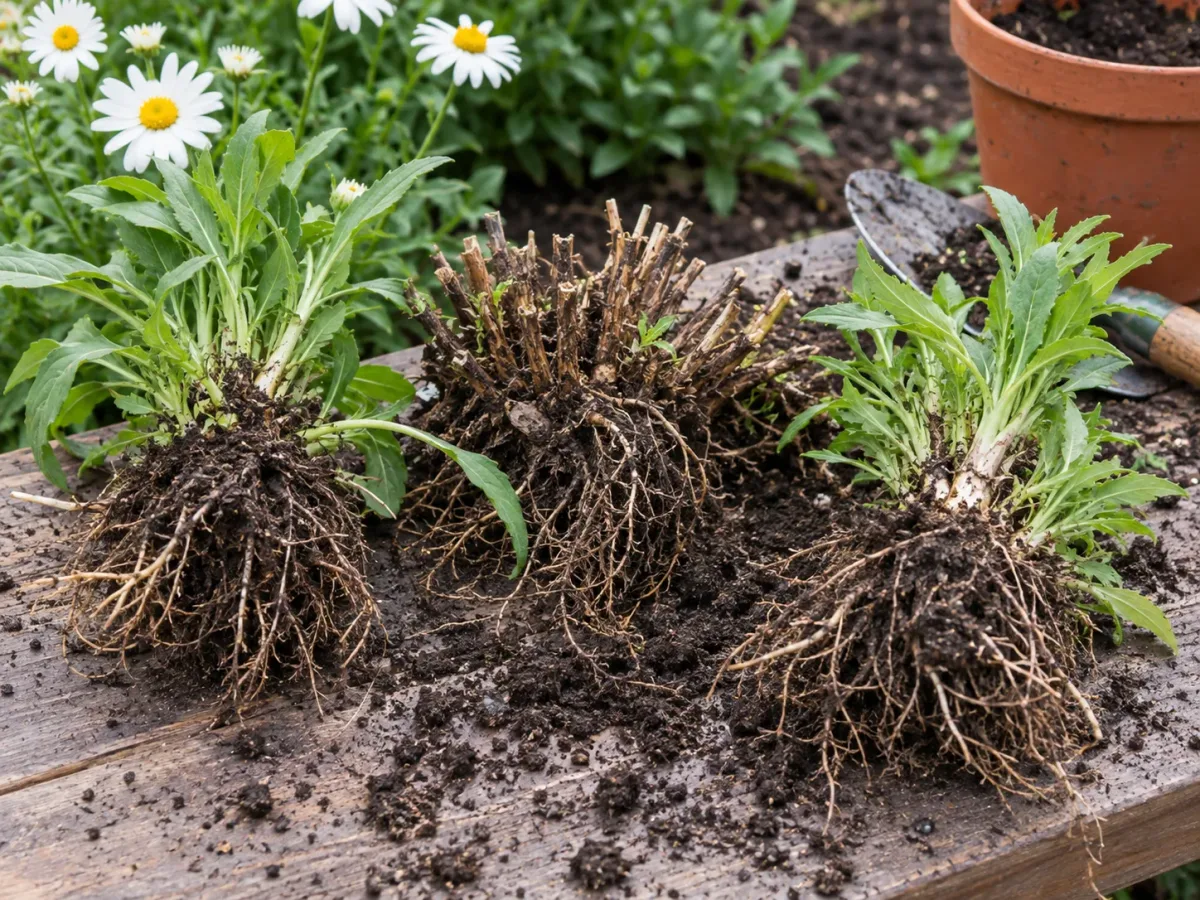
Start by loosening soil in a circle outside the leafy crown, not by slicing straight through the middle. A spade works for firm soil; a garden fork can be gentler where roots are tangled. Work around the plant, angle your tool beneath the root mass, and lift the clump with as many roots intact as possible. If the clump is large, widen the circle rather than levering forcefully against the crown.
Set the plant on a tarp and brush or shake away enough soil to see the crown and roots. You do not need to wash the roots bare; keeping them damp and shaded is more important. Identify any healthy outer growth and the central section. On older clumps, the middle can be woody, sparse, or dead. A division-focused guide from Gardening Know How describes lifting the full clump, teasing apart its healthy edges, and discarding an unproductive woody center. (Gardening Know How)
Separate the clump by hand if it comes apart cleanly. For a dense mass, slide two garden forks back-to-back into the crown and use them as levers, or cut through with a sharp, clean spade or knife. Make deliberate cuts; repeated chopping makes more wounds and does not create better plants. Keep the roots shaded and do not let them dry while you work.
Replant each useful piece as soon as possible. If you must pause, cover the roots with a damp towel or temporarily heel them into loose soil in shade. Do not leave the clump in direct sun or a warm breeze while you dig several new planting holes. The RHS advises planting divisions promptly and watering them in well, which is especially important when their roots have been exposed. (RHS perennial division guide)
Keep divisions with enough crown, shoots, and roots
The outermost sliver is not automatically a viable plant. Keep pieces with a firm section of crown, several healthy shoots or dormant buds, and a substantial spread of pale, sound roots. The RHS gives three to five healthy shoots as a useful target for divisions of some woody-crowned perennials; use that as a sensible guide for a Shasta daisy rather than trying to count out identical modules. A division with fewer shoots may still establish if it has good roots and a healthy crown, but tiny pieces are slower and less dependable. (RHS perennial division guide)
Discard soft, blackened, hollow, or badly damaged crown tissue, and remove obviously dead roots with clean pruners. Keep healthy divisions separate from diseased material; do not put suspect plant tissue into a home compost pile if you are unsure whether the disease will survive composting. If nearly every section looks weak or discolored, stop dividing and reassess the problem before moving pieces to another bed.
Aim for a few vigorous divisions rather than the maximum number. A plant that is too small to hold together may dry out before it can regrow. For a large, healthy clump, three or four robust sections are often a better outcome than a dozen scraps with little crown attached. You can always divide a thriving plant again in a later season.
Replant at the original depth and give each piece room
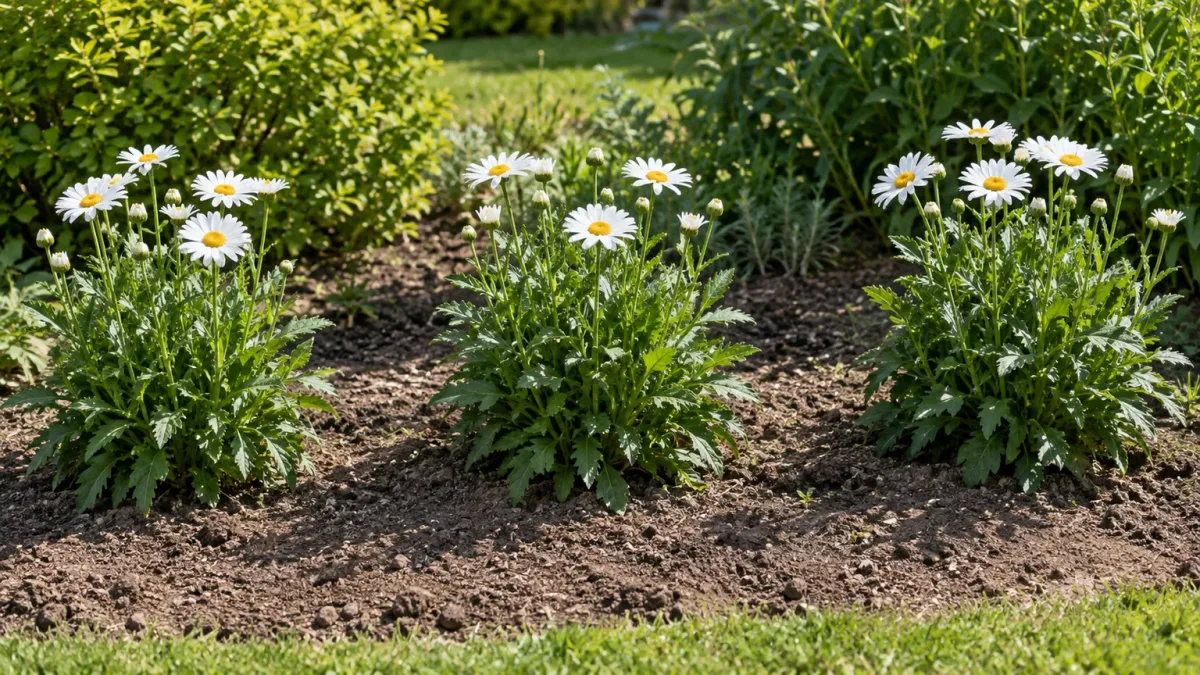
Dig each hole wide enough to spread the roots without bending them upward. Set the division so the crown sits at the same level it grew before; burying the crown can hold moisture against it and encourage decline, while leaving roots exposed can dry them. Backfill with the soil you removed, firm gently to close air pockets, then water to settle soil around the roots.
Space divisions according to the cultivar’s mature spread and the effect you want. If you want separate clumps with good airflow, leave room for each plant to reach its labeled width. Crowding them together may create a fuller display sooner but can lead to competition, leaning stems, and a need to divide again sooner. The species often forms a substantial clump, but individual cultivar labels are more useful than a single spacing number for every garden.
You can plant divisions back into the same bed if the original site has good drainage and enough room. If the old center was failing because the soil stays wet, moving the divisions to another place without changing the drainage problem only moves the risk. Make the location choice part of the division decision rather than an afterthought.
Water and mulch while roots reestablish
Water each newly planted division deeply once, then check the soil over the next several weeks. Keep it evenly moist while roots reestablish, but do not water by a weekly rule when rainfall has already soaked the bed. Feel the soil a couple of inches below the surface: if it is drying, water; if it is still wet and sticky, wait. Consistent moisture is helpful; permanently saturated soil is not.
Add a modest layer of mulch to buffer temperature and slow moisture loss. Keep mulch from pressing against or covering the crown. A thick, wet pile over a newly disturbed crown can trap moisture where the plant is most vulnerable. The RHS aftercare guidance emphasizes prompt planting and watering, and the Missouri Botanical Garden profile underscores the importance of drainage for Shasta daisies. (RHS perennial division guide, Missouri Botanical Garden Plant Finder)
Do not give newly divided plants a strong dose of fertilizer just to force quick growth before winter. Their immediate need is sound root contact, moderate moisture, and time. If you amend the bed, use a restrained amount of finished compost mixed with the planting soil, and leave the main feeding decision for the normal growing season. Avoid rich additions that produce soft new top growth late in the year.
How climate, drainage, and winter change the plan
In a mild-winter region, autumn may stay workable for a long time, making post-bloom division practical. In colder regions, the window can close quickly; division in early spring may give plants a full growing season to establish before winter. In wet climates or heavy clay, postpone if rain leaves the soil shiny, sticky, or easily compacted. Digging then damages soil structure and exposes divisions to the very drainage problem Shasta daisies dislike.
Container-grown clumps need a slightly different check. A Shasta daisy in a pot can dry faster after division, but a container that remains wet through winter can also damage roots. Use a free-draining potting medium and a container with drainage holes, and consider holding small or late-season divisions in pots in a sheltered place until they have grown stronger. This can be more manageable than installing weak pieces outdoors right before cold weather.
Hardiness and winter survival vary by cultivar and site. Missouri Botanical Garden lists the species for USDA Zones 5–9, but a zone range is not a guarantee for every named plant or a waterlogged garden. If your plant is near the cold edge of its range, prioritize spring division, good drainage, and an established root system before winter. (Missouri Botanical Garden Plant Finder)
What to do if fall division is already too late
If the ground is cold, saturated, frozen, or likely to freeze soon, leave the established clump undisturbed and wait for spring. The plant can tolerate an untidy or open center for another winter better than a newly lifted division with little time to establish. Mark the clump, note the problem you want to correct, and divide before new spring growth becomes too tall to handle.
If you have already lifted the plant and realize the window has passed, do not leave its roots exposed outdoors. Replant the divisions immediately in pots or a sheltered nursery bed, water them in, and protect the containers from drying winds and repeated hard freezes. The RHS suggests potting divisions individually to build size and overwintering them in a frost-free environment as an option for some perennials; adapt that approach to your local climate and the cultivar’s needs. (RHS perennial division guide)
Avoid storing bare-root pieces in a warm house for weeks. Dormant or slowing outdoor perennials need a cool, protected environment, not indoor warmth that may trigger weak growth. If you cannot keep divisions in suitable conditions, replant the best ones and accept that some may not make it rather than leaving them dry and unprotected.
What to expect from the divisions next year
A healthy, well-timed division may resume growth the next season, but it may not flower as heavily as the original mature clump right away. Small sections have fewer stored resources and roots, and a late division may spend more energy establishing than producing buds. Do not label the plant a failure because one or two flower stems are missing in the first year.
If there is little growth by late spring, check the basics before adding fertilizer: Is the crown still firm? Is the soil moist but not soggy? Does the plant receive enough sun? Is the division crowded by nearby roots? A division planted too deep or left dry can struggle; persistent wilting in wet soil suggests a root problem, not a need for more water.
Once the plant is growing steadily, remove spent flowers if you want to keep the bed tidy and potentially encourage additional bloom, but do not confuse deadheading with division. Deadheading removes old flowers; division renews a clump and makes additional plants. They solve different problems, and neither can compensate for unsuitable light or chronically wet soil.
Common division mistakes and how to avoid them
The first mistake is treating “fall” as a fixed date rather than a season of changing conditions. A sunny, dry September in one region can be a good window; a wet, cold October elsewhere may not be. Check the plant, soil, and forecast together, and choose spring if you cannot offer a reasonable establishment period.
Another common mistake is cutting the clump into tiny pieces because the goal is to multiply it. Small scraps with few roots are more vulnerable to drying and winter stress. Keep a manageable number of substantial pieces, and discard the bare woody center if it has little healthy growth. The point is to create plants that can establish, not to maximize the count on digging day.
Avoid planting divisions too deep, too close together, or in the same soggy location that damaged the parent. Do not leave roots in the sun while you prepare the bed, and do not compensate for exposed roots by constantly watering a poorly drained site. Good root-to-soil contact and drainage matter more than extra fertilizer or a heavy mulch blanket.
Finally, do not divide a plant solely because it looks tired if disease or environmental stress is more likely. Correct shade, drainage, or watering problems first, and seek a local extension diagnosis when widespread wilt or yellowing persists. Division is a useful maintenance tool, but it cannot turn a diseased or poorly sited plant into a healthy one by itself.
Division or seed: which method fits your goal?
Choose division when you want to renew a mature clump or create plants that closely match the parent cultivar. Each division is part of the original plant, so it preserves the parent’s characteristics more reliably than seed. That matters for named selections chosen for compact height, flower form, or a particular bloom habit.
Choose seed when you want to grow a larger number of plants and can accept variation. Seed-grown offspring may not look or perform exactly like a named parent, and they take longer to reach flowering size. If your goal is simply to fill a bed with the same cultivar, division is usually the more predictable home-garden method; if you are curious about variation, sowing seed can be worthwhile.
Neither method solves poor site conditions. Give seedlings and divisions the same basic needs: ample light, space for their mature size, and soil that drains after rain. If the original clump’s center is dead but the outer sections remain healthy, division lets you retain those good sections while resetting the planting. If the entire plant is declining, investigate the cause before propagating it.
Conclusion
You can divide Shasta daisies in fall after flowering, provided the weather is cool, the soil is workable, and the roots have a chance to settle before winter. Fall is one good window, while early spring is often the better choice in wet or cold regions and is also supported by RHS guidance for this plant. Let the clump’s condition and your local soil and weather—not a universal frost countdown—make the decision.
When you divide, lift the whole clump carefully, keep healthy crown sections with ample roots and several shoots, replant at the original depth, and water while the divisions establish. If the season has turned too wet or cold, wait. A sound spring division is better than rushing a fall job that leaves weak roots to face winter.



