How to Overwinter Dahlias: 4 Fall Tasks
Overwinter dahlia tubers with four fall tasks: time frost, lift carefully, divide only with visible eyes, and store them cool, dark, and dry.
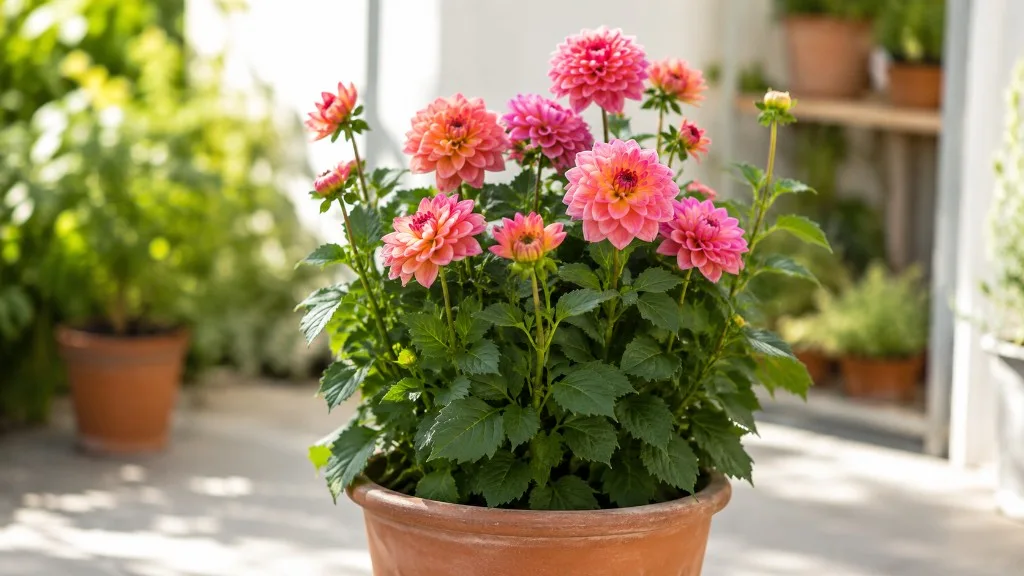
First, Decide Whether You Need to Lift Them
If your winters freeze the ground, the safest way to overwinter dahlia tubers is to lift them after the foliage has been killed by frost, then store them indoors above freezing. In a mild climate with light, sharply drained soil, you may leave them in place under a deep mulch layer, but that is a calculated risk rather than a guarantee.
The important distinction is that dahlias are tender plants grown from energy-storing tubers, not cold-hardy bulbs. The roots can survive a cool dormant season, but freezing soil, prolonged winter wet, or repeated freeze-thaw cycles can destroy the crown. Your winter plan should therefore be based on two questions: will the soil freeze, and will it stay wet?
Zone Is a Clue, Soil Is the Deciding Factor
Hardiness zones are a useful first filter, but they do not describe every garden. A dahlia in a sheltered bed of sandy soil may overwinter more successfully than one in a warmer-looking zone with heavy clay that stays saturated from November through March.
The Royal Horticultural Society’s dahlia growing guide treats dahlias as frost-tender and says lifting is safest, particularly in heavy soil. It also allows for leaving tubers in the ground in milder regions with light, free-draining soil, provided the crown is cut back and covered with about 6 inches of mulch. That gives you a practical decision rule:
- Lift and store if the ground freezes, your soil is heavy or wet, your garden floods in winter, or a prized cultivar would be difficult to replace.
- Try in-ground overwintering only if winters are mild, the bed drains quickly, and you can accept losing the clump in an unusually cold or wet season.
- Use a backup when experimenting: leave one clump in the ground and lift another, or lift the best clump and take the risk with a spare.
If you are lifting, label every variety before autumn foliage collapses. A weatherproof tag attached to the stake is helpful, but keep a second label with the clump because the plant name can become separated during cutting, washing, and dividing.
The Four-Task Timeline at a Glance
The job is easier when you treat it as a sequence rather than one frantic fall afternoon. First let the plant finish above ground, then lift and inspect the clump, decide whether to divide, and finally cure and store it.
- Let foliage finish and cut back. Wait for blackened, frost-damaged growth unless a hard freeze is about to reach the soil.
- Lift carefully. Loosen the soil well away from the stem and lift from underneath so the fragile neck and crown stay attached.
- Divide only with certainty. Each division needs crown tissue and at least one visible eye; otherwise hold the clump until spring.
- Cure and store. Dry the outside, protect the tubers from shriveling, keep them dark and cool above freezing, and inspect them through winter.
This timing is flexible by a few days. The real losses usually come from rushing the lift, storing wet tissue, cutting away every crown bud, or forgetting the box until spring.
1. Let Foliage Finish, Then Cut It Back
The first task is not to cut a green dahlia down on the first cool night. Let the foliage continue working while the weather is suitable, and wait for a killing frost that turns the leaves and stems black or limp. Late-season growth helps the plant finish its underground storage organs, and the crown becomes easier to read once the active top growth has stopped.
The American Dahlia Society explains that tubers mature late in the growing season and that, after a light frost, dahlias may continue growing if the soil has not frozen. That is why “the first frost” is a useful signal but not a universal calendar date. The better cue is frost-killed foliage followed by a safe digging window.
What Counts as Frost Damage
Frost damage is visible: leaves blacken or collapse, flowers brown, and the upper stems lose their healthy green color. A chilly forecast by itself does not mean the tubers are ready, and a light frost that only singes open flowers may not be enough to end the season.
Once the top growth is clearly damaged, cut the stems to about 2 to 6 inches above the soil. The short stub gives you a handle and helps you locate the clump, while the longer hollow stem can hold water that drains toward the crown. The RHS recommends 2 to 6 inches for stored tubers; the exact number matters less than leaving enough to handle without pulling on the crown.
If heavy rain is expected after you cut, protect the open stem from filling with water or lift sooner. The American Dahlia Society warns that water entering the cut stem can encourage crown rot. When possible, cut close to lifting day, turn the clump upside down after digging, and let trapped water drain before the long cure.
If a hard freeze is forecast before you can finish, do not wait for a textbook sequence. Lift the clump before the ground freezes, even if the tubers have had less time to mature. A slightly immature but firm clump is a better rescue candidate than one trapped in frozen soil.
2. Lift the Clump Without Breaking the Crown
Dahlia tuber necks are surprisingly easy to snap, especially right after digging. The crown is the central tissue where the stem and tubers join; it carries the eyes that will produce next season’s shoots. A tuber separated cleanly from that crown may look healthy but cannot grow by itself.
Use a garden fork or potato fork when the soil is workable. Insert it about 8 to 12 inches from the stem, loosen one side, then work around all four sides before lifting. The American Dahlia Society’s digging guidance makes the same point: loosen the clump from every direction and lift from below, rather than using the stalk as a lever.
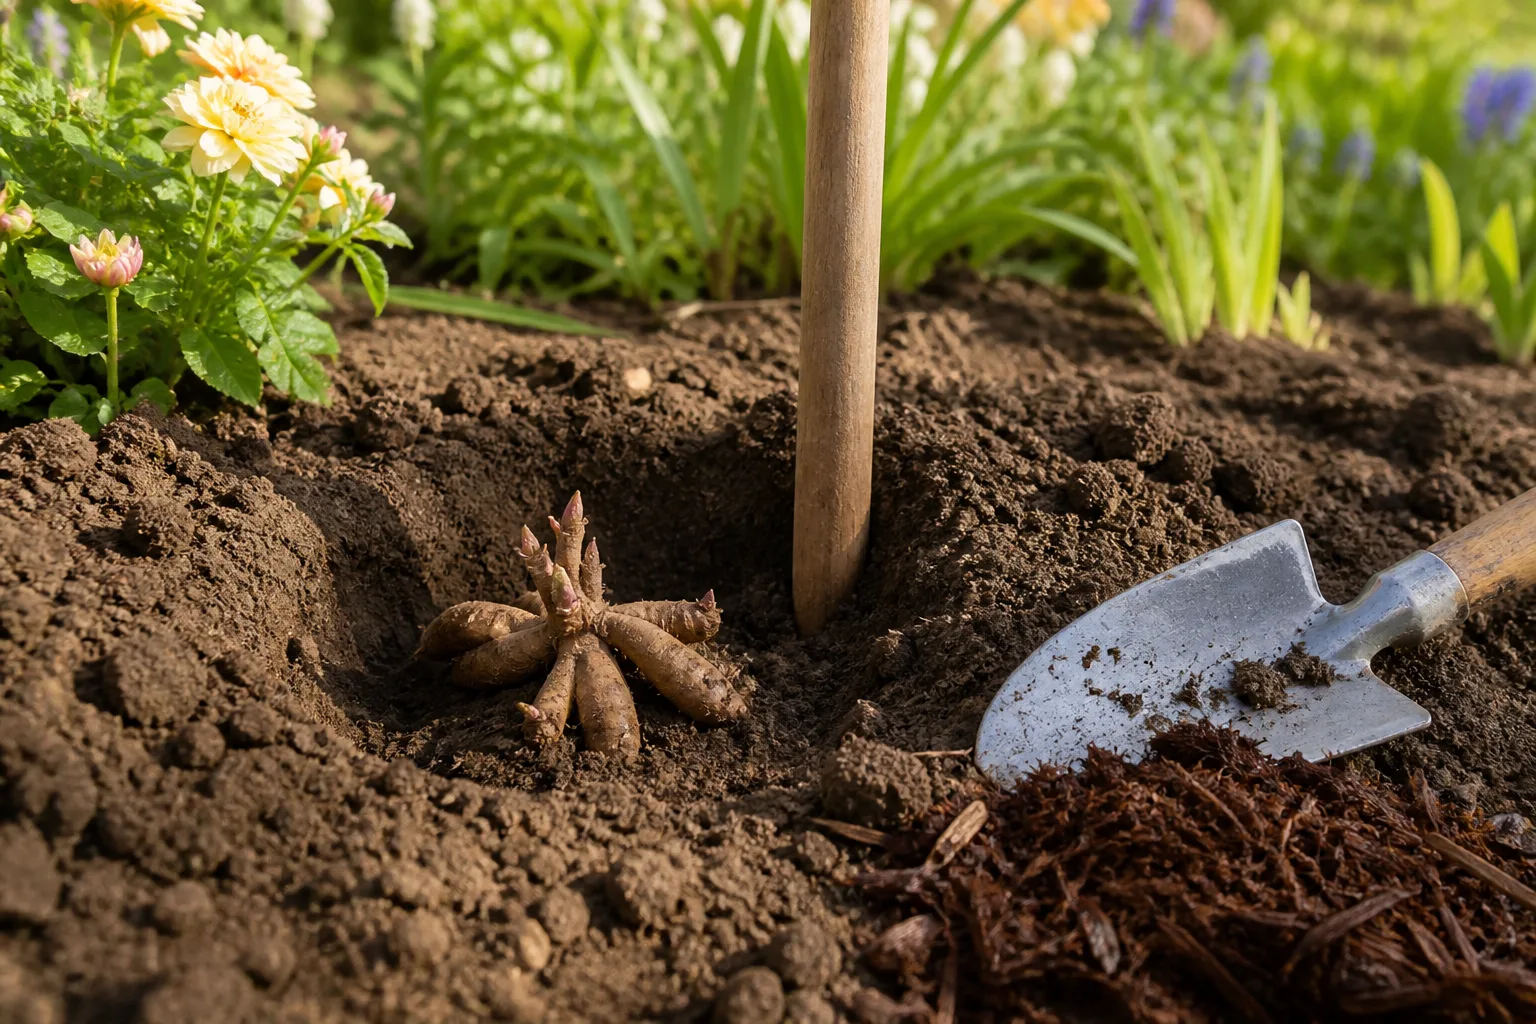
Do not yank on the remaining stem. Slide the fork under the loosened root ball and support the clump as it comes out. If a tuber breaks, set the pieces aside rather than discarding everything immediately; inspect the break for a viable crown section, but expect damaged pieces to be more vulnerable to rot.
Clean and Inspect Before It Dries
Shake off loose soil first. You can wash the clump with a gentle hose or in a tub of water, but avoid stabbing the skin with a nozzle, scraping it against concrete, or dragging it across a rough surface. Punctures and fresh cuts create easy entry points for decay during storage.
After washing, look for three categories: firm, healthy tissue; soft or water-soaked areas; and suspicious brown or rusty discoloration inside the crown or cut ends. Cut away soft or damaged tissue with a clean, sharp blade until the remaining tissue is firm and clean. If discoloration extends through the crown with no clear eye-bearing section left, discard that division rather than gambling on it.
Remove hairlike feeder roots and dead debris, but do not whittle away sound crown tissue in the name of tidiness. The short stem can remain while the clump drains and cures. If you make cuts, sanitize the knife or pruners between clumps; the American Dahlia Society describes a 1:10 bleach-to-water solution as an effective low-cost tool treatment for reducing virus transfer, though repeated bleach exposure can corrode metal, so rinse and dry tools afterward.
At this stage, keep the label with the clump. A row of unmarked brown tubers becomes impossible to sort once several cultivars are in the same box.
3. Divide Only When You Can See a Viable Eye
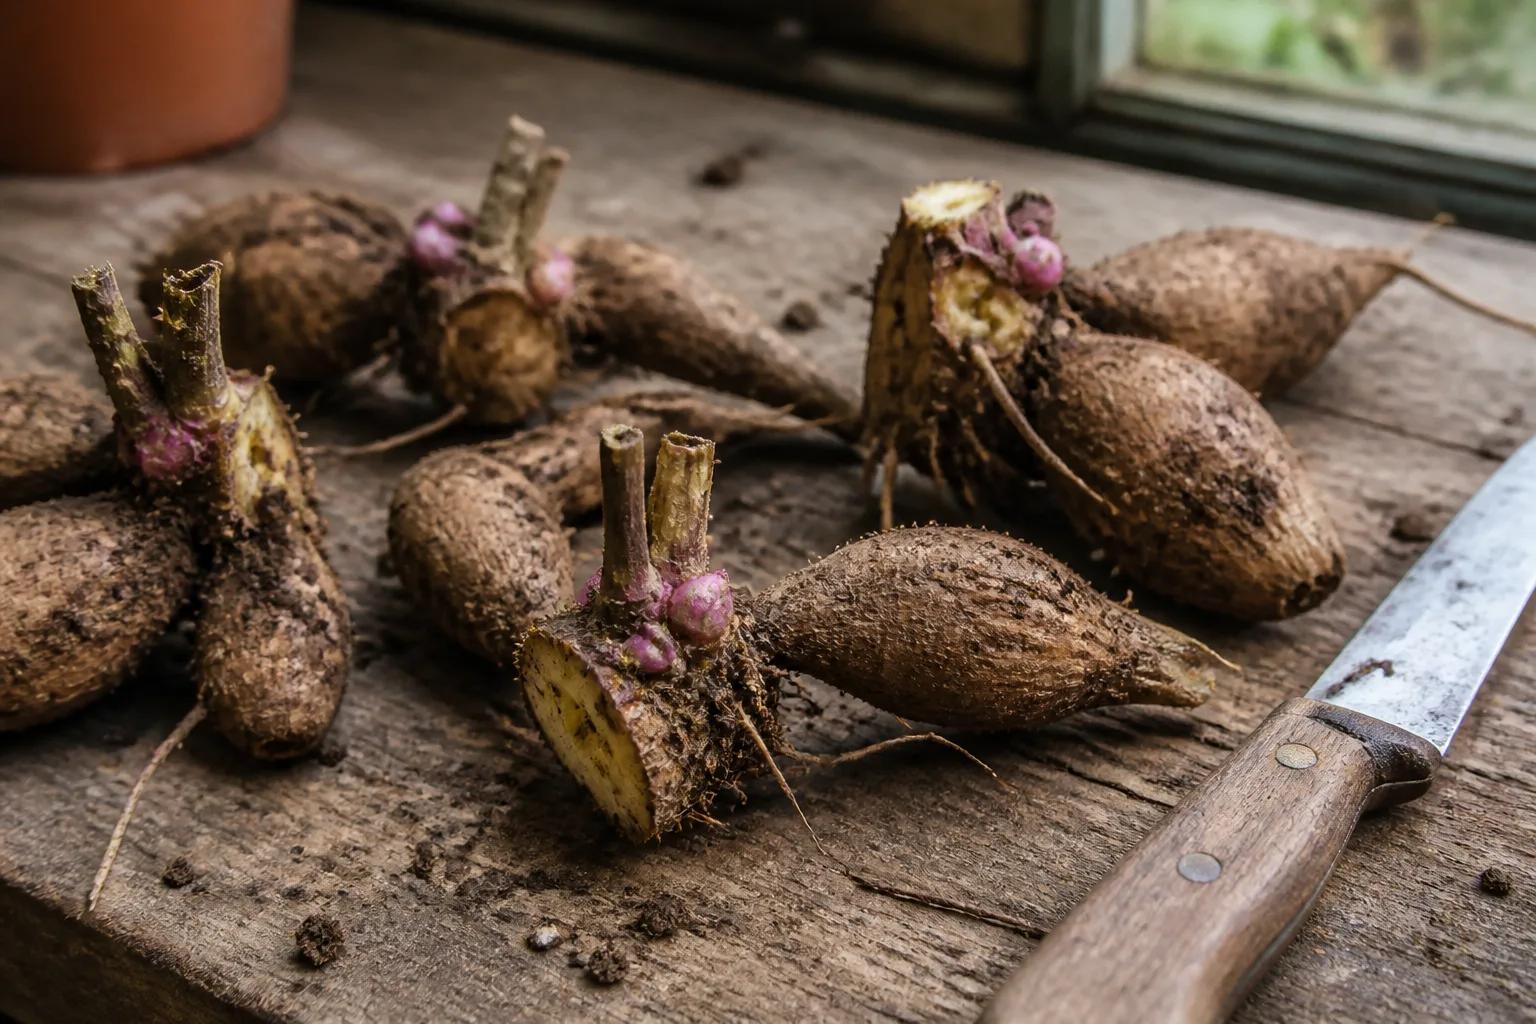
Dividing is how one dahlia clump becomes several plants, but it is also where many overwintering attempts fail. A plump finger-shaped tuber is not automatically a plant. A usable division must include a piece of the crown and at least one eye, the small bud-like bump from which the next stem emerges.
The National Garden Bureau’s dahlia storage guidance compares eyes to small pimples near the junction of the tuber and stem. They are often easier to see after the clump is washed and the stem is cut back, but some cultivars hide them until late winter or early spring.
How to Recognize a Good Division
Put the cleaned clump on a stable work surface with the old stem and crown facing up. Look for raised buds around the crown, not random marks on the tuber skin. Plan each cut so the resulting piece has:
- one or more firm tubers attached to crown tissue;
- at least one clear eye or swelling where an eye can develop; and
- no soft, brown, hollow, or deeply damaged section.
Use a sharp knife rather than twisting the fingers apart. Make deliberate cuts through the crown, and re-sanitize the blade before moving to the next variety. After dividing, allow the cut surfaces to dry until they are no longer wet to the touch before packing them.
Do not confuse a thin feeder root with a tuber, and do not separate every “finger” just because it can be snapped away. The eye belongs to the crown junction. A large tuber without that junction is stored carbohydrate, not a complete starting plant.
When to Leave the Clump Whole
For beginners, leaving a healthy clump intact for winter is often the better choice. Fall division is convenient when you have time to clean and label everything, and some varieties become hard to separate later, but each fresh cut is another wound that must dry before storage. Spring division lets dormant eyes swell and makes the correct cut easier to see.
The RHS recommends storing clumps intact and dividing in spring if your goal is to make more plants. The American Dahlia Society describes the trade-off differently: experienced growers may divide in fall because it is easier to clean, treat, and organize then, while gardeners who cannot identify eyes confidently should wait.
That is not a contradiction so much as a skill-based choice. Divide now when the eyes are obvious and you can cure the cuts properly; keep the clump whole when the crown is crowded, the variety is unfamiliar, or you are more worried about losing the plant than multiplying it. A dark, wrinkled “mother” tuber is often less vigorous than newer tubers, but do not remove anything solely because it is small—judge firmness, crown connection, and eyes together.
4. Cure, Pack, and Store at the Right Moisture
“Dry” is shorthand for a careful balance. The outside of a freshly washed tuber should dry so the storage box does not begin with free water, but the tuber must not be blasted until it is shriveled and hollow. A cool, shaded place with airflow is safer than a hot sunny porch or a dehumidified room.
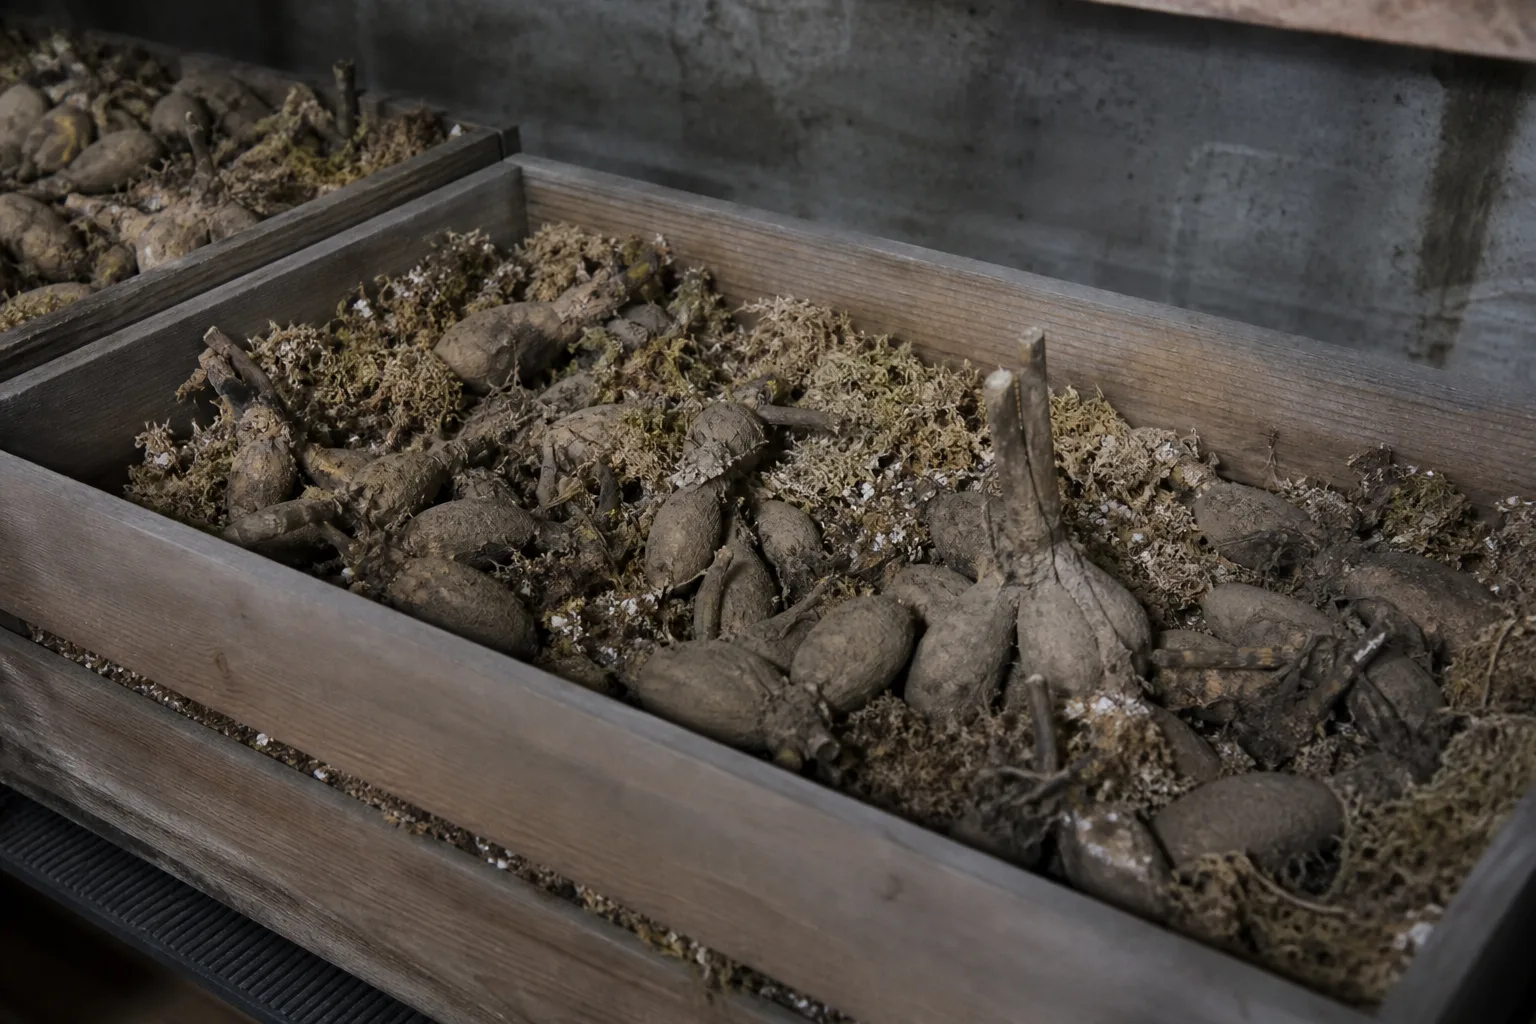
Set clumps or divisions in an open cardboard box, plastic crate, or bulb tray. Turn clumps upside down so moisture can drain from the hollow stem, and give them at least 24 hours before judging the surface; large, wet clumps or humid rooms may need several days or a week. They should feel dry on the skin but still firm inside.
Do not cure them on concrete. Both the American Dahlia Society and National Garden Bureau warn that concrete can pull moisture from the tubers and cause unnecessary shriveling. Avoid a strong fan or dehumidifier as well; fast surface drying can disguise the fact that the inside is losing too much moisture.
Choose Storage Medium by Your Room
Aim for a stable, dark storage area around 40 to 50°F (4 to 10°C), always above freezing. The American Dahlia Society notes that many growers use roughly 40 to 45°F, while Northern Gardener gives a broader 40 to 55°F working range. The shared principle is more important than a single magic number: avoid freezing, hot fluctuations, and a warm room that triggers early shoots and microbial decay.
Choose the container and packing medium based on whether your storage space tends to be dry or humid:
| Storage situation | Practical setup | What to watch |
|---|---|---|
| Cool, moderately dry basement or closet | Cardboard box or bulb crate lined with newspaper; tubers separated by dry paper or coarse vermiculite | Wrinkling and excessive weight loss |
| Dry garage or attic that stays above freezing | Coarse vermiculite or clean wood shavings around the clumps in a box or breathable container | Add only a small amount of moisture if tubers become firm but deeply shriveled |
| Damp room or humid winter climate | Open or lightly covered cardboard crate, generous spacing, dry paper, and frequent checks | Mold, condensation, and soft spots; reduce packing moisture |
| Very cold garage with freeze risk | Move the box to a frost-free basement or protected room before a cold snap | A blanket may slow temperature change but cannot make a freezing room safe |
Coarse vermiculite is a useful middle-ground because it buffers moisture without packing as tightly as soil. Peat moss, sand, and wood shavings can work in some setups, but their behavior depends on how wet they are and how humid the room is. The American Dahlia Society warns that dry peat can shrivel tubers while wet peat can promote rot; it also notes that sand is heavy and can encourage early roots, and that perlite does not absorb excess moisture well.
Do not seal newly washed tubers in airtight plastic. A plastic bag or lidded bin can work only when the clumps are fully cured, the medium is correctly conditioned, and you are willing to monitor condensation. For a first attempt, a cardboard box with space between clumps is easier to inspect and less likely to turn a small wet spot into a sealed rot chamber.
Keep each clump or division from touching its neighbors when possible. Label the box and each cultivar, record how many divisions you stored, and place it where you can reach it without moving a dozen other containers every month.
Monthly Inspection: Read the Tubers
Inspect at least monthly, and more often during the first two weeks after packing or whenever the room temperature swings. Lift each clump enough to feel it and check the box for condensation, mold, leaking tissue, or a sour smell.
Use this quick diagnosis:
- Soft, wet, collapsing, foul-smelling, or spreading mold: isolate it immediately, cut back only if a firm crown section with an eye remains, and discard the rest. Remove wet packing material around it and improve airflow.
- Firm but wrinkled: it is losing water, not necessarily dead. Slightly moisten the surrounding medium or apply a very light mist, then recheck in one to two weeks. Do not soak the tuber.
- Firm with a small early sprout: the storage space is probably too warm or fluctuating. Move the box cooler and darker, and do not knock the sprout off.
- Hard, dry, and hollow: it may be too desiccated to save, especially if the crown is also dead. Keep it separate from healthy stock while you decide.
The goal is not to keep every tuber plump as a potato. A little surface wrinkling can be normal during dormancy; softness and decay are the urgent signs. The American Dahlia Society also notes that the quality and storage behavior of cultivars vary, so a lost clump is not always proof that the whole method was wrong.
Special Cases: Containers, Mild Climates, and a Missed Freeze
Potted dahlias are simpler to protect if you have a place to move the whole container. After frost kills the foliage, cut the stems back, let excess water drain, and move the pot to a cool, dark, frost-free space. Savvy Gardening describes the same container approach and recommends letting the dormant pot rest without routine watering; a pot that stays wet through winter can rot just as easily as a garden clump.
If the container is too large to move, remove the clump using the same careful fork or hand-lifting method. Do not leave a plastic nursery pot outside beside a warm wall and assume the roots are protected. Containers experience temperature changes faster than the ground, and a hard freeze can reach the tuber from every side.
For a mild, well-drained garden, cut the stems down after frost and cover the crown with roughly 6 inches of airy mulch such as compost, chopped stems, or bark. The RHS describes this as the easiest but riskier option: an unexpectedly wet or harsh winter can still cause losses. Do not use a thick, soggy blanket of material that holds water against the crown.
If you missed the ideal digging date, act on the next workable day. When the soil is still diggable, lift and sort the clump as usual. If the ground has frozen, wait for a thaw rather than breaking the clump with a spade; salvage firm, undamaged crown sections and accept that frozen or mushy tissue may not recover. Keep rescued pieces separate from healthy stored stock until they have dried and passed inspection.
Spring Reset: Wake Stored Tubers Safely
In late winter or early spring, inspect the clumps before planting. This is often the best time to divide a clump you left whole because the eyes will begin to swell and become easier to see. Make every division around a visible eye and a piece of crown, then let fresh cuts dry before potting.
To start early, place the tubers in shallow pots of well-drained, peat-free potting compost with the crown or eye near the surface. Keep them frost-free in good light once shoots appear, and water lightly rather than saturating dormant tubers. The RHS advises that overwatering a slow-to-sprout tuber can cause rot quickly.
For direct planting, wait until the danger of spring frost has passed and the soil is warming. Harden off plants started indoors before moving them into the bed, and protect tender new shoots from late cold. You can find the site-specific planting and early support details in the LeafyPixels dahlia plant guide, while this guide’s winter lesson remains simple: do not rush a dormant tuber into cold, wet ground.
Common Winter-Storage Mistakes
The following errors are common because each one sounds reasonable in isolation:
- Digging at the first cool night. A cool evening is not the same as frost-killed foliage. Let the plant finish unless a hard freeze threatens the soil.
- Waiting through a hard freeze because a calendar says “after frost.” Lift before the ground freezes if a dangerous freeze is coming; the rule exists to protect the tubers, not to test your patience.
- Pulling on the stem. The crown and neck are fragile. Loosen all sides and lift from below.
- Cutting every tuber away from the crown. A finger-shaped tuber without crown tissue and an eye cannot reliably produce a plant.
- Dividing when no eyes are visible. Keep the clump whole and divide in spring rather than making blind cuts.
- Packing wet tubers. Surface moisture, condensation, and a sealed container create a rot-friendly environment. Cure first.
- Using a warm indoor closet. Warm storage can trigger shoots too early and encourage decay. Find the coolest stable frost-free space you have.
- Misting on a schedule. Moisture is a response to shriveling, not a monthly ritual. Inspect first, then add very little if the tuber is firm but too dry.
- Skipping labels or sanitation. A healthy tuber with no name is a mystery, and an unclean knife can move problems between clumps.
The National Garden Bureau summarizes the practical balance well: stored tubers need a cool, dark, dry location with air circulation, but a severely shriveling tuber may need a small moisture correction. Think of the box as a monitored environment, not a place to hide the plants until spring.
Conclusion
The four things that give dahlias their best chance over winter are straightforward: let the foliage finish, lift the clump gently, divide only when an eye is certain, and store cured tubers in a cool, dark, frost-free place with controlled moisture. In-ground overwintering can work in mild climates with light, well-drained soil, but lifting is the safer default when winter freezes or the bed stays wet.
Label before you cut, keep the crown intact, and check the box monthly. Those small decisions protect the part of the dahlia that matters most—the living crown and its eyes—so spring starts with a healthy plant rather than a handful of anonymous, shriveled tubers.



