Why December Is the Best Time to Mulch Your Garden
Learn why December is the right time to mulch garden beds, how deep to spread leaves or bark, and which winter mistakes can harm roots.
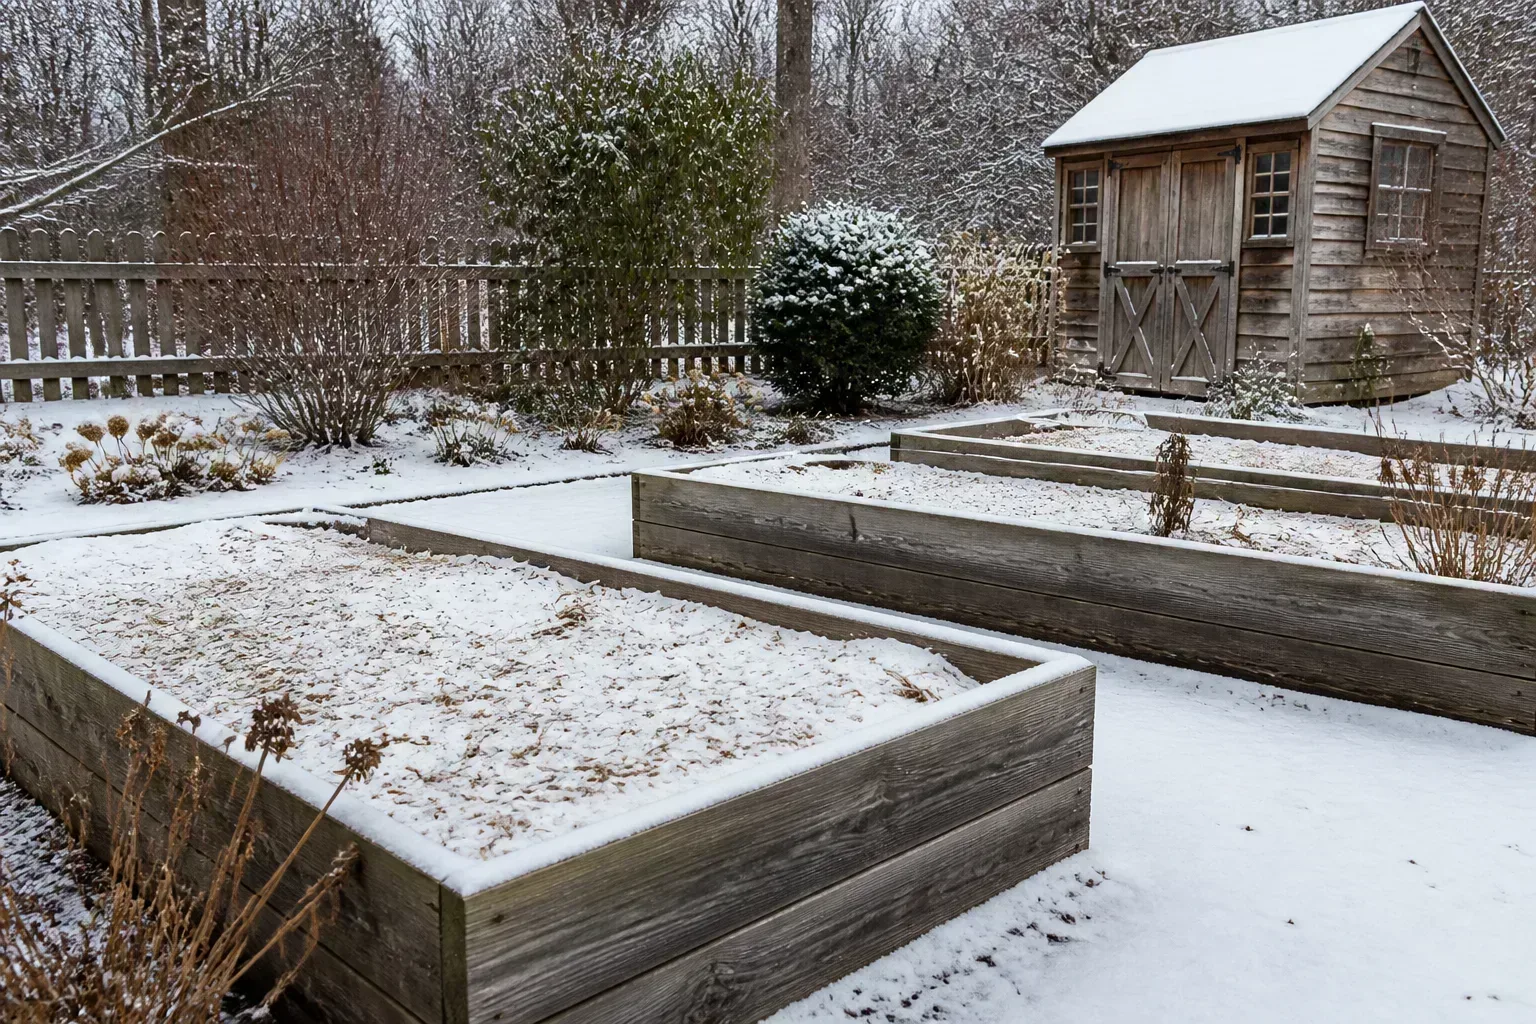
December is a useful month to mulch in places with a real winter because the garden has crossed an important line: many plants have slowed or gone dormant, most deciduous leaves have fallen, and the soil is cooling into the freeze-thaw season. A well-placed layer now can protect roots, reduce erosion, and keep temperature swings from repeatedly lifting shallow-rooted plants.
The date itself is not magic. In a mild climate, December may still be an active growing month; in a colder climate, the best window may arrive in November or even later. The reliable signal is a combination of plant dormancy, cold soil, local weather, and the condition of the bed—not the number on the calendar.
The most important distinction is this: winter mulch moderates the root zone; it does not make a plant hardy, dry out wet soil, or shield evergreen leaves from wind. Use the guide below to decide what your garden needs before you pick up the rake.
Why December works for winter mulching
Mulch is a surface layer that slows evaporation, limits weed germination, reduces erosion, and moderates soil temperature. The Royal Horticultural Society’s mulch guidance describes late autumn through late winter as a useful application period for frost protection and recommends at least 2 inches, with about 3 inches a practical target for many organic mulches.
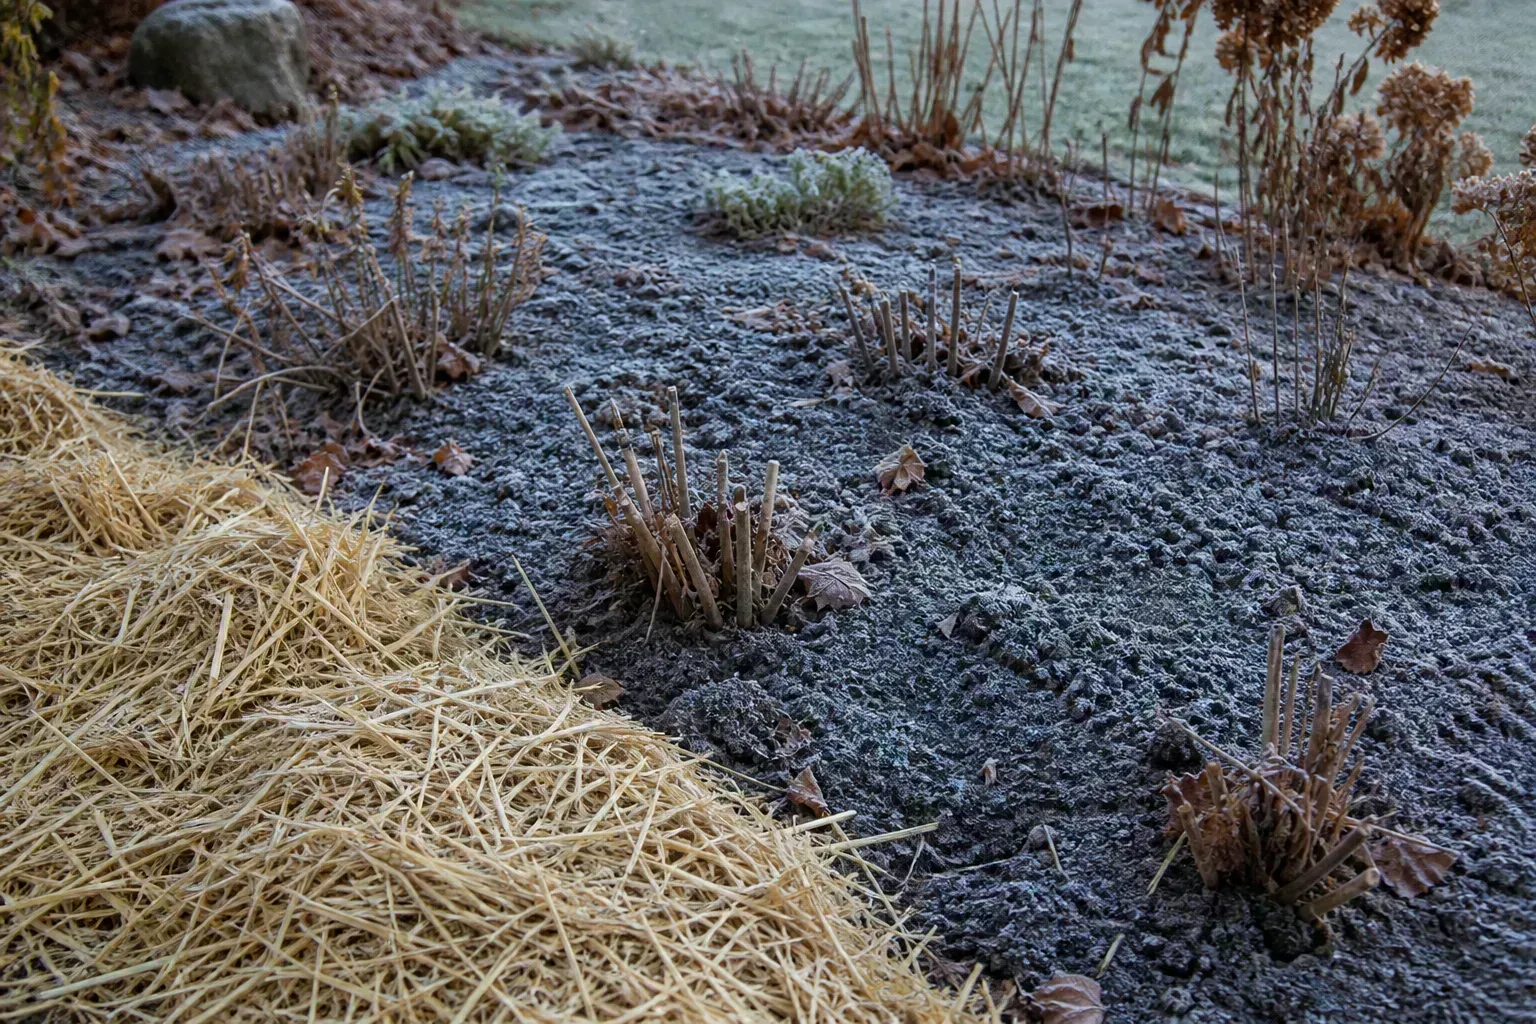
In December, the goal is usually stability rather than warmth. A loose layer slows how quickly the soil loses heat, softens abrupt temperature changes, and helps keep water in the root zone. That matters when shallow roots or newly planted crowns are alternately frozen, thawed, and exposed to drying air.
The timing also makes the work easier. Spent annuals are out of the way, perennials have revealed their crowns, and the leaf drop gives you a free source of organic material. A few minutes spent clearing trouble spots and measuring the layer can prevent a much longer spring repair job.
December mulch is most valuable for newly planted or divided perennials, shallow-rooted shrubs, exposed beds, and bare vegetable soil. An established plant in a sheltered bed with good snow cover and healthy, well-drained soil may need less. Matching the protection to the risk keeps you from turning every bed into a damp, overbuilt mound.
The weather-based timing rule to use instead of a calendar date
Use this three-part rule: wait for dormancy, check the soil, and apply before the weather becomes persistently severe. Plants should be slowing down rather than producing tender new growth, and the soil should be cold enough that you are protecting winter conditions rather than trapping late-season warmth.
There are two sound timing windows because gardeners use mulch for different jobs. For a normal 2–3-inch layer over an ornamental or vegetable bed, apply it when the soil is moist and cold but still workable. For a dedicated winter cover over a new or tender perennial, wait until the ground has frozen or is consistently close to freezing, then add a loose insulating material that will not hold wetness against the crown.
That distinction reconciles advice that otherwise sounds contradictory. Tennessee’s mulch guidance notes that mulch can be applied after the ground freezes in late fall or early winter to moderate winter temperatures, while Penn State Extension’s perennial guidance specifically recommends winter mulch after the ground is frozen for newly planted or tender perennials.
Do not rush to cover warm soil on the first chilly night. Early, heavy coverage can keep the root zone warmer and wetter than you intended and can create shelter for rodents. Do not postpone the job for weeks after a hard freeze if a new planting is exposed and the forecast calls for repeated thawing; use a thin, breathable layer now and add a looser crown cover when conditions settle.
Inspect the bed before you spread anything
Mulch should be the final step in a short inspection, not the first thing you do. Walk each bed and look for dry soil, standing water, buried stems, diseased foliage, old compacted mulch, and plants that will need more than root protection.
Check soil moisture while the ground is workable
Push a soil probe, narrow trowel, or long screwdriver into the root zone in several places. If the upper soil is dry and the tool meets resistance, water slowly and deeply while the ground is still open. A light sprinkle on the surface does little for established roots, and putting mulch over dry soil simply preserves the problem.
Water in the morning or during a mild spell so the soil has time to absorb the moisture. Stop if water begins to pool, run downhill, or sit beside the plant. The Penn State Extension discussion of winter burn emphasizes that plants entering winter with adequate soil moisture are better positioned for periods when frozen ground limits root water uptake.
Check drainage, crowns, stems, and old mulch
If soil is saturated, do not compensate with a thicker blanket. Find the cause first: a downspout, compacted path, low spot, or heavy clay may be holding water around roots where added organic material will keep the crown wet. Mulch protects a well-drained root zone; it cannot turn a bog into a healthy bed.
Clear diseased foliage and mushy plant debris from the crown area. Leave healthy stems and seed heads when they provide winter structure or wildlife habitat, but do not seal visibly diseased material under fresh mulch. Rake aside old mulch that has formed a dense, sour-smelling mat, and make sure the root crown or trunk flare is visible before adding anything new.
Mark small plants with a label or short stake if their crowns have disappeared under leaves. This simple step prevents you from burying emerging crowns or scattering a dense layer over a plant that needs air at its center.
Choose mulch by the job it needs to do
The best winter mulch is the one that stays appropriately loose, allows rain to reach the soil, and fits the plant’s sensitivity. There is no single material that is best for every bed.
Match leaves, straw, bark, compost, and boughs to the plant
Shredded leaves are an excellent general-purpose choice for perennial and vegetable beds. They are free, break down into organic matter, and are less likely to form a water-shedding mat than whole leaves. Penn State Extension’s survey of mulch options cautions that intact leaves can mat and restrict oxygen and water movement, so run dry leaves through a mower or shredder before using them in a cultivated bed.
Whole leaves have a different job. They can make useful habitat in a designated leaf area or on a vacant bed, particularly when held in place with a porous cover. The Old Farmer’s Almanac guide to overwintering insects in leaves explains that intact leaf layers provide air pockets and shelter for caterpillars, cocoons, spiders, and other small organisms. Keep that habitat away from crowns that stay wet, walkways, drains, and plants whose foliage was diseased.
Straw is light, airy, and highly useful for tender crowns, strawberries, garlic, and vegetable beds. Use clean straw rather than hay: hay contains more seed heads and can turn winter protection into a weed problem. Pull straw apart so it is fluffy, and reserve the thickest layers for a specific frost-protection job rather than every established shrub.
Pine bark, shredded bark, and coarse wood chips stay put better than leaves and suit trees, shrubs, and permanent beds. Use them on the surface instead of mixing them into the soil. Fresh woody material may temporarily tie up nitrogen while microorganisms decompose it, and the RHS advises storing fresh chips for a few weeks before using them around plants.
Compost and leaf mold can improve soil, but they are not interchangeable with a fluffy winter blanket. A thin layer of finished compost can be useful, while a deep, wet layer of pure compost against a crown is more likely to stay dense. Evergreen boughs are a useful seasonal add-on for low perennials because they break wind, hold light snow, and can be removed easily in spring.
For a practical comparison of winter materials, Gardening in Steps’ winter-mulch guide also distinguishes airy straw and pine needles from denser materials and warns against using hay as a substitute for straw. Treat its depth suggestions as a starting point and adjust for your plant, climate, and drainage.
How deep should winter mulch be?
For most established ornamental beds, 2–3 inches is enough. Measure after spreading rather than judging by eye; a layer that looks modest beside a wheelbarrow can be much deeper once it settles. The Tennessee environmental guidance gives a general range of 2–4 inches, while Penn State and the RHS keep ordinary landscape layers closer to 2–3 inches to preserve oxygen and water movement.
| Garden situation | Starting depth | Material and placement |
|---|---|---|
| Established perennial or ornamental bed | 2–3 inches | Shredded leaves, bark, or a loose organic blend; keep crowns visible |
| Tree or shrub root zone | 2–3 inches | Coarse bark or chips; spread broadly and keep the trunk clear |
| New or tender perennial | 2–3 inches at the root zone, then a loose cover if needed | Straw, leaves, or boughs added after the soil is cold or frozen |
| Bare raised vegetable bed | 2–4 inches | Clean shredded leaves or straw; remove diseased debris first |
More is not automatically safer. A deep, wet layer can reduce oxygen, delay spring warming, bend tender stems, hide rodents, and keep bark or crowns damp. If your existing layer is already 3 inches deep, refresh it by loosening or replacing compacted material rather than adding another layer on top.
How to mulch an established perennial bed
Start by pulling weeds and removing only the plant debris that should not overwinter. Healthy standing stems can support birds and beneficial insects, and they also help you see where the crowns are. Cut back plants that are diseased or collapsing into a wet mat, then move the debris to the appropriate yard-waste or compost system.
Water if the root zone is dry and the soil is not frozen. Let the surface drain, then spread mulch from the center of the bed outward, keeping a small open ring around each crown. The layer should look like a shallow, even blanket—not a pile that buries the middle of the plant.
Use your fingers or a rake to fluff leaves and straw after rain. Bark and chips can be leveled with a rake, but do not compact them by walking on the bed. Leave paths, drains, and the bases of evergreen stems clear so winter moisture can move away.
Finally, take a slow look from standing height. You should still be able to identify the crown of each perennial, see the lower stems of woody plants, and spot the boundary between bed and path. If the material has drifted into a low pocket, redistribute it before the next storm.
How to mulch trees and shrubs without creating a volcano
Trees and shrubs need a mulch donut: a broad, shallow ring that covers the root zone while leaving the trunk or stems visible. Extend the ring toward the drip line when practical because many fine roots grow outward, not in a concentrated cluster directly under the trunk.
Keep mulch several inches away from trunks and main stems, and expose the root flare of a tree. The mulch should slope gently to an even 2–3-inch depth, not rise like a cone. Penn State’s mulch survey explains that excessive depth can reduce oxygen and water availability, and it specifically recommends keeping tree mulch away from the trunk.
The RHS winter-damage guidance adds a useful reminder for exposed sites: containers and vulnerable plants may need shelter or wrapping in addition to root-zone mulch. A mulch ring is not a substitute for a windbreak, a salt barrier, or a correction to planting too deeply.
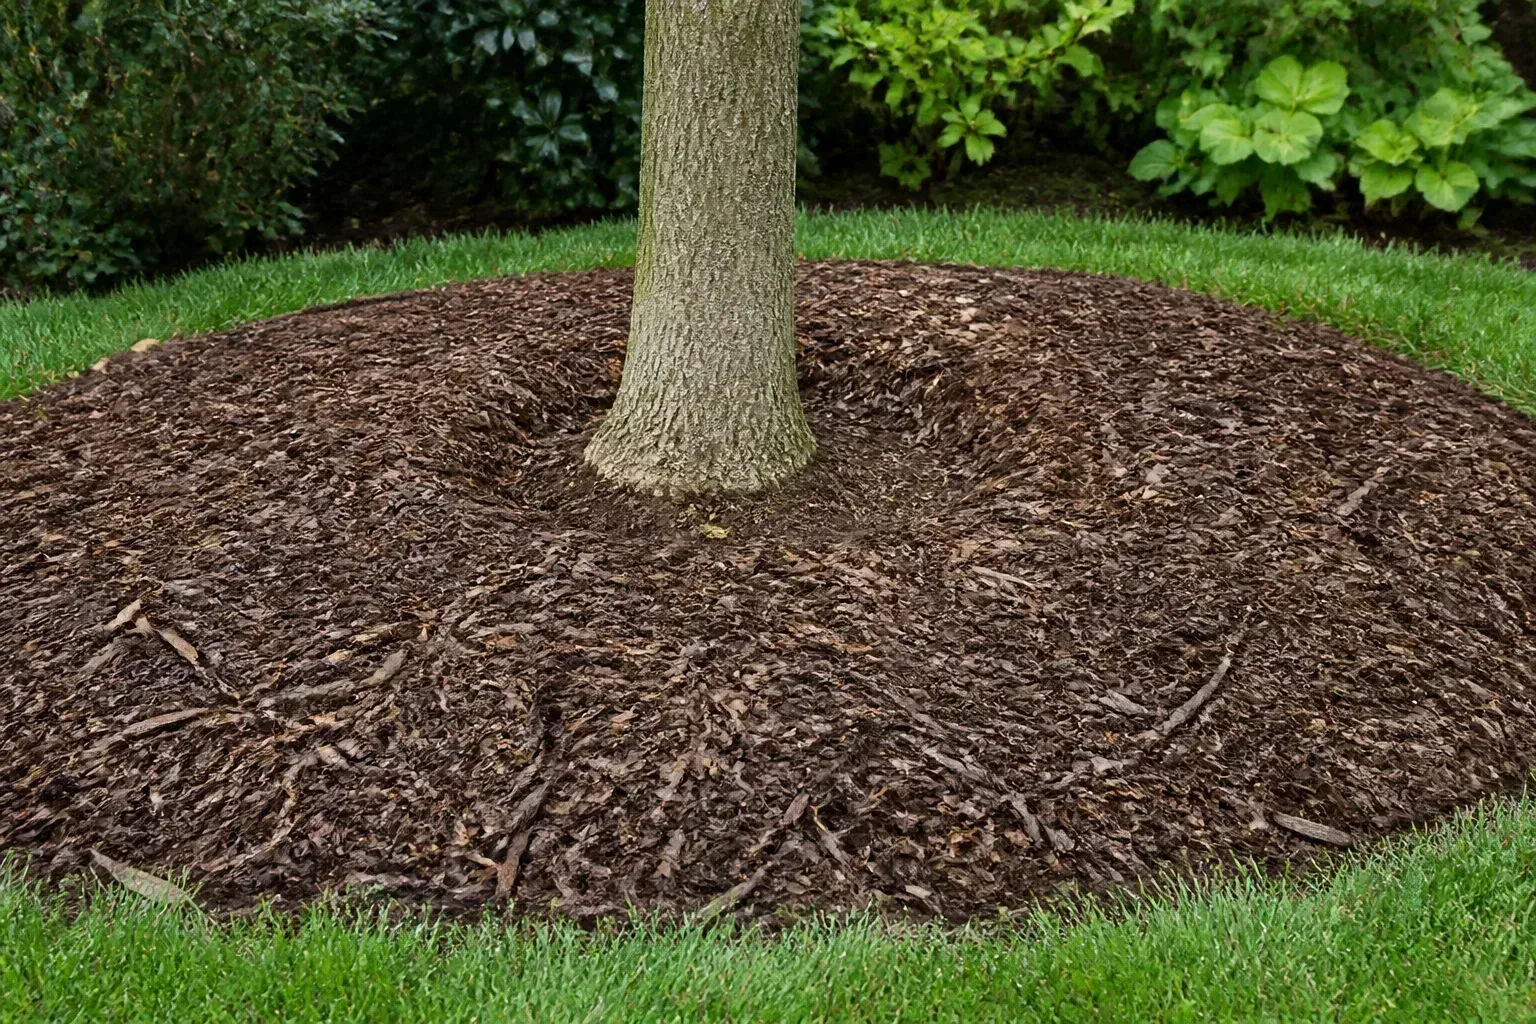
Inspect the ring after wind and heavy rain. If mulch has washed against the trunk, pull it back immediately. If a rodent has tunneled through a deep, fluffy layer, thin it near the plant and address the sheltering conditions rather than adding more material.
Give new and tender plants a looser winter cover
Newly planted and divided perennials have not yet developed a wide root system, so frost heave can lift the crown or expose fine roots. The Penn State perennial-care guidance recommends winter mulch of evergreen boughs after the ground freezes for newly planted or tender perennials and says to remove that protection gradually in spring.
For a plant in this category, first apply the normal root-zone layer. Once the soil is cold or frozen, add a loose cap of straw, chopped leaves, or evergreen boughs if the plant’s hardiness, exposure, or lack of snow cover justifies it. Keep the crown recognizable and avoid pressing wet leaves into the center of the plant.
This is where material choice matters more than raw depth. Boughs can interrupt wind while allowing air through; straw provides a fluffy air space; chopped leaves settle into a heavier mat. Use the lightest material that gives the needed protection, and remove or reduce it when spring growth begins.
Do not cover every perennial simply because it is December. Plants that prefer dry winter conditions, have evergreen foliage resting on damp soil, or are already in a protected microclimate may suffer more from a wet cover than from cold. When in doubt, protect the root zone modestly and reserve the loose top cover for the most exposed or tender plants.
Use winter mulch in raised vegetable beds
Raised beds lose moisture and change temperature faster than deep in-ground soil, so an empty bed benefits from a protective surface layer. Mulch reduces the impact of winter rain, slows erosion, and keeps bare soil from repeatedly crusting and thawing. It also gives spring soil organisms a source of organic material to work on.
Clear out plants that were diseased or infested, but do not treat every healthy stem as waste. A few sturdy stems can protect the soil surface and offer winter habitat. If you are leaving roots in place, cut plants at soil level rather than pulling and disturbing the bed when it is wet.
Spread 2–4 inches of clean shredded leaves or straw across the bed, keeping the material a little thinner around overwintering crops that need light and airflow. If a bed contains newly planted garlic or another crop that benefits from insulation, use loose straw after the soil has cooled and anchor it where wind is a problem.
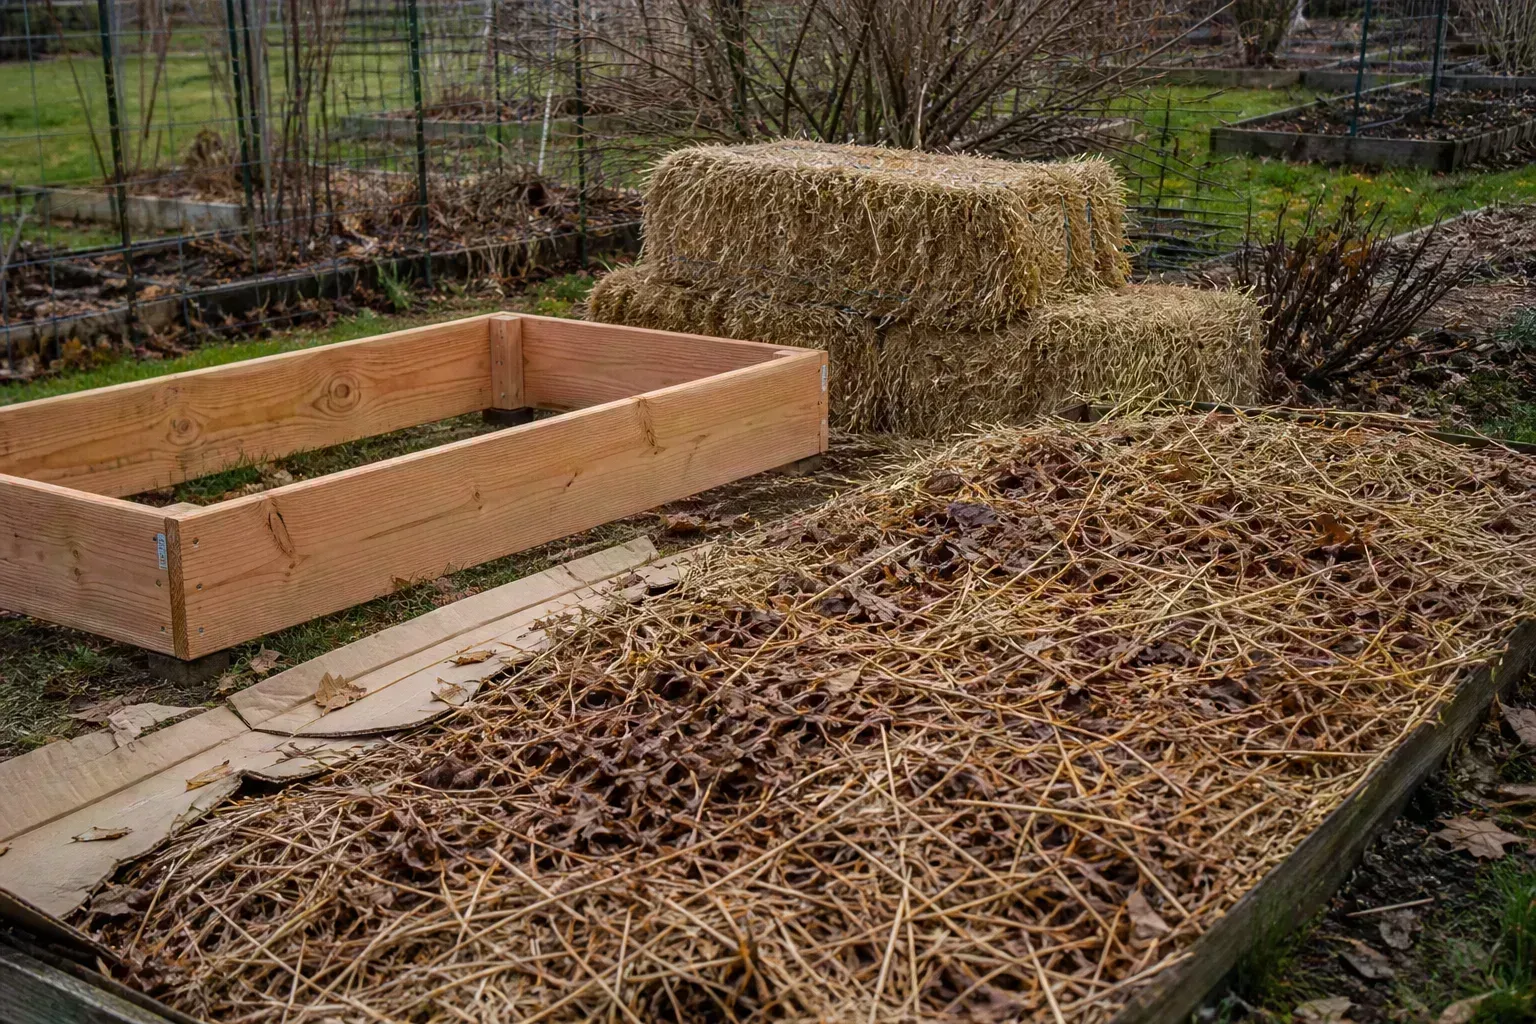
Avoid fresh grass clippings in a thick winter layer. They compress, heat as they decompose, and become a slimy barrier that sheds water instead of accepting it. Do not bury plastic, landscape fabric, or unknown municipal mulch in an edible bed without knowing what the source material contains; Penn State notes that free mulch may carry unknown pesticide residues.
Let some leaves stay for wildlife—but not diseased debris
Fallen leaves are both a garden resource and habitat. Not every leaf needs to be shredded, bagged, or removed from the property. A quiet corner, the edge of a shrub border, or a vacant bed can hold whole leaves for overwintering insects and other small wildlife.
That wildlife-friendly decision should be deliberate. Keep walkways, drains, gutters, and steps clear, and move leaves away from plant crowns that stay wet. If a leaf pile is blown into a cultivated bed, rake it into an even layer or move part of it to a designated habitat area instead of allowing a thick, airless mat to form.
Do not use foliage with obvious disease as winter mulch around susceptible plants. The safest choice is to remove clearly diseased leaves and stems according to local disposal guidance, while allowing clean leaves to break down where they will not create a sanitation problem.
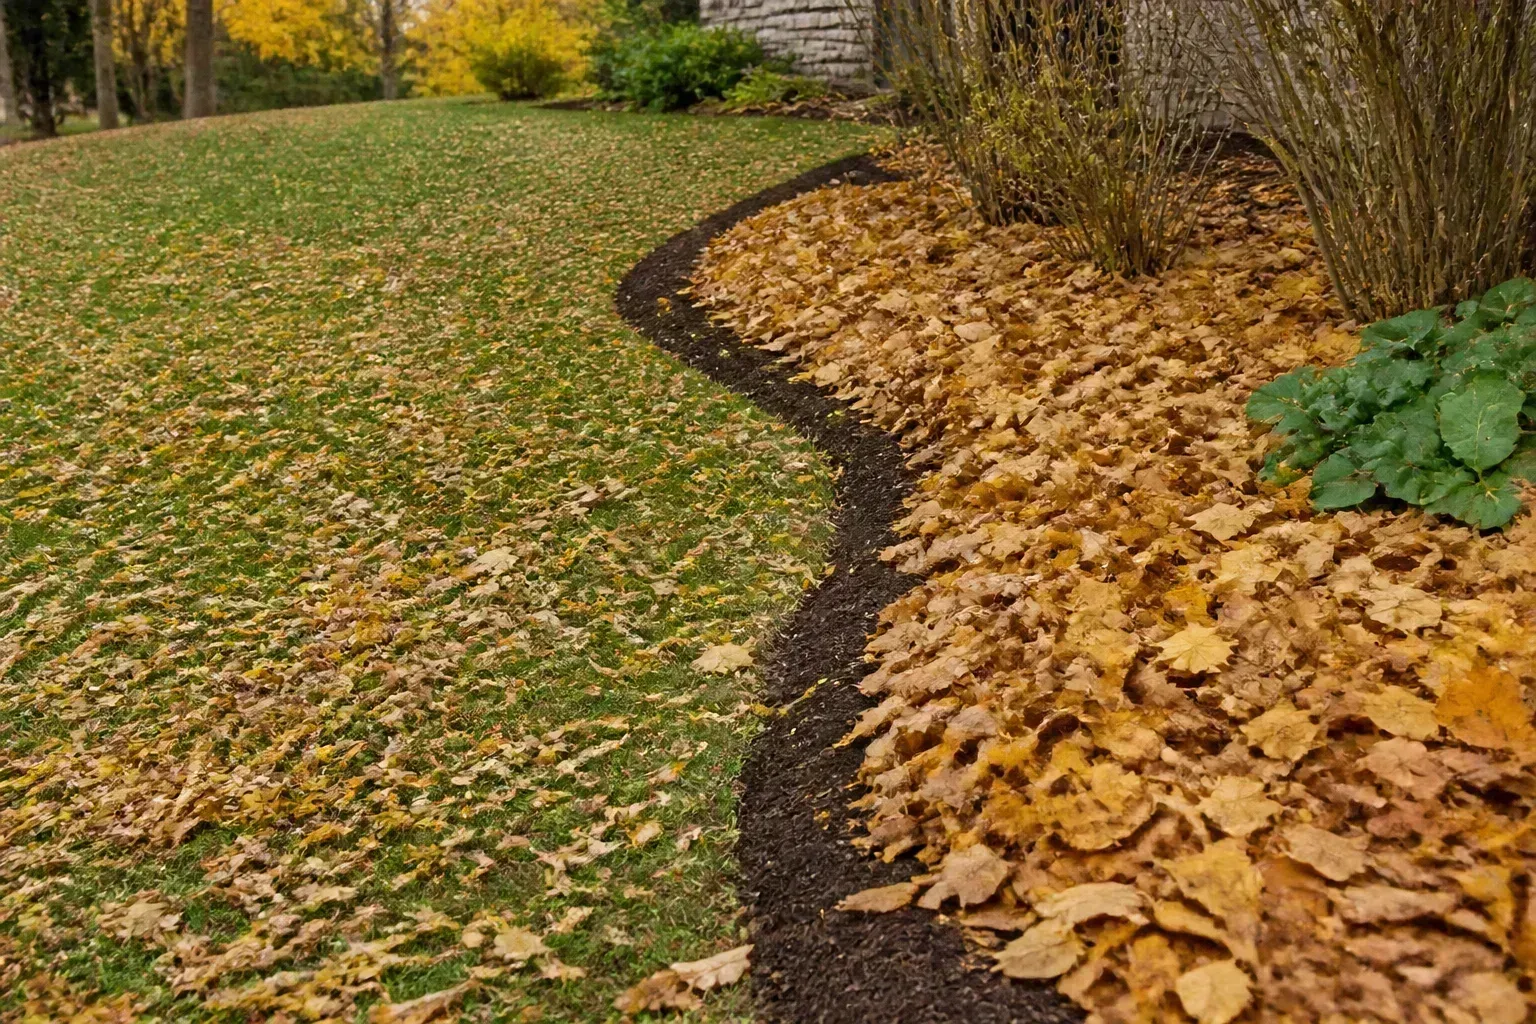
The practical compromise is simple: leave leaves where they help, process them where they mat, and remove them where they spread trouble. This is more useful than treating “leave the leaves” or “clean everything” as a universal rule.
Mulch mistakes that backfire in winter
The same material that protects roots can create problems when it is placed without an inspection.
- Mulching warm soil too early. A heavy layer can keep the bed warm and damp after the plant should be hardening off. Wait for cold soil and dormancy rather than the first cool evening.
- Building a volcano. A mound against a trunk or crown holds moisture where bark and stems need air. Spread outward and keep a visible gap.
- Burying the crown. The crown is the plant’s regrowth point. Mark it before spreading and keep the center of the plant open.
- Using hay as if it were straw. Hay carries more seed heads and can introduce a spring weed crop. Choose clean straw for winter cover.
- Leaving leaves whole in a cultivated bed. Thick, wet leaves can mat and restrict water and oxygen. Shred them for beds; keep intact leaves in a managed wildlife area.
- Adding to a compacted old layer. Depth accumulates every year. Rake, inspect, and refresh instead of stacking new material on top of a dense mat.
- Mulching saturated soil. A blanket over standing water does not improve drainage and can prolong crown rot. Correct the water problem first.
- Expecting mulch to neutralize salt. Salt spray and salty plowed snow need a barrier, better routing, or relocation. Extra mulch is not a salt treatment.
What mulch cannot fix on its own
Winter mulch can reduce root-zone temperature swings and conserve moisture already present in the soil. It cannot stop wind from drying evergreen leaves, repair a dead root system, correct a plant that is hardy for a different climate, or compensate for a downspout that floods the bed.
Evergreen shrubs are a good example. Penn State’s winter-burn explanation describes how foliage can continue losing water while frozen ground limits root uptake, especially under bright sun and drying wind. Mulch helps the roots, but exposed shrubs may also need adequate fall moisture, a windward burlap screen, shade from harsh winter sun, or protection from salt.
If an evergreen is brown in spring, do not assume the mulch failed or add a deeper layer. Check whether browning is concentrated on the windward side, whether twigs are alive beneath the bark, whether the soil stayed saturated, and whether road salt or a buried root flare is involved. A correct diagnosis prevents you from treating a siting or drainage problem as a mulch-depth problem.
Containers need a different winter plan
A pot is not an in-ground bed in miniature. Its root ball is surrounded by air on every side, so it can freeze faster and experience sharper temperature changes even when the same plant would be hardy in the landscape.
Use a thin layer of leaves or bark on the potting mix only if it will not block drainage or stay against the stem. Then prioritize the container’s location: group pots together, move them beside a protected wall or under an overhang, and keep them out of a spot where a roof will dump snow or ice. RHS winter-protection guidance also recommends grouping containers and wrapping or plunging them into the ground where appropriate.
Do not bring a container into a warm room simply because it is cold outside unless the plant is not winter-hardy or the pot is at real risk of freezing. Sudden warmth can disrupt dormancy and create a light and humidity mismatch. For a plant that must move indoors, inspect for pests, place it in appropriate light, and adjust watering to the reduced winter growth rate.
The five-minute December mulch checklist
When the weather window arrives, work in this order:
- Choose the bed. Prioritize new plantings, tender crowns, shallow-rooted shrubs, exposed sites, and bare raised beds.
- Check the soil. Water slowly if it is dry and workable; stop if it is saturated or frozen solid.
- Clean selectively. Remove weeds and diseased debris, but keep healthy stems and clean leaves where they serve wildlife or protect soil.
- Check the base. Expose crowns, root flares, and lower stems before adding material.
- Pick the material. Use shredded leaves or bark for a general layer, straw or boughs for a loose tender-plant cover, and clean whole leaves only in a managed habitat area.
- Measure the layer. Start with 2–3 inches for most beds and trees, or the lower end where the site is mild, wet, or rodent-prone.
- Build the donut. Keep mulch away from stems and trunks and spread it toward the root zone rather than upward.
- Recheck after weather. Pull material away from stems if rain, wind, or snow has moved it, and thin a damp or tunneled area.
This sequence is short because the important work is decision-making. A measured layer on the right bed is more protective than a thick layer spread everywhere by habit.
Remove or reduce winter mulch in spring
Winter mulch should not become permanent crown cover. As the soil thaws and plants show new growth, pull the thickest material away from the crown first. Penn State recommends removing winter protection gradually, which gives tender plants some buffer against a late cold snap without keeping the crown buried as growth resumes.
Remove evergreen boughs once the severe-weather window has passed, and rake compacted leaves or straw into a thinner surface layer if it is clean and useful as summer mulch. Compost healthy organic material; dispose of diseased material through the method your local program recommends.
Spring is also the right time to inspect what winter revealed. Look for heaved crowns, exposed roots, rodent tunnels, broken stems, sour-smelling soil, and dead twigs. Let living growth show you where pruning is needed instead of cutting an entire plant back because the outer leaves look brown.
If the old mulch has decomposed to a thin, open layer, there is no need to remove every fragment. The goal is to expose crowns and restore air movement, not to leave bare soil everywhere. Keep a modest summer layer where it supports moisture retention, but reset the depth before the growing season accelerates.
Conclusion
December is the best time to mulch your garden when it lines up with cold soil, plant dormancy, and the approach of repeated winter freezing—not because every garden follows the same calendar. Use a 2–3-inch layer for most established beds, spread it broadly, keep it off stems and trunks, and reserve looser deeper cover for new or tender plants that truly need it.
Start with moisture and drainage, choose clean material for the job, and leave some leaves in place when they provide habitat without creating a wet mat. Then remember what mulch cannot do: exposed foliage may still need wind protection, containers may need shelter, and salty or waterlogged sites need a different fix. That measured December check is what turns a quick seasonal task into useful winter protection.



