Gloxinia Care Guide: Light, Water, and Seasonal Dormancy
Keep gloxinia healthy indoors with clear watering cues, an easy potting mix, bloom care, a seasonal dormancy plan, and fixes for yellow or drooping leaves.
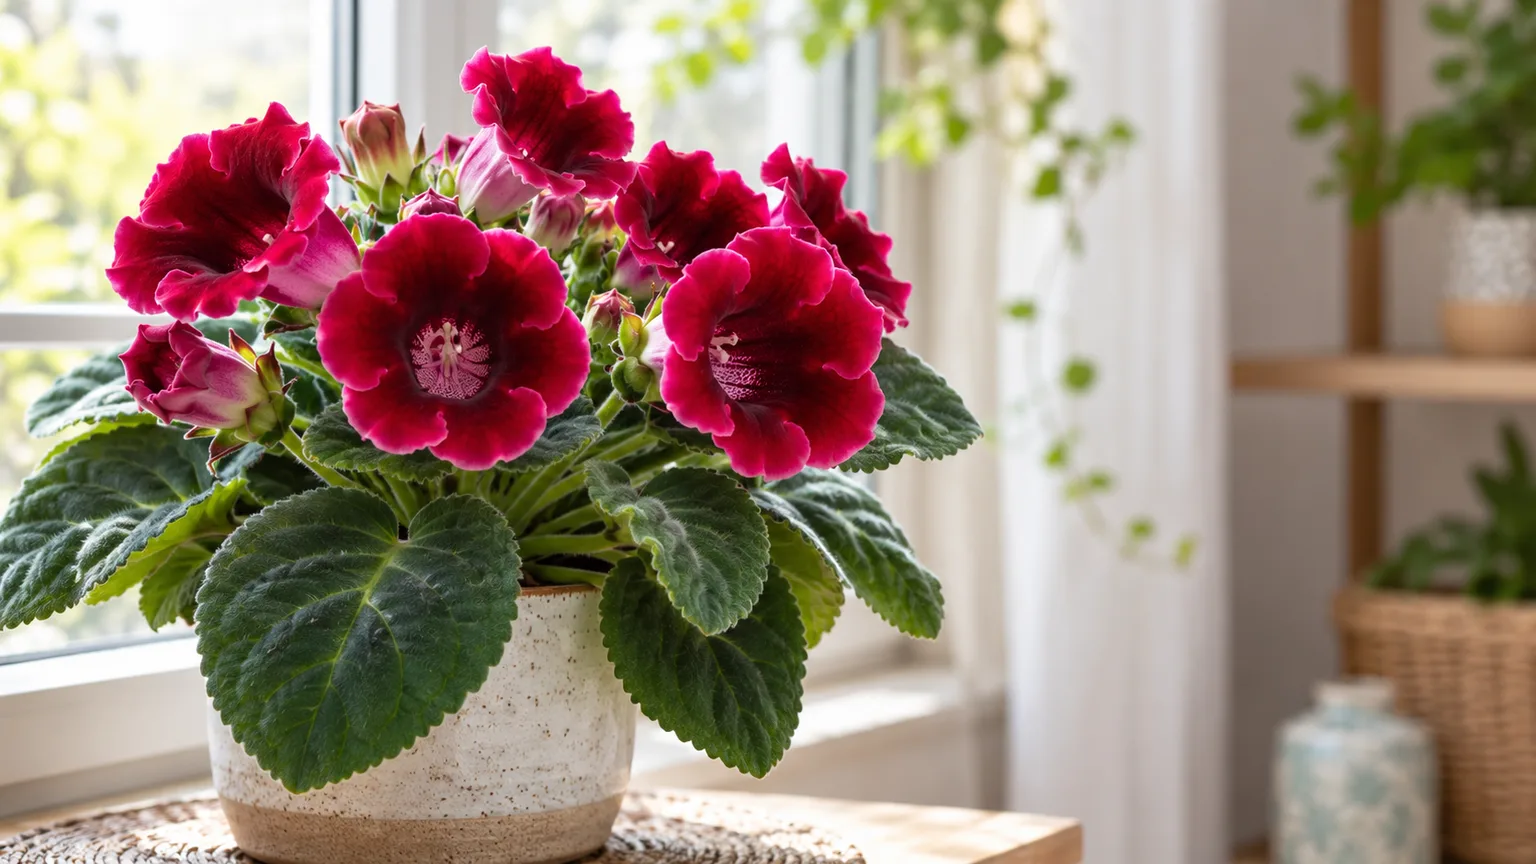
The key to gloxinia care is reading the plant’s season, not following a fixed weekly routine. A florist’s gloxinia (Sinningia speciosa) grows from a tuber: it needs steady moisture while making leaves and flowers, then a much drier rest when its foliage naturally dies back. During active growth, give it bright filtered light, warmth, a small pot with drainage, and water only after the surface of the mix begins to dry.
Gloxinia care at a glance
Set a flowering plant near a bright window where sunlight is softened by a sheer curtain or arrives gently in the morning. Use a loose, peat- or coir-based African violet mix with extra perlite if it stays wet, and choose a pot only a little wider than the tuber. The Royal Horticultural Society lists florist’s gloxinia as Sinningia speciosa and describes the genus as including tuberous perennials; this growth habit explains why water needs change so sharply over the year (RHS plant profile).
The most useful rule is simple: water the growing plant when the top layer feels just dry, but do not keep watering a plant whose leaves have died back and whose tuber is resting. Drain the saucer, keep water off the fuzzy leaves and crown, and never remove green leaves just to force dormancy. If the plant stops flowering, check light, temperature stability, and the seasonal cycle before adding more fertilizer.
Know the plant’s growth cycle
“Gloxinia” usually means florist’s gloxinia, Sinningia speciosa, a tender Brazilian member of the Gesneriaceae family. It has a low rosette of soft, textured leaves and large bell- or trumpet-shaped flowers. The common name can also be applied to hardy gloxinia (Incarvillea delavayi), a different plant with a different garden habit, so use the botanical name when buying a tuber or looking up care.
A healthy florist’s gloxinia is not necessarily an all-year evergreen houseplant. It builds leaves, forms buds, flowers, and may then slow down as the tuber stores energy; the timing varies with the cultivar, the plant’s growing conditions, and when it began its cycle. Iowa State University Extension and Outreach’s care page and horticultural profiles from Gardenia and Dutch Bulbs all treat the tuber and post-flowering rest as central to successful care (Iowa State Extension; Gardenia; Dutch Bulbs).
That seasonal rhythm changes the meaning of a yellow leaf. One older leaf fading while the rest of the plant is firm and flowering is different from many leaves yellowing while the potting mix is wet. After bloom, gradual dieback can be a normal transition; in the middle of active growth, sudden yellowing asks you to inspect moisture, roots, light, and drafts.
Build a comfortable indoor setup
Start with a location that is bright but not hot. Gloxinia can be grown outdoors in frost-free climates, but an indoor pot is easier to protect from rain, cold nights, and harsh afternoon sun. A covered, shaded patio can work in warm weather if you acclimate the plant and bring it back inside before temperatures fall or weather turns rough.
Give it bright, filtered light
Place the plant close to an east-facing window, or a few feet back from a brighter south- or west-facing window where a curtain filters the strongest rays. A north-facing window can work if the room is genuinely bright; a dim corner may keep the leaves alive but often produces stretched growth and weak flowering. If the plant leans toward the glass, rotate the pot a quarter turn every week or two rather than moving it repeatedly.
Direct midday sun is not the same as bright indirect light. Hot rays through glass can bleach or crisp the leaves and fade flowers, while very low light slows bud formation and makes the plant more vulnerable to overwatering because the mix dries slowly. If you use a grow light, place it above the foliage and begin with a modest daily period, then adjust based on compact growth and healthy leaves rather than pushing the plant with intense light.
Use an airy mix and a snug pot
A commercial African violet mix is a practical starting point because it holds some moisture without behaving like dense garden soil. If it feels heavy or stays wet for days, blend in perlite to open the texture; the goal is a mix that takes up water evenly and then drains, not a gritty mix that dries before the roots can use it. Avoid adding garden soil to an indoor pot because it can compact and slow drainage.
Choose a container with an open drainage hole and enough room for the tuber and roots, but avoid a much larger pot. Excess unused mix around a small tuber can remain wet long after the roots have taken up what they need. A decorative cachepot is fine if the inner nursery pot drains freely and you empty water left in the outer container after watering.
Repot when the mix has broken down, the tuber has outgrown the container, or the plant is ready to resume growth after dormancy. You do not need to disturb a healthy plant in flower just because the pot looks small. If a firm tuber is being restarted, refresh old compacted mix and keep the tuber near the surface rather than burying it deeply.
Keep warmth steady and humidity moderate
A comfortably warm room is usually suitable; many practical care references place active growth around 65–75°F (18–24°C). Protect the plant from cold window glass, drafty doors, air-conditioner blasts, and hot heating vents. Sudden shifts can trigger bud drop or leaf damage even when the average room temperature seems appropriate.
Aim for ordinary comfortable indoor humidity with some air movement. If your home is exceptionally dry, a room humidifier can raise humidity more evenly than misting; droplets trapped on the velvety leaves or flowers may mark them or linger long enough to encourage fungal problems. A pebble tray can add a little moisture immediately around the pot, but it will not substitute for watering correctly and the pot base must stay above the waterline.
Water by growth stage, not by calendar
Check the mix with a finger or lift the pot to learn its weight. During active leaf growth and flowering, water when the top layer begins to dry, then water thoroughly enough to moisten the root zone and let excess drain away. The exact interval depends on pot size, mix, temperature, light, and airflow, so a weekly schedule is a poor substitute for checking the soil.
Pour slowly around the inside edge of the pot so water reaches the mix without soaking the crown or fuzzy leaves. Bottom watering can also work: set the pot in shallow water briefly, then remove it and let it drain completely. Do not leave it standing in water, and do not wait for the entire root ball to turn bone-dry during active growth; repeated swings from saturated to very dry can stress buds and roots.
When growth slows after flowering, increase the time between waterings and watch the leaves. If the plant is still green and actively growing, it still uses water; do not impose dormancy by withholding water abruptly. Once the foliage naturally yellows and dies back, stop routine watering and let the pot become mostly dry. During dormancy, moisture is the greater threat to the tuber; if you are unsure whether the plant is resting or still growing, inspect the foliage and feel the mix before watering again.
Dutch Bulbs similarly recommends adjusting water with the plant’s stage and keeping moisture away from foliage, while Gardenia describes watering as consistent but not soggy. The useful interpretation is not “keep the soil wet”; it is keep an actively growing root zone evenly supplied while preserving air in the mix. If the top is dry but the pot still feels heavy, wait and check drainage rather than adding more water.
Feed while leaves are actively growing
Use a complete, water-soluble houseplant fertilizer at half the label strength every two to three weeks during active growth, or follow a product label that is specifically formulated for flowering houseplants. Start only after the plant is making leaves, and stop when growth slows or the tuber enters dormancy. Gardenia recommends diluted balanced feeding during the growing period; that is a safer baseline than chasing a high-phosphorus formula for more flowers.
Do not fertilize dry roots, a sick plant, or a dormant tuber. If you have been feeding often and see a crust on the mix or brown leaf edges, pause fertilizer and flush the pot with plain water only if the plant is actively growing and the container drains freely. More fertilizer cannot compensate for low light, cold drafts, waterlogged soil, or a tuber that is simply resting.
Keep the flowering plant stable
Gloxinia flowers can open in succession, so remove an individual bloom when it fades by pinching or snipping the flower stalk near its base with clean scissors. This keeps dead petals from sitting against leaves and makes it easier to see new buds. Avoid cutting healthy leaves or forcing a second flush by pinching every early flower; a plant with strong light, steady warmth, and consistent moisture is more likely to flower well than one repeatedly disturbed.
While buds are forming, keep the pot in its chosen bright spot and avoid sudden changes in watering, temperature, or orientation. If several buds drop before opening, look for a recent dry-out, persistently soggy mix, low light, or a cold draft. Correct the clearest cause first and give the plant time to respond; stacking several changes at once makes it harder to see what helped.
Manage dormancy without losing the tuber
A florist’s gloxinia can lose its leaves after flowering and return from its tuber, but the transition is not always tidy or synchronized. Some plants hold foliage for longer, and some nursery plants are grown as short-lived seasonal gifts. You can try to keep a sound tuber, but rebloom is not guaranteed because the outcome depends on the plant’s health, cultivar, and how well it completed active growth.
Normal dieback or a problem?
Normal dormancy tends to arrive gradually: flowering tapers, growth slows, then older leaves yellow and dry while the tuber remains firm. The potting mix should also be drying more slowly as the plant uses less water. Do not cut off green leaves just because flowers have finished; the remaining foliage is still returning energy to the tuber.
Rot looks different. A soft, mushy, foul-smelling tuber; a collapsing crown; or wilting while the mix stays wet points to a water or drainage problem, not a healthy rest. If the plant is in flower and only one or two lower leaves fade, that alone does not prove rot. Check the soil and the base of the stems before deciding whether to reduce water, repot, or discard damaged tissue.
Rest the plant, then restart it
As natural dieback progresses, reduce watering rather than continuing the active-season routine. When the foliage has fully dried, remove it cleanly and keep the tuber in its pot in a cool, dry, frost-free, dark place. Gardenia and Dutch Bulbs describe a reduced-water rest after leaves die back; because home conditions vary, prioritize a firm tuber and a mostly dry mix over a rigid number of weeks.
Check the pot occasionally, not daily. If the mix is very dry and the tuber is shriveling, a small amount of water around the pot edge may help; if the tuber is soft or the mix is damp, add no water. After a rest, look for a new shoot or a swelling growing point. Refresh the mix if it is compacted, set the growing point upward near the soil surface, and give only a light drink at first. Increase watering after new leaves appear, then return the pot to bright indirect light and begin diluted feeding once growth is established.
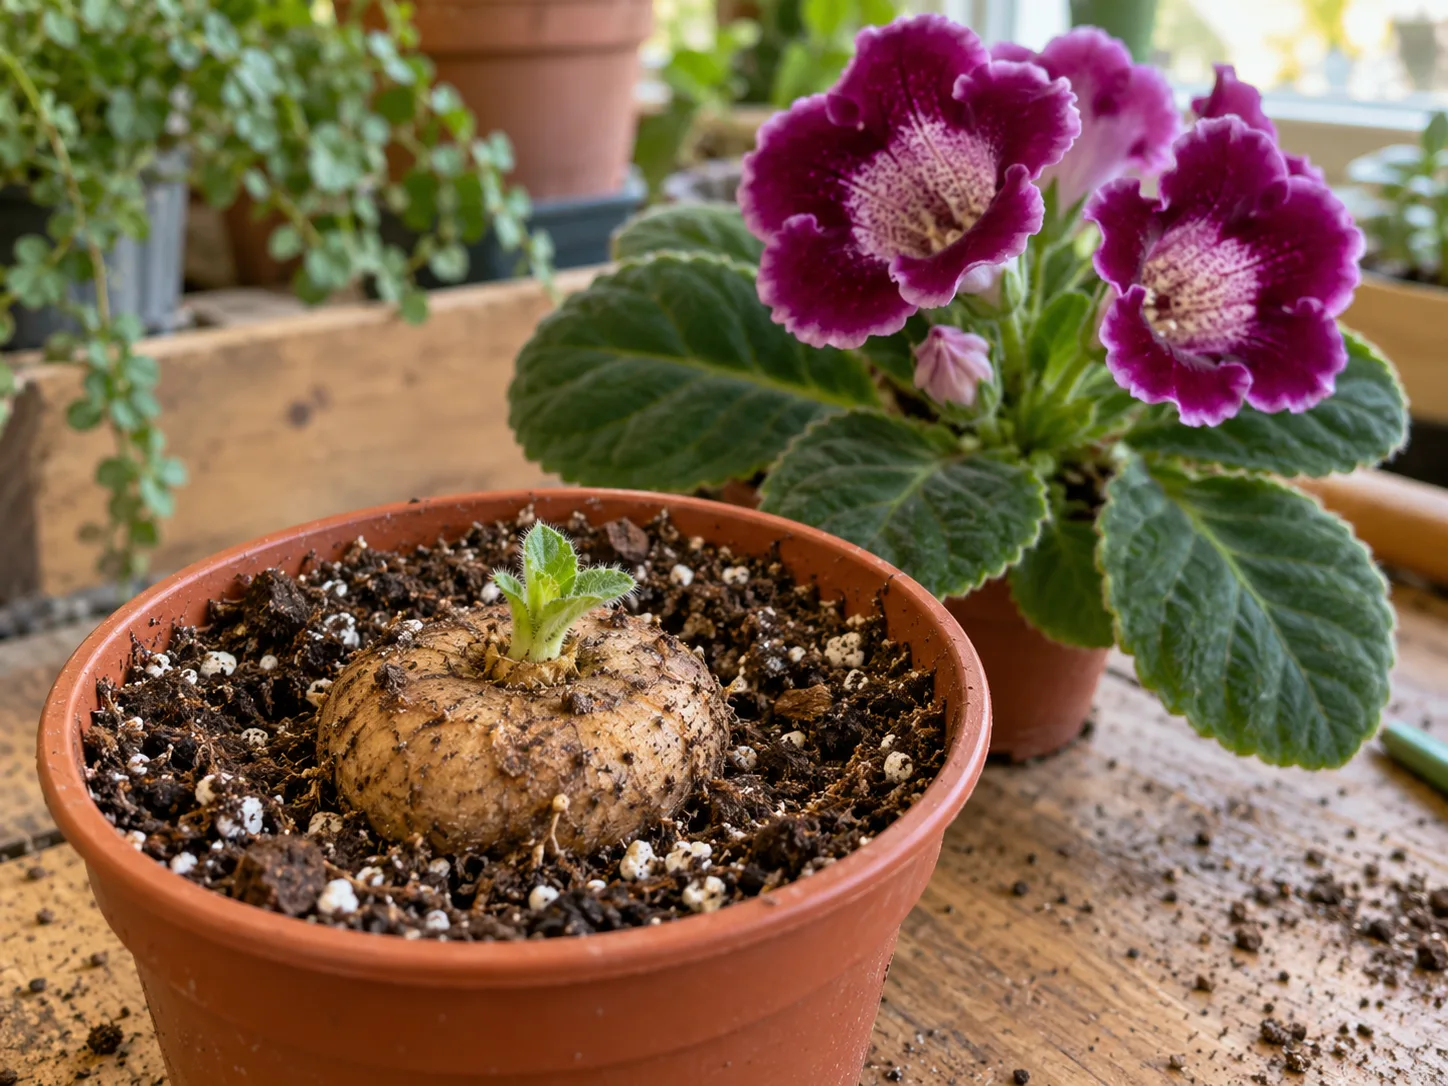
A tuber may take time to wake, and a dormant pot may look empty while it rests. If there is no firm tuber or new growth after a long rest, do not keep the soil wet in an attempt to force a sprout; inspect it once and judge by firmness. Discard a tuber that is fully soft or decayed, since keeping it in moist potting mix can spread rot to nearby plants.
Diagnose leaf and flower problems
Before treating a symptom, ask three questions: Is the plant actively growing or entering dormancy? Is the mix wet, just moist, or dry? Did the problem begin after a change in light, temperature, or watering? Those checks narrow the cause more reliably than reacting to a single yellow leaf or wilted flower.
Yellowing, brown spots, and leaf drop
A gradual fade of older leaves after flowering can be normal. Yellowing during active growth is more concerning when several leaves change at once, the soil remains wet, or the plant is stretched toward dim light. Wait to see whether the mix is drying at a reasonable pace; if it is persistently wet, empty the saucer, confirm the drainage hole is open, and move the plant to brighter indirect light without placing it in hot sun.
Brown spots or ring-like marks on velvety leaves can follow water sitting on foliage, though sun scorch and disease can look similar. Keep water at soil level, improve gentle air circulation, and remove badly damaged leaves with clean scissors. If a spot continues spreading, isolate the plant and inspect both leaf surfaces before assuming the problem is a nutrient deficiency or applying a product.
Drooping, bud drop, and root or crown rot
A drooping plant does not automatically need water. Feel the mix first: if it is dry and the pot is light, water thoroughly and let it drain; if the mix is wet and the plant is limp, adding water can worsen root damage. A healthy tuber and roots should feel firm, while dark, soft roots or a mushy crown suggest rot. If you find rot, remove the plant from wet mix, trim only clearly dead material with a clean blade, and repot a salvageable firm tuber in fresh, airy mix; discard a fully rotted tuber.
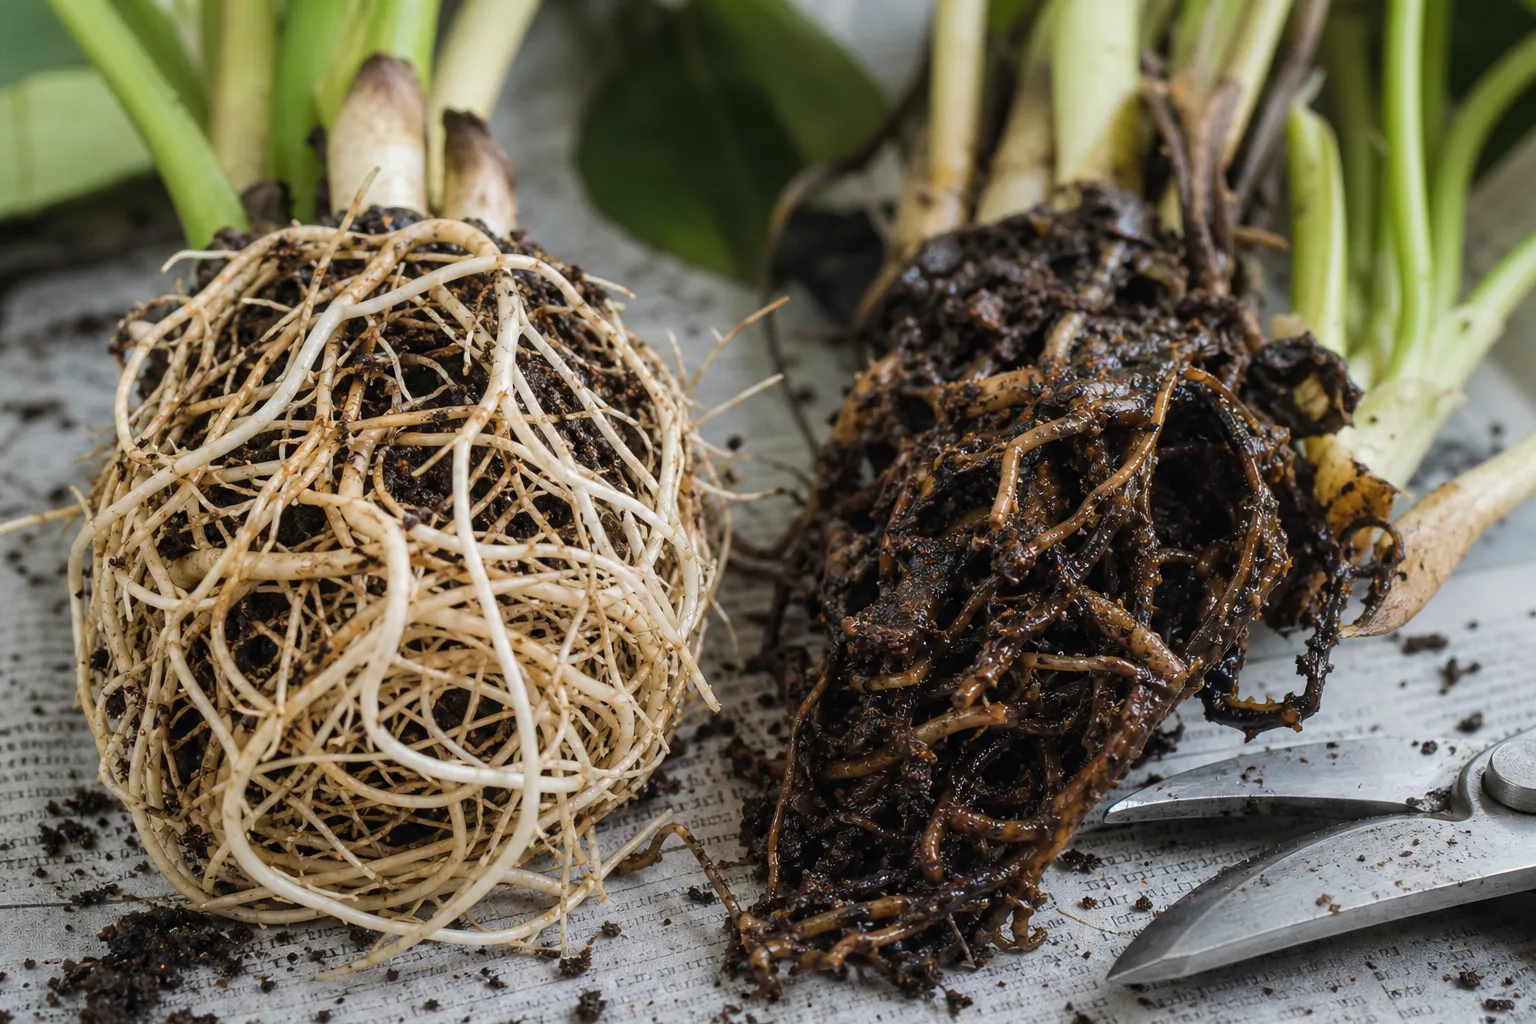
Bud drop often follows stress around the time buds are developing. Review the last few days for a dry spell, waterlogged soil, direct sun through glass, cold air, or a move to a different location. Restore stable conditions first; do not respond to dropped buds with extra fertilizer, which will not reverse environmental stress and may add salt to already-stressed roots.
Check for pests before treating
Look under leaves, around the petioles, and inside the newest growth when leaves curl or flowers distort. Aphids cluster on tender buds, mealybugs look like white cottony spots, and spider mites can leave fine stippling or webbing; tiny flying fungus gnats usually point to persistently damp mix rather than damage to the flowers. Isolate a suspected plant before pests move to neighboring houseplants.
For a small infestation, remove visible insects with a damp cotton swab or rinse the foliage carefully without leaving water trapped in the crown. Let the plant dry with good airflow and repeat inspections over the next several days, since eggs or hidden insects can be missed. Fuzzy leaves can react poorly to oils or soaps, so identify the pest first and use only a product labeled for indoor ornamental plants, following the label and testing a small area before treating the whole plant.
Propagate only when the plant is strong
Leaf cuttings are the lower-risk way to make another gloxinia without cutting into the parent tuber. Gardenia’s propagation guide describes leaf-petiole cuttings and tuber division as options; for a small florist plant, starting with one healthy leaf preserves the main plant if the cutting fails. Propagation is best attempted during active growth, not while the parent is stressed, flowering heavily, or dormant.
Leaf cuttings, tuber division, and seed
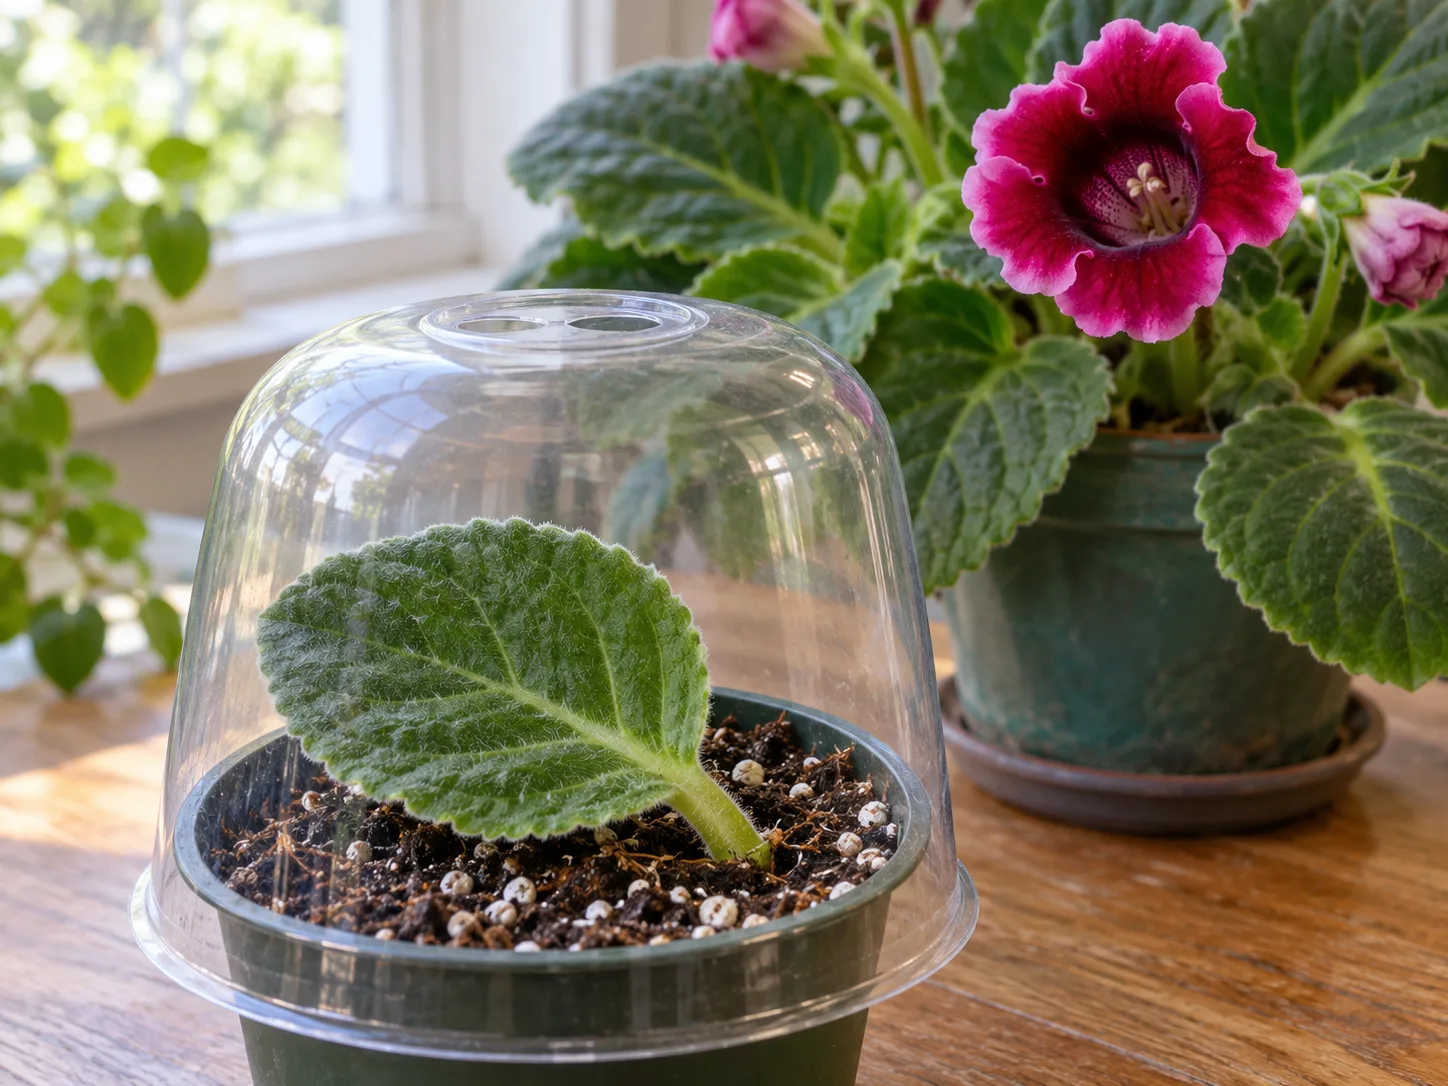
Choose a mature, healthy leaf and cut its petiole with a clean blade, leaving a short stem attached. Insert the petiole into lightly moist, airy propagation mix so the blade stays above the surface, then cover loosely with a clear dome to hold humidity without trapping water against the leaf. Place it in warm bright indirect light and vent the cover regularly; keep the mix lightly moist, not saturated. Small plantlets may appear after several weeks, but timing varies, so wait for visible roots and new growth before separating them.
Dividing the tuber can produce a larger new plant sooner, but it also creates a wound that can rot if the mix stays wet. Attempt it only on a mature, firm tuber with clearly visible growth points; use a sterilized blade, make sure each section retains a growing point, and let cut surfaces dry briefly before potting. If the tuber is small or you cannot identify the eyes, keep it whole and choose a leaf cutting instead.
Seeds are possible but slower and less predictable for a home grower. Gloxinia seeds are tiny, so scatter them on the surface of a moist seed-starting mix rather than burying them, cover the tray to retain humidity, and provide warmth and filtered light. Seedlings take time to size up and may not come true to a named hybrid, so use seed when the process interests you, not as the quickest way to replace a favorite plant.
Conclusion
Give gloxinia bright filtered light, a warm steady spot, an airy draining mix, and water based on what the soil and foliage show. Keep it stable while it flowers, remove spent blooms, and let green leaves finish naturally before treating a gradual post-bloom decline as dormancy. A firm tuber can often be rested and restarted, while a soft tuber or collapsing crown calls for a moisture and rot check instead.
The routine gets simpler once you separate active growth from rest: water an actively growing plant when the surface begins to dry, stop feeding as growth slows, keep a dormant tuber mostly dry, and increase water only after fresh shoots appear. If you want another plant, begin with a leaf cutting and leave the parent tuber intact. These cues make florist’s gloxinia less mysterious and give it a fair chance to return with healthy foliage and another round of flowers.



