How to Grow Geraniums in Containers
Learn exactly how to grow geraniums in containers, from choosing a pot and watering well to pruning, troubleshooting, and overwintering tender Pelargoniums.
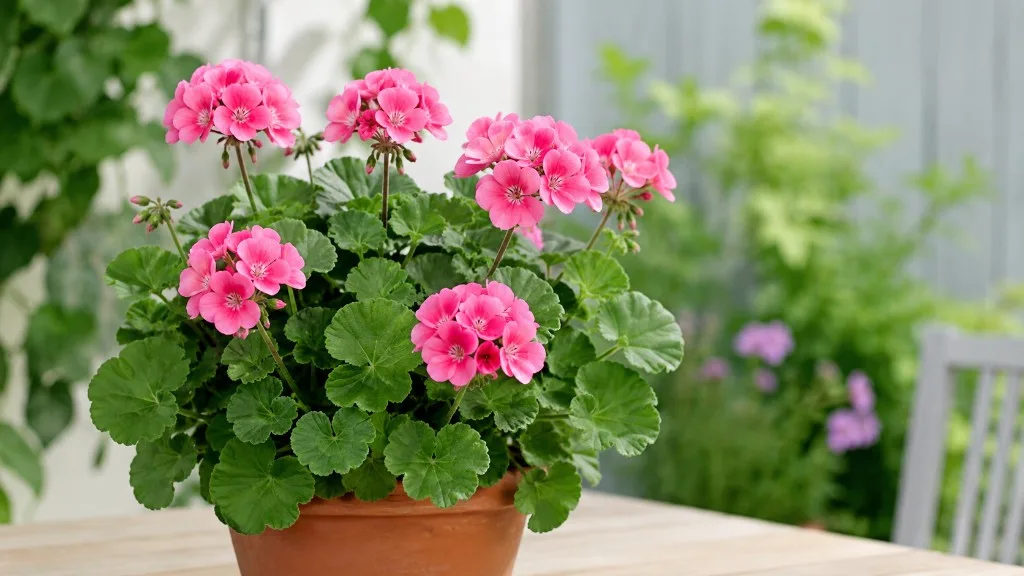
Container geraniums bloom for months when three things line up: bright light, an open-draining pot, and watering that responds to the mix instead of a fixed schedule. The plants sold as bedding geraniums are usually tender Pelargoniums, so a pot also gives you a way to move them out of hard weather or bring a favorite indoors.
Start by matching the plant’s shape to its spot, then give its roots room without surrounding them with a large volume of slow-drying soil. During the growing season, water deeply when the upper mix has begun to dry, let excess drain away, and remove fading flower stems. When autumn approaches, decide whether the plant is worth overwintering as a leafy houseplant, a dormant bare-root plant, or a few cuttings.
Start With the Right Kind of “Geranium”
Most familiar red, pink, white, and salmon plants sold in spring as garden or bedding geraniums belong to the genus Pelargonium. They are different from hardy Geranium perennials, often called cranesbills, which can survive winter outdoors in many climates. NC State Extension describes the commonly cultivated Pelargoniums as zonal, ivy-leaved, and scented types, with different habits and uses; check a plant label if you need to know which one you have.
This distinction matters because advice for a hardy garden perennial may not fit the tender plant in a patio pot. Common Pelargoniums are often grown as warm-season annuals in places with freezing winters, though they can be carried indoors or propagated for another season. For general container care, think of them as sun-loving flowering plants that need air around their roots and protection from frost, rather than as perennials that can simply stay outside all year.
Choose a Geranium Form for Your Container
Upright zonal geraniums make compact focal plants for a pot, window box, or mixed display. Their rounded leaves often have a darker band, and their flower clusters rise above the foliage. A single plant can fill a smaller container; a larger pot can hold a group if there is space for each crown and enough airflow between leaves.
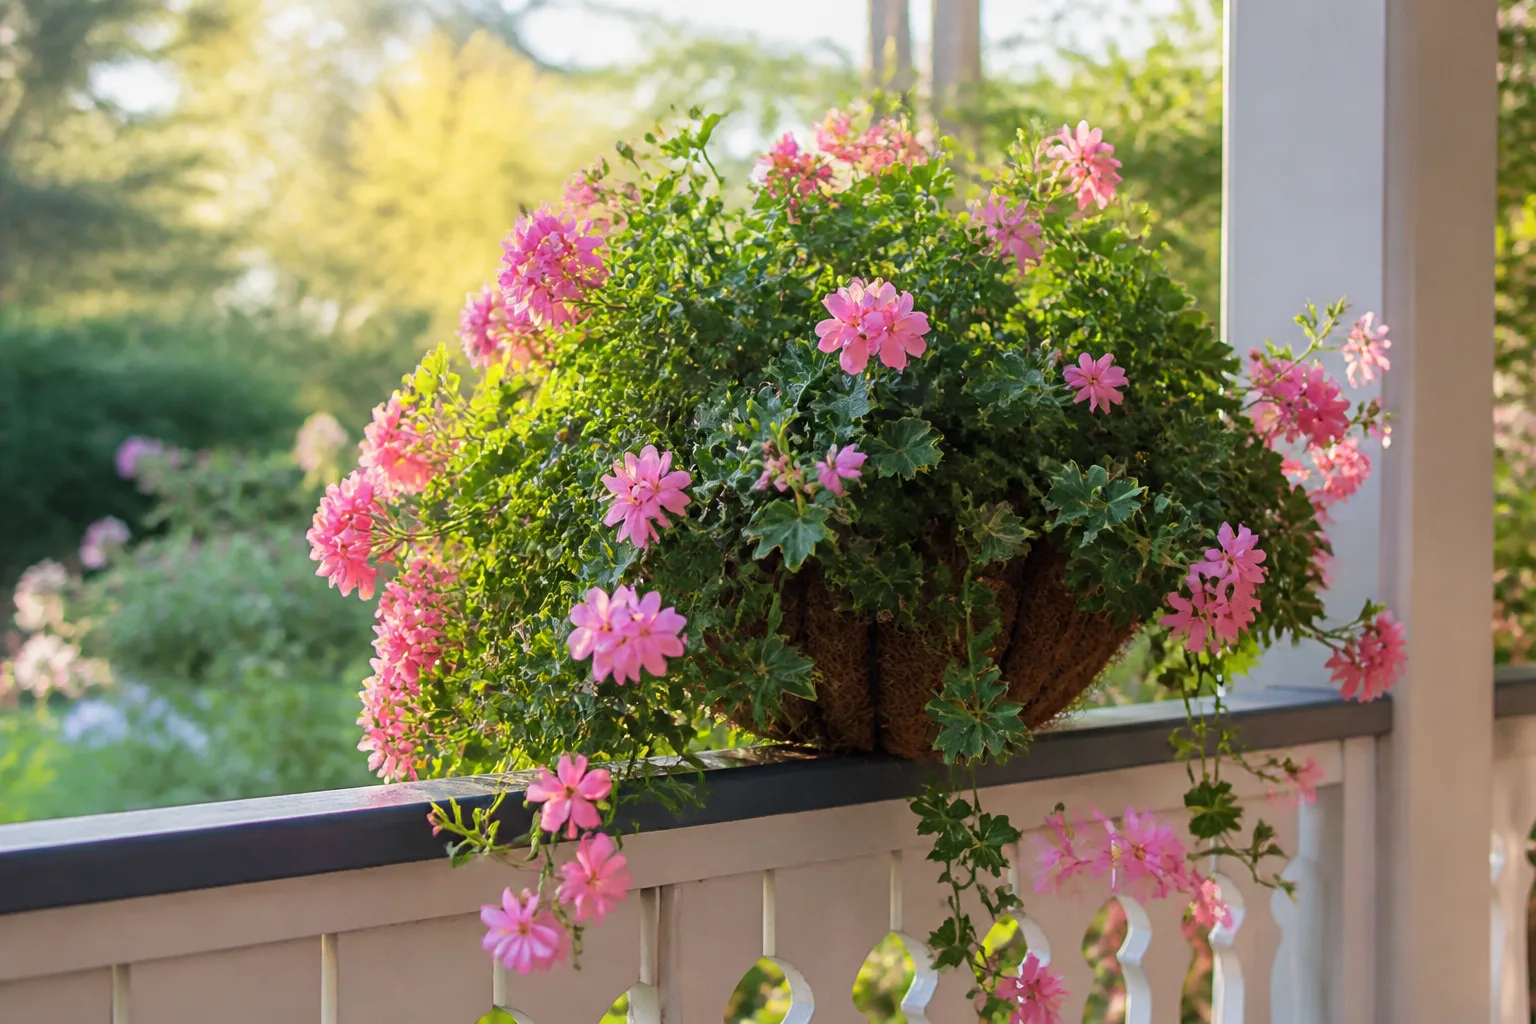
Ivy-leaved types have flexible stems and glossy, trailing foliage, so they suit hanging baskets, railing planters, and the edges of a tall pot. Their cascading shape softens a balcony or porch without blocking the center of a planter. A trailing variety is also easier to appreciate when the container sits above eye level, where flowers and leaves can hang freely instead of being crowded by upright neighbors.
Scented-leaf Pelargoniums are grown for aromatic foliage as much as for flowers. They can be useful beside a path or doorway where brushing a leaf releases its scent, though their blooms may be less showy than those of common zonal types. Gardeners’ World’s container plant guide lists scented-leaf Pelargoniums among suitable pot plants and notes that tender kinds need a frost-free place over winter. Choose the form for the view and use you want, not only for flower color.
Pick a Pot That Drains and Fits the Root Ball
Every container needs drainage holes. When water cannot escape, the lower mix stays saturated and roots lose access to air; repeated saturation can cause root decline even if the surface looks dry. Put the pot on feet or an open stand if its base sits flat on a patio, and clear leaves or debris from the holes whenever you repot.
Choose a pot only moderately wider than the current root ball. A much larger container holds more unused mix, which can remain wet long after the roots have taken up water. University of Georgia Extension gives examples of stepping up a small nursery plant by a few inches rather than moving a 4-inch plant directly into a very large pot. That is a useful principle even when your container dimensions differ: leave room for growth, but do not overwhelm a small root system.
Material changes how quickly the pot dries. Unglazed terracotta loses moisture through its walls and may need more frequent checks in hot or windy weather; glazed ceramic and plastic hold moisture longer. A heavy pot is less likely to tip when an upright plant grows tall, while a light hanging basket is easier to lift and move. If you use a saucer to protect a deck, empty it after watering so the container does not sit in standing water.
Geraniums do not need to be deliberately crowded or root-bound to flower. Repot when roots circle densely around the root ball, push through drainage holes, or the mix dries so rapidly that the plant wilts soon after watering. Move it into the next practical pot size, loosen only the outer roots if they are tightly matted, and water the new mix through. A plant that has simply grown large may need pruning, not an oversized pot.
Use a Fresh, Airy Potting Mix
Use a fresh commercial container mix rather than digging garden soil into the pot. Garden soil is dense for a container and can compact, drain unevenly, or stay waterlogged. University of Georgia Extension notes that prepared artificial mixes are convenient for container geraniums and that drainage and aeration are essential. Look for a mix made for containers, not a product labeled only as topsoil or garden-bed soil.
Before planting, moisten a very dry mix in a tub so it accepts water evenly. Set the plant at the same depth it was growing in its nursery pot, with the top of the root ball level with the surrounding mix; burying the stem base can keep it too wet. Firm gently around the roots to remove large air pockets without tamping the whole container into a hard mass, then water until excess flows from the holes.
Skip a gravel layer at the bottom. It does not create better drainage through the potting mix and takes up root space; drainage comes from a suitable mix and unobstructed holes. If a hole is large enough for mix to escape, cover it loosely with mesh or a small piece of a broken pot, leaving a path for water to flow.
Give Geraniums Strong Light, With a Heat Adjustment
Start with a spot that receives at least six hours of direct sun for a common zonal geranium. NC State Extension lists full sun, defined as six or more hours, for Pelargonium × hortorum. With adequate light, plants generally stay more compact and bloom better; in a dim location, stems may stretch toward the window and produce fewer flowers.
Light and heat are related but not identical. A bright, hot wall or dark pot can heat the root zone and dry it quickly, while prolonged high temperatures can slow flowering even if the plant receives plenty of sun. In a hot-summer climate, morning sun with some afternoon shade can reduce stress. University of Georgia Extension specifically notes that zonal and ivy types tolerate full sun when moisture is adequate but can benefit from light midsummer shade.
Place indoor and outdoor pots where they can thrive
Outdoors, place the pot where rain can reach it if that suits your watering plan, but keep it out of a roof drip line that repeatedly floods the mix. A sheltered spot near a wall can reduce wind damage and help a hanging basket dry less quickly; it can also trap heat, so check the soil more often. Rotate a pot a quarter-turn every week or two if one side leans toward the strongest light.
Indoors, give a growing Pelargonium the brightest window you have, ideally with several hours of direct sun. A plant kept in a warm room with little light is more likely to become lanky than one overwintered in a bright, cooler place. If winter light is weak, trim back stretched growth and consider using an appropriate grow light rather than compensating with extra fertilizer.
Water by Checking the Mix, Not the Calendar
Water when the upper layer of mix has begun to dry and the pot feels lighter, then water slowly and thoroughly until some runs from the drainage holes. The exact interval changes with weather, pot size, material, root growth, and whether the plant is in sun or shade. A small terracotta pot in a breezy, sunny spot may need attention much sooner than a large glazed pot in cooler weather, so “twice a week” is only a guess.
Check the mix with a finger near the edge of the root ball, not only at the surface. If the top inch or so feels dry but the lower mix is still slightly moist, you can wait briefly; if it is dry several inches down and the plant is actively growing, water. For a lightweight hanging basket, lifting it is an easy way to learn the difference between a freshly watered pot and one that is ready for another drink.
When watering, wet the root ball rather than sprinkling only the leaves. Apply water in two passes if a dry mix repels the first splash: give it a light pass, wait a few minutes, then water again until it drains. Empty the saucer afterward. University of Georgia Extension recommends watering container geraniums as the soil becomes dry to the touch and allowing water to drain through, while warning that water left in a saucer can keep the mix waterlogged.
Do not let a growing plant wilt repeatedly. A dry root ball can pull away from the pot wall and become hard to rewet, while cycles of severe drought and flooding stress the plant. As days shorten or the plant slows in cooler weather, it will use less water; extend the interval rather than continuing a summer routine. A dormant, leafless overwintered plant needs far less moisture than one still growing in a sunny window.
Read yellowing and wilting before adding water
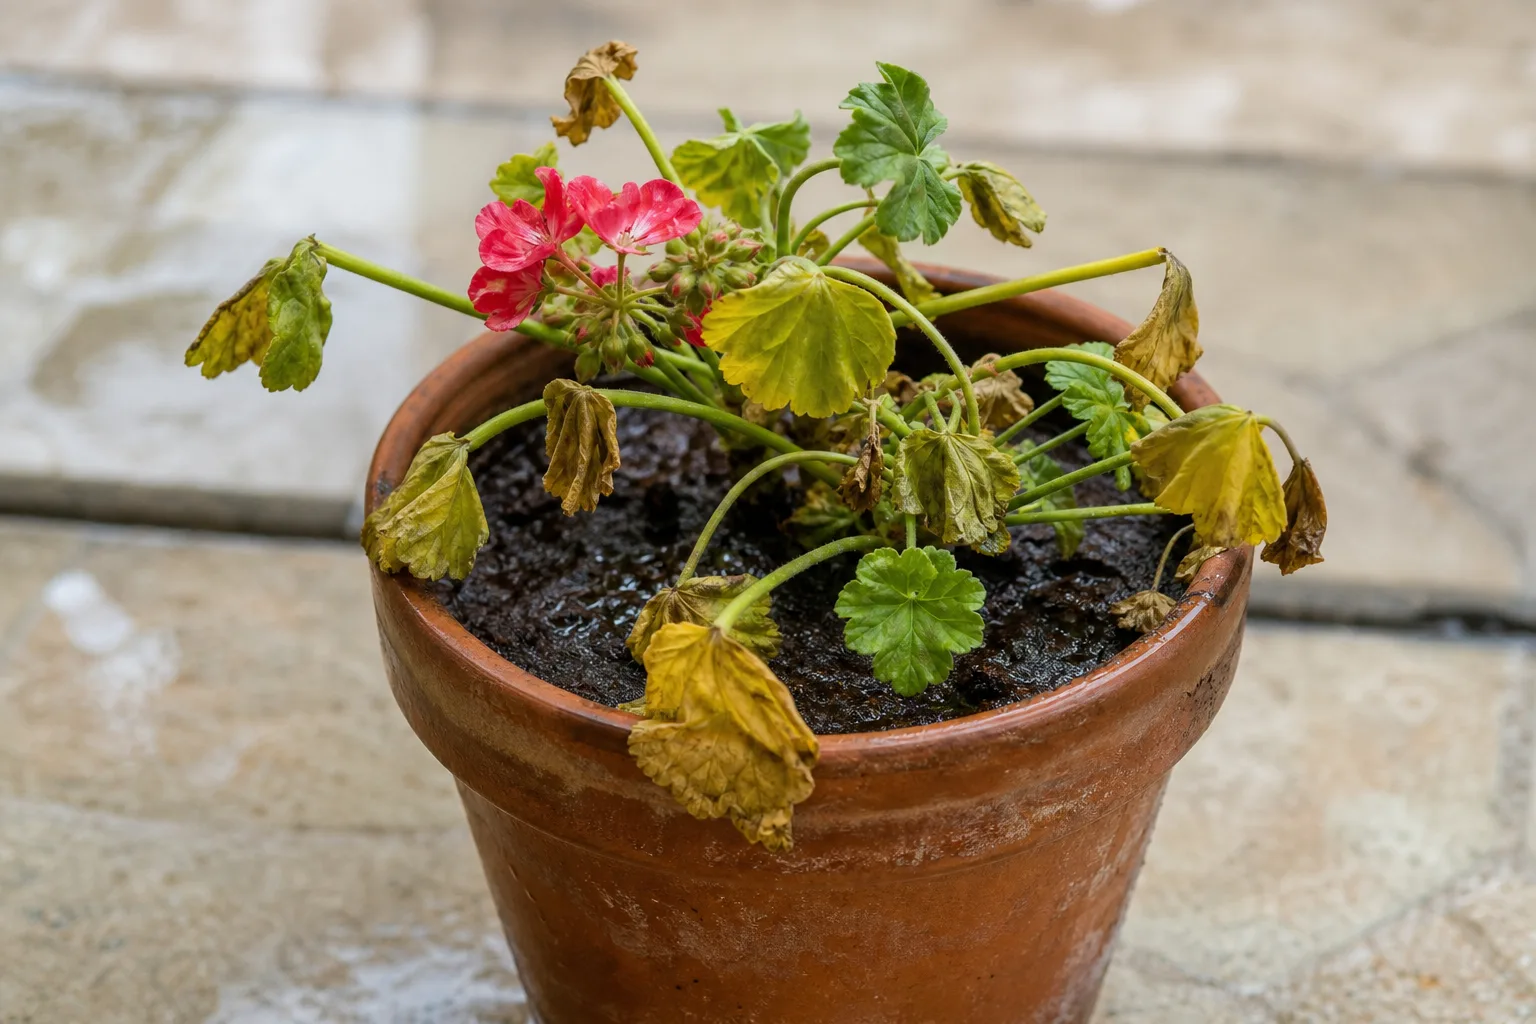
Wilting is not proof that a plant needs more water. If the mix is bone dry and the pot is light, water thoroughly and watch for recovery. If the mix is wet, the pot feels heavy, or yellow leaves keep appearing, stop watering long enough for the root zone to begin drying and check whether holes are blocked or the plant sits in a full saucer.
Persistent wetness can deprive roots of oxygen, so a plant may look limp even though it has plenty of water around it. Check the root ball if decline continues: healthy roots are generally firm, while mushy, dark roots and a sour smell point to rot. Remove obviously damaged roots with clean snips, repot into fresh airy mix, and use a container with working drainage. If the crown or stem base is badly rotted, a healthy cutting may be a better rescue than repeatedly treating the same failing root system.
Feed for Flowers Without Overdoing It
Container plants have a limited supply of nutrients, and regular watering gradually carries some nutrients out through the drainage holes. Start by checking whether the new potting mix already contains fertilizer. If it does, follow the label’s expected feeding window before adding anything else; combining a fresh charge of slow-release fertilizer with frequent liquid feeding can overdo it.
During active growth, choose one simple feeding approach. A slow-release fertilizer mixed in at planting can reduce how often you need to feed, while a water-soluble product gives more control when used according to its label. University of Georgia Extension discusses both methods for container geraniums and cautions that fertilizer should be watered in to limit soluble-salt injury. The Old Farmer’s Almanac Garden Planner also recommends monthly feeding for established container plants, illustrating why product labels and the plant’s growth rate matter more than a universal weekly dose.
Use the rate on the package for containers rather than estimating by eye. Apply liquid fertilizer to already damp mix or as part of a normal watering, and avoid splashing concentrate on leaves or stems. If the leaf edges brown and a pale crust forms at the surface, pause feeding and flush the container with clean water so salts can drain away. Then resume at the labeled interval only after the plant is growing well.
More fertilizer does not necessarily mean more flowers. Excess nitrogen can push soft leafy growth, especially when light is low, without fixing a cramped root ball, chronic wetness, or inadequate sun. If flowering slows, first look at light, temperature, dead flower stems, and root-zone moisture before increasing the dose.
Deadhead Flowers and Pinch Leggy Growth
Remove each faded flower cluster along with its stem, cutting or snapping it back to where that stalk meets the main stem. Leaving spent blooms in place can look untidy and lets the plant devote energy to developing seed rather than new flower clusters. The Old Farmer’s Almanac Garden Planner notes that removing old flower clusters supports continuing bloom; make a quick check whenever you water.
Pinch a young or stretched stem just above a leaf joint to encourage branching below the cut. This helps a newly planted geranium become fuller, and it can tidy a plant that has leaned or grown leggy indoors. Use clean fingertips or snips, and avoid removing so much foliage that the plant has little leaf area left to support new growth.
For a plant that has become long and sparse by late summer, shorten the longest stems in stages rather than shearing every branch at once. Cut just above a healthy node and keep the plant in good light as it regrows. If you want to overwinter the plant as a leafy specimen, do the shaping before bringing it indoors and leave enough healthy foliage to recover; a dormant storage method has different pruning needs.
Handle Summer Heat and a Midseason Slowdown
Geranium flowering can ease during a hot spell, particularly when nights stay warm. That pause does not automatically mean the plant is dying or needs a heavy dose of fertilizer. University of Georgia Extension reports that flowering and growth slow in hot weather and that light shade can help plants recover; give the root ball steady moisture without keeping it saturated, and remove faded flowers and damaged leaves.
Check the pot itself during a heat wave. Dark containers against masonry can become hot, while small pots lose moisture quickly. Move a container to morning sun and afternoon shade for a while if leaves scorch or the plant wilts despite a thorough watering. Do not make several changes at once: adjust placement, check moisture, and watch the next few days of growth before pruning heavily or changing fertilizer.
Once temperatures moderate, return the pot to brighter light gradually. If the plant remains sparse after the heat passes, inspect leaf undersides for mites and review drainage, pot size, and root health. The goal is to solve the limiting condition, not to force flowers with extra feeding.
Check for Pests Before Bringing Pots Inside
Inspect leaves, stem joints, and the undersides of foliage every week or two, and always before moving an outdoor pot indoors. Spider mites are particularly easy to overlook: their feeding can leave leaves mottled or pale, while a heavier infestation may show fine webbing. University of Georgia Extension’s geranium guide describes mites as more common in warm, dry weather and notes that they feed on the undersides of leaves.
If you find insects or webbing, isolate the plant from other houseplants and confirm what you are seeing before choosing a treatment. Rinse foliage, especially the undersides, and remove badly damaged leaves. For a persistent infestation, consult a local extension service or use only a product labeled for the identified pest and plant, following every label direction. A routine preventive pesticide spray is not a substitute for inspection and can expose people, pets, and beneficial insects unnecessarily.
Check the pot rim, saucer, and drainage holes for hitchhikers too. Remove fallen flowers and yellow leaves before they enter the house, and quarantine a newly moved plant for a short period if possible. If a plant is badly infested or diseased, it may be more sensible to compost it and save a clean cutting from healthy growth than to bring the problem inside.
NC State Extension lists common zonal Pelargoniums as problematic if eaten by dogs, cats, and horses and notes that contact can irritate sensitive skin. Keep pots where pets are unlikely to chew them, and wash hands after handling sap if your skin is reactive. For an animal that has eaten the plant, contact a veterinarian for case-specific advice.
Choose an Overwintering Method That Fits Your Space
Common container geraniums are tender and should not be left out where frost can damage them. Decide before the first frost whether to keep the whole plant, preserve a few cuttings, or let it go and buy a new one next season. The right choice depends on how much indoor light and space you have, how valuable the cultivar is, and whether you can monitor a dormant plant.
Choose only plants that are healthy enough to carry forward. Remove dead leaves and check for pests before moving them; overwintering a weak, infected plant takes space without guaranteeing a spring recovery. Wisconsin Extension describes three practical options: growing the plant indoors, storing it dormant and bare-root, or taking cuttings. Keeping a backup cutting is sensible if a particular plant is a favorite.
Keep the whole plant growing indoors
This is the most straightforward approach if you have a bright window and room for the pot. Before frost, inspect and clean the plant, trim it back by about one-third to one-half if it is too large, and place it in a sunny, relatively cool location away from heating vents. Wisconsin Extension recommends a bright spot and cooler indoor temperatures around 60 to 65°F; water when the mix feels dry rather than keeping it constantly moist.
Growth often slows in winter, and lower light can make new stems stretch. Pinch or prune those stems above a leaf node, rotate the pot toward the window, and avoid feeding heavily while the plant is barely growing. If the brightest window is dim, a grow light can help. Do not keep the root ball wet just because the pot is indoors: lower winter light and cooler temperatures slow water use.
Store the plant dormant and bare-root
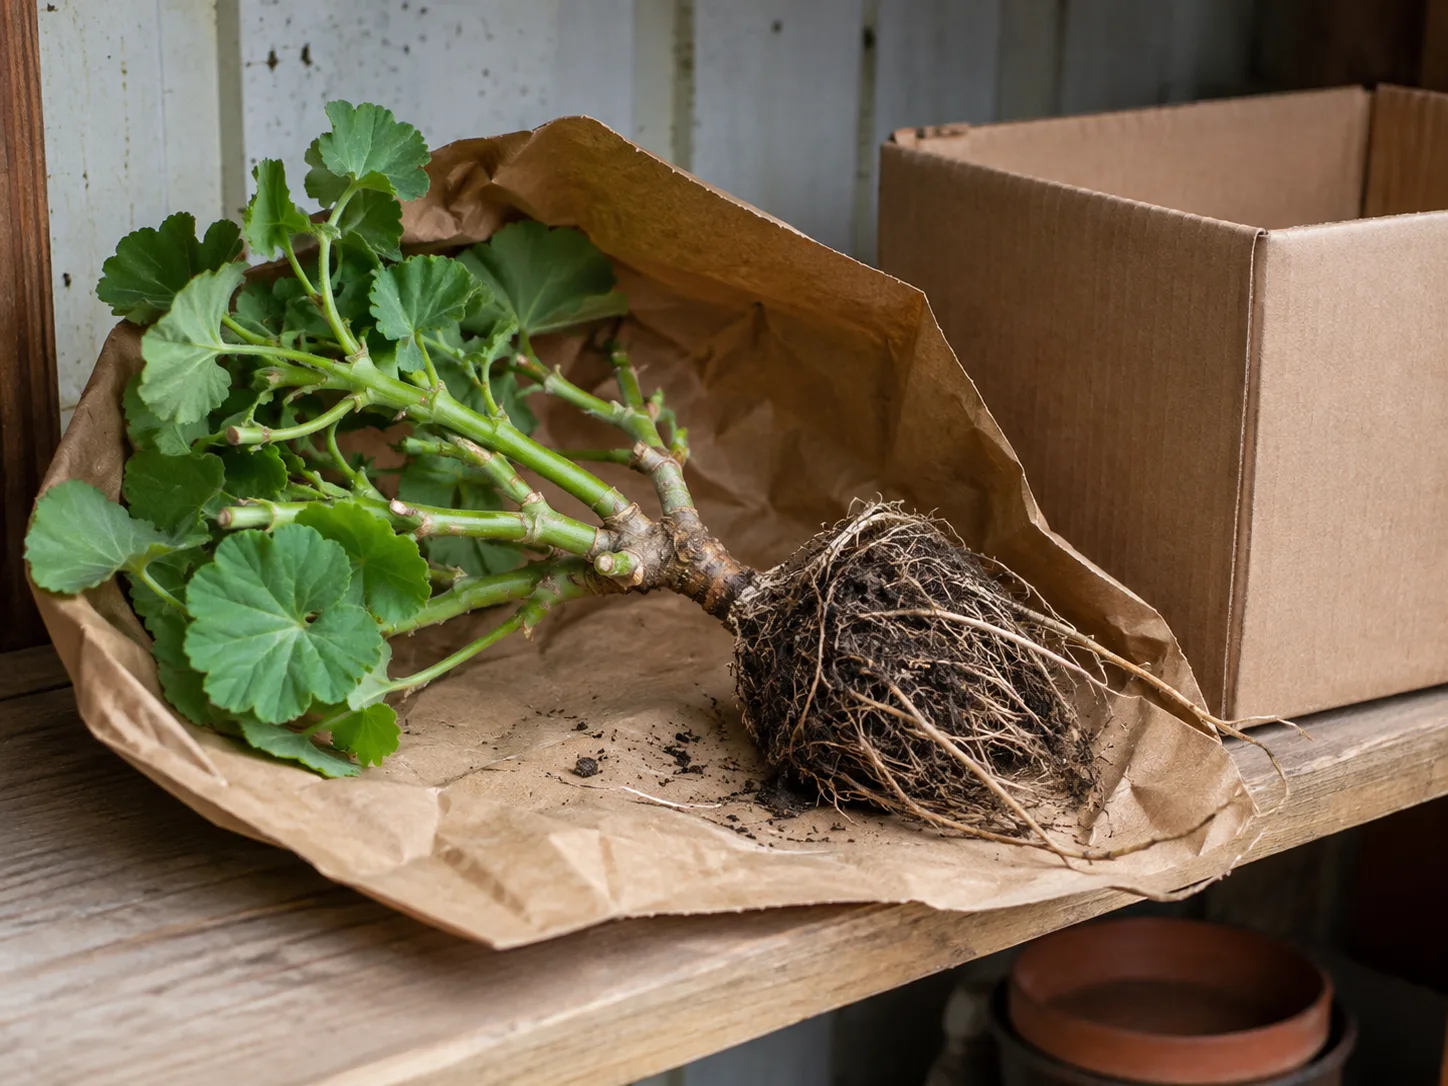
Bare-root storage can save floor space, but it is less forgiving than keeping a potted plant in a bright room. Before a hard freeze, lift the plant, gently shake away the soil, and store it in a cool, dry, frost-free place with air circulation. Wisconsin Extension describes a range around 45 to 55°F for dormant storage and notes that leaves may dry and fall; that is expected, not a sign that the method has failed.
Inspect stored plants periodically for shriveling, mold, or rot. Some gardeners soak roots briefly if they become excessively dry, then let them drain and return the plant to storage; avoid leaving the roots wet in an enclosed bag. In early spring, remove dead material, cut back to firm living growth, pot the plant into fresh mix, and water it thoroughly. Bare-root plants can take time to restart, so keep them in bright light and do not assume a slow first flush means certain failure.
Take cuttings when space is limited
Cuttings use less room than several mature pots and can preserve a plant you particularly like. With clean snips, take a healthy 3- to 4-inch tip cutting, remove the leaves from its lower portion, and insert it into a moist, free-draining rooting medium. Keep it warm and brightly lit out of harsh direct sun while roots form, and keep the medium lightly moist rather than waterlogged.
When the cutting resists a gentle tug or shows new growth, pot it up in container mix and grow it in the brightest available window. Wisconsin Extension estimates that cuttings may root in about six weeks under suitable conditions, though timing varies with warmth, light, and the plant. Take more than one cutting if the cultivar is important: not every cutting roots, and the parent plant may not survive storage.
Move Geraniums Back Outdoors Gradually
Return overwintered plants outside only after frost danger has passed. A plant that spent months behind glass has not experienced outdoor sun, wind, or cool nights, even if it is healthy indoors. Set it outside in a sheltered, shaded spot for a short period, then increase its outdoor time and light over about a week; bring it back in if temperatures fall or strong weather is forecast.
Before leaving the pot outdoors full time, inspect new growth and check that roots are not tightly circling the container. Refresh the top layer of mix or repot one size up if the root ball is crowded and the pot dries too quickly. Resume normal watering as the plant begins active growth, and wait to feed until you know whether the new mix contains fertilizer.
If the leaves pale or scorch after the move, step back to a less intense spot and build sun exposure more gradually. Once acclimated, place the container in the brighter location that best matches its type and local heat. This spring reset helps an overwintered Pelargonium transition from indoor survival back to a full season of container growth.
Conclusion
Growing geraniums in containers is mostly a matter of matching the plant’s form to the pot, then keeping the root zone airy and evenly supplied with water. Choose a pot with open drainage, use container mix, give common zonal types several hours of sun, and adjust placement when summer heat slows growth. Deadhead flowers, feed according to the mix and product label, and investigate yellow or wilted leaves before watering again.
When cold weather approaches, move tender Pelargoniums in before frost and choose the winter method you can support: a bright indoor spot for a whole plant, cool storage for a dormant plant, or a few cuttings when space is tight. That simple sequence—from planting and checking the mix to deciding what to carry through winter—keeps the container manageable and gives a healthy geranium its best chance to bloom again.