How to Blow Out Sprinklers for Winter Safely
Learn how to blow out sprinklers for winter with safe pressure limits, compressor sizing, zone order, backflow-drain steps, and mistakes to avoid.
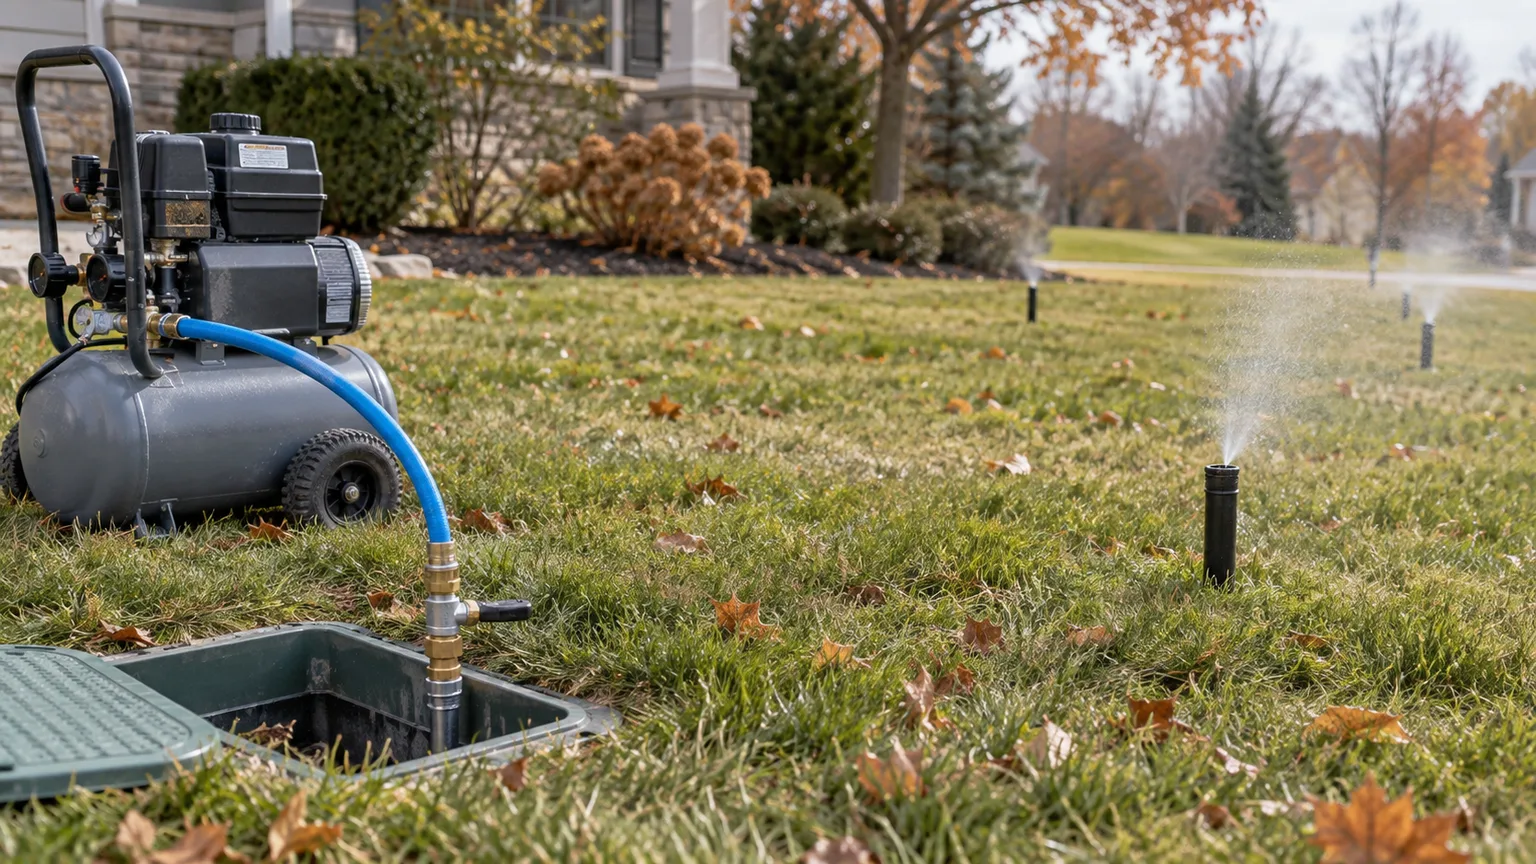
If your lawn irrigation system will see freezing weather, the goal is simple: remove water from every component that cannot safely expand when ice forms. The difficult part is that an irrigation system is not one open pipe. It is a network of zones, valves, low spots, sprinkler bodies, backflow equipment, and sometimes a pump, so a rushed compressor connection can protect one section while damaging another.
This guide walks through a safe sprinkler blowout for a typical residential system, explains how to choose pressure and compressor capacity, and shows when to stop and hire an irrigation professional. If you cannot identify the pipe material, the blowout fitting, or the type of backflow preventer, do not guess with compressed air.
Why a sprinkler blowout protects more than the pipes
Water expands when it freezes. Colorado State University Extension explains that water increases in volume by about one-eleventh as it turns to ice, enough to split sprinkler cases, crack valves, rupture fittings, and damage pumps when the water is trapped. Underground pipe can survive ordinary temperature changes, but a closed pocket of ice has nowhere to relieve its force.
A blowout also protects the small parts that are easy to overlook: solenoid valves, check valves, swing joints, rotors, pop-up bodies, filters, pump casings, and above-ground backflow assemblies. You are not trying to make the lawn “dry”; you are removing standing water from the irrigation hardware before the freeze reaches it.
Decide whether your system is a safe DIY candidate
Compressed air is powerful enough to eject debris at high speed, split a fitting, or turn a minor connection error into a dangerous release. The Portland Water Bureau warns that blowing out sprinkler lines with compressed air can cause severe injury and recommends qualified, licensed service for this method. Treat that as a sensible boundary, not as a challenge to improvise.
DIY is most reasonable when you have a clearly labeled irrigation shutoff, a purpose-built blowout port downstream of the backflow device, a regulator on the compressor, and a simple zone layout you understand. Hire a pro if the system has an unfamiliar pump, a buried or inaccessible connection, an RP or PVB backflow assembly you have never drained, no pressure gauge, damaged fittings, or a mix of irrigation and domestic plumbing you cannot confidently isolate.
Identify the pipe, valves, and backflow device first
Find the irrigation isolation valve before connecting anything. It may be near the water meter, in a basement or crawlspace, inside a valve box, or beside a stop-and-waste fitting. Downstream, look for the backflow preventer and a threaded blowout fitting; that fitting is usually a tee or capped port intended for connecting air without sending it through the backflow body.
Look at the pipe entering the valve box or visible near the service point. Rigid white PVC and flexible black polyethylene do not have the same pressure limit. Check the irrigation plan, pipe markings, or installer documentation if you are unsure. Also identify whether the backflow assembly is an atmospheric vacuum breaker (AVB), pressure vacuum breaker (PVB), or reduced-pressure (RP) device. The method for draining those assemblies is not interchangeable.
Gather the right equipment and compressor
Have the following ready before the water is off:
- A compressor with an adjustable regulator and a readable outlet gauge
- A rated air hose, coupler, and irrigation blowout adapter that fits the system’s port
- Eye protection; hearing protection is sensible around a running compressor
- A bucket or drain pan for the hose bib or low-point drain
- A sprinkler valve key, flat-head screwdriver, and the correct wrench for drain plugs
- A phone or notebook for recording zone order and final valve positions
- A helper if the controller and the farthest sprinkler zones cannot be seen from one place
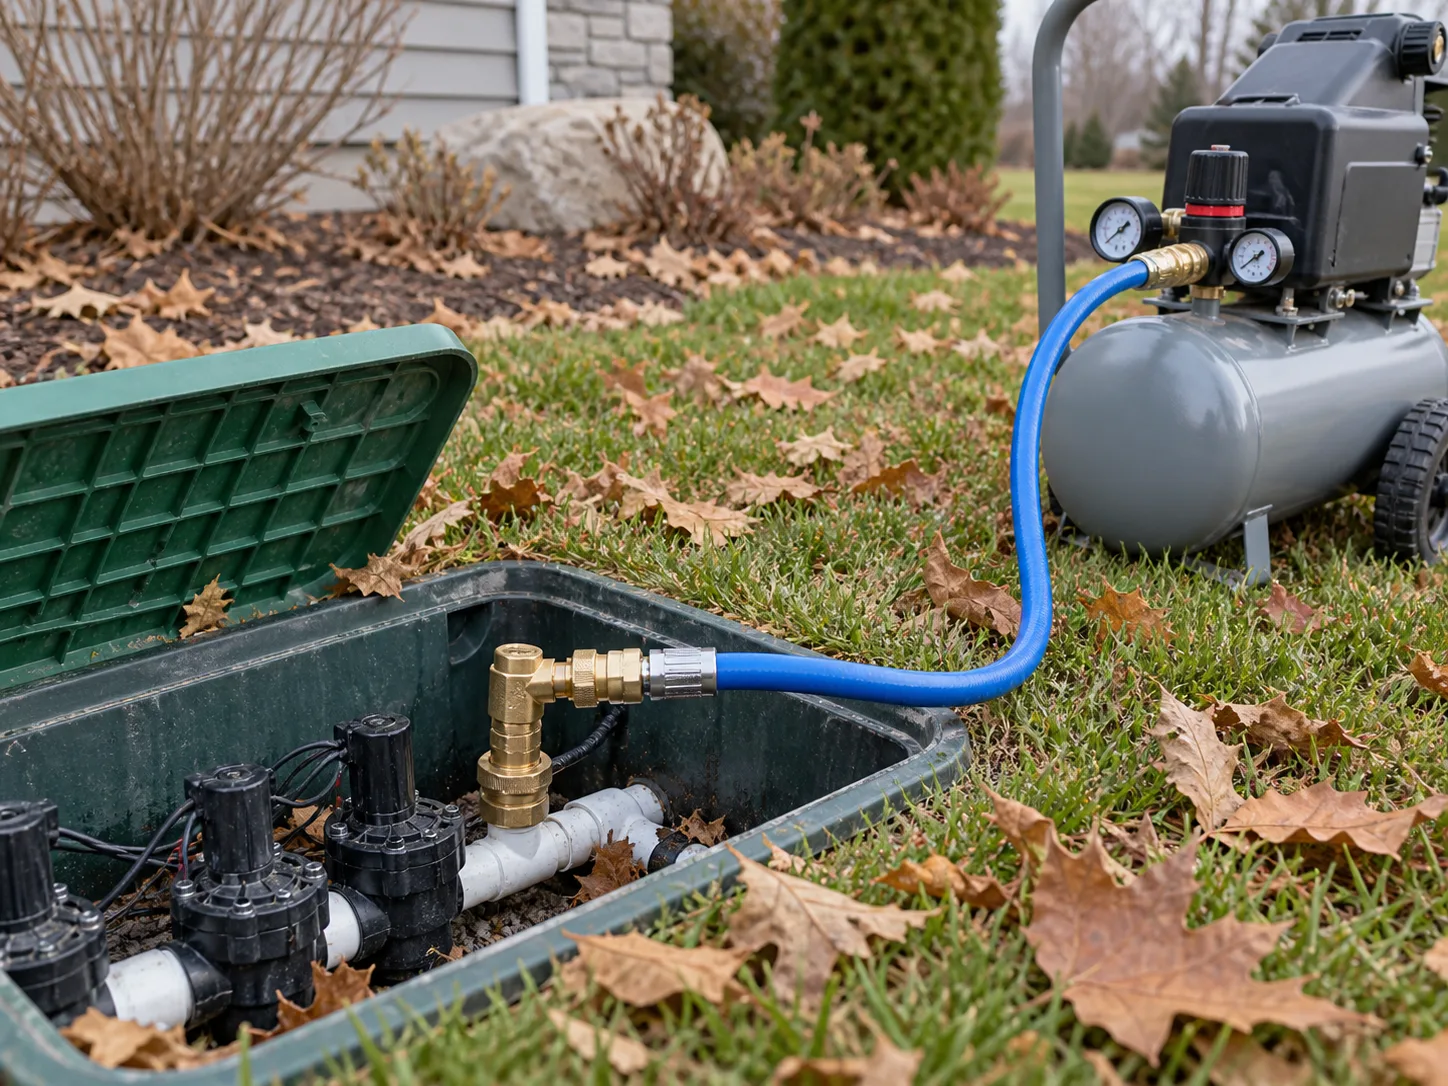
Do not rely on the compressor’s tank size printed on the label. A practical DIY walkthrough from Making Manzanita shows the adapter-and-hose setup clearly, but its small-compressor example is not a universal fit. A pancake compressor may build impressive pressure while delivering too little continuous air volume to move water through a long zone, leaving a thin layer of water behind while the machine cycles constantly.
Size air volume from zone flow, not tank size
Colorado State University Extension gives a useful sizing rule: estimate the gallons per minute (GPM) flowing through the largest zone, then divide that number by 7.5 to estimate the cubic feet per minute (CFM) needed at the working pressure. If a zone uses 15 GPM, the starting estimate is 2 CFM; a 30-GPM zone suggests about 4 CFM. This is a planning formula, not permission to exceed a pipe or nozzle rating.
Find each zone’s GPM on the irrigation plan or add the flow ratings printed for its sprinkler nozzles. If the plan is missing, a qualified irrigation technician can measure or estimate the flow. Choose a compressor that can deliver the needed CFM at the pressure you will actually use, not just the free-air number on a sales sticker.
Air volume matters because air needs to keep a steady column moving through the zone. With insufficient volume, air can slide over the top of a low pocket of water; the spray looks finished at one head while water settles elsewhere. The right compressor keeps the heads extended and the discharge moving without forcing you to raise pressure.
Set pressure by pipe material and component rating
Use the lowest regulated pressure that clears the zone. As a conservative ceiling, Colorado State University Extension lists 80 PSI maximum for rigid PVC and 50 PSI maximum for polyethylene irrigation pipe. If a sprinkler head, nozzle, filter, valve, or manufacturer manual has a lower rating, that lower rating wins.
| System component or pipe | Practical pressure ceiling | What to do |
|---|---|---|
| Rigid PVC laterals | 80 PSI maximum | Start lower, then increase slowly only as needed. |
| Flexible polyethylene laterals | 50 PSI maximum | Keep the regulator at or below 50 PSI; do not use a PVC setting. |
| Mixed or unknown materials | Use the lowest known rating | Stop and verify the system before applying air. |
| Backflow preventer body | Do not assume it is a blowout path | Isolate and drain according to the device instructions or use a pro. |
PSI is not the same as CFM. Pressure supplies force; CFM supplies the volume needed to keep water moving. More pressure does not compensate safely for an undersized compressor, and opening several zones at once can overload the compressor and raise friction heat in the pipe.
Choose the winterization date by freeze risk
Finish the job before the first hard freeze expected for your property, not on a universal date printed on a calendar. A forecast that briefly touches 32°F may not have the same consequence as a sustained freeze, but an exposed backflow assembly or above-ground pump can be damaged sooner than deep underground laterals.
Plan a dry work window early enough that a delayed rental, stuck valve, or missing adapter does not push the job into the freeze. In climates where irrigation does not encounter prolonged freezing, a complete blowout may be unnecessary; local Extension guidance, the system installer, and the equipment manufacturer can help you decide whether draining exposed components is sufficient. If you do not know your site’s freeze history, assume exposed water-holding parts need protection.
Shut off water and pause the controller
Turn off the irrigation isolation valve so the compressor cannot push air against an active water supply. Open the downstream hose bib or drain port into a bucket and allow the mainline to depressurize. If the valve is a stop-and-waste type, turn it gently; forcing a buried valve can break the stem or disturb the fitting.
Put the controller in off, rain, or winter mode according to the manufacturer’s instructions. The important goal is preventing an automatic station from opening while you work. Keep the controller’s schedule documented rather than deleting it, and follow the equipment instructions about whether the controller should remain powered; Colorado State University Extension notes that some controllers are intentionally kept powered through winter to reduce moisture-related problems and exercise solenoids.
Drain the mainline, pump, and exposed components
Let the hose bib run until the flow drops and the line no longer carries household pressure. That first drain is not the same as purging the laterals; it simply removes the easy water and reduces the load before compressed air is introduced.
If the irrigation system has a pump, find the drain plug and pump casing. University of Georgia Cooperative Extension’s winterization checklist emphasizes draining or removing pumps, filters, control valves, and any other component that can hold water. An above-ground pump casing can split even when the buried irrigation lines are empty.
Do not remove a drain plug over an electrical box, and do not open an unfamiliar fitting under pressure. If the pump serves a well, pond, or other surface-water source, isolate the pump and follow its service manual; a landscape sprinkler blowout does not automatically winterize the suction side or the pump housing.
Connect the compressor at the correct blowout port
Attach the air hose to the dedicated downstream blowout fitting, not to the household faucet, not to a random open valve, and not directly through the body of a PVB or RP backflow preventer. Keep the compressor valve closed while making the connection. Check that the coupler is fully seated and that the hose will not whip if a fitting fails.
Close the downstream isolation valve on the backflow assembly if your system is designed for that position during a blowout. Valve layouts vary, so use the installation diagram or manufacturer instructions when the handles are not labeled. The point is to send regulated air into the irrigation zones while keeping the water-supply and backflow-protection parts out of the compressor path.
Before opening the compressor valve, put on eye protection and move everyone—including pets—away from the sprinkler heads. The first discharge can contain water, grit, gravel, or pieces of a damaged nozzle. Never lean over a pop-up head while air is connected.
Blow out zones in the right order
Run one zone at a time. Open the zone at the controller or manually at the valve, then open the compressor valve very slowly so the line has an escape path through the sprinkler heads. Start with the zone farthest from the mainline or at the highest elevation when the yard is sloped; that order helps water leave the long or elevated run before it can settle into lower sections.
Do not open every station to “save time.” Colorado State University Extension advises blowing the system the same way it normally irrigates—one station at a time—because excess airflow and friction can heat pipe and fittings. A system with many heads may also exceed the compressor’s available CFM when multiple zones are open.
Use a short first pass and watch the discharge
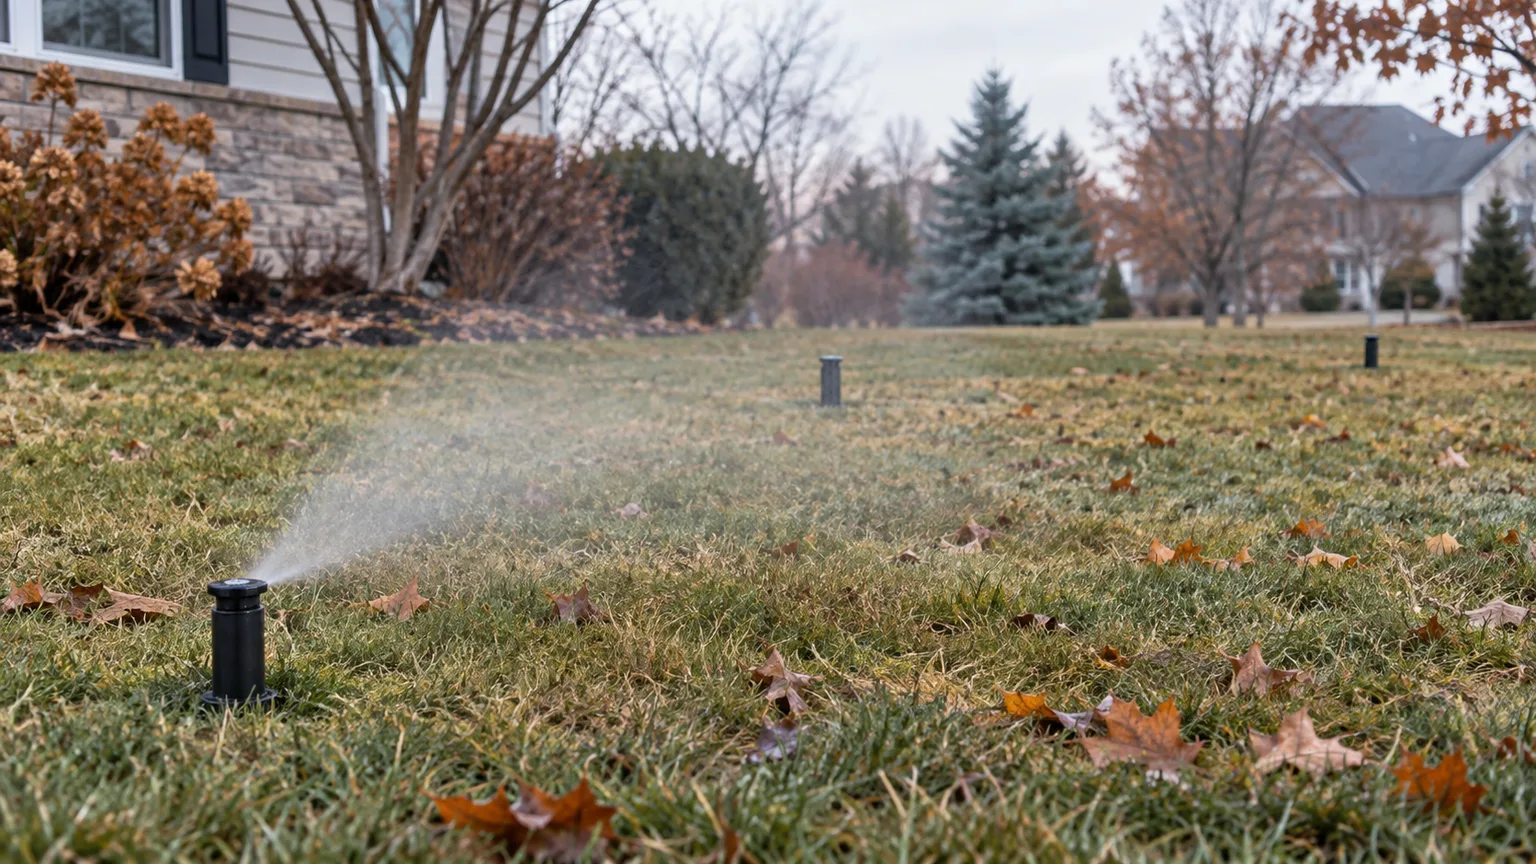
Watch the farthest head or have a helper watch it while you control the compressor. The discharge usually changes from a stream to a pulsing spray, then to a fine mist and mostly air. The exact time varies with zone length, pipe size, elevation, head type, and compressor capacity; a stopwatch is less reliable than the water coming out.
When the water has largely stopped, close the zone at the controller and then close the compressor valve. Do not stare directly over the head, and do not treat a loud hiss as proof that the zone is empty. A hiss can mean the compressor is simply bypassing a pocket of water or an open valve.
Repeat briefly, then stop before the pipe runs dry
Give the compressor a chance to recover, then repeat each zone with another short pulse. Two brief cycles are safer and often more effective than one long cycle; Colorado State University Extension recommends two short cycles per zone because the second pass can move water that settled into a low spot after the first pass.
Once a zone produces only air, stop forcing air through it. Compressed air moving through a dry line creates friction and heat, which can damage pipe, fittings, sprinkler nozzles, or internal valve parts. If water returns on the second pass, that is useful information: continue with short cycles only while water is present, and investigate a low point, check valve, or incorrect valve position if the zone never clears.
After every station has been purged, close the compressor’s shutoff before disconnecting the hose. A pressurized hose can whip or release debris when the coupler is opened. Release pressure at the connection in the manner specified for the adapter, then cap the blowout fitting.
Protect the backflow preventer and above-ground parts
The backflow preventer is a separate winterization job. An atmospheric vacuum breaker may be handled as part of the zone blowout in some installations, but a PVB or RP assembly should not be used as a path for compressed air unless the exact manufacturer procedure says it is safe. Colorado State University Extension warns that pressurized air can damage the rubber seals in these devices; they must be drained through their test cocks, check zones, or drain ports using the proper sequence.
For a PVB, the usual winter position is not simply “all handles closed.” A correctly drained assembly may require ball valves or test cocks to be left partially open so water cannot remain trapped inside. For an RP device, internal check chambers can require separate draining and component handling. If you cannot identify the assembly or its test-cock sequence, stop at the downstream blowout and call a backflow or irrigation professional.
Insulate or cover above-ground valves, exposed pipe, filters, and the main irrigation shutoff only after they are drained and the manufacturer permits it. Insulation slows heat loss; it does not remove trapped water. Do not wrap a wet, pressurized component and assume it is winterized.
When manual or automatic drain-down is the better path
Some systems are designed to drain through manual drain valves, automatic drain valves, or both. Gravity drain-down can be appropriate when the system was installed with consistent slope, the drain points are accessible, and the manufacturer or installer says the layout is designed for it. Open the main shutoff drain and every low-point drain, then give the water time to stop before closing or protecting the ports.
Drain-down has limits. Underground pipe can shift, humps can develop, electric valves can retain water above a diaphragm, and check valves can keep water inside sprinkler bodies. A system that looks empty at one drain may still have water in a valve box, pump, filter, or low pocket. Colorado State University Extension therefore favors compressed air for systems with electric valves and warns that manual or automatic drains alone may not prove that the system is empty.
If the system is designed for automatic drain, follow the manufacturer’s pressure-relief instructions rather than manually forcing a zone open. Some automatic drains activate only after internal pressure falls below a set point. A practical Simmons Landscape & Irrigation winterization guide likewise recommends observing each zone and stopping once water is no longer being expelled. Run the system only as directed with the water supply isolated, then inspect the heads and exposed components for water that did not leave.
Mistakes that leave water behind or damage the system
Using the highest PSI available is the fastest way to turn winterization into a repair. Keep PVC at or below its rated ceiling, keep polyethylene at or below 50 PSI, and use a lower setting when the nozzle, filter, valve, or manufacturer specifies one.
Choosing a compressor by tank gallons leaves long zones only partly cleared. If the spray never develops into a steady purge, the problem may be insufficient CFM rather than insufficient pressure; rent the right compressor or hire a service instead of turning up the regulator.
Blowing through a PVB or RP body can damage seals and check assemblies. Connect downstream at the proper fitting and drain the backflow device independently.
Running multiple zones can create too much friction and too little useful air at each head. One station at a time is easier to observe and keeps the compressor’s output working where you need it.
Continuing after the mist disappears overheats dry pipe and sprinkler internals. Short repeat cycles are the useful part; endless air is not.
Ignoring the pump, filter, or above-ground valve box protects only the buried laterals. Walk the system after the blowout and drain every component that can hold water.
Leaving the controller free to run can reintroduce water while the system is meant to be isolated. Use winter or rain mode and place a note inside the controller with the shutoff position, zone order, and any fault you noticed.
Finish the shutdown and record spring-ready settings
With the compressor disconnected, release any trapped air according to the system instructions. Return the compressor shutoff and irrigation isolation valve to the winter position, but do not casually open a water-supply valve just to “test” a winterized system. Confirm that the backflow device, drains, pump, filter, and exposed valves are left in the positions specified for cold storage.
Make a spring note while the layout is fresh: date of winterization, pipe material, pressure used, compressor CFM, zone order, valve positions, and any head that never cleared. Photograph the valve box and backflow assembly with the handles in their final positions. That record saves guesswork when the first warm day arrives and helps a technician diagnose a stubborn zone without repeating the entire winterization process.
In spring, inspect for cracked heads, shifted risers, missing nozzles, and leaks before fully pressurizing the system. Open the main water valve slowly, then test zones one at a time; gradual pressurization helps limit water hammer. Our guide on how to turn a lawn sprinkler system back on in spring covers that restart sequence.
Conclusion
The safest sprinkler blowout is controlled, not forceful: isolate the water, identify the pipe and backflow device, size the compressor by zone flow, regulate pressure conservatively, and purge one zone at a time through the correct fitting. Stop when water has become a faint mist, repeat only in short cycles, and drain pumps and backflow assemblies separately.
If any part of the system is unknown or inaccessible, professional winterization is cheaper than guessing with compressed air. A clear valve map and spring note make next year’s shutdown faster—and protect the parts that a quick blast through the nearest faucet would miss.



