How to Carve a Pumpkin With Less Mess, Step by Step
Learn how to carve a pumpkin with less mess: choose the right opening, contain seeds and pulp, transfer a stencil, cut safely, and display it with an LED.

A pumpkin is easiest to carve when the mess has somewhere to go. Before you make the first cut, choose a stable work surface, cover it, and place separate containers where your hands can reach them without crossing the blade. That simple setup keeps strings, seeds, tools, and the finished design from competing for the same small patch of table.
There will still be sticky pulp; “no mess” is not a realistic promise for a hollow gourd. The useful goal is to contain it, keep the pumpkin from rolling, and make each step predictable. This workflow covers the choice of pumpkin and opening, the tools that give you control, stencil transfer, safe carving, lighting, and a cleanup routine that does not require chasing seeds across the kitchen.
Why the setup does most of the cleanup work
A crowded table creates two problems at once: scraps have nowhere to land, and tools disappear under paper or pulp. Give the pumpkin its own non-slip zone, place a waste bowl on one side and a seed bowl on the other, and leave one clear area for the stencil and saw. If you have to move a full bowl over the carving surface, pause and empty it first rather than stretching across the pumpkin with a tool in hand.
The U.S. Consumer Product Safety Commission estimated an annual average of 3,200 Halloween-related emergency-room injuries over the three-year period it reported, with 55% related to pumpkin carving. That is a useful reason to treat this as a cutting task, not merely a craft: a clean, bright, dry station and a deliberate adult-led workflow make it easier to notice where your hands and tools are. (CPSC’s Halloween safety guidance)
Choose a pumpkin and a design that cooperate
Start with a pumpkin that feels firm and sits without rocking. Avoid soft spots, splits, bruises, or a broken stem sunk into the shoulder; damaged areas can collapse under pressure and make the pumpkin harder to hold still. A broad, relatively smooth face is forgiving for a first carving, while the ribs and bumps on an unusual pumpkin can be part of a design if you are comfortable adapting the pattern.
Match the silhouette to the design before you buy or cut. A tall pumpkin suits a vertical ghost or window; a squat one gives a wide face room; and a flatter side is easier to stencil than a sharply curved one. Epic Gardening’s pumpkin-variety guide likewise treats rind and shape as practical carving criteria, not just appearance.
Rotate the pumpkin on a dry surface, pick its front, and take a quick photo so you remember that orientation after you turn it to scoop. Use the photo as a checkpoint before opening the pumpkin: if the design looks crooked from its viewing angle, rotate it now.
Choose a pattern you can read from the place the pumpkin will sit. Large eyes and a broad mouth stay recognizable from a path; tiny teeth and hairline bridges can disappear in low light or break while you push out a cut section. For your first attempt, use a simple cutout face or silhouette with thick connections.
If you want finer detail, combine open cutouts with shallow etching rather than trying to remove every narrow line. The existing pumpkin carving ideas guide has options by style and effort; a no-knife display is also possible with the no-carve pumpkin ideas guide.
Gather a small, purpose-built tool kit
You do not need a large carving set. A few items with clear jobs prevent the improvised-tool problem—especially reaching for a long kitchen knife because it is nearby. Place everything on the table before the pumpkin is open so you are not searching through drawers with sticky hands.
- A small serrated pumpkin saw for the lid and design. Its short blade is easier to control in a thick rind than a long kitchen knife.
- A sturdy spoon or blunt pumpkin scraper for seeds and stringy pulp. A scraper with a broad edge helps remove the slick inner membrane.
- A large bowl for pulp and a second bowl or tray for seeds you want to keep.
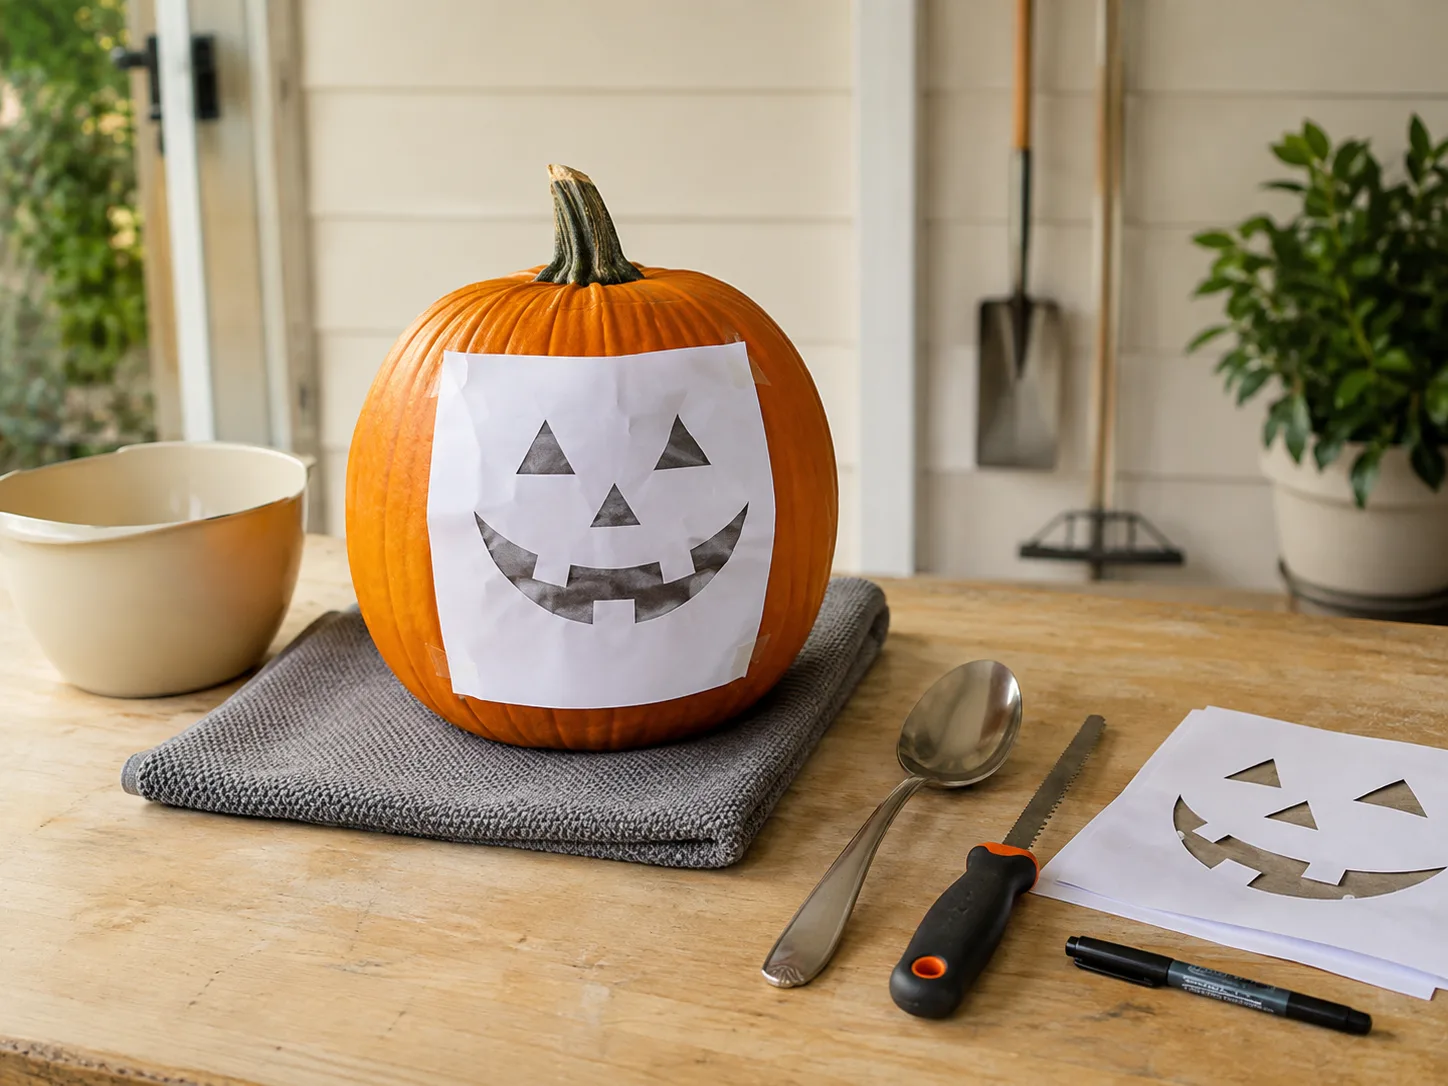
- A washable marker, printed pattern, painter’s tape, and a blunt pushpin or transfer wheel.
- A non-slip mat or folded damp-free towel, protective table covering, paper towels, and a small scrap bag.
- A battery-operated LED light for the finished pumpkin.
Shriners Children’s recommends a clean, dry, well-lit area and small, controlled strokes. Its hand surgeon also cautions that a larger or sharper knife can wedge in the thick shell and then require force to pull free; small serrated pumpkin tools are less likely to become stuck. A kit is optional, but the tool shape matters more than whether it came in a seasonal package. (Shriners Children’s pumpkin-carving safety guidance)
Set up a contained carving station
Work at a height where you can keep your shoulders relaxed and look directly at the cut. A sturdy kitchen or outdoor table is easier to control than the floor or your lap.
Cover it with a washable vinyl cloth, a cut-open clean trash bag, or several overlapping sheets of newspaper; fold the edges up a little to catch seeds that roll. Keep the covering flat under the pumpkin so it does not wrinkle into a slipping hazard.
Put a non-slip shelf liner under the pumpkin, or make a shallow ring from a rolled towel to stop it from turning. The towel must be dry, and the pumpkin should not wobble when you press lightly on the side.
Shriners Children’s specifically advises washing and thoroughly drying hands, tools, and the cutting surface because moisture can contribute to slipping. A plastic or metal tray under the pumpkin can contain juice, but use it only if the base sits securely inside it.
Keep seeds and pulp in separate containers
Set a wide bowl close to the opening for the wet mixture, plus a second bowl or baking sheet for seeds. If the seeds are destined for roasting, separate them as you work rather than digging through the entire pile later. Otherwise, put all interior material into the scrap bowl and decide what to compost after the cutting is finished; a waste bag lined in a small bin works if you do not want to wash another bowl.
Keep a damp cloth nearby for hands and marker smudges, but do not leave it under the pumpkin or let water collect near the tools. One paper towel stack can handle quick wipes; reserve a clean, dry towel for the pumpkin’s outer surface.
Real Simple’s carving instructions similarly recommend protecting the table and keeping a large bowl ready for the seed-and-string mixture. The important improvement is to decide where each kind of scrap goes before it is wet.
Wash, dry, and mark the pumpkin
Rinse or wipe the outside before cutting, especially if it came from a field or a busy display. Dry the rind completely with a towel and check that your hands, board, tools, and covering are dry too. This is both a cleanup step and a control step: marker writes more clearly on a dry surface, and damp hands or tools make the work harder to grip.
Stand the pumpkin on its chosen base and mark the front lightly. If it rolls, adjust the towel ring or select a flatter orientation instead of trying to hold it with one hand during every cut.
Draw the opening and stencil placement before you start. When using a printed pattern, center it on the flattest area and confirm that the whole design remains visible from the viewing angle.
Decide where to make the opening
There is no universal rule that every pumpkin must have a hole around the stem. The best access point is the one that gives you room to remove the pulp, keeps the pumpkin stable, and works with the light you plan to use. A top lid is familiar and simple for most first-time carvers; a bottom opening can preserve the stem area and make a cleaner-looking top, but it takes care to keep the pumpkin standing securely afterward.
Top lid or bottom opening?
Use a top opening when easy access and straightforward scooping matter most. Draw a circle large enough for your hand and scoop, but keep it inside the pumpkin’s widest shoulder so the lid has a ledge to rest on.
Angle the saw slightly inward as you cut; that creates a tapered lid that sits on the opening instead of slipping into the cavity. Avoid cutting through the stem itself, and do not lift the pumpkin by the stem once the opening is made.
A bottom opening leaves the top intact and can be useful when you want to set a pumpkin over a small LED. It is a good option if you can make a flat, stable base and have enough access to clean the interior; it may be awkward on a lumpy-bottomed pumpkin or when you need to carry the pumpkin often.
Jessica Gavin’s step-by-step guide describes a bottom cut as one way to keep the stem-topped design neat, while Martha Stewart’s carving guide notes that the opening can be placed at the top, base, or side depending on the light and access plan. Choose for stability and workflow, not tradition.
For either opening, hold the saw like a pencil or small hand tool and move it with short back-and-forth strokes. Keep your other hand on the far side of the pumpkin, outside the path of the blade; never put it inside the cavity opposite the cut. If the pumpkin starts to shift, stop, put the saw down, reset the support, and resume only when it no longer rolls.
Scoop and thin the shell without smearing pulp
Set the removed lid directly onto the scrap covering with its wet side facing up. Put the spoon or scraper into the cavity, pull material toward the opening, and drop it into the bowl rather than flinging it onto the table.
Work around the wall in sections. If the mass is stringy, lift a small clump with the spoon and use your fingers to separate seeds over the bowl; do not squeeze a handful over the clean stencil area.
Scrape away loose strings and seeds first, then make a second pass to smooth the inside behind the face. A thinner wall there lets more light through, but scraping the whole pumpkin to paper-thinness makes it fragile.
Martha Stewart’s guide gives a 1/2- to 3/4-inch wall as a practical carving range; treat that as a reference rather than a measurement you must hit everywhere. Leave extra thickness around the lid, base, and narrow bridges. For a simple, bright face, thinning the area immediately behind the design usually matters more than scraping every side equally.
If a standard spoon glides over the fibers, switch to a blunt scraper or an ice-cream scoop that you can control with your wrist. Hold the tool with the working edge pointed away from your supporting hand, use moderate pressure, and pause to empty the bowl before it reaches the rim. A clean interior is enough; over-scraping adds effort and can weaken the face before you even transfer the design.
Transfer the pattern cleanly
The cleanest pattern transfer is the simplest one that fits the curve. A freehand marker drawing avoids loose paper; a printed stencil is better when you want symmetry or a repeatable shape.
For a stencil, use a few short pieces of painter’s tape around its edges and cut small slits in the paper where it needs to fold around the pumpkin. Overlapping the folds helps the template lie closer to the rind instead of buckling across the design.
Prick through the main lines with a blunt pushpin or transfer wheel, then remove the stencil and connect the dots with a washable marker. Fine Gardening’s pumpkin-carving directions and Martha Stewart’s transfer method both describe pinprick transfer; Martha Stewart gives close pin spacing for detailed designs, but a beginner can space dots farther apart on broad shapes and add more only at tight curves.
Before cutting, mark the sections you intend to remove with a small X or light hatch so you do not confuse a cutout with a section that must stay attached. Keep bridges between holes wide enough to survive handling. If the pattern has very thin lines, convert them to etched areas or simplify them now; fixing a complicated stencil after the paper is off is harder and messier than revising it before the first cut.
Carve with controlled strokes
Start with the central or smallest cutouts while the pumpkin face is still strong, then work outward toward larger shapes. Short, steady sawing strokes give you more control than pushing the tool into the shell. Keep the pumpkin supported with the non-slip base, turn it to bring a new section toward you, and reposition your hands instead of reaching across the blade path.
For a curved line, rotate the pumpkin as you cut rather than twisting your wrist around the rind. Let the teeth do the work; if the saw stops moving, ease it back along the cut instead of forcing it forward. When you reach a corner, stop and change direction in two short cuts so the blade does not lever against a narrow piece of shell.

Cut each piece all the way through, then push it inward gently and retrieve it through the opening. If a section will not release, do not pry outward on the face.
Run the saw along the stuck edge again, or divide the piece into smaller sections that fit through the opening. The useful order is: cut the outline, check that the section is free, then remove it; levering first can split the skin beyond your pattern.
For etched detail, remove only the colored skin with a scraping or sculpting tool, leaving the pale flesh as a translucent layer. That gives the design contrast without punching another hole or weakening a thin bridge.
Keep the etched area shallow and even, and use it for fur, leaves, lettering, or shading where a full cutout would make the pumpkin less sturdy. Fine Gardening’s carving tutorial also distinguishes removing the whole shell from trimming flesh for a brighter patch, a useful way to add detail without multiplying fragile openings.
Free a stuck saw and rescue fragile details
A saw that binds usually means the cut is under pressure, the shell is thick, or the pumpkin has shifted. Stop pushing.
Keep the tool pointed away from your other hand, move it gently back through the groove, and reset the pumpkin if it is rocking. Do not twist the blade hard or pull it toward your body to force it loose.
If a tooth, corner, or small bridge breaks, stop cutting and inspect the shape before widening the gap. A clean break can sometimes be reattached from inside with a toothpick, but that repair is only a visual fix and may not hold if the pumpkin is moved.
The more reliable response is to redesign the nearby cut as a larger opening, add a deliberate notch or scar, or switch that narrow feature to shallow etching. A simpler silhouette often looks intentional; frantic trimming usually makes the break spread.
Light and display the jack-o’-lantern safely
Use a battery-operated LED tea light, a small battery lantern, or a glow stick as the default. The CPSC recommends battery lights or glow sticks over open-flame candles for jack-o’-lanterns (CPSC’s Halloween safety guidance).
The U.S. Fire Administration advises considering flameless candles and keeping any lit candle at least 12 inches from burnable materials. A pumpkin is often displayed near dry leaves, a porch mat, paper decorations, or costumes, so an open flame adds a hazard the carving itself does not need. (U.S. Fire Administration candle guidance)

Set the light on a stable base inside the cavity and test the face in a dim room before displaying it. If the eyes glow but the mouth looks dark, remove the light and scrape a little more flesh from behind the mouth; do not enlarge the external cutout automatically.
For a bottom opening, place the LED on the display surface and lower the pumpkin over it only if the pumpkin sits evenly and cannot rock. Keep the finished carving out of a walking path and away from children’s costumes, curtains, and dry foliage.
If someone chooses to use a candle, treat it as an open flame that needs constant attention, not as a harmless craft accessory. Keep it stable and away from anything combustible, never leave it unattended, and extinguish it before leaving the room or going to bed. Battery lighting provides the glow with far less risk and works better where wind, children, or pets may disturb the display.
Clear the station and sort the scraps
Do the cleanup in the order that contains the wettest material first. Put the lid and large pulp scraps into the waste bowl, sweep loose seeds and strings off the covering into the same bowl, and wipe the outside of the pumpkin with a paper towel.
If saving seeds for food, keep that clean batch separate from scraps and any material that has touched the floor, outdoor dirt, craft paint, glue, or the display area. Once the pumpkin is a decoration, do not treat its exposed flesh as ready-to-eat food.
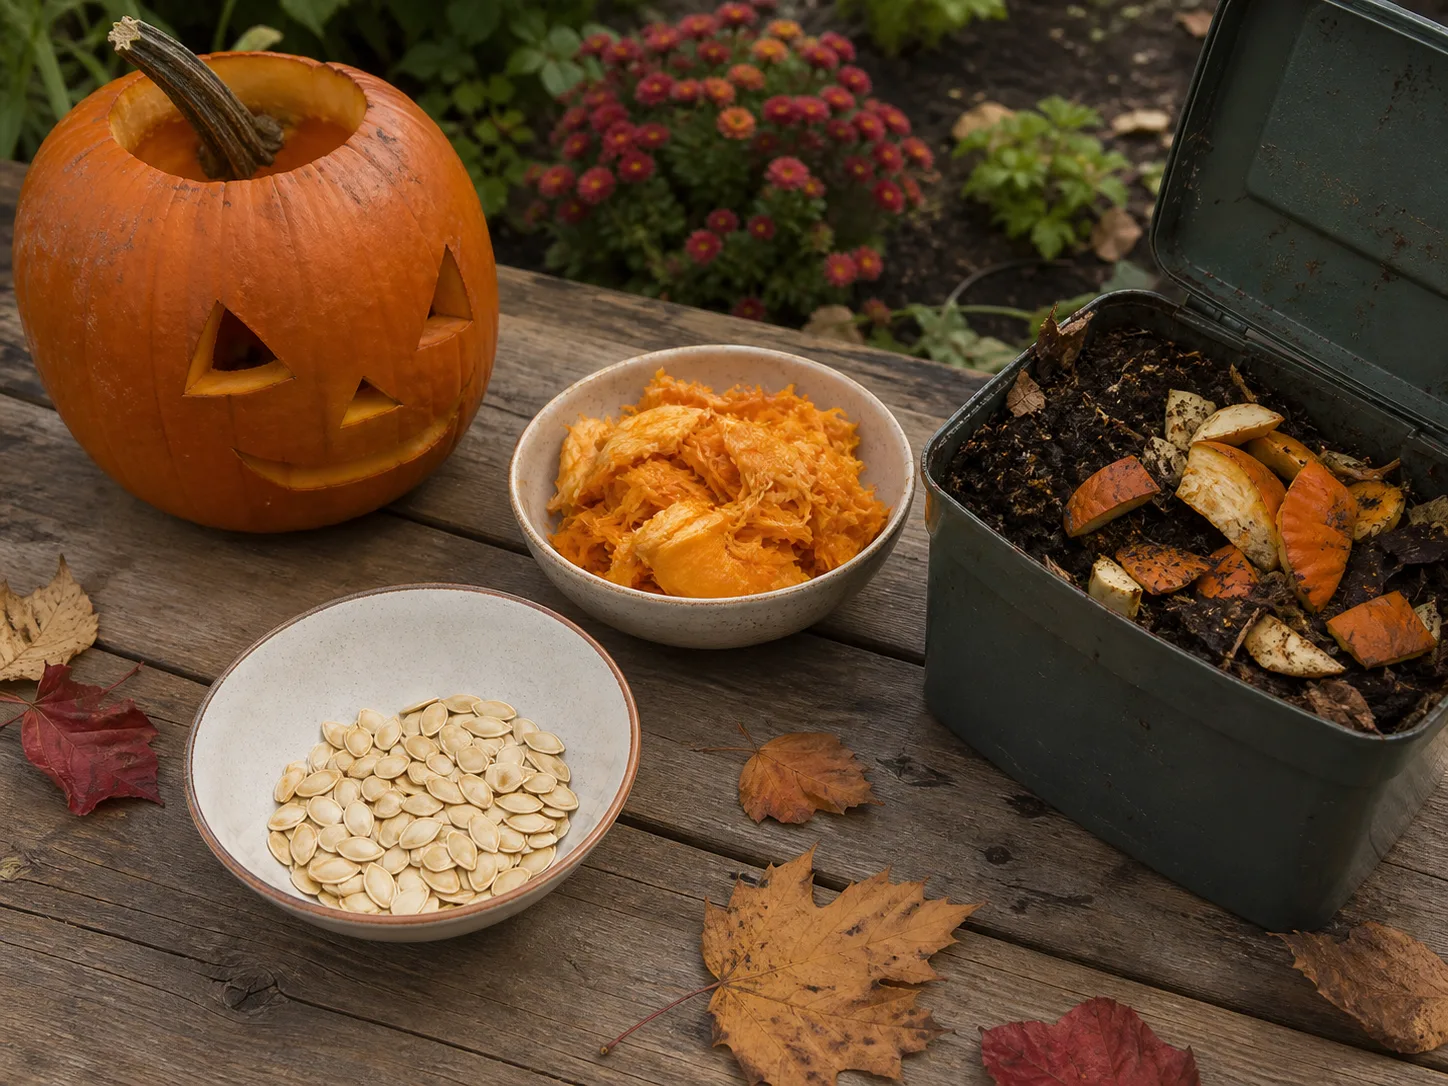
Lift the pumpkin before removing the covering so drips stay inside the liner. Fold or roll the covering inward, trapping scraps in the center, then empty it into compost or household waste according to local rules.
Wash the bowls, spoon, scraper, and cutting surface with hot soapy water, and dry the small saw before storing it where children cannot reach. If pulp has dried, soak the washable surface rather than scrubbing hard enough to spread orange streaks.
A two-bowl station may feel like an extra step, but it prevents the classic cleanup delay: picking seeds out of wet strings after everything else is already put away. If no one plans to cook the seeds, skip the sorting and use one bowl; if the pumpkin was treated with paint or glue, keep those parts out of food and compost according to your municipality’s guidance. The goal is to finish with the scraps already contained, not to create more dishes than the carving requires.
Conclusion
Carve a pumpkin with less mess by deciding where scraps go before you cut, keeping the work surface dry and stable, and using a short serrated saw with controlled strokes. Choose the opening that suits your pumpkin, remove the pulp into a nearby bowl, transfer a pattern that leaves sturdy bridges, and push cut pieces inward instead of prying against the face. These choices reduce spills and make it easier to recover when a cut binds or a detail breaks.
An LED is the safest, simplest way to show off the finished design. Prepare the station before opening the pumpkin, carve only what you can display soon, and fold the covering inward when you are done. The result will not be literally mess-free, but it can be contained, safer to make, and ready to enjoy without a second cleanup project.



