How to Deadhead Asters: Timing and Cut Points
Deadhead asters at the right stage, cut above a healthy node, and keep the display going. Plus, know when to save seed or leave stems for wildlife.
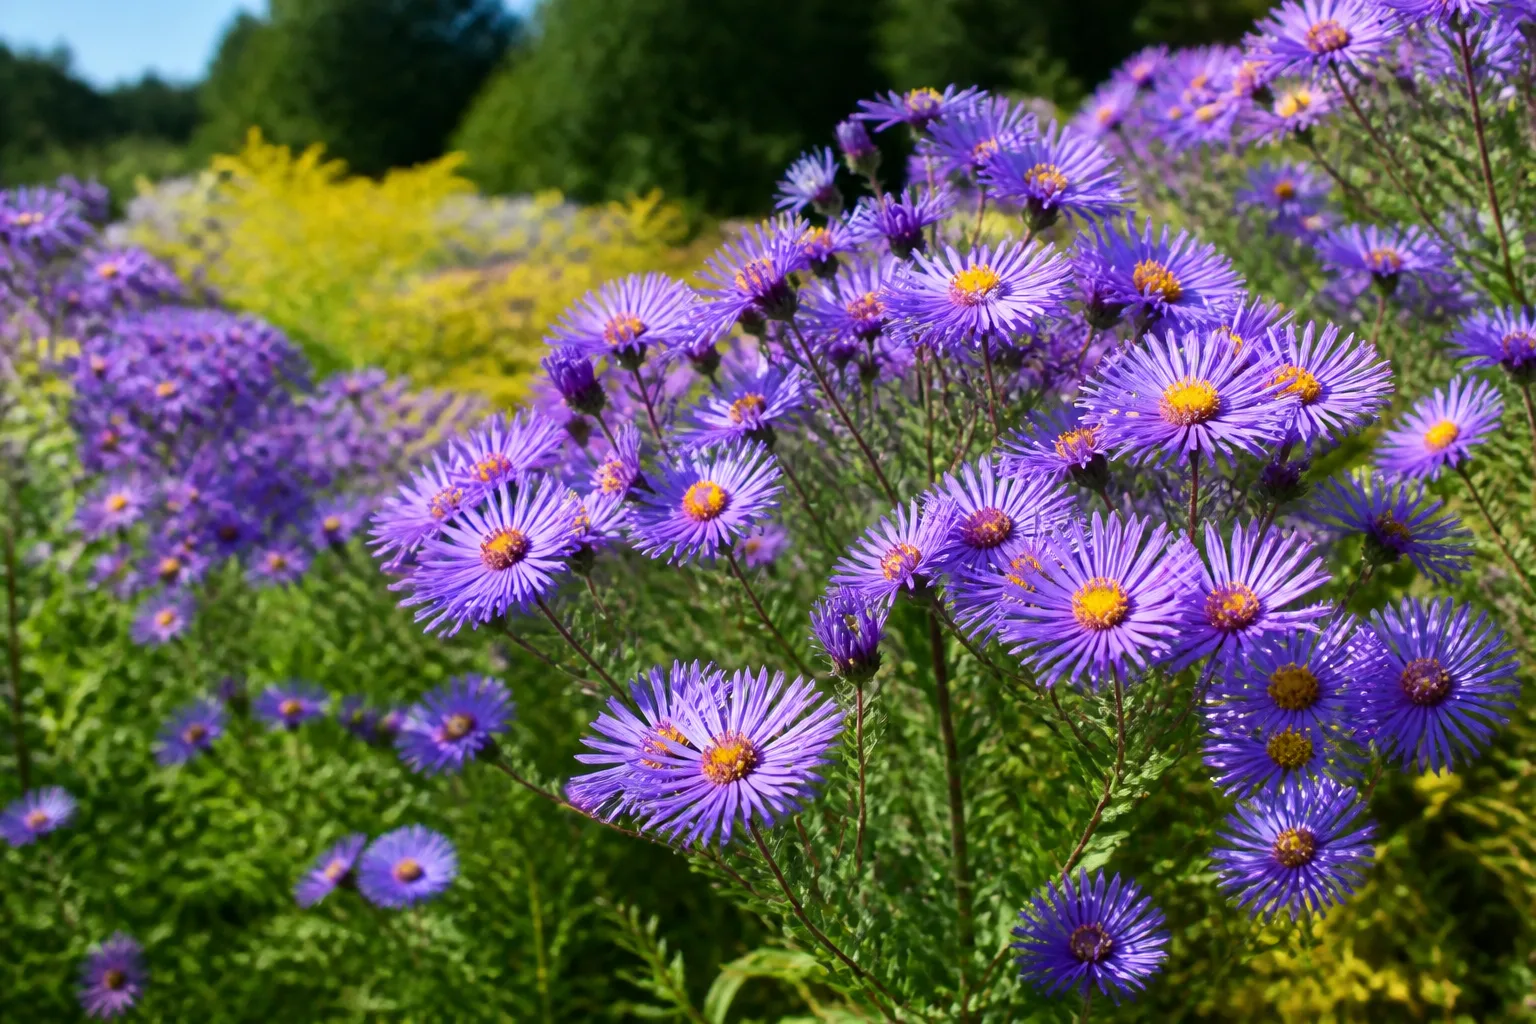
The right way to deadhead asters is simple: remove a fading flower and its short stem back to a healthy leaf node or side shoot, while leaving nearby buds and green foliage intact. That small cut keeps the plant from spending as much effort on a finished flower and can help preserve a longer, tidier display.
Deadheading is not the same as shearing an aster to the ground. The best cut depends on what you see: one spent flower, a whole finished cluster, diseased growth, or a plant that has already entered winter dormancy. Most mistakes happen when gardeners make a seasonal cleanup cut during bloom season, or remove a flower head without following its stem to the next useful growth point.
The guidance below applies broadly to perennial asters, including many plants sold as New England asters, smooth blue asters, and other Symphyotrichum species. “Aster” also covers plants with different heights, bloom windows, and habits, so use the plant tag when a cultivar has specific instructions. NC State Extension describes asters as late-summer-to-fall bloomers that range from mounding plants to stems several feet tall, which explains why one universal pruning rule does not fit every clump. NC State Extension
The short answer: remove finished heads, not future buds
Check asters whenever several flowers are open and others are beginning to fade. A spent bloom usually has drooping or dull petals, a browning center, or a dry, papery look. Follow that flower’s stem downward until you reach a healthy leaf junction, a branching point, or a side bud, then snip just above it.
If only one head on a branched stem is finished, remove only that head. If every flower on the branch has finished, take the branch back to the next substantial side branch or healthy foliage. Keep enough green stem and leaves for the plant to continue photosynthesizing; midseason deadheading should make the plant look cleaner, not leave a thicket of bare sticks.
The payoff is realistic rather than magical. Removing fading heads can encourage additional flowering on plants that have the time and growing conditions to produce more buds, and it reduces the chance of unwanted seedlings. UF/IFAS specifically lists pinching off spent flowerheads as a way to encourage more flowering on Stokes’ aster, while also describing the plant as low-maintenance and pollinator-friendly. UF/IFAS Gardening Solutions
Deadheading, pruning, and cutting back are different jobs
These words are often used interchangeably, but the distinction matters because they describe different amounts of plant removal.
| Job | When it happens | What you remove | Main purpose |
|---|---|---|---|
| Deadheading | During bloom | A spent flower and a short piece of stem, or a finished flowering branch | Maintain the display and limit seed formation |
| Pruning or pinching | Usually before flowering | Selected growing tips or wayward stems | Shape the plant, improve branching, or reduce flopping |
| End-of-season cutback | After flowering and dormancy begin | Most or all aboveground stems | Tidy the bed, remove diseased debris, or control seed spread |
Deadheading should be selective because the plant is still actively flowering. Aster pinching is a separate earlier-season technique: cutting soft growing tips before buds form can encourage a bushier plant, but doing a hard pinch late in summer can remove flower-bearing tips and delay the display. Likewise, a fall cutback is a winter-management choice, not a shortcut for every brown flower you see in September.
Gardener’s Path describes deadheading perennial asters as removing a finished stem to its point of origin once the blossoms on that stem are done. That is useful for a fully finished branch, but it should not be interpreted as cutting every flowering stem to the crown after the first faded petal. Read the stem first, then match the cut to its stage. Gardener’s Path
How to tell when an aster bloom is spent
Asters often carry tight buds, open flowers, fading flowers, and dry seed heads at the same time. That mix is normal and is exactly why indiscriminate shearing wastes future color. Look at the whole head and the stem below it before you reach for pruners.
Use these cues to identify a flower that is ready to remove:
- The ray petals have wilted, curled, or dropped, and the center has lost its fresh color.
- The head hangs lower than nearby open flowers or turns brown after a wet spell.
- The center is becoming dry and seed-like, especially if a pale tuft is beginning to form.
- A cluster has several finished heads but still has tight buds on another branch; remove only the finished heads.
Do not cut a tight green bud because it looks small, and do not remove a flower simply because a few petals are weathered after rain. A flower can look rumpled but still be serving pollinators and may recover in a day of sun. The more reliable test is whether the head is clearly past its showiest stage and whether a healthy node or side shoot remains below it.
Also separate normal fading from disease. A brown flower head is a deadheading target; spotted leaves, a gray moldy mass, or a white coating spreading across foliage are plant-health concerns. Remove infected tissue promptly with clean tools and keep it out of home compost. Deadheading helps the appearance of the plant, but it does not cure powdery mildew, leaf spot, or a root problem.
Choose timing by bloom stage, not the calendar
Start deadheading as soon as a meaningful number of flowers begin to fade, before the plant has finished turning those heads into mature seed. You do not need to remove every head the minute one petal drops. The practical goal is to keep the plant from carrying a large proportion of old heads while fresh buds are still developing.
During peak bloom, inspect asters every few days or at least once a week. Tall, heavily branched clumps can change quickly after rain, while a small container may need attention more often because a few fading heads make up a larger share of the display. A quick pass is easier on the plant and on you than waiting until every branch is brown.
The calendar is less useful than the plant’s condition. Aster bloom times vary by species, cultivar, latitude, heat, and day length; NC State’s plant profile places many asters in the late-summer and fall window but also notes that the genus includes plants with different forms and requirements. In a warm region, your Stokes’ aster may flower on and off from spring, while a New England aster may wait for shortening days.
Choose a dry period for cutting. Wet leaves and flower debris make it easier to move fungal material between plants, and a clean, dry cut is easier to see. Gardener’s Path recommends pruning on a dry morning after dew has evaporated and emphasizes sharp, sanitary tools because cut stems are temporary wounds. If the plant is wilted from drought, water the root zone and let it recover before doing a large maintenance pass.
Tools and weather conditions for a clean cut
Soft aster stems can often be pinched between your fingers, but sharp snips are more precise and bypass pruners are useful for thicker or woody-feeling stems. You should not need loppers for ordinary deadheading. Reserve larger tools for a true end-of-season cleanup when a mature clump has many tough stems.
Before you start, check that the blade is sharp enough to slice rather than crush. A ragged wound takes longer to dry and leaves more damaged tissue around the cut. Brush soil and plant residue from the blade, then disinfect it according to the product directions you use; clean the blade again when moving from a visibly diseased aster to another plant.
Work from healthy plants toward questionable ones, not the other way around. Keep a small bucket or paper bag nearby for removed heads and a separate trash bag for material with obvious mildew, rot, or leaf spots. This prevents a handful of wet debris from being dropped back into the crown where it can stay damp.
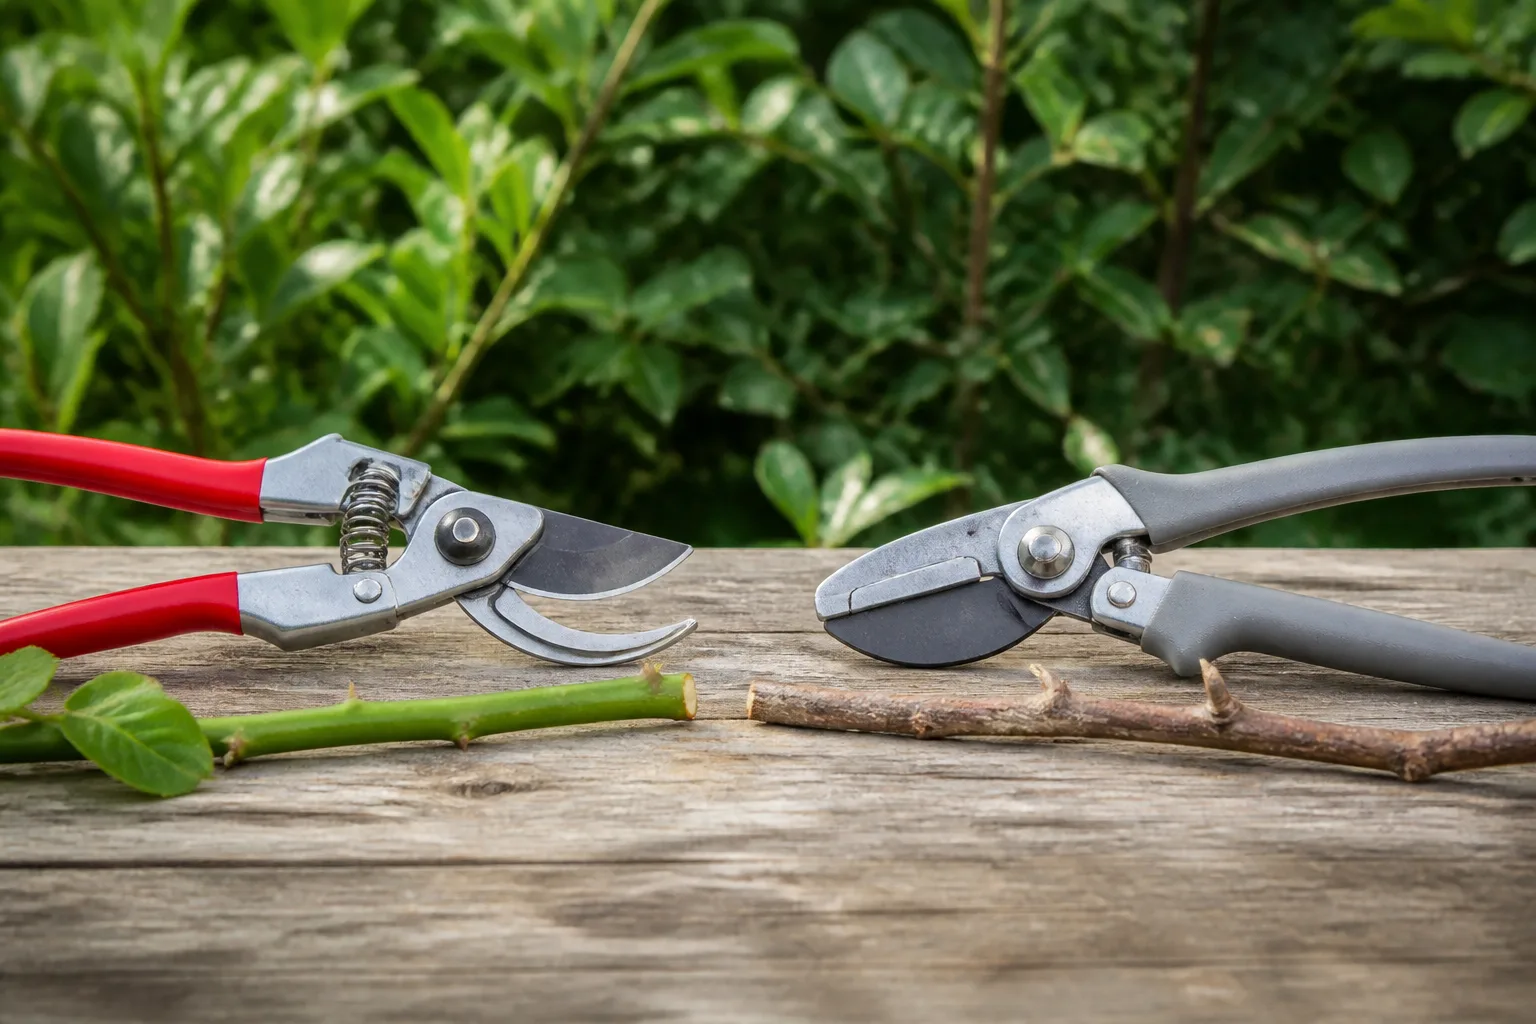
Wear gloves if the foliage irritates your skin or if the plant is dense. Gloves are not a substitute for seeing the cut point, so use them for protection while keeping the node and the stem visible. The safest setup is a dry plant, a stable stance, and a tool you can control with one hand.
How to deadhead asters step by step
The following sequence works whether you are removing one fading flower from a border plant or tidying a potted aster. It keeps the cut small until you have confirmed that an entire branch is finished.
Step 1: Sort open flowers, buds, and spent heads
Begin at the outside of the clump where individual stems are easiest to see. Identify what is still opening, what is forming a bud, and what has clearly finished. Leave open flowers for pollinators and leave tight buds connected to green, healthy stems.
If several heads are crowded together, gently separate them with your eyes or the back of your fingers rather than pulling the stems apart. Aster flowers can sit close to side shoots, and a quick tug may break a stem below a bud you wanted to keep. When a head is questionable after rain, wait for it to dry and look again unless it is obviously rotting.
Step 2: Trace the finished head to a node or side shoot
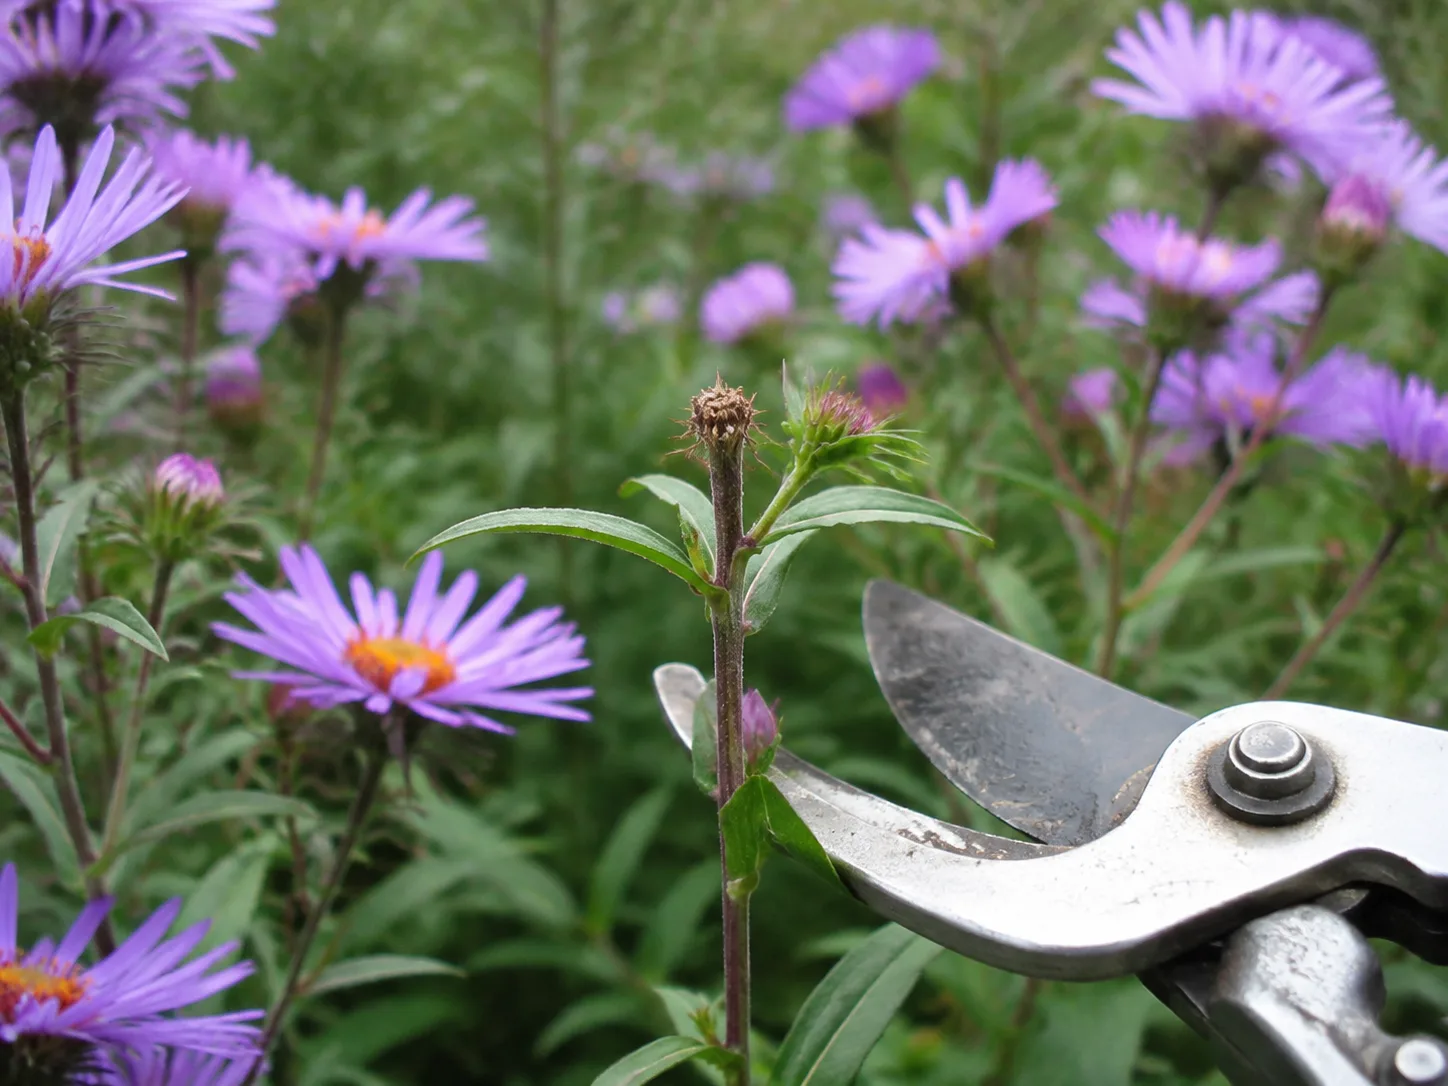
Once you select a spent head, follow its stem downward. The best target is the first healthy leaf pair, a visible node, or a vigorous side shoot that points outward. That point is where the plant already has a growth pathway; cutting there leaves a short, purposeful stem instead of a long dead stub.
On a branched aster, the nearest node may be only a few inches below the bloom. On a long, bare-looking branch, the next useful cut may be farther down at a larger fork. Do not assume the cut belongs at the soil line just because the top flower is brown. Midseason roots and crown stay in place while you work through the flowering stems.
Step 3: Make the smallest useful cut
Position sharp snips just above the node or side shoot and make one clean cut. Avoid slicing into the node itself, because that can remove the bud or damage the tissue that will support the next branch. A slight angle helps water run off the cut, but precision and a clean blade matter more than a perfect angle.
For a single spent bloom, remove the head plus a short length of stem. For a fully finished flowering branch, cut back to the next healthy branching point. If the stem is soft enough to pinch, use your fingertips only when the head comes away cleanly; if you have to pull or twist, switch to snips.
Step 4: Remove debris and reassess the plant
Collect the cut head instead of leaving it in the foliage. Healthy, dry flower heads can go into a compost pile that is managed properly, but do not compost material carrying obvious disease or a heavy moldy coating. Bag suspicious debris and clean the blade before touching another plant.
Step back after each small section. You are looking for more light and air around the remaining flowers, not a perfectly symmetrical mound. Stop when fresh buds are exposed, the plant still has enough green foliage, and the remaining heads are either flowering or intentionally being left for seed and wildlife.
How far back should you cut an aster?
During the growing season, cut back only as far as the nearest healthy node, leaf pair, or side shoot below the spent bloom. In practical terms, that may mean removing an inch or two of stem, or taking a whole finished branch back several inches to a fork. There is no useful universal measurement because a compact cultivar and a tall, branching species do not place their growth points in the same spots.
The “smallest useful cut” rule prevents two opposite errors. Cutting only the dry petals leaves the seed-forming center attached, while cutting too far down removes green leaves and flower-bearing side shoots. Aim for a cut that eliminates the old head and stops just before the plant’s next healthy growth point.
At the end of the season, the answer changes. If you choose a tidy winter cutback after flowering is over and the plant has gone dormant, leave a short stub above the crown rather than cutting into the crown itself. Many gardeners leave roughly 2 to 4 inches for easy cleanup, but a taller remnant may be useful for winter structure; the exact height is a goal-based choice, not a rebloom technique.
Do not use a full cutback to correct flopping during bloom. A tall aster that leans needs an earlier structural plan—better spacing, a support, a site with adequate light, or spring-to-early-summer pinching—not a late-season haircut that removes its remaining flowers.
What to do with clusters, tall stems, and container asters
Asters naturally flower in clusters, so work branch by branch. When one head fades, remove that head. When every head on a smaller branch is finished, remove the branch to its next fork. When a tall main stem has a mixture of fresh and finished clusters, take only the finished side branches and return later for the rest.
Avoid taking every spent branch from a large clump on the same day if doing so would remove a lot of green tissue. A staged pass keeps the plant’s silhouette balanced and lets you notice whether new buds are developing. It also makes the task more manageable in a mature border where the flowers are at different stages from one side to the other.
For tall asters, cutting a few flowering stems for a vase is another gentle way to reduce wayward growth. Make those cuts at a useful branching point and treat them as selective shaping, not as permission to shear the whole plant. If stems flop every year, correct the cause next season: crowded plants have poorer airflow, shade encourages stretch, and some cultivars simply need discreet support.
Potted asters need the same cut placement, but the smaller root volume changes the maintenance rhythm. Check containers more often during bloom, remove fading heads before they become a dense wet mass, and keep the plant in the strongest light the cultivar can handle. Do not drastically cut a container-grown perennial while it is still green just to make it fit a pot; wait for the proper dormant-season cleanup or move the container instead.
When deadheading will not make asters rebloom
Deadheading improves the odds of a longer display; it does not manufacture a second bloom cycle. Some asters flower in one concentrated flush, some produce intermittent side blooms, and some cultivars slow naturally as nights cool. Removing a spent head cannot override the plant’s genetics, the first hard freeze, or a lack of light.
Look for another cause if your plant stays green but produces no new buds:
- Too little sun: Most border asters flower best with several hours of direct light. Shade can produce thin stems and sparse bloom that pruning cannot fix.
- Drought or root stress: A wilted plant prioritizes survival and may pause buds. Check soil moisture and drainage before adding fertilizer.
- Late-season cold: Buds that were forming may stop as frost arrives. Continue only light cleanup; do not expect summer behavior in November.
- A short flowering window: The cultivar may simply be finished. Keep the foliage until it naturally declines unless you need to remove disease.
- Disease or crowding: Powdery mildew, leaf spots, and dense stems reduce the quality of the display. Improve spacing and sanitation next season rather than cutting deeper now.
- Seed already maturing: If many heads have turned to dry seed, the plant has already moved into reproduction. You can still tidy it, but the missed rebloom window cannot be recovered.
Do not respond to weak late-season flowering with a heavy dose of fast fertilizer. That may encourage soft growth when the plant should be preparing for dormancy. Correct light, water, drainage, and spacing in the next growing cycle, then use deadheading as maintenance rather than as a rescue treatment.
Should you cut asters back after frost?
After frost, stop treating every brown head as an in-season deadheading problem. First decide whether you want a clean bed, fewer seedlings, winter structure, or habitat for insects and birds. Then remove only what matches that goal.
If foliage has been blackened, stems have collapsed into a wet mat, or disease is present, cleanup is reasonable once the plant is clearly finished. Cut stems above the crown, rake away fallen debris, and discard diseased material rather than leaving it to sit against new growth. If the foliage is still green after a light frost, wait; it may still be contributing energy to the crown.
If you prefer a tidy winter border, finish the cutback after flowering and dormancy have begun rather than while the plant is actively green. Martha Stewart’s expert guidance describes leaving about 2 to 3 inches for a conventional cleanup, while noting that some gardeners leave 6 to 8 inches for winter interest. The important limit is to avoid damaging the crown, where next year’s shoots emerge. Martha Stewart
Seed heads, pollinators, and the case for leaving some stems
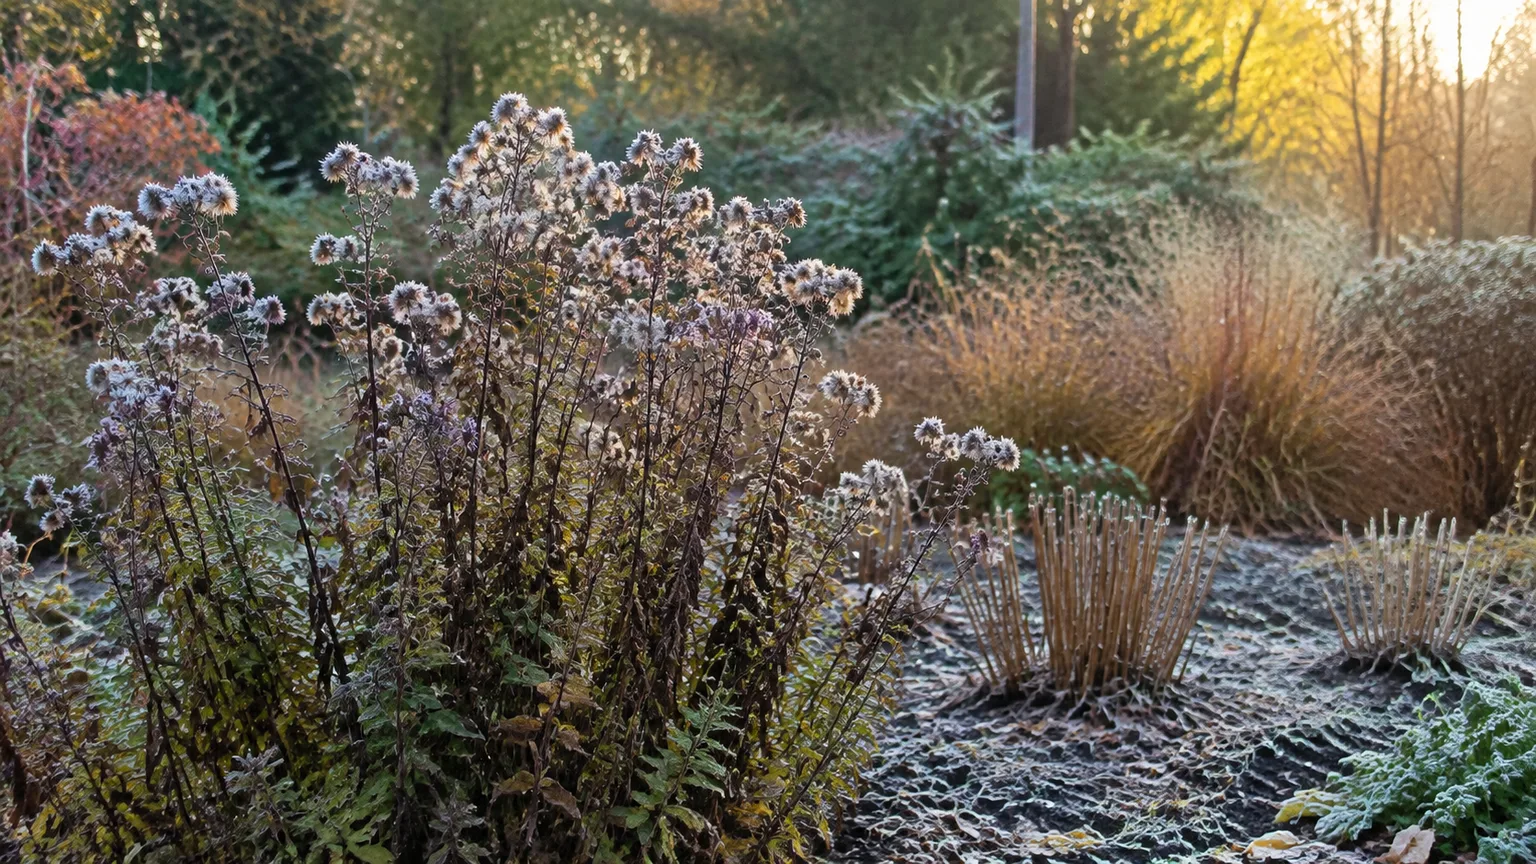
There is no horticultural requirement to make every aster disappear after frost. Healthy standing stems can add winter texture, protect the visual shape of the border, and offer places for small insects to shelter. Leaving selected stems also prevents a whole bed from becoming bare at the exact time many gardens are losing structure.
If your goal includes wildlife, leave a portion of the clump intact and cut only diseased, broken, or intrusive stems. One practical compromise is to clean the front edge and paths while leaving a few rear stems at varied heights. You can finish that cleanup in late winter or early spring before new shoots make the old stems difficult to remove.
Martha Stewart’s reporting on perennial asters notes that standing stalks can become nesting sites as they hollow and that seed heads can help birds through winter. That does not mean every aster stem must stay forever; it means “tidy” and “healthy” are not the only useful outcomes. Choose the mix that fits your garden and the wildlife you want to support.
During bloom, asters themselves are valuable late-season nectar plants. NC State Extension lists their flowers as attractive to butterflies and bees, and UF/IFAS highlights the pollinator value of Stokes’ aster. Deadhead the flowers that are finished, but allow open flowers to remain available while pollinators are using them.
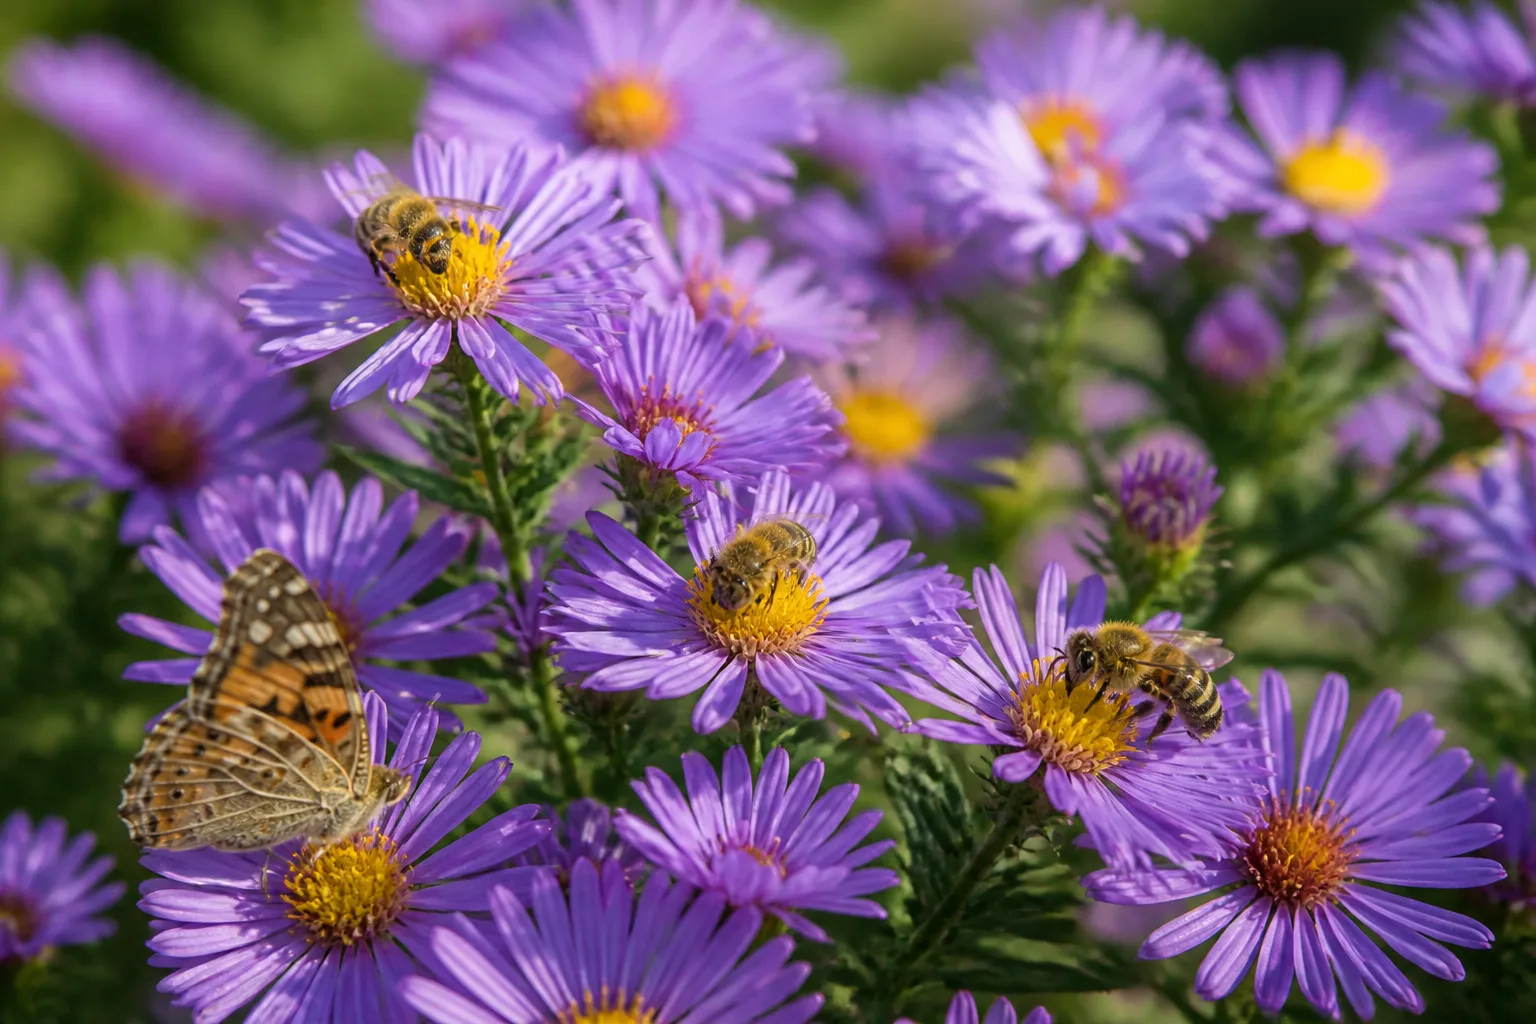
If you want to save seed, leave a few healthy, fully mature heads on a less prominent stem. Let them dry on the plant, collect them in a labeled paper envelope, and store them dry. Seed from hybrids may not produce plants identical to the parent, and seed should never be saved from a diseased plant. Deadhead the rest of the clump so seed saving does not turn the entire bed into a thicket of dry heads.
Common aster deadheading mistakes
Plucking petals instead of removing the head. Dry petals are not the entire spent flower. If the center and its short stem remain, the plant can still spend effort on seed formation and the brown disk stays visible.
Cutting at the crown in September. A hard cut to the ground removes green leaves and can erase buds that would have opened later. Save a near-crown cut for dormant-season cleanup, not routine bloom maintenance.
Removing a branch that still has buds. Aster clusters are uneven. Follow each finished head to the node and leave a nearby bud with its leaves attached.
Deadheading wet plants. Rainy, crowded foliage is a poor time to spread cuts through the bed. Wait for a dry window when possible, and remove visibly rotten material rather than handling it repeatedly.
Using dull or dirty tools. Crushing stems and moving residue from one plant to the next creates avoidable problems. Clean the blade before you start and whenever disease is suspected.
Expecting pruning to cure a site problem. More cutting will not compensate for deep shade, drought, waterlogged soil, or a cultivar that is naturally tall. Diagnose the growing conditions and plan changes for the next season.
Cutting every stem for tidiness. Asters can be healthy and useful after bloom. If seed, shelter, and winter structure matter to you, make a selective cleanup instead of a total one.
Composting diseased debris. A home compost pile may not reliably destroy every pathogen or pest stage. Bag suspicious foliage and stems rather than returning them to the bed as finished compost.
A simple aster maintenance schedule
Use the following rhythm as a flexible checklist rather than a fixed calendar. It keeps the task tied to what the plant is doing.
- Before bloom: Confirm the plant has the light, spacing, and support it needs. If the cultivar tends to flop, do any pinching or support work early enough that you do not remove developing flower tips.
- As flowers open: Leave healthy blooms and identify the stems carrying the first buds. This is an observation pass, not a reason to start cutting.
- During peak bloom: Walk the plant every few days to a week. Remove spent heads back to healthy nodes, then remove the cut material from the foliage.
- After rain or disease pressure: Wait until the foliage is dry, inspect for rotting heads and spotted leaves, and sanitize tools between plants. Treat disease as a separate problem from ordinary fade.
- As frost approaches: Stop trying to force new flowers once the plant is clearly slowing. Decide whether you want seed, habitat, or a tidy bed, and mark only the stems that need a different treatment.
- After dormancy: If you choose to cut back, leave a short stub above the crown and clear diseased debris. If you leave stems standing, schedule a late-winter or early-spring cleanup before new shoots are crowded by old growth.
The best deadheading routine is the one you can repeat without overworking the plant. A short, observant pass preserves more flowers than a dramatic haircut, and a selective winter cleanup supports more goals than a blanket rule.
Conclusion
Deadhead asters by following each fading flower to the nearest healthy leaf node, side shoot, or finished branch, then making the smallest clean cut that removes the old head. Work in dry conditions with sharp, clean tools, protect nearby buds, and inspect the plant again before cutting more.
Keep the larger decision in view. Deadheading is for managing flowers during the season; pruning and pinching shape growth; a post-frost cutback handles dormancy, disease, seed spread, or tidiness. If you leave a few healthy stems for winter structure and wildlife while removing only what is diseased or in the way, your asters can serve both the garden and the wider living border.



