How to Grow Watermelons From Seeds
Grow watermelons from seed with practical soil-temperature, spacing, transplant, pollination, watering, and harvest advice for gardens and large pots.
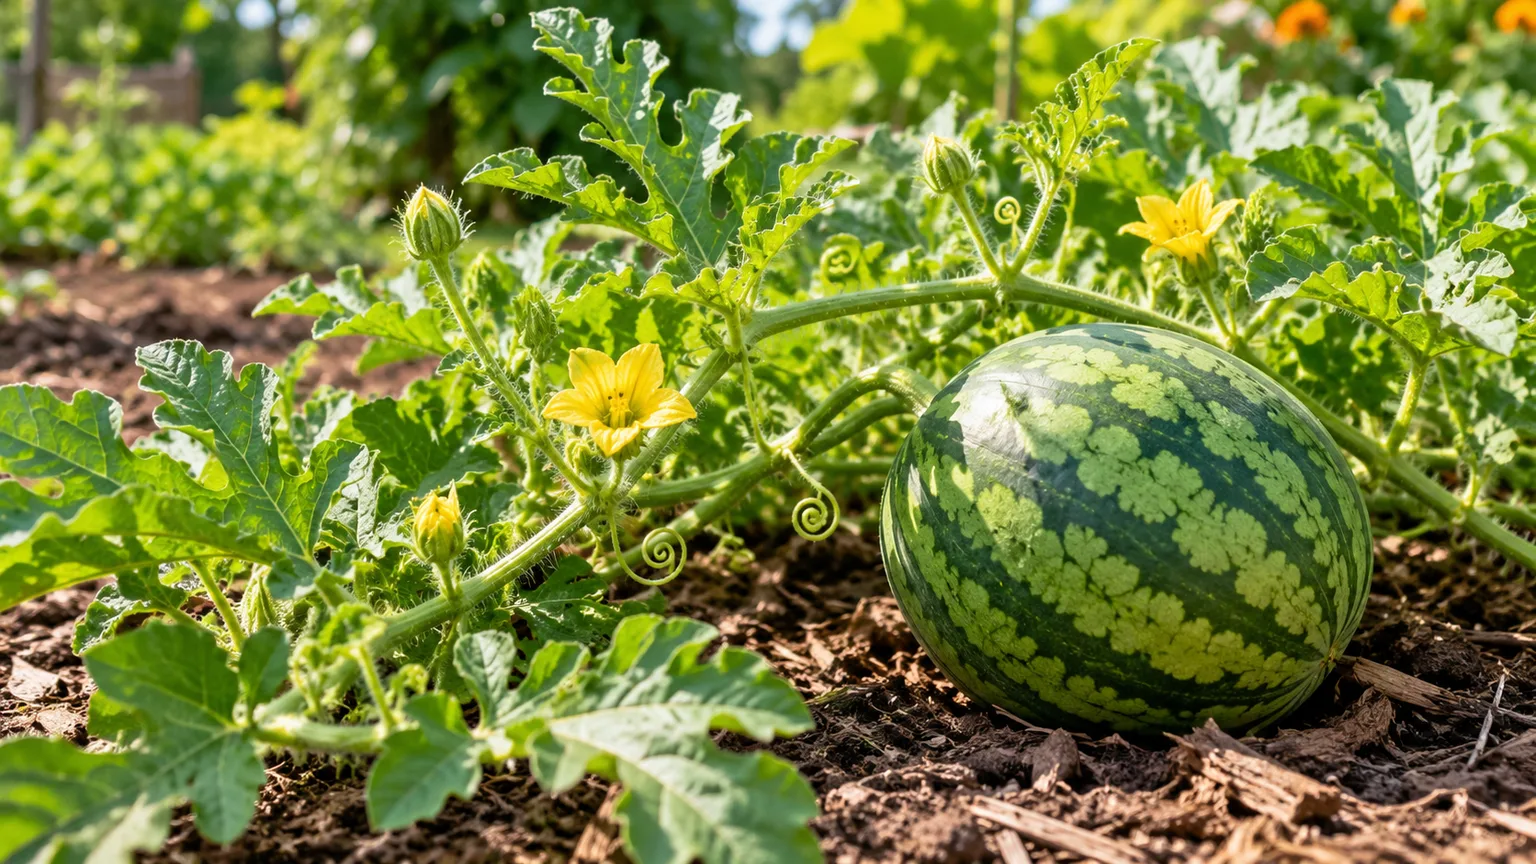
The most reliable way to grow watermelons from seed is to wait for warm soil, plant a variety that can mature before your first fall frost, and keep young roots as undisturbed as possible. Direct sowing works well where summers are long; starting seeds in small individual pots can buy time where the season is short, but an early, root-bound transplant can lose that advantage.
Watermelon (Citrullus lanatus) is a heat-loving annual vine. A packet’s days-to-maturity estimate, the size of its fruit, and your local planting window matter more than the calendar date printed in a generic guide. The steps below help you match those details to the garden you actually have.
Decide whether to direct sow or start indoors
Direct sowing is usually the simplest option if your growing season is long enough. The seeds can germinate in place, roots are never disturbed, and the plant starts growing as soon as outdoor soil and weather suit it. Sow outside only after frost danger has passed and the soil has warmed; watermelon seedlings can be set back badly by cold nights even when they survive.
Indoor starting is useful when your frost-free season is short or spring soil stays cool. It gives the plant a head start without requiring you to plant into cold earth. Keep that head start modest: watermelons grow quickly, dislike root disturbance, and can become stressed if they spend too long in a small cell while you wait for outdoor conditions.
Choose a variety for your frost-free window
Look for the packet’s days to maturity and check whether the number is counted from sowing, transplanting, or another stage. Then compare it with the warm growing days you realistically have after planting, leaving a cushion for cloudy weather, cool nights, and the time a fruit needs to size up. A variety advertised at 80 days is not a promise that every garden will harvest it exactly 80 days after sowing.
Short-season gardeners should prioritize an early cultivar and a smaller-fruited or compact type, rather than choosing a giant picnic melon and trying to force it. Mini or “icebox” fruits can still need sprawling vines, so check the plant’s habit as well as fruit weight. If you want a seedless type, read the packet before buying: triploid plants have different germination and pollination requirements from ordinary seeded varieties.
Choose a sunny site before you sow
Choose a spot with full sun for most of the day and soil that drains promptly after rain. University of Georgia Cooperative Extension recommends 8 to 10 hours of sun for watermelons and advises preparing the soil based on a test rather than guessing at amendments. A shaded, soggy corner can produce leaves, but it is a poor place to expect sweet, mature fruit. UGA Cooperative Extension
Before planting, remove persistent weeds and mix finished compost into the bed if the soil needs organic matter. A soil test helps you avoid applying nutrients that are already present or changing pH without a reason. Watermelons tolerate different soil textures when drainage is good; in heavy soil, use a raised bed or a modest mound to lift the root zone, not a tall mound that dries out quickly in hot weather.
Give each vine enough space
Watermelon vines can travel well beyond the planting hole, and overcrowding reduces airflow and makes fruit harder to find. The Alabama Cooperative Extension System suggests allowing about 24 to 30 square feet per standard large-fruited plant, while mini melons can use less. Treat those figures as a planning range, then follow the spacing on your seed packet; variety, row direction, and whether vines can spill into an unused path all change the layout. Alabama Cooperative Extension System
If your bed is small, consider one compact or bush variety instead of squeezing several standard vines together. Give each plant a clear patch to run into, mark the base of the vine, and keep paths open so you can water and check fruit without stepping on runners. A mound is optional in a well-drained bed; where you use one, space mounds according to the cultivar rather than assuming every melon needs the same distance.
Wait for warm soil, not just a frost-free date
The last frost date tells you when freezing weather is less likely; it does not guarantee that the ground is warm enough for watermelon seed. Measure soil temperature a few inches below the surface in the morning for several days. A practical target is soil consistently around 70°F (21°C), with nights warming as well; seeds may sprout in cooler soil, but emergence is slower and less dependable.
Published advice varies on the minimum. Farmers’ Almanac gives a lower threshold above 60°F, while Georgia Extension describes acclimating seedlings for planting when soil is consistently 65–70°F. For a home gardener who wants to avoid seeds lingering in cold, damp earth, waiting closer to 70°F is the safer rule; use local extension guidance if your region has a specific recommendation. Farmers’ Almanac UGA Cooperative Extension
Do not start the season by putting seeds outside just because the daytime forecast looks warm. The bed cools at night, and a cold rain can drop soil temperature for days. If spring is late, warm a prepared bed with black plastic mulch ahead of planting or start a few seeds indoors; remove or cut planting holes in plastic carefully, and make sure water can reach the roots.
Start seeds indoors without root-bound transplants
Use indoor starts only when they solve a real timing problem. Sow about two to three weeks before the date you expect the soil and nights to be warm enough for transplanting, rather than automatically counting backward from the last frost. Alabama Extension notes that watermelon transplants can be ready in roughly three to four weeks with adequate light, but the outdoor planting window may arrive later than the frost date. Alabama Cooperative Extension System
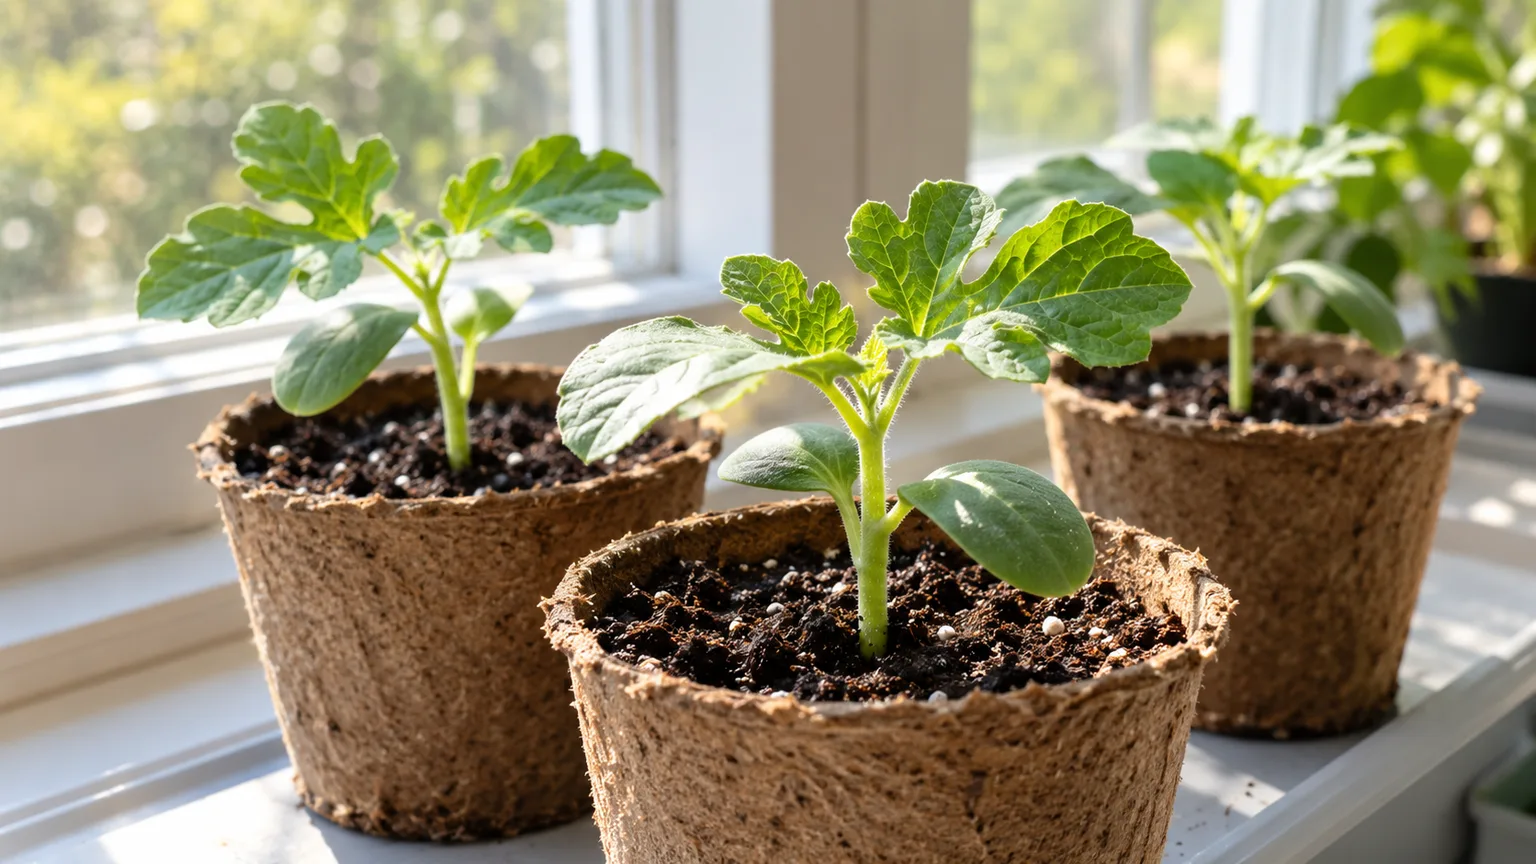
Plant one or two seeds about an inch deep in an individual pot with drainage, using fresh, lightly moist seed-starting mix. A biodegradable pot can reduce root handling, but it must be kept evenly moist and its rim should be buried at transplanting so it does not wick water away from the root ball. Set pots somewhere warm and bright; if seedlings stretch toward a window, add a grow light rather than feeding them more fertilizer.
Keep the strongest seedling and snip the extra at soil level once the seedlings have true leaves. True leaves look like the plant’s characteristic lobed leaves; the first two seed leaves are smoother and do not count. Harden the plant off over several days by introducing outdoor light and wind gradually, then transplant when soil is warm and the seedling is still compact, not tangled with roots circling the pot.
Water the pot before transplanting, move the entire root ball gently, and avoid teasing or breaking the roots. Set the plant at the same depth it grew in the pot, water it in, and shade it briefly if the first afternoon is intensely hot. A watermelon transplant that wilts a little during the first day may recover; one that stays collapsed in moist soil may be suffering from cold, root damage, or overwatering.
Direct-sow watermelon seeds step by step
Direct sowing removes transplant shock and is usually the best route when the planting bed is warm. First, weed the area and loosen only the soil where roots need to grow; avoid working very wet soil, which compacts easily. If the soil is heavy or slow to drain, make a low hill about 6 inches tall, but skip the mound in a loose, well-drained bed.
Plant two or three seeds about 1 inch deep at each planting spot, then cover with loose soil and water gently so the seeds stay in place. If planting in a row, follow the variety’s stated in-row spacing; if using hills, leave enough room for the vines to spread. A small temporary label helps you remember the variety and sowing date when several seedlings emerge at once.
Keep the seed zone damp, not saturated, while the seeds sprout. In warm conditions, expect germination in about a week, though cooler soil can lengthen that wait; Susan Mulvihill’s garden notes give a typical range of 7 to 10 days. If nothing has emerged after roughly two weeks, check soil warmth and moisture before replanting. Susan’s in the Garden
Thin seedlings without disturbing the keeper
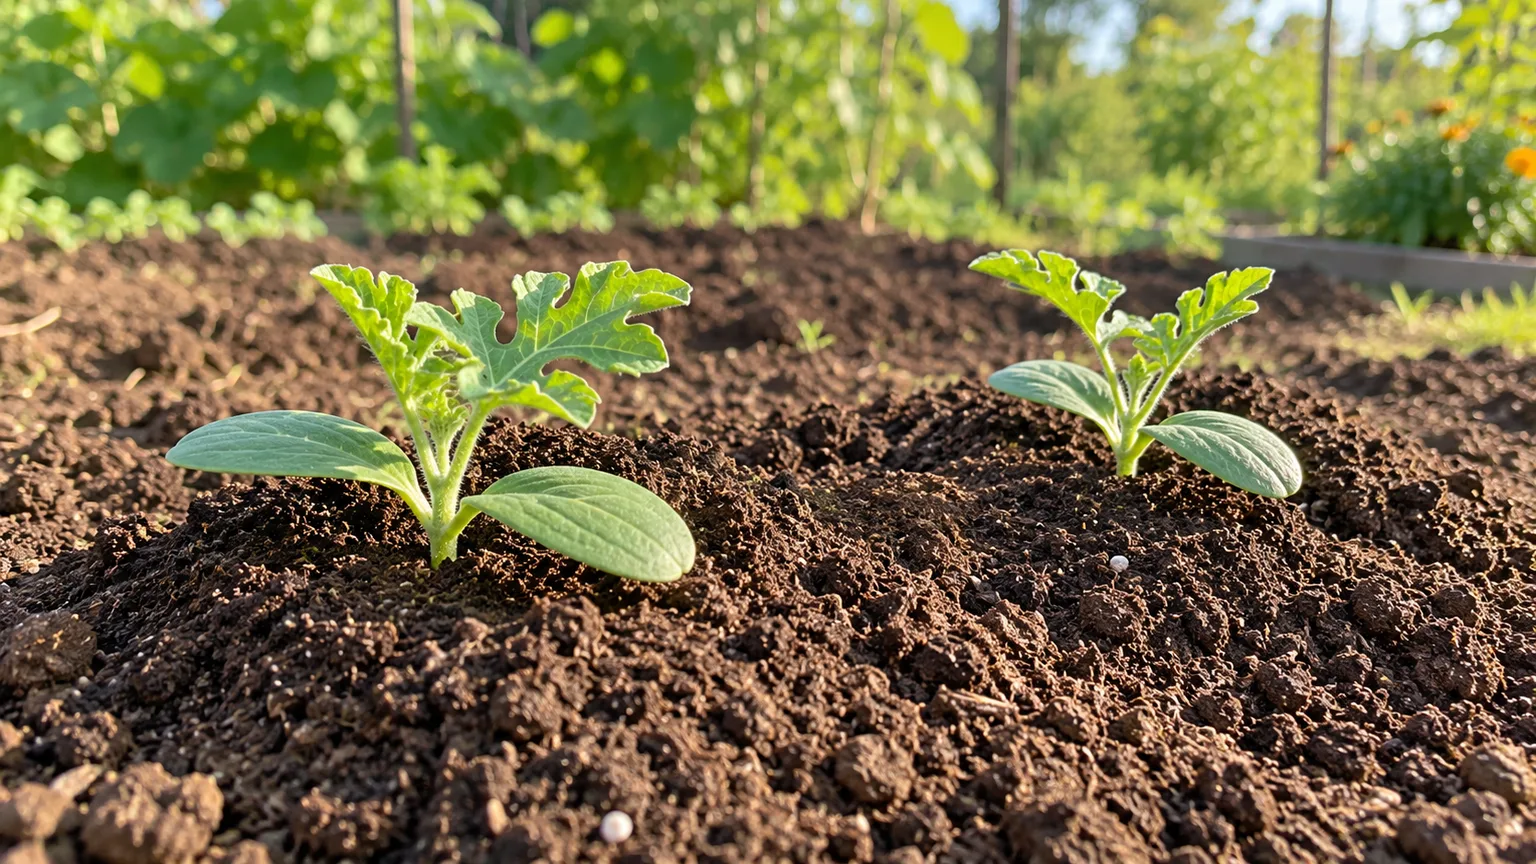
Once the seedlings have a couple of true leaves, choose the healthiest one or two according to your space and the packet directions. Cut unwanted seedlings at the soil line with clean scissors instead of pulling them; pulling can disturb the roots of the plant you are keeping. For an ordinary home garden, one vigorous plant per position is often easier to manage than a crowded clump.
Do not thin too early if germination is uncertain, but do not leave all the seedlings competing for weeks. The strongest plant is usually compact, green, and upright, with no pinched stem at soil level. If seedlings collapse where the stem meets the soil, remove them and check that the bed is warm and not waterlogged before sowing again.
Protect seedlings, then give flowers access to bees
In a cool spring, a floating row cover can shield young plants from chilly wind and some insect pests. Anchor it so it does not flap against the seedlings, and lift it on warm sunny days if heat builds beneath it. Remove the cover as flowering begins, or earlier if needed, so bees and other pollinators can reach the flowers. A cover that stays closed through bloom may protect leaves while preventing fruit set.
Weed shallowly around the plants while they are small, then use clean straw or another suitable mulch once the soil has warmed. Mulch reduces weed competition and slows moisture loss, but do not pile wet material against the crown. If cucumber beetles, aphids, or leaf disease are common locally, inspect the undersides of leaves and the growing tips regularly; remove badly diseased plant debris and rotate cucurbits to a different bed when possible.
Water evenly from vine growth through fruit sizing
Water when rainfall is insufficient to keep the root zone evenly moist. A rough starting point is about 1 inch of water per week, adjusted upward during hot, dry, windy weather and downward after substantial rain. Georgia Extension recommends checking moisture several inches into the soil and using drip irrigation when possible; watering at the base also keeps leaves drier than frequent overhead sprinkling. UGA Cooperative Extension
The most important rule is consistency. Letting the bed dry hard and then soaking it can stress plants and contribute to fruit cracking as melons enlarge. Sandy soil may need smaller, more frequent waterings; heavier soil holds water longer and should be checked before irrigating again. Do not keep roots in standing water just because the fruit is mostly water.
As fruit approaches maturity, avoid both extremes: do not flood a dry bed after a long drought, and do not impose a severe dry-down in an effort to “concentrate” sweetness. Extension and gardening advice differs on easing irrigation near harvest, but abrupt moisture swings are a clear risk. Continue checking rainfall and soil, and make only gradual adjustments when the bed is staying wetter than the plant needs.
Feed for fruit without forcing leafy growth
Prepare fertility before sowing by following a soil test and incorporating compost if needed. If you do use a packaged fertilizer, follow the label rate for your bed area and local crop guidance. A generic high-nitrogen feed applied repeatedly can create vigorous leafy vines while delaying or reducing flowering; it can also contribute to nutrient runoff when rain washes excess product away.
A soil test is more useful than guessing from leaf color alone. Pale, slow growth can reflect cold soil, waterlogged roots, or poor light as well as low fertility. Once vines are growing well, avoid the impulse to keep feeding at every watering. Alabama Extension emphasizes soil testing before planting, and its spacing and transplant recommendations vary by melon type; match fertilizer decisions to the bed and the variety rather than using a fixed monthly schedule. Alabama Cooperative Extension System
Understand pollination before expecting fruit
Watermelon plants produce separate male and female flowers on the same vine. Male flowers usually appear first; a female flower has a small swollen ovary behind its petals that resembles a tiny melon. A flower opening without fruit behind it is not a failed watermelon—it is likely a male bloom.
Female flowers need pollen transferred by bees and other insects. If the female flowers open but the small fruits yellow and fall, check whether the plants are flowering under a row cover, whether pollinators are active in the morning, and whether cold, rain, or heat coincides with bloom. Keep insect-exclusion covers off during flowering and avoid spraying open flowers with products that can harm pollinators.
If pollinator visits are scarce, you can hand-pollinate early in the day. Pick a newly opened male flower, remove its petals, and gently touch the pollen-bearing center to the center of a newly opened female flower. This is a useful backup for a small garden, not a substitute for warmth and a healthy plant; a weak vine will not reliably carry fruit just because a flower receives pollen.
Seedless watermelons add one more requirement. These are generally triploid hybrids that do not supply viable pollen, so a compatible seeded (diploid) variety must bloom nearby for pollination. Alabama Extension recommends about one-third seeded pollinators in commercial plantings and notes that pollinators need to be timed as transplants too; home gardeners should follow the seed company’s cultivar-specific ratio and plant the pollinator close enough for bees to move between vines. Seedless seeds also germinate less reliably than seeded ones, so follow the packet’s warmer starting instructions. Alabama Cooperative Extension System Farmers’ Almanac
Fit watermelons into a small garden or large pot
Small-fruited does not always mean small-vined. For limited ground space, choose a bush or compact cultivar by its vine habit, not just the size of the melon. A sturdy trellis can train a smaller variety vertically, but each developing fruit needs a strong, breathable sling that supports its weight without cutting into the stem. Do not assume every melon will stay attached to a trellis without support.
Container growing is possible with compact varieties, but a watermelon is demanding in a pot because the roots and leaves use water quickly. Use the largest container your space can handle—roughly 15 to 20 gallons for one compact plant is a more forgiving target than a small patio pot—and make sure it drains freely. Some garden guidance lists 8 to 10 gallons as a minimum, but a larger soil volume buffers heat and moisture swings better. Southern Living
Set the container in full sun, use a quality potting mix rather than dense garden soil, and check moisture daily during hot weather. A trellis can save floor space, but hand-pollination may be useful if pollinators do not visit a balcony or enclosed patio. Expect fewer or smaller fruit than a sprawling in-ground plant, and grow only the number the vine can mature before cool weather returns.
Troubleshoot slow germination and stalled vines
If seeds do not sprout, start with the conditions at seed depth: was the soil warm, was it moist but not soaked, and is the seed fresh? Old or poorly stored seed can have lower viability, while cold ground can delay germination long enough for seed to decay. Re-sow into a warm, drained patch rather than watering the original spot repeatedly.
If vines are growing leaves but no flowers, check sun, soil warmth, and nitrogen use before pruning. Too much shade or fertilizer can favor foliage over flowering. Also give young plants time: the first blooms may be male, and female flowers generally follow as the vine matures.
If flowers appear but fruit does not enlarge, look for lack of bee access, cool or wet bloom weather, too much heat, or a missing seeded pollinator for a seedless type. If vines wilt despite damp soil, do not add more water automatically; inspect drainage and the base of the stem. Watermelon wilt diseases and root problems can look similar from above, so remove a badly declining plant and consult local extension if neighboring cucurbits are affected.
If fruit stays small, compare it with the expected size and maturity of the cultivar before changing fertilizer. Too many fruits on a young or compact vine, limited sun, irregular moisture, crowding, and a short season can all constrain size. Leave the healthy leaf canopy intact; leaves supply the energy the fruit needs to grow.
Keep developing fruit dry and supported
When a melon is resting directly on wet soil, slide a flat board, clean straw, or another dry support beneath it while the fruit is still small enough to move without twisting the vine. This improves airflow and reduces direct contact with damp ground. Recheck after heavy rain, because a board or thick mat can hold moisture underneath if it stays wet.
Move vines only while they are young and before fruit has set. Once the stems are long and fruits are attached, lifting or turning a runner can crack it or loosen the fruit stem. Guide new growth gently toward open space, then let the plant settle rather than repeatedly repositioning it.
Harvest when several ripeness signs agree
Use the seed packet’s maturity range as a planning aid, but begin checking each fruit based on when it set. Watermelons do not continue to sweeten after harvest, so a calendar alone is not enough. Look for several cues together: the tendril nearest the fruit stem turns brown and dry, the ground spot shifts from pale to creamy yellow, and the rind loses some of its glossy look. A tap can add context, but the sound varies with fruit size and experience; do not rely on it by itself. Southern Living Farmers’ Almanac
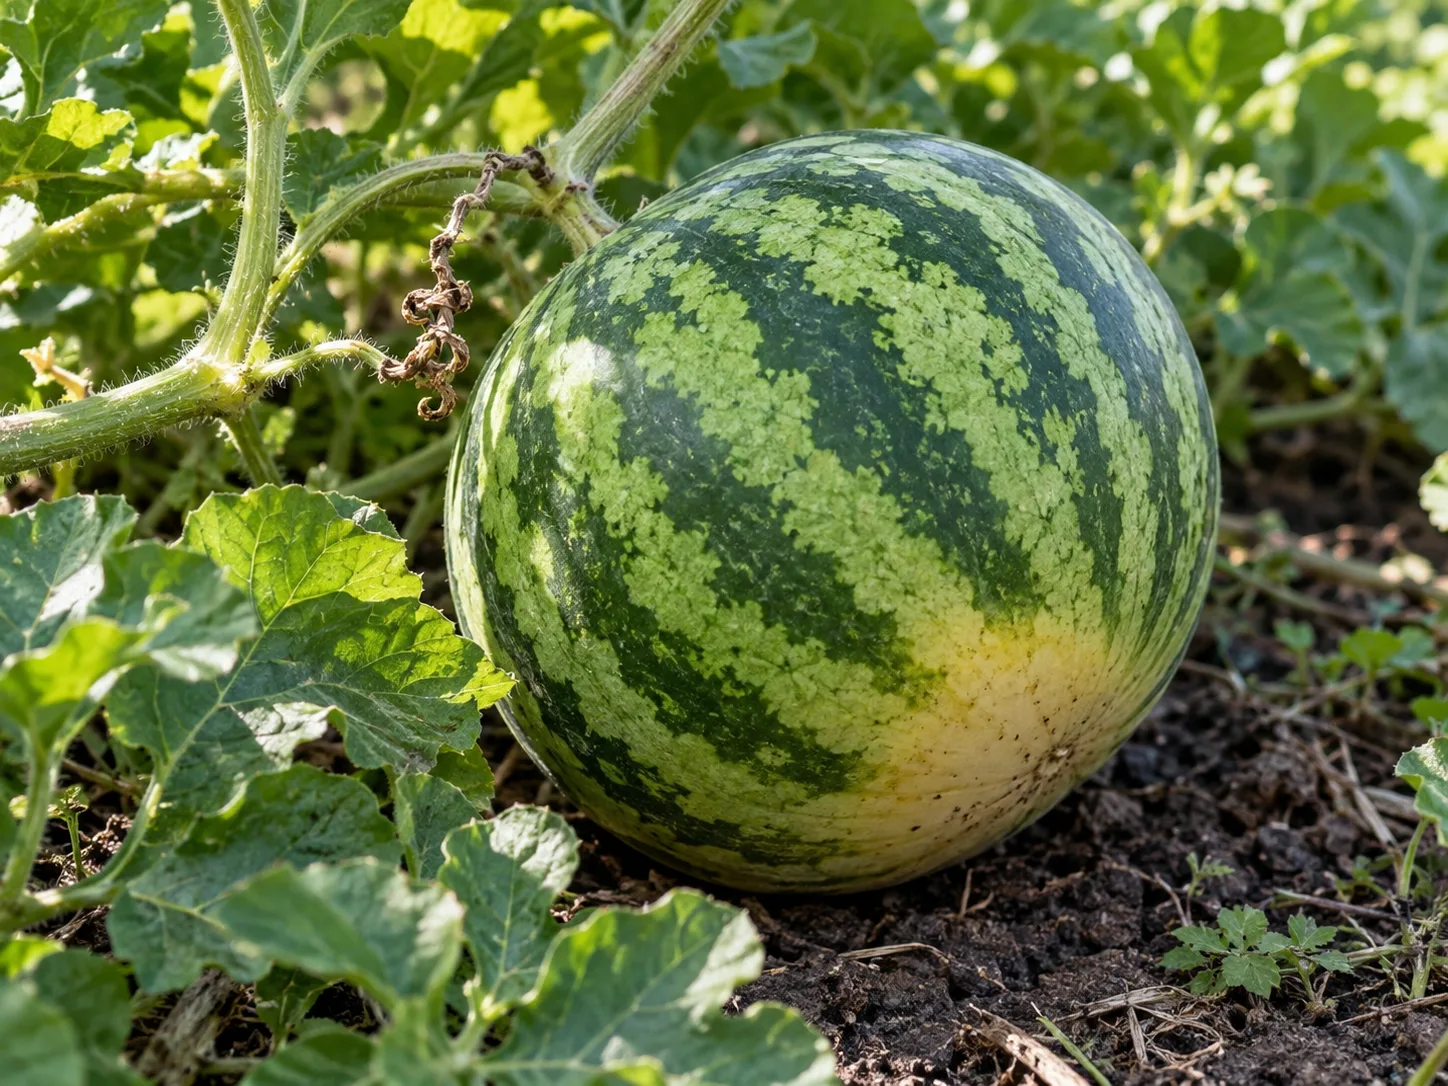
Check the cultivar, too. A striped melon may not show the same ground-spot color as a dark-rinded type, and some varieties keep a shinier rind near maturity. When the signs point to ripeness, cut the stem with clean pruners and leave a short piece attached. If uncertain, harvest one test fruit from a vine with several mature melons, then use what you learn about that variety for the next one.
Save seeds only when the variety will come true
Seeds from an open-pollinated watermelon can be saved, but the next generation may not match the parent if bees carried pollen from another watermelon variety nearby. If preserving a specific type matters, grow one variety or control pollination and label the fruit. Never expect seeds from a hybrid to reproduce the same size, flavor, or plant habit; triploid seedless watermelons are especially unsuitable for ordinary seed saving.
To save viable seed from a suitable fruit, choose a fully mature, healthy melon, remove the seeds, rinse off the pulp, and dry them thoroughly before storage. Keep them labeled in a cool, dry place. A packet from a reputable seed supplier is the more predictable choice when you want a known variety or have limited growing time.
Conclusion
Successful watermelon seed growing comes down to timing the seed to warm soil and the variety to the length of your summer. Direct sow when conditions are already warm; start indoors only when that modest head start can help, and move seedlings before their roots become crowded. Give each vine enough sun and space, keep moisture steady, and make sure bees can reach flowers.
Choose a compact, early variety if your garden or season is limited, and treat seedless types as a separate project because they need a compatible seeded pollinator. When harvest approaches, combine several ripeness signs instead of trusting one thump or a date on the packet. That sequence gives a seedling the best chance to become a ripe melon before cool weather closes the season.



