How to Harvest Sage Without Weakening the Plant
Learn how and when to harvest sage, where to cut green stems, how much to take, and the safest ways to dry, freeze, and store fresh leaves.
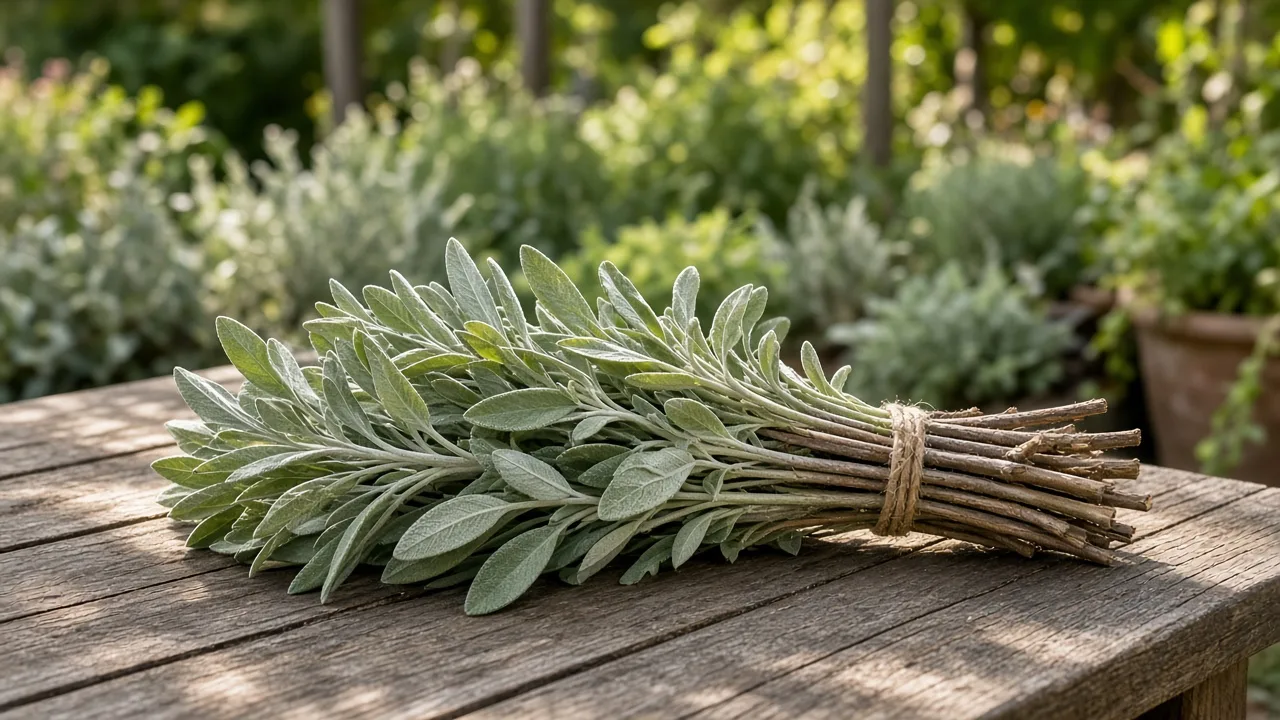
Common garden sage, Salvia officinalis, rewards a light, observant harvest. It is a semi-woody perennial, so it has a permanent framework of older stems as well as fresh leafy shoots. Treating it like basil and cutting the whole plant down can leave you with fewer buds, more bare wood, and a disappointing recovery.
The practical rule is simple: harvest healthy green growth while leaving leafy shoots and the woody framework in place. Pick individual leaves when you need a little for dinner. Cut short leafy stems when you want a larger batch for drying or cooking. On a mature, vigorous plant, use about one-third of the green top growth as a conservative upper limit, and use a much lighter hand on a first-year, drought-stressed, container-grown, or late-season plant.
For the best dried-leaf quality, cut on a dry morning after dew has evaporated and before intense afternoon heat. A large harvest is often easiest before the main flower flush, but sage does not become useless when it blooms. The right harvest date depends on the plant’s growth, your purpose, and how much recovery time remains before winter.
The short answer: harvest healthy green growth
Look for a plant with several active shoots, fully expanded leaves, and enough foliage that removing a few stems will not expose the center. A small new transplant with only a handful of leaves is not ready for a serious harvest, even if those leaves are large. North Carolina State Extension recommends harvesting new plantings lightly during the first year while they become established (NC State Extension).
Choose leaves that are clean, well colored, and free from obvious insect injury, disease spots, or spray residue. The exact leaf size is less important than the plant’s overall reserve. A mature sage with many branches can spare more than a small pot that has just recovered from heat.
Then decide what you need. A garnish or two calls for leaf picking. A jar of dried sage calls for several leafy tips. A structural cut to shorten an old branch is pruning, not routine harvesting, and should be planned separately.
Identify culinary sage before you cut
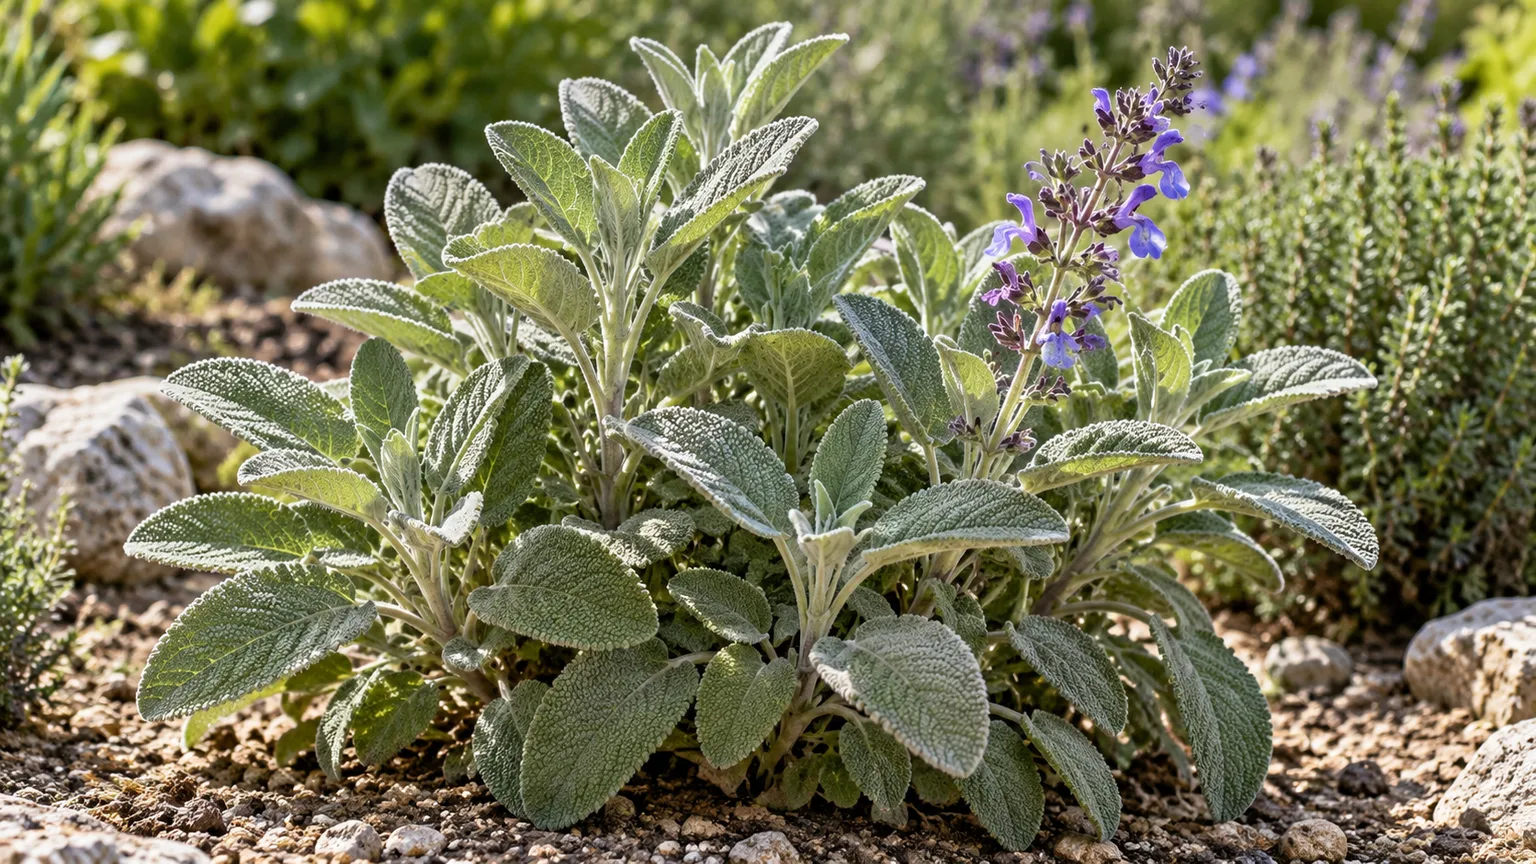
The sage used as a kitchen herb is usually common or garden sage, Salvia officinalis. It has opposite, oval leaves with a soft, slightly pebbled surface and gray-green coloring. Young stems are flexible and green; older stems become brown and woody. NC State describes common sage as a bushy, spreading, semi-woody perennial shrub from the Mediterranean region, a useful clue when comparing it with ornamental salvias (NC State Extension).
The word “sage” also appears in the names of many ornamental salvias. A plant being in the Salvia genus does not automatically make it a culinary substitute. Confirm the species or cultivar from its nursery tag, seed packet, or a reliable plant record before eating it. Avoid harvesting any plant recently treated with a product whose label does not permit use on edible herbs.
Cultivars with purple, gold, or variegated leaves can still be culinary, but flavor and vigor may differ. If you are growing sage mainly for food, favor a cultivar sold and labeled for culinary use. If you are growing an ornamental for flowers, enjoy it as an ornamental instead of guessing that its leaves belong in a recipe.
Give a new sage plant time to establish
First-year restraint is the harvest decision that protects the most future flavor. Sage grown from seed, rooted from a cutting, or newly transplanted from a nursery needs to build roots and a stable crown before it supports repeated removal of leaves. The plant may look leafy above ground while still being poorly anchored below.
During the establishment season, take only what you need: a few individual leaves or one short tip at a time. Leave most of the canopy intact, especially if the plant is still wilting between waterings, has recently been transplanted, or is producing only a few branches. A light harvest can encourage branching; a heavy harvest forces a young plant to rebuild its photosynthetic surface before it has much root reserve.
Start larger harvests after the plant has rooted into its bed or pot and is pushing new growth steadily. A simple field test is to look for several stems with multiple healthy leaf pairs below the tips. If removing one stem would leave a conspicuous hole, wait or harvest one leaf at a time. Outdoor Happens also recommends giving seed-grown plants roughly a year to build a robust harvestable framework (Outdoor Happens).
Read the plant and choose a dry harvest window
Calendar advice such as “harvest in spring” is a useful starting point, but plant signals are more reliable. In spring, wait for active new shoots rather than cutting immediately because a date on the calendar says it is time. In summer, harvest while the plant is growing and before a heat wave, drought, or prolonged wet spell adds stress. In a mild climate, a few leaves may remain usable outside the main season even when new growth slows.
For a preservation harvest, choose a dry day after the morning dew has disappeared. Penn State Extension recommends harvesting herbs when essential oils are concentrated, generally in the morning after dew evaporates, and removing bruised or imperfect material before drying (Penn State Extension). The point is not to chase a magical minute; it is to avoid adding surface water to a dense bundle.
Mid-morning also gives you cool, hydrated foliage that is less wilted than leaves cut in late afternoon. If you need sage for tonight’s meal, harvest when convenient. For drying, avoid cutting directly after rain and do not leave freshly cut stems in hot sun while you gather the rest.
Pick leaves or cut leafy stems for the job
For a small kitchen harvest, pinch or snip individual leaves with a short piece of petiole attached. Take leaves from more than one side of the plant so one branch does not lose its entire canopy. Handle the fuzzy leaves gently; bruising releases aromatic oils before you are ready to cook with them.
For a larger quantity, use clean, sharp scissors or bypass pruners to take leafy stem tips. A short stem with several leaf pairs is easier to carry, rinse, sort, and hang than a pile of loose leaves. It also leaves side buds and foliage below the cut, which can produce new branching.
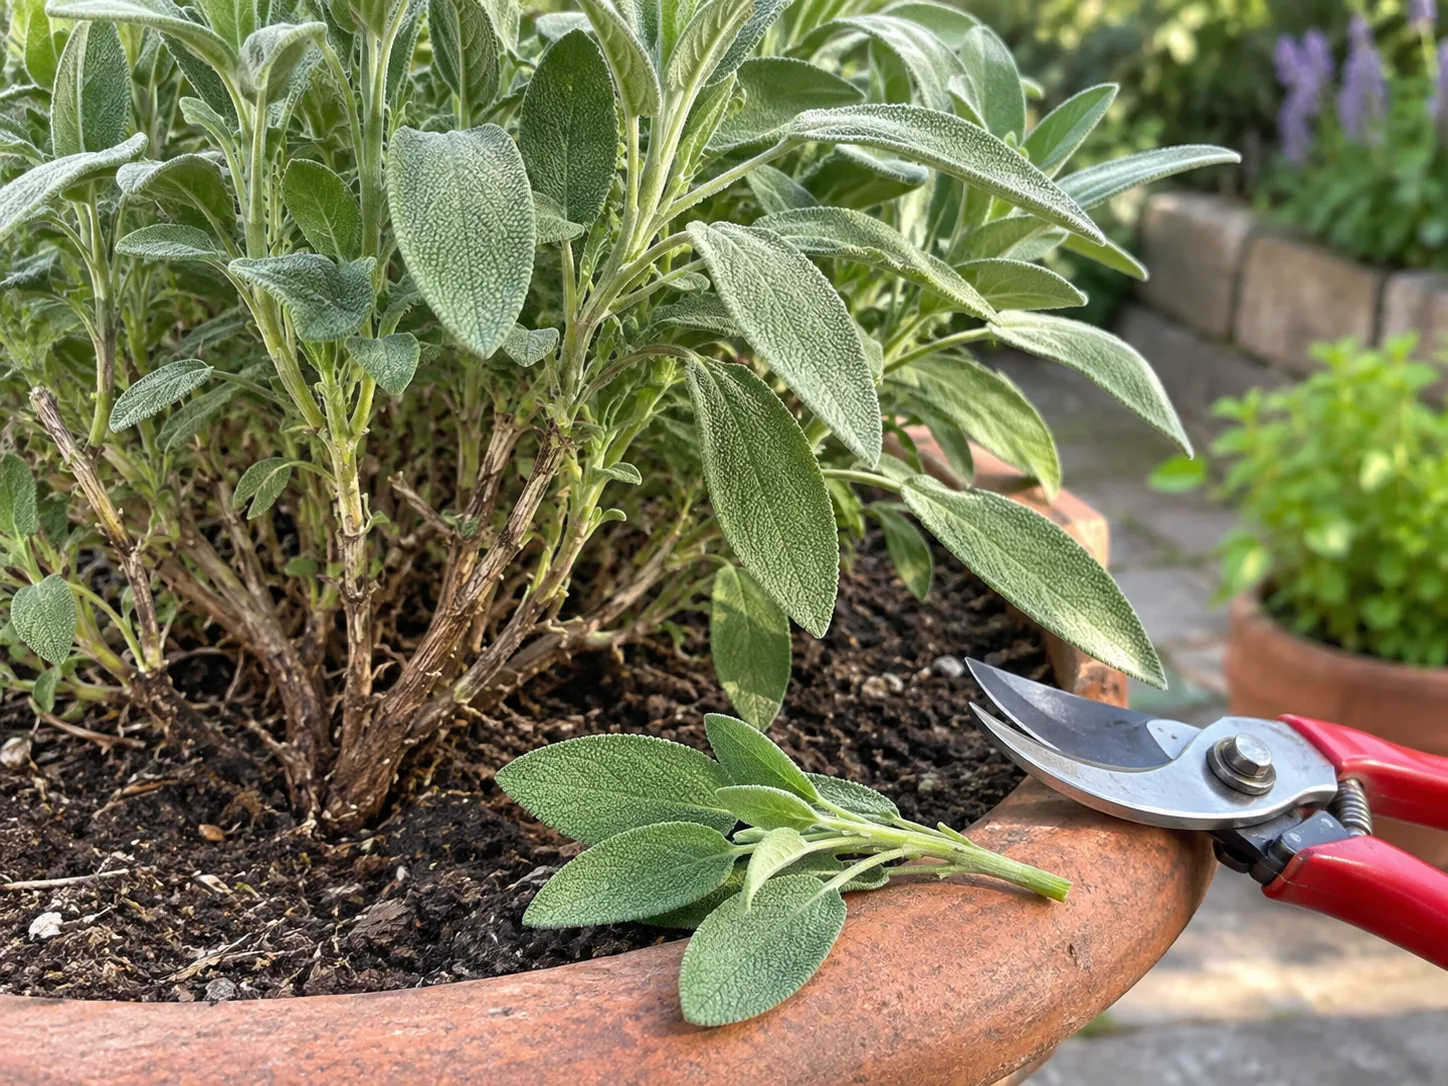
Keep the harvest proportional to the use. Cut only what you can process promptly if the weather is humid. A small fresh harvest that goes straight into a meal is better quality than a large basket that sits warm and damp while you decide how to preserve it.
Make every cut above living growth
Trace the stem from its leafy tip downward before you snip. Make the cut just above a healthy leaf pair, side shoot, or visible node while flexible green growth remains below it. This leaves buds and foliage that can continue photosynthesizing and branching.
The cut-location test is more useful than a fixed measurement. If the section below the intended cut is green or carries healthy leaves, it is a reasonable harvest point. If it is rigid, bare, and brown with no visible buds, move the cut upward. NC State specifically cautions that mature woody stems of common sage seldom produce new growth after hard pruning (NC State Extension).
Do not shear the entire plant into a flat ball for routine harvest. Uniform cuts can remove every growing tip at once and expose the old center. Selective cuts create a less tidy instant silhouette, but they preserve more living points from which the plant can recover.
After cutting, remove lower leaves that would sit in water or touch a drying surface. Keep healthy leaves attached if you are cooking immediately, and strip the leaves from the stems when the stems are too woody for the recipe.
Use one-third as a ceiling, not a target
The one-third rule is a conservative way to prevent a mature plant from being stripped bare, not a quota to fill at every harvest. On an established, well-watered sage with abundant green growth, removing roughly one-third of the leafy top growth at one time leaves a useful canopy for recovery. Less is better when the plant is small or stressed.
First-year sage should lose only a light sampling. Reduce the amount further after transplanting, during drought, after pest damage, or when the plant is recovering from winter injury. A container plant may have less root volume and less moisture reserve than a shrub in the ground, even when both look the same size.
If you need more sage than one plant can spare, grow several plants and rotate them. You can take a larger total harvest without repeatedly overworking one crown. Space larger cuts out long enough for fresh shoots to extend before making another preservation harvest. Epic Gardening similarly favors light, repeated harvests and leaving old wood intact (Epic Gardening).
Adjust harvests for pots, weather, and winter
Potted sage dries out faster in hot, windy weather and can also suffer when a container stays wet after rain. Harvest lightly if the plant is wilted, recently repotted, or growing in a pot with poor drainage. Correct the growing problem before asking the plant to replace a large amount of foliage.
In a wet site, slow regrowth may be a root problem rather than a cutting problem. Common sage prefers full sun and well-drained, medium-to-dry soil and is intolerant of persistently wet conditions, according to NC State Extension (NC State Extension). A cut plant that sits in saturated soil can decline even when every snip was placed correctly.
As the season turns cold, reduce large harvests early enough for your local weather pattern. Late heavy cuts can leave tender regrowth exposed to frost and remove foliage the plant needs to prepare for dormancy. In a mild climate, small fresh harvests may continue; in a cold or wet climate, preserve what you need before the plant slows.
Harvest before flowering, then adapt after bloom
If your goal is the strongest classic dried-leaf flavor, plan the main harvest when the plant is full of leafy growth and flower buds are forming but have not opened widely. Penn State’s herb-preservation guidance generally favors the bursting-bud stage for drying because new tip leaves have concentrated flavor (Penn State Extension). That timing also gives you many leafy stems to cut without removing every flower stalk.
Flowering is not a spoilage signal. Existing leaves remain usable during and after bloom, although texture, aroma, and the pace of new leaf production can change. Taste a leaf and decide whether it suits the recipe. For everyday cooking, a few post-bloom leaves are a reasonable harvest; for a large drying batch, the earlier window may give a more consistent result.
You can remove some flower stems if leaf production and compact growth are your priority. You can also leave some flowers for bees and other pollinators, then harvest separate leafy shoots. If you want seed, do not cut every flowering stem as soon as it fades.
Separate harvesting from structural pruning
Harvesting is taking plant material for use. Pruning is changing the plant’s shape, removing damaged structure, or managing legginess. Confusing the two is how a cook ends up making a hard cut into old wood simply because a recipe called for more leaves.
During active growth, routine harvest cuts should stay in flexible green stems. Structural pruning is best done when you can see where the living buds are and when the timing will not push a flush of tender growth into a freeze. Remove dead tips first, then shorten long branches back to green growth rather than cutting the whole crown to an arbitrary height.
Clean tools matter for both jobs. Wipe soil and plant residue from pruners, and use sharp blades that make a clean cut instead of crushing the stem. If you are moving from a diseased plant to a healthy one, clean the blades between plants and do not put spotted leaves into your drying batch.
Repair or replace a woody, slow-regrowing plant
A sage plant that is mostly brown, open, and leafless cannot always be rejuvenated with one dramatic cut. Start by removing dead tips and taking only a few branches back to visible green growth. Leave the rest of the living framework in place and watch for new shoots before making another reduction.
If regrowth is weak, diagnose the plant in this order: did the cut leave any living leaves or buds below it; was the plant overharvested; is the soil staying wet; does it receive enough sun; did winter or heat damage the crown; and is the plant simply old? This sequence separates a bad cut from a root-zone or environmental problem.
Do not assume fertilizer will solve bare wood. Common sage is adapted to lean, well-drained conditions, and pushing lush growth with excessive feeding can create soft shoots that do not match the compact habit you want. Improve light and drainage, then give the plant time.
When an old plant has very little green growth left, replacement is often kinder than cutting it to a stump. A new culinary sage plant or a rooted cutting can produce a better harvest while the old plant is left as an ornamental if it still has value in the garden.
Choose between fresh storage, freezing, and drying
Use fresh leaves when the dish benefits from sage’s soft texture and bright aroma. Use freezing when you want a fresh-tasting herb for cooked food but do not have enough dry air for reliable air-drying. Use drying when you want a compact pantry supply that can last for months.
For short-term fresh storage, do not seal wet leaves in plastic. Wrap dry, unwashed leaves loosely in a paper towel and refrigerate them, or place cut stems in a small amount of water and keep the leaves above the waterline. Inspect the leaves each day and discard any that become slimy, moldy, or strongly off-odor. Wash just before use if the leaves are clean and destined for immediate cooking.
To freeze sage, wash and dry leaves, then freeze them whole on a tray before moving them to a freezer container, or portion chopped leaves into ice cubes for soups, sauces, and braises. Frozen leaves will not keep the same crisp texture as fresh leaves, but that matters little in cooked dishes. Label oil-filled portions clearly and keep them frozen; do not treat a homemade herb-in-oil mixture as a shelf-stable pantry product.
Air-dry sage with controlled moisture
Sage is one of the sturdier leafy herbs for air-drying, but thick leaves and bundled stems still need airflow. National Center for Home Food Preservation guidance calls for warm, dry air, no direct sun, and complete dryness before storage; it also warns that sun drying can cost herbs color and flavor (National Center for Home Food Preservation).
Sort the harvest first. Remove spotted, bruised, soiled, or insect-damaged leaves. If the stems need rinsing, use cool water, shake off the excess, and pat or spin away surface moisture. Do not hang a wet, dense handful above a stove or sink and expect it to dry safely.
Tie only a few stems into a loose bundle with string or a rubber band. Hang the bundle upside down in a dark or shaded, dry, well-ventilated spot. A loose paper bag with ventilation holes can shield it from dust, but a sealed plastic bag traps moisture. In a humid home, a single-leaf screen or tray is usually safer than a hanging cluster.
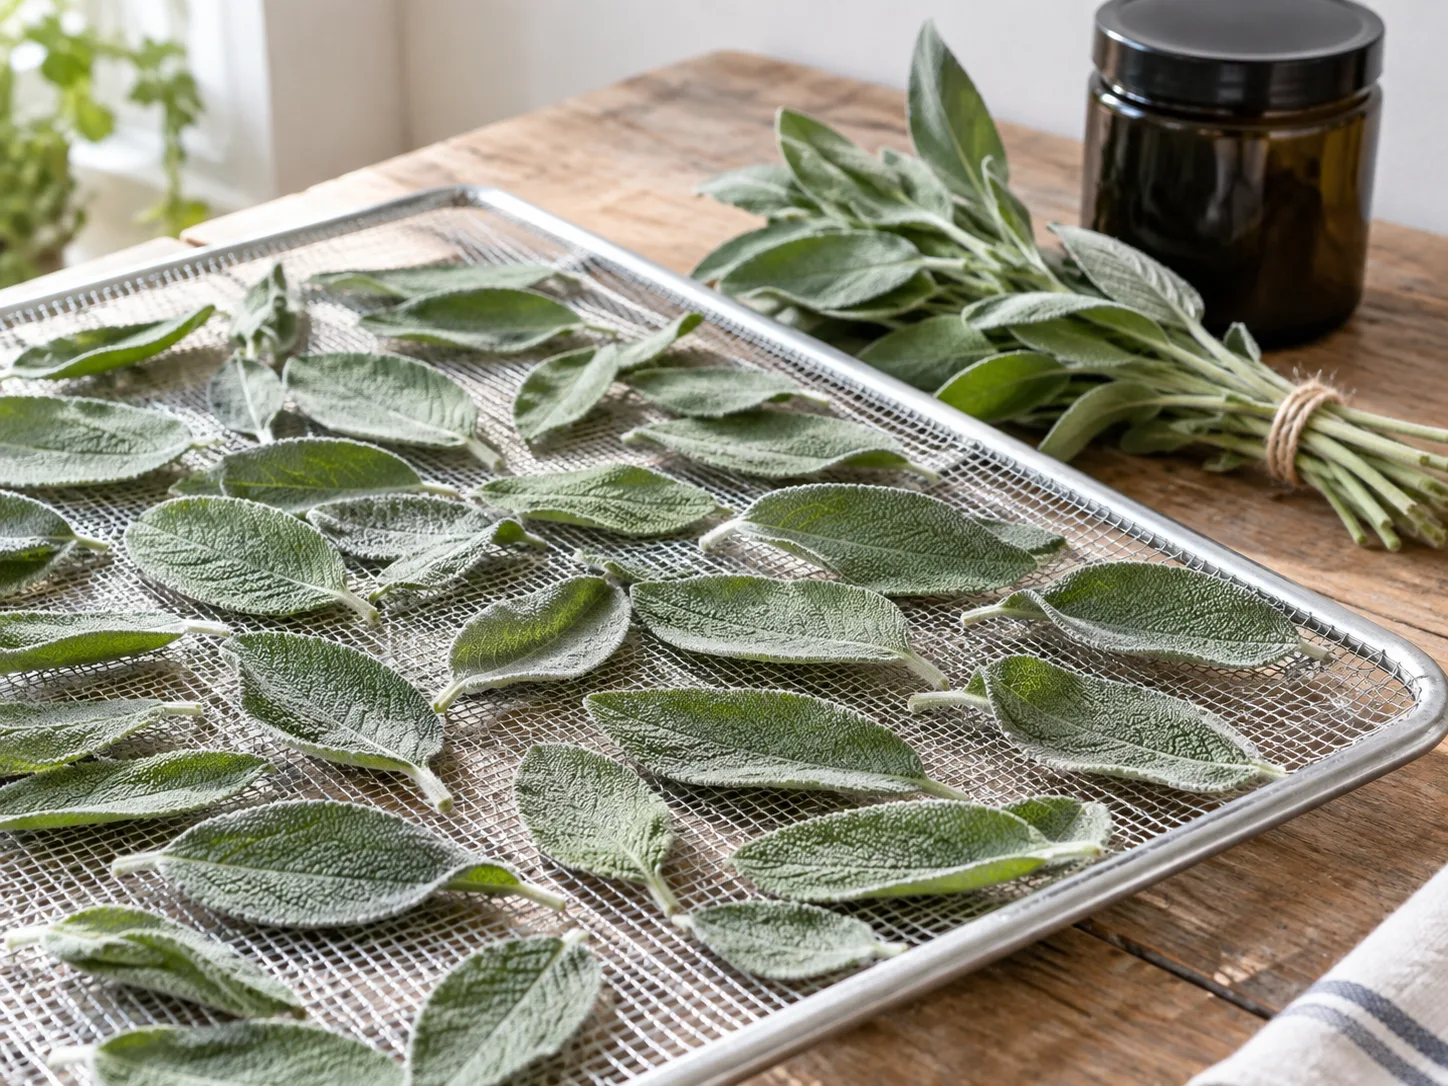
Check the center of a bundle, not just the outer leaves. Sage is ready when the leaves feel crisp and crumble easily rather than bending coolly or leathery. Strip the leaves from the stems after they are dry, and keep the whole leaves intact until you are ready to season food.
Use a dehydrator for speed and consistency
A dehydrator is useful when the room is humid, the harvest is larger, or you want more predictable airflow. Penn State lists low-temperature herb dehydration around 95–110°F, with leaves arranged so they do not overlap heavily (Penn State Extension). Follow the appliance manual if it gives a more specific setting for herbs.
Spread the sage in a single layer on the trays. Separate thicker leaves from thin ones if they finish at different rates, and avoid drying sage in the same load as strongly scented or high-moisture produce if you do not want the aromas to mix. Start checking early rather than relying on a single universal time; leaf thickness and humidity change the result.
Avoid turning the heat high just to finish faster. Excess heat can dull color and drive off volatile aroma. The finish test is still the same: the leaves should be crisp and crumble readily, with no flexible midrib or cool damp center.
An oven is a less controlled fallback. The lowest setting may still be too hot for ideal flavor, and an oven can brown delicate leaves quickly. If you use it, monitor constantly, provide a way for moisture to escape, and remove the leaves as soon as they are dry. For a small home harvest, air-drying or a dehydrator is usually easier to judge.
Store dried sage whole and inspect the batch
Let dried leaves cool before sealing them. Pack them into a clean, dry, airtight glass container and keep it in a cool, dark cupboard away from the stove, dishwasher, sink, and sunny windowsill. Penn State recommends storing herbs away from heat, light, and moisture and notes that whole leaves retain quality longer than crushed herbs (Penn State Extension).
Label the jar with “sage” and the harvest year. Whole leaves protect their aromatic oils better than grinding the entire crop in advance, so crumble or rub only the amount needed for a recipe. Judge an older jar by its aroma and flavor; a year is a useful quality horizon, not a guarantee that every batch loses strength on one exact date.
Check a new jar during its first few days. If you see condensation, feel soft leaves, or notice a musty smell, the batch was not dry enough. Spread it back out and dry it again if there is no mold. If any mold is visible, discard the affected batch rather than trying to rescue it by picking out one leaf.
Do not store questionable leaves with good herbs. A clean, dry harvest from a healthy plant is part of preservation, not a cosmetic extra. Storage cannot improve leaves that were damaged, contaminated, or left damp after cutting.
Save seeds and build a season-long routine
To save seed, leave a few flower stems on the plant until the flowers fade and the seed structures dry. Cut the dry stems into a paper bag or onto a clean tray, let them finish drying in a cool, dry place, and rub the heads gently to release the seeds. Store clean seed in a labeled, cool, dry container.
Seed from a named cultivar may not produce an identical copy, particularly if other sages flower nearby. If matching the parent plant matters, propagate from a known cutting instead. If you do not want volunteer seedlings, remove fading flower heads before mature seed falls.
A workable annual rhythm is to inspect for winter damage in spring, then remove dead tips back to living growth. Take small kitchen harvests as new shoots extend. Make the largest drying harvest from an established plant before the main flower flush, leave some flowers if pollinators matter, and continue light picking while the plant is actively growing. As cold or wet weather approaches, reduce the size of cuts and preserve what you need.
That routine keeps the goal in view: a useful harvest this week and a vigorous sage plant next season. If the plant does not have enough green growth for both, protect the plant first and take less.
Conclusion
Harvest sage by reading the plant before you cut. Give first-year plants a light sampling, choose a dry mid-morning for preservation, pick individual leaves for small needs, and cut leafy stems just above a node or side shoot while green growth remains below.
Treat one-third as a conservative ceiling for a mature, healthy plant, not a target for every harvest. Harvesting before flowering often gives the most consistent dried-leaf quality, but flowers do not make sage unusable. When the leaves are destined for storage, control moisture from the garden to the jar: dry them fully, keep them whole, and store them cool, dark, and airtight.