7 Ways to Hide Mouse Traps Safely at Home
Hide mouse traps safely with seven smart locations, wall-runway setup, pet and child safeguards, bait tips, daily checks, and cleanup steps.
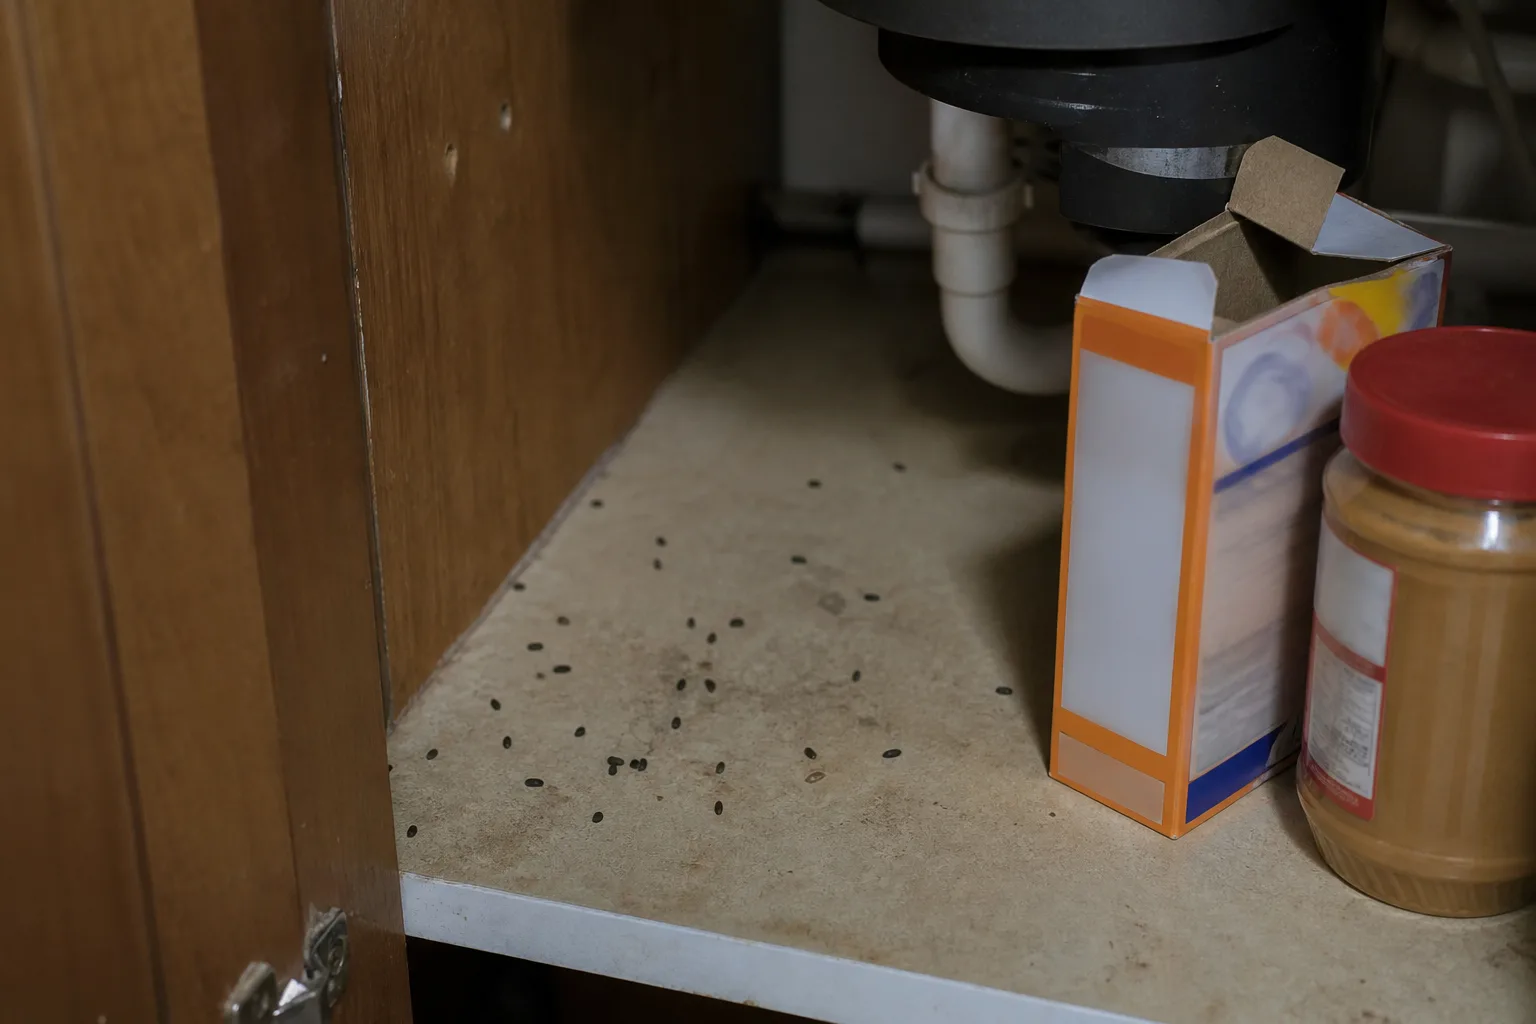
The best place to hide a mouse trap is not simply the darkest corner. It is a quiet mouse runway that people and pets cannot reach, but you can still inspect every day. In most homes, that means behind an appliance, inside a cabinet, along the back edge of furniture, or in a garage corner where droppings and gnaw marks confirm activity.
The distinction matters. A trap that guests cannot see but you can safely reach is well hidden. A trap pushed into a wall void, buried under insulation, or forgotten behind a heavy appliance is merely inaccessible—and it can leave you with an odor, a sanitation problem, or an unconfirmed infestation.
Use the seven locations below as a route map, then set the trap correctly, record where it is, and keep checking. For the bigger plan—choosing between snap, electronic, and bait-station options—see our guide to the best mouse traps.
What Makes a Hidden Trap Effective?
A hidden trap has four jobs: it must sit on a route the mouse already uses, present the trigger without an easy way around it, stay safe from children and pets, and remain easy enough for you to check. Miss any one of those and the trap may look neatly out of sight while catching nothing—or creating a new hazard.
Think of concealment as a visibility problem, not a biology problem. Mice do not care whether a trap blends with your baseboard or whether it is tucked behind a cereal container. They care about shelter, edges, food, and the unfamiliar object in their path. Your job is to use their route while making the device uninteresting to everyone else.
Follow the Mouse, Not the Room
Start with evidence instead of placing one trap in the center of every room. Fresh droppings, gnaw marks, shredded paper, a musky odor, disturbed food, and a repeated sighting tell you where to investigate. The CDC lists droppings and gnaw marks as key signs, while Nebraska Extension notes that nests are often found near warm, sheltered areas such as refrigerators, ovens, and water heaters (CDC rodent-control overview; Nebraska Extension’s house-mouse guidance).
Mice generally travel along walls and other objects rather than crossing a bright, open floor. UC IPM says house mice seldom venture more than about 30 feet from their nest and food supply, so a trap near fresh evidence is usually a better bet than a trap in the room that seems most convenient to you (UC IPM house mouse). Follow the baseboard, cabinet toe-kick, pipe chase, or storage edge until you find a place where a mouse can pass and you can still reach the trap.
Choose a Trap You Can Check
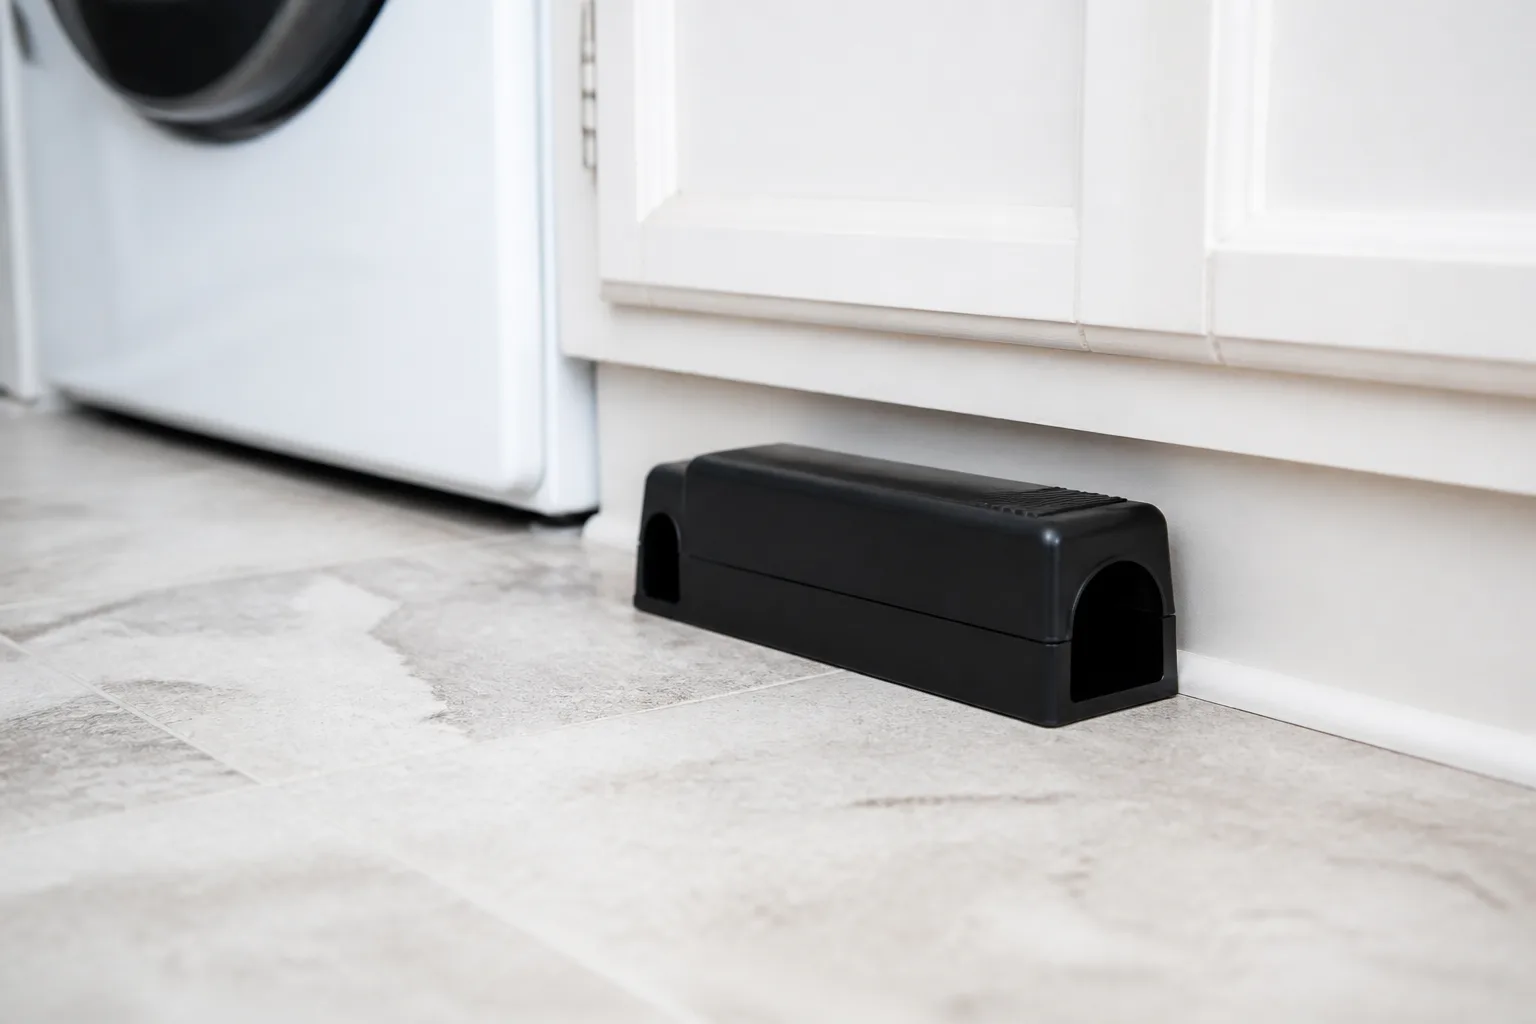
For most small indoor mouse problems, a mouse-size snap trap is the straightforward first choice. The CDC recommends traditional snap traps around the home and says to keep traps and bait out of reach of children and pets; it also advises against glue traps and live traps because frightened rodents can urinate, increasing the risk of exposure (CDC trap-up guidance).
An electronic trap or an enclosed snap trap can be useful where a curious cat, toddler, or dog makes an exposed spring trap unsafe. Use a product designed for that purpose and follow its instructions. Do not improvise a tight cardboard tunnel around a loaded snap trap: the cover can shift, prevent the trigger from working, or make the trap harder to find.
Match the trap to the animal. A large trap does not automatically catch a small mouse, and a mouse trap is not appropriate for a rat. If droppings are much larger than expected, gnawing is heavy, or the animal is repeatedly active in daylight, pause and identify the rodent before setting a row of mouse-size devices.
1. Behind the Refrigerator, Range, or Dishwasher
The narrow strip behind a large kitchen appliance is one of the most useful hiding places because it combines darkness, warmth, crumbs, and a wall edge. A refrigerator, range, or dishwasher can also conceal a trap from visitors while keeping it close to a route that mice already use.
Before moving anything, check the appliance manual and the installation. Do not pull a gas range, hard-wired appliance, or anti-tip-secured range away from the wall unless you know how to do it safely. Keep the trap away from burners, heating elements, motors, moving parts, water, and electrical connections. If the appliance cannot be moved enough for a clear daily inspection, choose the cabinet toe-kick or a different route instead.
Use a flashlight to look for droppings, greasy rub marks, torn packaging, nesting material, or a gap at the floor-wall junction. Clean loose crumbs around—but not by dry sweeping droppings—and place a mouse-size snap trap on a firm, level surface near the wall. Take a phone photo from the front before sliding the appliance back so you know the exact position.
2. Inside an Under-Sink Cabinet
Under-sink cabinets are effective hiding spots because plumbing penetrations create routes, the doors keep traps out of sight, and a leak or condensation can provide the water mice seek. Check both kitchen and bathroom cabinets, especially the back corners where pipes pass through the floor or wall.
First remove cleaning products, bags, sponges, and loose packaging so you can see the cabinet floor. Keep a trap away from liquid cleaners, drain lines that may drip, and anything that can fall onto the trigger. If children can open the cabinet, add a working child lock or use a properly enclosed trap that still allows you to inspect it without reaching blindly into the cabinet.
Place the device beside the wall or cabinet side where the evidence is strongest, not directly in front of the plumbing hole unless the trap can sit level and remain dry. A trap that is damp, blocked by a bottle, or buried behind shopping bags is not a safe hidden trap. Leave a clear inspection path.
Repair the leak and inspect the pipe opening after the trap is set. A trap can reduce the mouse already inside, but it cannot stop another mouse from following the same warm, food-scented route. The CDC specifically lists areas under sinks, behind appliances, and around plumbing lines as places to inspect for openings (CDC seal-up guidance).
3. At the Back of a Pantry or Food Cabinet
A pantry provides darkness and food, but it is also the place where a hidden trap is most likely to be forgotten. Set one only after you remove damaged packages and transfer food into thick plastic, metal, or glass containers with tight lids. Otherwise the mouse has a buffet of competing smells and may ignore the bait entirely.
Use the lowest back corner, a cabinet side, or the space beside a fixed shelf where you see fresh droppings or gnawing. Do not hide a trap behind loose cans, open flour bags, or a stack of boxes that could shift onto the trigger. Keep the baited end pointed into the travel lane and leave enough room to remove the trap without putting your hand where the spring can strike.
The best bait is often a food the mouse is already stealing. UC IPM recommends using what house mice are already eating; a tiny smear of peanut butter, a small piece of kibble, a seed, or a bit of nesting material can all make sense depending on the evidence. Keep portions small. Too much bait lets a mouse nibble from the edge without pressing the trigger, and a large blob can obscure whether the trap fired.
After setting the trap, clean the shelf and inspect nearby packages. Throw away food with droppings, urine, gnawing, or a damaged seal rather than trying to brush it clean. The CDC seal-up checklist recommends tight-lidded food storage, prompt spill cleanup, and putting pet food away after use; those steps make the trap more attractive and limit the next mouse.

4. Under a Sofa, Bed, or Heavy Chair
Furniture creates a dark edge that mice can follow, and it keeps a trap below ordinary eye level. Use this location when you have seen a mouse cross a living room or bedroom, or when droppings appear behind a sofa, under a bed, or beside a chair leg.
Slide the trap near a wall, not in the middle of the open space under the furniture. Put it where the furniture will not roll, recline, rock, or press on the device, and keep it away from bed skirts, cords, toys, and pet bedding that could touch the trigger. If the gap is so tight that you cannot see and remove the trap easily, it is too tight.
In a home with pets or young children, ordinary furniture is not a safety barrier. A cat can reach under a sofa, and a child can crawl there. Use an enclosed commercial trap or block access to the entire under-furniture area with a stable, non-gnawable barrier that does not touch the trap. Check that the barrier has not shifted before you leave the room.
5. Behind a Trash Can
Trash cans offer food odors, a dark vertical surface, and a gap that is often left undisturbed. A trap behind a kitchen or bathroom can work when the can sits along a baseboard where mice already travel.
Empty the can and clean spills before setting the trap. If the can is moved every night, place the trap beside the wall rather than directly behind the wheels so it will not be dragged across the floor. A narrow gap between the can and baseboard can hide the device, but it must not wedge the trap or let the can tip onto it.
If you keep seeing fresh evidence around the trash can after several nights, inspect the nearby cabinet toe-kicks, dishwasher gap, floor-wall joint, and exterior door threshold. A bin can be the visible food source while the entry hole is several feet away.
6. Along Attic, Basement, and Crawl-Space Edges
Attics, basements, and crawl spaces offer quiet corners, insulation, stored boxes, pipe penetrations, and little human traffic. That makes them good places to hide traps from guests, but it also makes them easy to neglect. Set traps along walls, beside foundation edges, near utility penetrations, and beside fresh droppings—not in the middle of insulation or a pile of stored items.
In an attic, check around vents, roofline penetrations, chimneys, and the edge where insulation meets a wall. In a basement or crawl space, look around floor drains, rim joists, pipes, furnaces, water heaters, and the floor-wall joint. Keep traps off damp concrete, away from moving equipment, and out of areas where a child, pet, or wildlife visitor can reach them.
If insulation is heavily contaminated, the area smells strongly of urine, or rodents are inside an air duct, stop treating it as a simple trap-placement project. The CDC recommends special precautions for heavy infestations and professional help when rodents have reached areas that cannot be safely cleaned (CDC cleanup guidance).
7. In a Garage or Storage Outbuilding
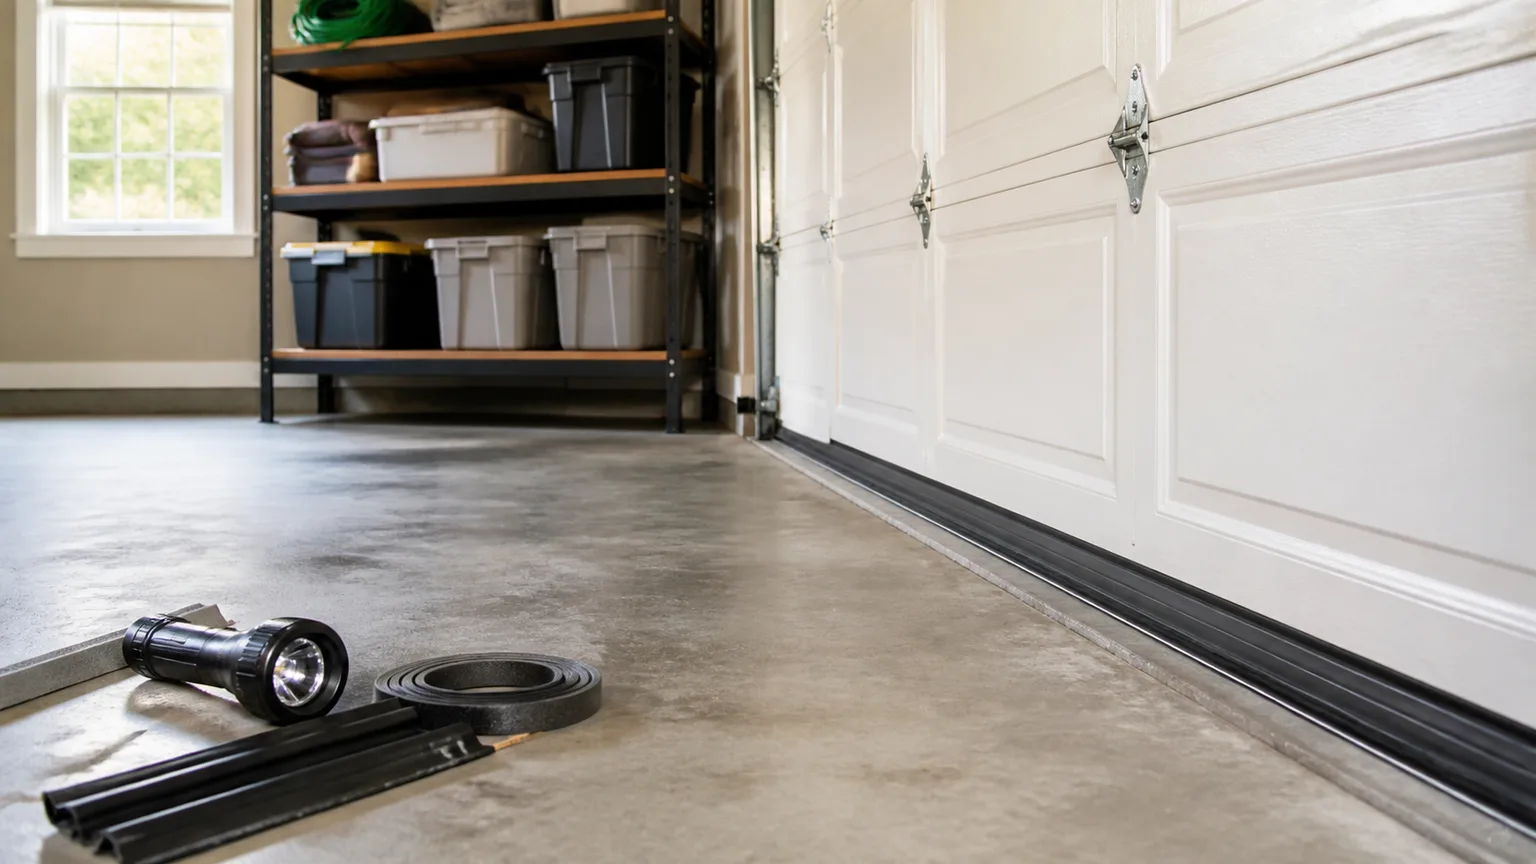
Garages and sheds are useful locations for hidden traps because they contain shelving, corners, cardboard, birdseed, pet food, and seasonal clutter. They also provide a transition route into the house, so trapping there can reduce pressure before mice reach the kitchen or pantry.
Start by moving feed, seed, and pet food into hard-sided containers with tight lids. Pull boxes a few inches away from walls where practical, remove nesting material, and leave a narrow inspection gap so new droppings are visible. Epic Gardening’s rodent-control coverage also emphasizes secure storage for pet and chicken feed and reducing sheltered clutter outdoors (Epic Gardening).
Set traps along the garage wall, beside shelving legs, near the garage-door threshold, or in a dark corner with fresh evidence. If the garage door opens frequently, protect an indoor trap from rain and curious animals; for outdoor or exposed control, use only a device designed for that setting. Gardening Know How similarly recommends placing outdoor traps where pets cannot contact them and treating cleanup and exclusion as part of mouse control (Gardening Know How).
How to Set a Mouse Trap So It Gets Triggered
Correct placement beats clever concealment. Set the trap before you slide it behind an appliance or cabinet, keep the baited side facing the travel lane, and follow the manufacturer’s arming sequence. A trap that is hidden but facing the wrong direction can sit untouched for weeks.
Use the Wall-and-T Method
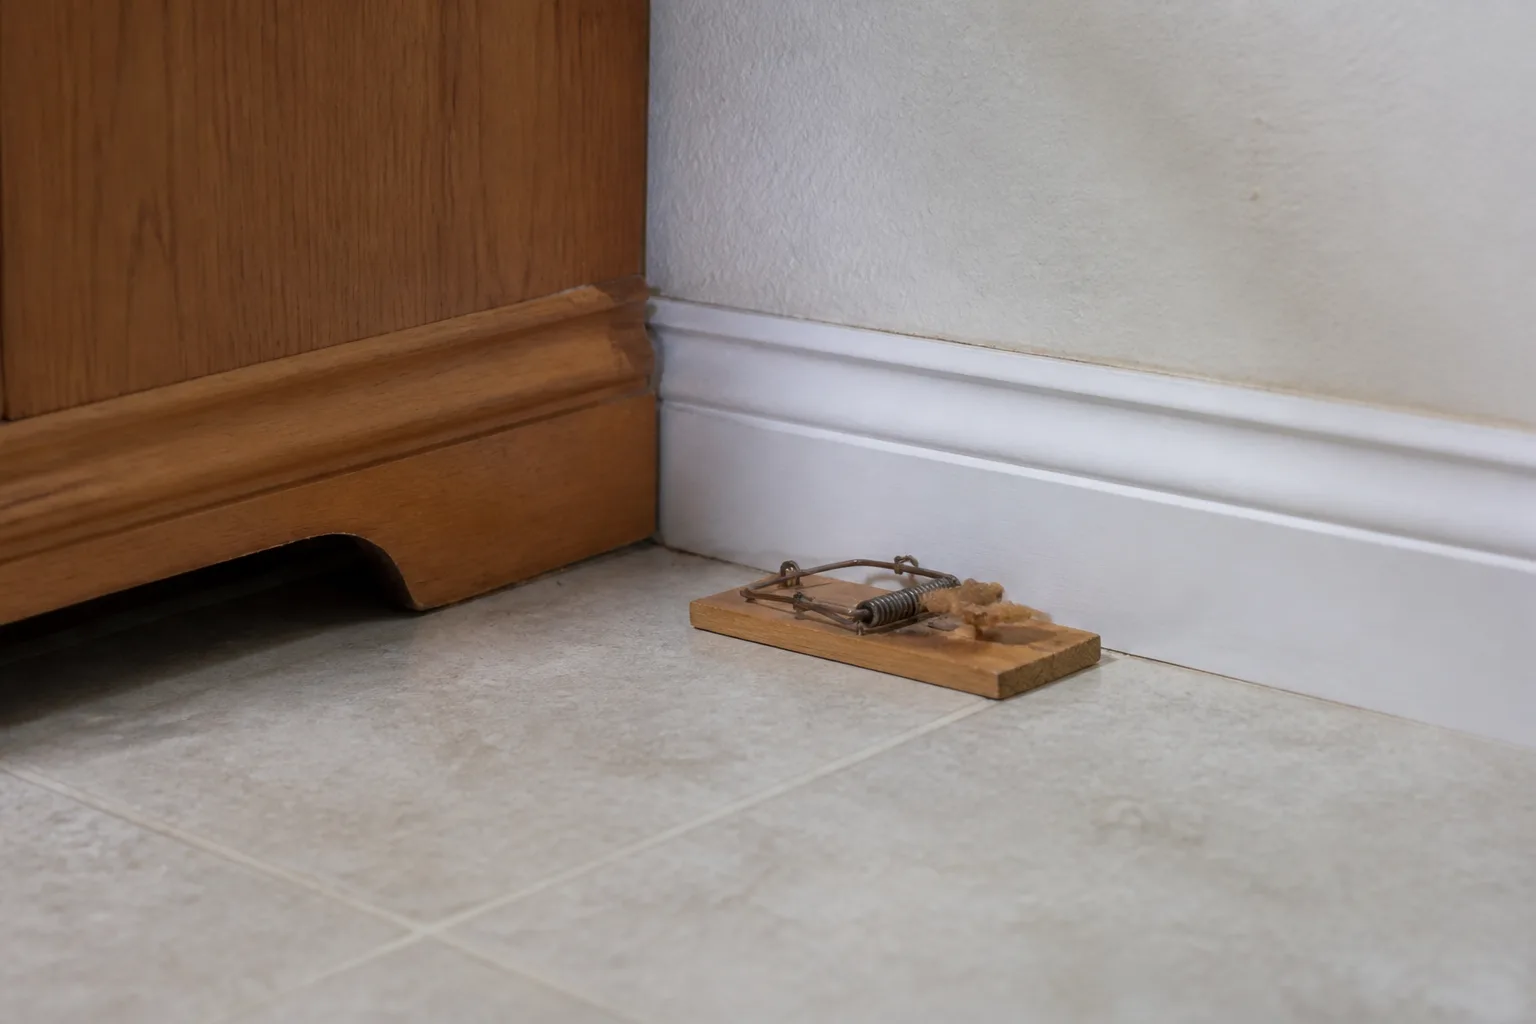
Place a traditional snap trap on the floor against a wall so the baited end is next to the wall and the trap forms a T with the baseboard. Mice use walls and objects as protective edges, so this orientation puts the trigger into the path instead of making the mouse walk around a parallel trap. The CDC gives this wall-and-T placement for household trapping and also recommends putting traps where droppings, nesting material, gnaw marks, or nibbled food appear (CDC trap-up guidance).
If your trap has a different shape, use its printed diagram rather than forcing a T orientation that blocks the trigger. The device should sit level, stable, and close enough to the wall for a mouse to cross the trigger. At a corner, two traps facing the two wall directions can cover both routes; do not stack or touch them unless the product instructions permit it.
For an active runway, multiple traps usually work better than moving one trap from room to room. UC IPM suggests spacing traps no more than about 10 feet apart where mice are active, while Nebraska Extension gives a rough example of two dozen properly placed snaps for a new infestation in a 1,500-square-foot structure. Treat those as scale clues, not a universal prescription: fresh evidence, home layout, species, and safety access should determine the final count.
Bait Small and Match the Evidence
Use a pea-sized amount or less unless the trap instructions say otherwise. Sticky peanut butter, a small amount of the food found in the damaged package, or a tiny tuft of cotton or dental floss can work. Nebraska Extension and UC IPM both note that too much food can be removed without triggering the trap, while nesting material can be attractive when a female is collecting fibers.
Put bait on the trigger before you arm the trap. Wear gloves if you prefer, but do not smear bait over the floor or create a food trail that leads away from the device. If a food allergy is present in the household, choose a different lure and keep all bait away from food-preparation surfaces.
Mice may investigate a new object cautiously. If the bait disappears from an unset trap, pre-baiting can help: leave the baited trap unarmed until the bait is taken, then arm it in the same location. This is more useful for trap-shy rodents and for a new object in a quiet route than for a mouse that is already moving rapidly through a kitchen.
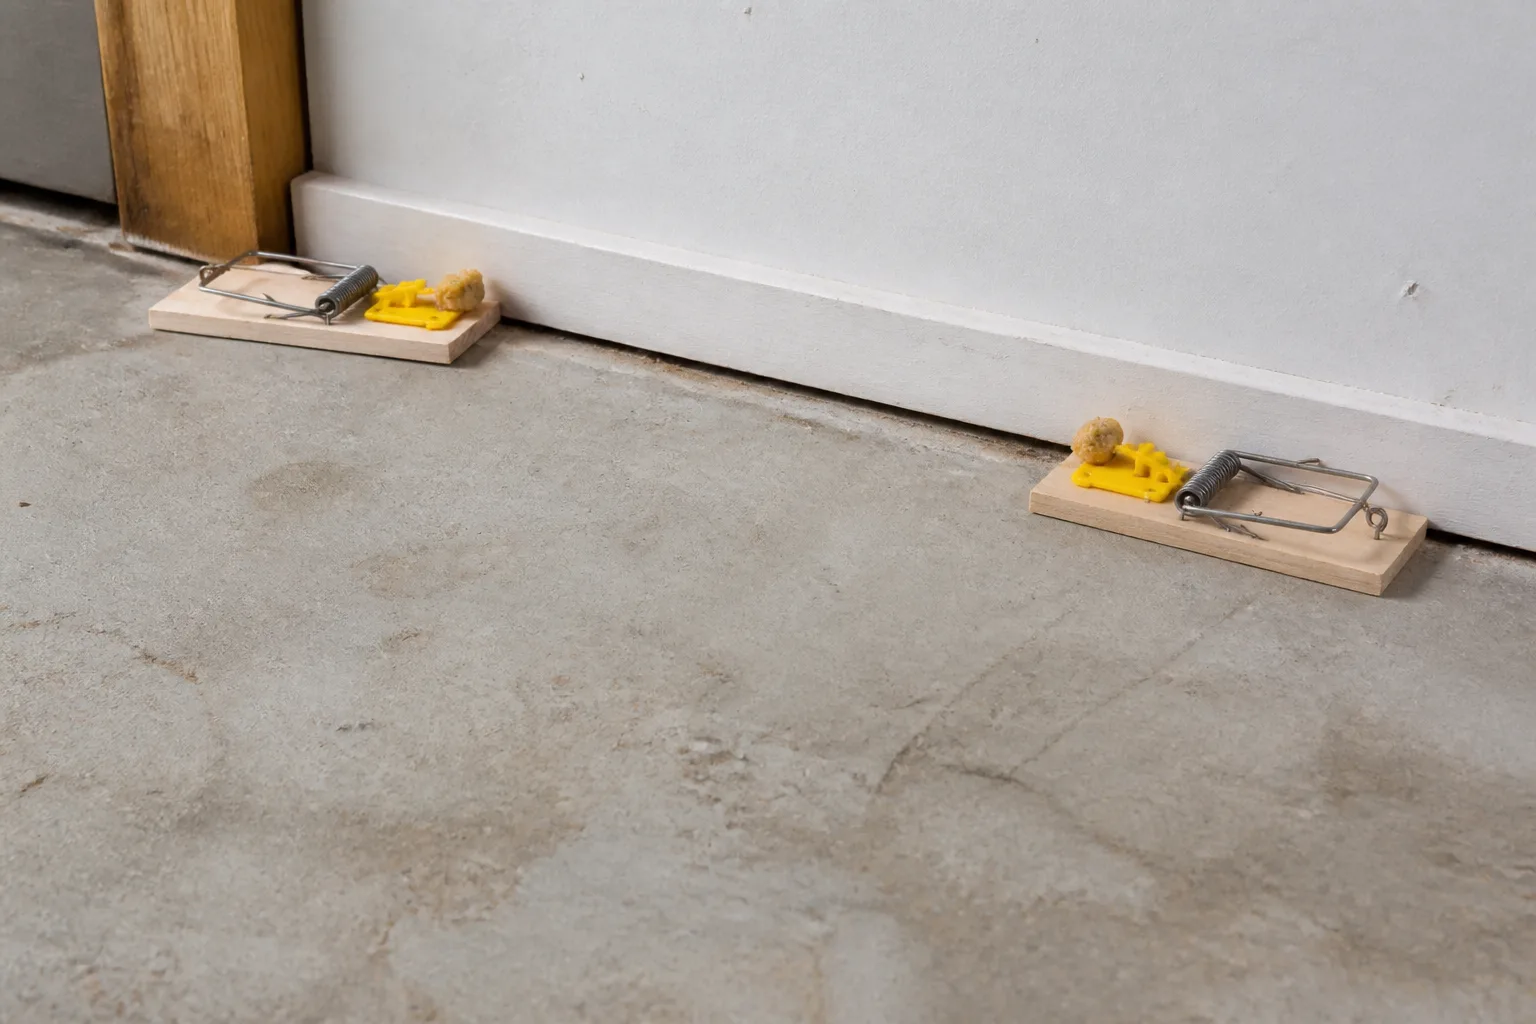
Hide Traps From People Without Hiding Them From Yourself
The safest concealment is usually a fixed object that blocks a casual view: the back corner of a cabinet, the space beside a shelf, the rear edge of a trash can, or the shadow line behind an appliance. Avoid hiding a trap under loose paper, inside a bag, behind a stack that can fall, or inside a wall cavity you cannot open.
Use three simple controls for every hidden trap. First, take a photo showing its location and orientation. Second, write the room and landmark—“left side of sink cabinet, behind drain pipe”—on a note or phone list. Third, set a daily reminder until the trap is removed. A small piece of painter’s tape on the cabinet exterior can mark the location without telling every visitor what is inside.
If a pet or child can reach the space, move the trap or use a purpose-built enclosed trap. Do not rely on a cabinet door that does not latch, a sofa skirt, a lightweight box, or a decorative basket. A good barrier is stable, cannot be chewed or tipped aside, and still allows you to inspect the trap without putting your fingers into a blind gap.
Never place a loaded trap where you must reach past a hot surface, gas line, live wire, sharp metal, or moving appliance part. If the only way to check the device is to dismantle the appliance or crawl into contaminated insulation, that location fails the access test.
What to Do If the Bait Disappears
Missing bait does not prove that a mouse triggered and escaped. An insect may have taken it, a mouse may have licked it from the edge, or the trigger may be too stiff. Look for fresh droppings, tooth marks on the bait, a disturbed trap, or evidence that the device shifted.
Reset with less bait and a more attractive texture. Try the food that was actually damaged, or anchor a tiny cotton wad to the trigger so the mouse must tug rather than lick. If you have a safe, documented location, leave the trap unset and baited for a short pre-baiting period, then arm it without moving it. A new hiding spot can be more disruptive than a familiar trap.
If several traps lose bait, add devices along the active wall route instead of adding larger bait blobs. Check whether the trap is too close to a competing food source, whether the trigger is blocked by the wall, or whether you are dealing with rats and need the correct trap size. If bait disappears but fresh signs continue, assume the plan has not worked and keep adjusting until the evidence stops.
Check, Clean, and Remove the Trap Safely
Check hidden traps daily, preferably in the morning after the period when mice are most active. The CDC says to check traps daily and immediately dispose of dead rodents; Nebraska Extension also points out that checking in the morning can improve success because house mice are most active before dawn and after dusk (CDC trap-up guidance; Nebraska Extension’s house-mouse guidance).
If a trap has caught a mouse, keep children and pets out of the area, put on rubber or plastic gloves, and do not touch the animal with bare hands. CDC cleanup guidance says to spray the dead rodent, the trap, and the surrounding area with an EPA-registered disinfectant, let it remain wet for five minutes or the label contact time, and double-bag the rodent and used materials before placing them in a covered garbage can (CDC cleanup guidance). Follow local disposal rules if they differ.
If you plan to reuse a traditional snap trap, the CDC advises submerging it with the rodent in disinfectant for five minutes while wearing gloves, then releasing the rodent into a plastic bag, rinsing the trap, and letting it dry completely. If you are not comfortable handling the trap, discard it as directed by local guidance or ask a pest professional to remove it.
Never sweep or vacuum dry droppings, urine, or nesting material. Wet the material thoroughly with disinfectant, wait the required contact time, wipe it up with paper towels, bag the waste, disinfect the hard surface again, and wash your gloved hands before removing the gloves. For a detailed room-by-room plan, our guide to keeping mice out of your house covers the same seal, sanitation, and monitoring sequence.
Close the Entry Point After the Catch
Trapping removes the mouse you can catch; exclusion keeps the next one from using the same route. Inspect the exterior foundation, door thresholds, garage sweep, vents, roofline, and every utility penetration. The CDC says mice can fit through a hole about the width of a pencil—roughly 1/4 inch—so a gap that looks too small to matter deserves attention (CDC seal-up guidance).
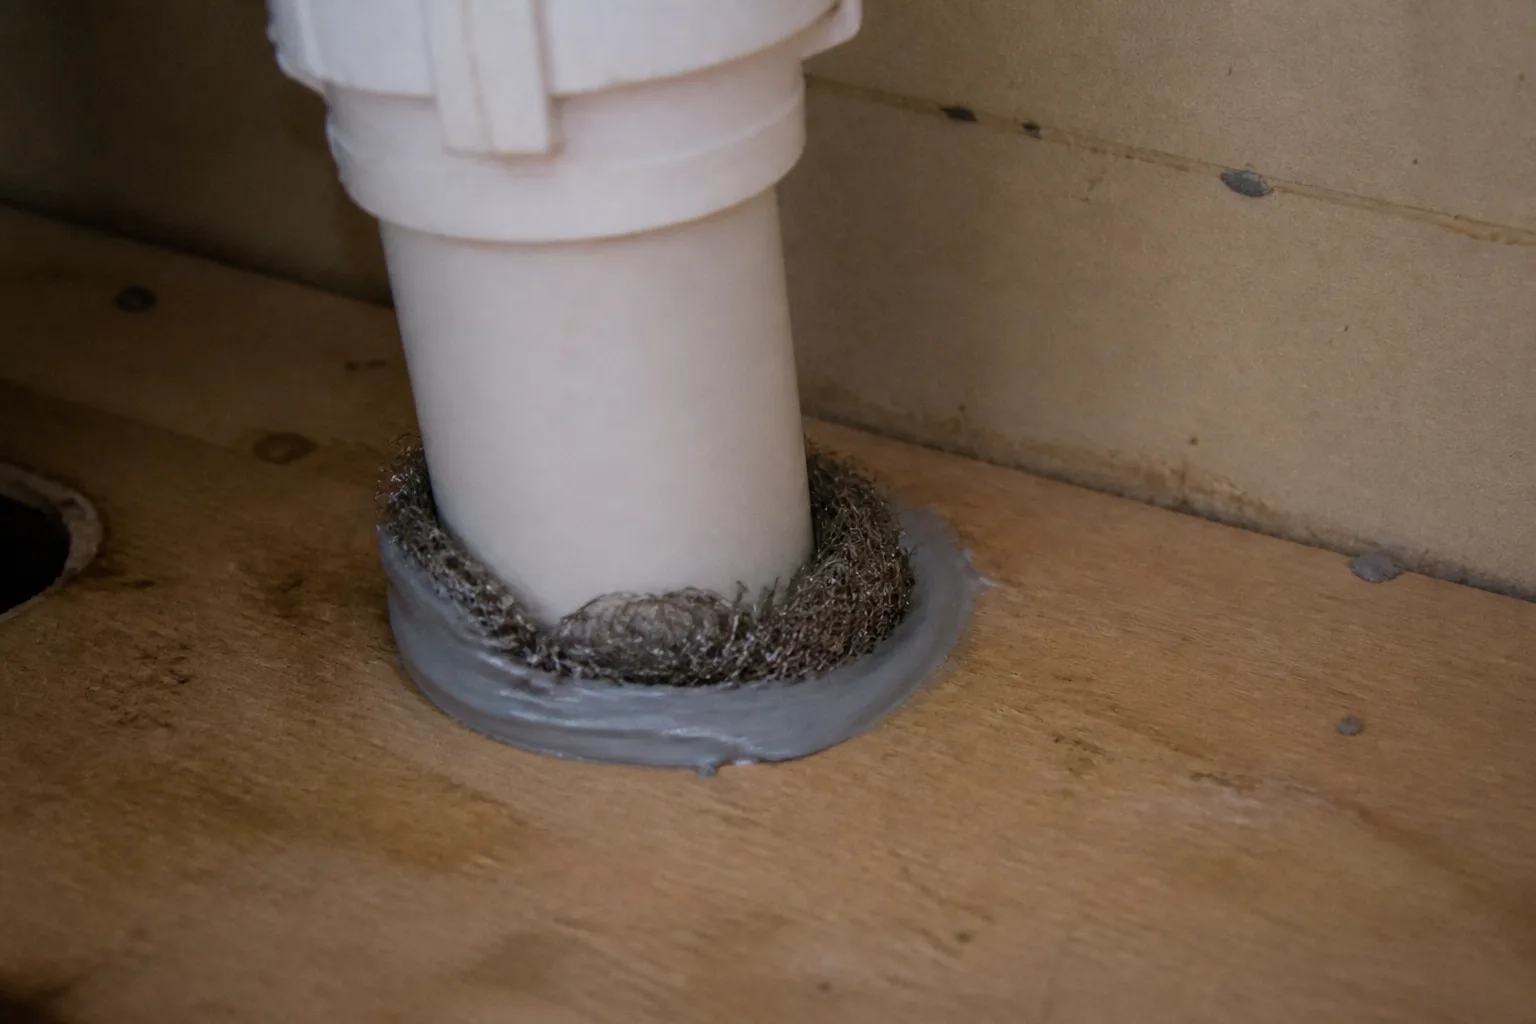
For small holes, pack in steel wool and use caulk to hold it in place. For larger openings, use gnaw-resistant materials such as metal, cement, hardware cloth, or metal sheeting, fitted and fastened so an edge cannot be pulled away. Spray foam alone is not a durable mouse barrier where gnawing is possible; use it only as part of a repair that includes an appropriate resistant material.
Keep doors, windows, screens, dryer vents, drains, combustion-air openings, and appliance exhausts functioning. Do not fill a vent or pipe opening just because it is near droppings. If you are unsure whether a gap contains wiring, gas, drainage, or ventilation, stop and have it assessed.
Sanitation helps the traps compete. Store food and pet feed in tight-lidded containers, clean spills promptly, keep garbage closed, remove nesting clutter, and do not leave pet food or water bowls out overnight. Gardening Know How recommends exterior cleanup and pet-proof placement for outdoor control, while the CDC’s seal-up guidance puts food, garbage, and nesting-site management alongside structural repairs.
When Hidden Traps Are Not Enough
Call a pest professional when fresh droppings continue after a deliberate trapping and exclusion effort, activity spans several rooms, you hear heavy movement in a wall or ceiling, wiring is damaged, or mice are inside ducts, inaccessible cavities, or heavily contaminated insulation. Professional help is also sensible when you cannot safely reach the trap or identify whether the animal is a mouse, rat, or protected wildlife.
Rodenticide is not a shortcut for a forgotten trap. The CDC recommends traditional snap traps for household rodent reduction and reserves poison or bait stations for infestations that persist; all poison baits must be used according to their labels and kept away from children and pets. UC IPM also warns that poisoned mice may die inside a structure and that rodenticides are toxic to people, pets, and wildlife, which is why location and containment matter (UC IPM house mouse).
Use an outdoor tamper-resistant bait station only when the product and local rules allow it, and never scatter loose poison behind an appliance, in a pantry, or under furniture. A station can reduce access to the bait, but it does not seal the gap, remove the food source, or guarantee that a mouse will die somewhere you can retrieve it.
Keep checking and resetting traps until you have no captures and no new droppings, urine spots, gnawing, or nesting material for at least a full week. If the signs return after that quiet period, go back to the inspection step rather than assuming the same seven spots will solve a new entry route.
Conclusion
The best hidden mouse trap is placed on a proven route, not hidden at random. Start with the seven practical locations—behind appliances, inside sink cabinets, pantries, furniture, trash cans, attic or basement edges, and garages—then narrow the choice using droppings, gnaw marks, nesting material, food damage, and safe access.
Set a mouse-size snap trap perpendicular to the wall, use a small amount of bait, protect children and pets, photograph the location, and check it every day. After a catch, clean it with disinfectant and avoid dry sweeping or vacuuming droppings. Finish by sealing pencil-width openings, securing food and garbage, and monitoring until the evidence stays gone for a week. That sequence keeps the trap out of sight without letting the problem disappear from your view.



