How to Plant Onion Bulbs and Grow Onions
Plant onion sets with the right depth, spacing, water, and light. Follow this practical guide from first planting through harvest and curing.
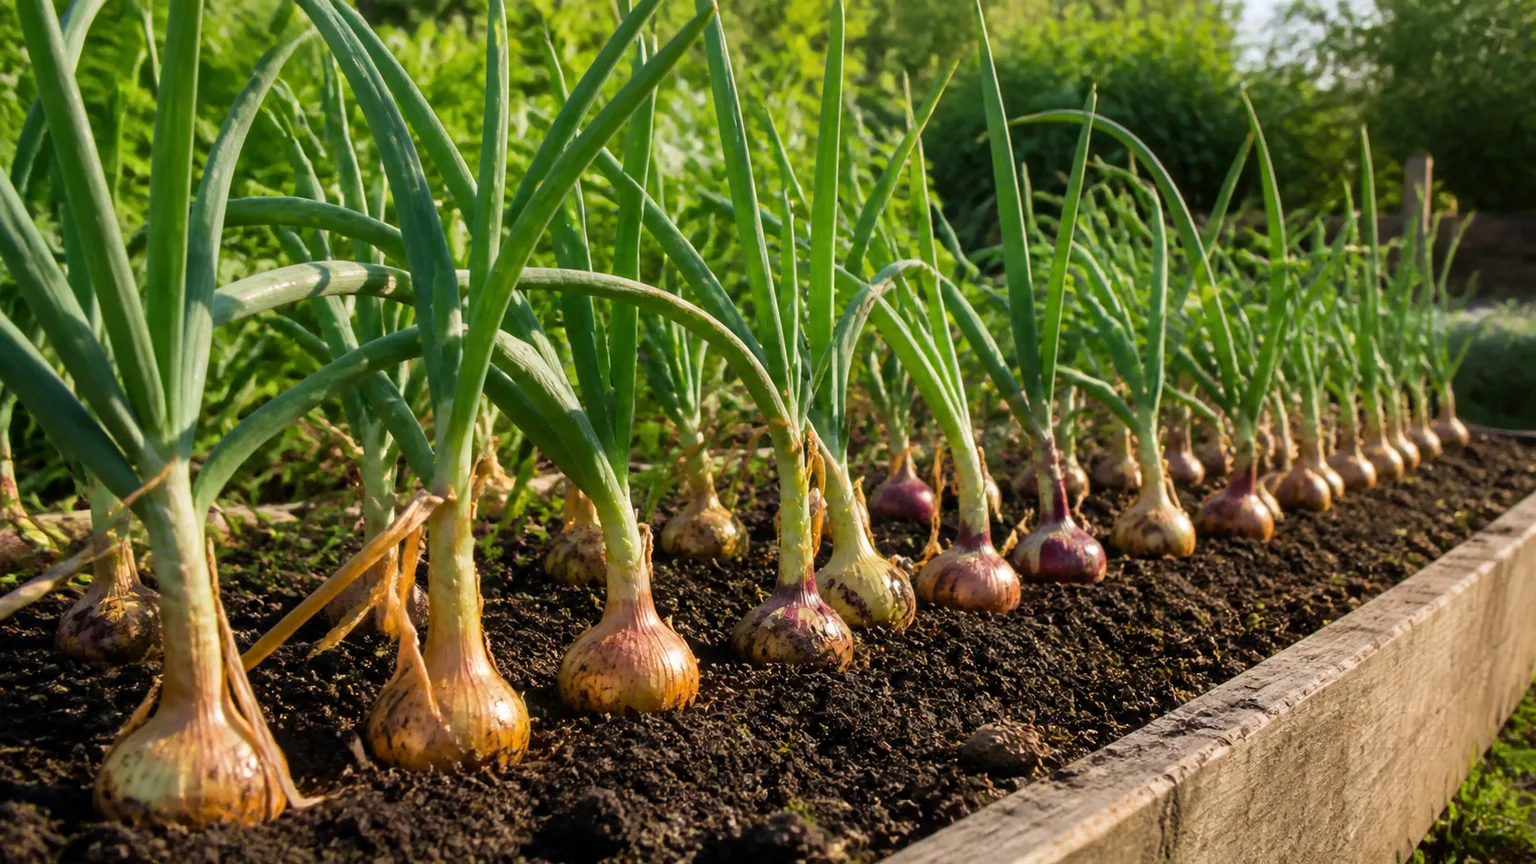
The quick answer: yes, an onion set can grow a new bulb
Yes—if by “onion bulb” you mean a dry, dormant onion set sold for planting. A set is a small onion grown from seed, lifted while immature, dried, and sold for a quick start. Planted with its root plate down and pointed tip up, it can root, make leaves, and swell into a larger onion. One set normally produces one harvestable onion, although some varieties can make offsets.
That is different from planting half a grocery-store onion or an onion scrap. A kitchen onion may sprout, but it was selected for eating and storage rather than reliable garden performance. The cut base can sometimes produce green shoots or several small bulbs, yet it rarely gives you the uniform, full-size storage onion that a named set, transplant, or seed-grown plant can produce. For the predictable route, buy firm sets and decide before planting whether you want green onions, small fresh bulbs, or dry onions for storage.
The species is Allium cepa, a cool-season crop with shallow roots. Its leaves do the energy work: the more healthy foliage it builds before bulbing begins, the more material it has to put into the bulb. That is why planting depth matters, but so do day length, early weed control, steady moisture, and choosing an onion type suited to your latitude. NC State Extension’s onion profile describes the crop as a full-sun, cool-season vegetable and recommends shallow planting, good drainage, careful lifting, and curing before storage.
Choose the right onion set before planting
Start with a set that looks dormant, not distressed. Pick bulbs that are firm, dry, and free of fuzzy mold, wet spots, deep cuts, or a sour smell. A little papery skin flaking is normal. A long green shoot is not an automatic reason to discard a set, but it tells you the bulb has already started growing and may establish unevenly; plant it promptly and plan to use that plant early if it fails to form a sound storage bulb.
For a storage crop, avoid the largest sets in the bin. Oversized sets can be more likely to bolt because they have accumulated enough size to respond to cold and day-length cues as if they are older plants. Utah State University Extension notes that sets or transplants larger than about 5/8 inch can have a greater tendency to produce a seed stalk (Utah State University onion guide). A small-to-medium, firm set is usually the safer compromise for a beginner who wants a dry bulb rather than an early flower.
Color is not the same thing as climate adaptation. Yellow, red, and white describe the skin and flavor, while short-day, intermediate-day, and long-day describe when the plant receives the daylight signal to start bulbing. Penn State Extension explains that bulbing is primarily induced by photoperiod, or day length, and that the appropriate group depends on the growing region. If a packet or bin label names a day-length group, take that information more seriously than the color name.
Sets are convenient, but they are not always the best material. Seeds offer the widest cultivar choice and let you start the plant at a known age; transplants give short-season gardeners a leaf-building head start and often offer more variety than sets. The trade-off is time and handling. Sets are fastest to plant, seeds are most flexible, and transplants are often the middle ground.
Pick a planting window that fits your climate
Use the calendar as a prompt to inspect conditions, not as an order to plant on one universal date. The useful window is when the set’s variety fits your day length, the soil is loose enough to work without smearing, and the plant has enough cool growing time to establish before heat or rapid day-length change pushes it into bulbing.
Spring planting for most frost-prone gardens
In a cold or temperate garden, plant sets in early spring as soon as the bed is workable—often a few weeks before the average last frost. Onions tolerate light frost once established, but a newly planted set still needs a stable root zone. Planting into cold, saturated clay is a poor bargain: the set may sit without oxygen, rot, or be heaved out of the ground before it roots.
Spring is also the default for long-day onions in northern regions and many intermediate-day types farther south. The RHS onion-growing guide recommends spring planting for ordinary sets and notes that spring-planted sets are generally harvested from summer into early autumn. If your spring supplies arrive early, keep dormant sets in a cool, dry, airy place for a short time and plant them as soon as the bed is ready rather than storing them for months.
Fall planting for suitable overwintering varieties
Fall planting can produce an earlier crop in mild-winter regions, but not every set is an overwintering set. Choose a variety specifically sold or recommended for fall planting, give it excellent drainage, and allow enough time for roots and a modest crown of leaves to form before hard freezes. In cold-winter or winter-wet soil, spring planting is safer.
The RHS cautions against autumn planting in heavy soil that stays waterlogged because sets can rot. Utah State’s guidance also describes overwintered onions as special varieties, mulched late in the year to reduce winter damage. A layer of light organic mulch can buffer temperature swings, but it cannot rescue a bulb planted in a puddle. If your soil holds water after rain, use a raised bed or wait for spring instead of treating fall as automatically better.
Prepare a sunny bed or container that drains
Choose a site with at least six hours of direct sun, and more is helpful for large dry bulbs. Onions have limited, shallow roots, so they cannot compensate well for deep shade, hard compaction, or weeds that take the available moisture first. A raised bed is useful for heavy soil because it lets you control drainage and looseness without trying to remodel an entire garden.
Work the soil before planting, not around the set after it has rooted. Remove hard clods and stones, loosen the upper root zone, and mix in finished compost or other well-rotted organic matter. Both Penn State and Utah State Extension emphasize friable, fertile soil with good drainage and moisture-holding capacity. A practical target is slightly acidic to neutral soil; the sources give ranges around pH 5.8–7.0, so use a soil test rather than adding lime or sulfur by guesswork.
Avoid fresh manure. It can be too strong for young roots and may bring weed seeds or excess salts. If a soil test calls for fertilizer, work the recommendation into the top several inches before planting. Compost is a soil conditioner, not a reason to pile a thick, wet layer around the necks of the sets.
For containers, choose a wide pot, trough, or grow bag with drainage holes and at least about 8–12 inches of usable depth. A pot can grow good onions, but the container must be wide enough for the number of bulbs you plant. One large storage onion per roughly 4–6 inches of horizontal space is a better expectation than cramming four bulbs into a small pot. A container dries and loses nutrients faster than a bed, so you will need to check it more often. Cannon Creek Farm’s container guidance makes the same practical point: drainage holes, a deep enough container, and generous spacing matter more than using a fancy pot (Cannon Creek Farm onion tips).
Plant onion sets step by step
Planting is simple when you separate the actions: make a shallow hole, identify the two ends, place the set, firm only enough to remove air gaps, and water the root zone. Do not bury the bulb deeply in an attempt to anchor it. Onions expand at or near the soil surface, and a buried neck stays wetter than it needs to.
Set the bulb at the right depth and orientation
Make a hole or narrow drill about 3/4 to 1 inch deep, then place the flat, root-bearing plate down and the pointed tip up. Cover the set so the tip is just visible or only lightly covered. The RHS gives approximately 2 cm (3/4 inch) and specifically advises that the pointed tip should just show above the surface; NC State gives a range of about 1/2 to 1 inch. Those measurements describe the same practical rule: keep the set shallow and the growing tip exposed.
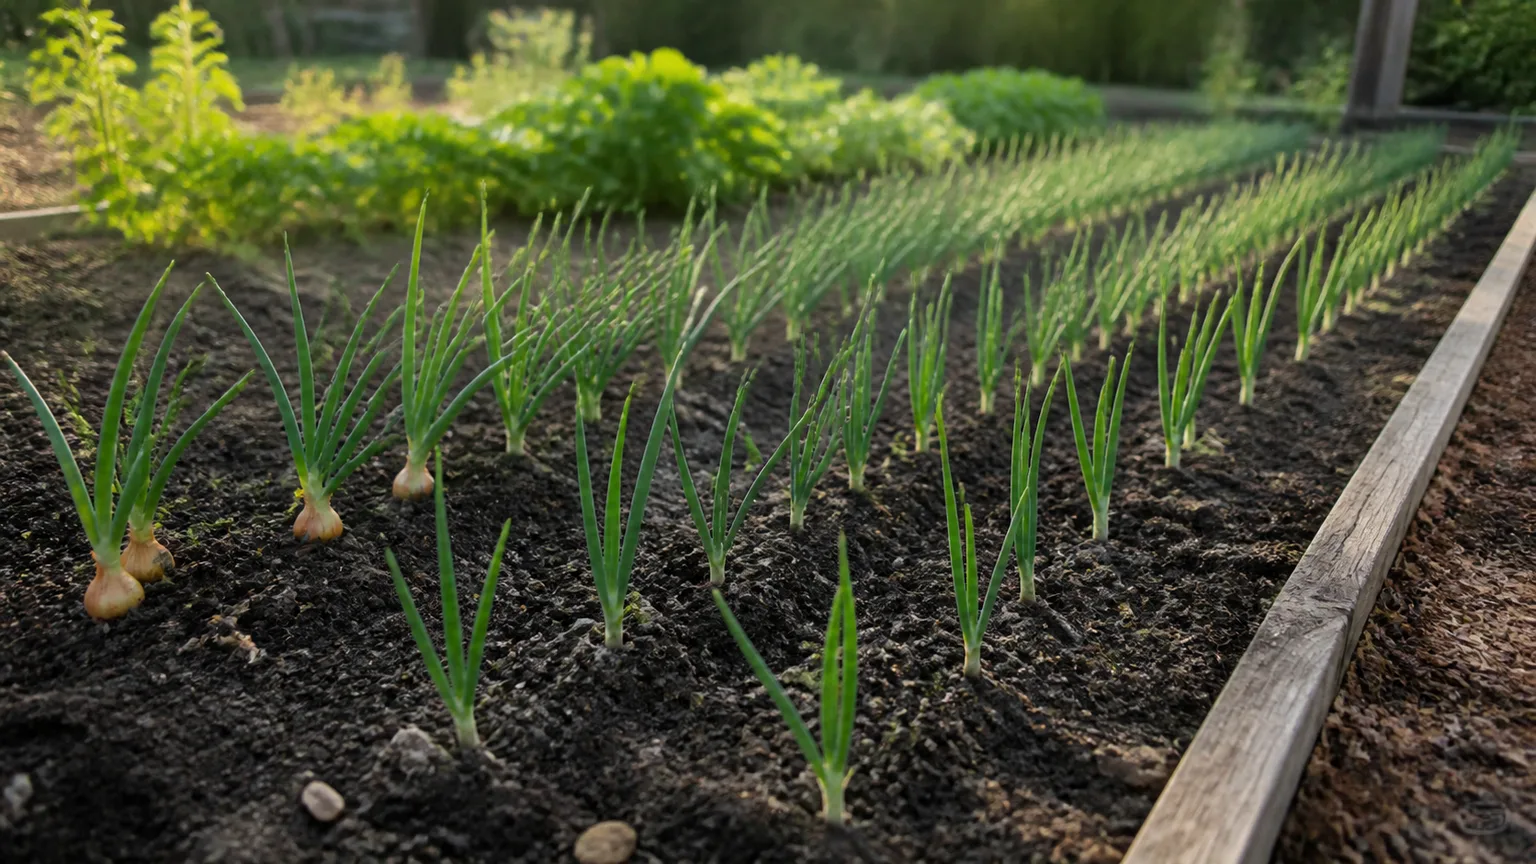
Space sets 3–4 inches apart for medium dry bulbs and move toward 4–6 inches if large bulbs matter more than total count. Leave about 8–16 inches between rows, depending on the tool you need to use for weeding. For green onions, 2–3 inches is workable because you will harvest before each plant needs room to swell fully. Utah State Extension recommends 3–4 inches in the row and says closer spacing can be thinned to green onions; its guidance also warns that dense plantings reduce bulb size unless water and nutrients are adequate.
Do not split a set. Do not hill soil over it as the bulb expands. The plant will make its own roots from the base and its own bulb above the root plate. Press the surrounding soil gently so the set cannot rock loose, but leave the neck open and avoid packing wet soil against the tip.
Water in and protect fresh plantings
Water immediately after planting so soil settles around the root plate and removes large air pockets. Use a gentle rose, drip line, or low stream directed at the soil rather than blasting the sets sideways. Newly planted sets are easy for birds to pull from loose soil, especially in an open bed; a light row cover or netting can keep them in place until roots anchor them.
Keep the cover lifted or removed as needed for watering and check that it does not press on the leaves. A row cover is a short establishment tool, not a substitute for choosing the right planting date. In a spring bed, it can also soften a brief cold snap; in a fall bed, use only a cover appropriate for your crop and local weather.
Care for onions while leaves are building
The first phase is leaf production. Keep the plants growing steadily without making the soil either dusty or waterlogged. A few healthy leaves are not a sign that the bulb is finished; they are the factory that powers the bulb later. This is also the phase when small weeds can do disproportionate damage because onions cast very little shade.
Keep shallow roots evenly moist and weed-free
Give the bed a thorough drink when the upper soil begins to dry, aiming to moisten the root zone rather than wetting the foliage every evening. The exact schedule depends on rain, soil, temperature, and whether the onions are in a pot, but about 1 inch of water per week is a useful starting estimate during active growth. Utah State Extension advises maintaining moist soil and notes that drought stress reduces yield, bulb size, and flavor.
Check the soil instead of following a timer. If a finger pushed into the top inch finds dry, loose soil and the plant is actively growing, water deeply; if the soil is cool and sticky, wait. How often to water your vegetable garden explains the same principle at a broader garden scale. A light layer of clean straw or chopped leaf mulch can conserve moisture and suppress weeds, but keep it thin and away from the neck in a wet climate. Gardening Know How’s practical onion guidance likewise treats mulch as optional and advises skipping it when cool, wet conditions would trap moisture (Gardening Know How onion guide).
Weed shallowly and often. Onion roots sit close to the surface, so deep hoeing can cut the roots you are trying to protect. Hand-pull weeds close to the plants and cultivate only the top skin of soil between rows. Prioritize the first two months, when onions are slow and weeds can take the bed before the crop gains size.
Feed for leaves, then stop pushing nitrogen
A soil test is the most defensible way to decide whether the bed needs fertilizer. If the soil is reasonably fertile and you incorporated finished compost, you may not need repeated feeding. If a test or local extension recommendation indicates a nitrogen need, side-dress while the plants are actively making leaves and keep fertilizer off the neck.
Do not keep applying high-nitrogen fertilizer once the bulbs are swelling or the tops begin to mature. Utah State Extension recommends additional nitrogen in the early and middle growing season but says not to fertilize after mid-summer because late leaf growth can reduce storage potential. Excess nitrogen can make a lush, soft plant that stays green too long and cures poorly. Always follow the label for a purchased product; do not copy a commercial field rate into a home bed.
Solve common setbacks before they ruin the crop
A problem in onions is often a sequence rather than a single symptom. Yellow tips can follow drought, root injury, disease, or natural maturity. A fallen top can be a finished bulb, storm damage, or a plant whose roots have been eaten. Inspect the base, neck, soil moisture, and neighboring plants before changing several variables at once.
What to do when onions bolt
Bolting is the production of a flower stalk before the bulb has finished swelling. Cold exposure, abrupt temperature changes, variety mismatch, and large sets can all raise the risk. The flower stalk diverts energy away from bulb growth, and the resulting onion commonly has a tough central core and a shorter storage life.
If you see a stiff, round flower stalk, cut it near the base or pull that onion for fresh use once it is a useful size. Do not expect it to become a premium storage bulb after the stalk appears. Next season, choose smaller sets or a bolt-resistant variety, plant at the recommended window, and avoid fall planting with a spring-only type. The RHS onion guide notes that heat-treated sets reduce bolting risk, while USU specifically flags larger sets and transplants as more prone to seed stalks.
How to recognize rot, pests, and weak growth
Water-soaked scales, a soft neck, foul odor, or a mushy base point to rot rather than thirst. Lift and discard badly affected bulbs, improve drainage, and stop watering on a fixed schedule. Crop rotation is useful where onion diseases or maggots have appeared; why you should rotate crops explains how moving plant families interrupts recurring soil problems.
Silvery streaks or twisted leaves can indicate thrips, while sudden wilting and damaged roots can point to onion maggots. Downy mildew and other leaf diseases are more likely when foliage stays wet and air movement is poor. Start with cultural controls—clean planting material, spacing, drip or soil-level watering, weed control, crop rotation, and prompt removal of badly diseased plants. If you consider a pesticide, identify the pest first and use only a product labeled for onions in your location, following its label and harvest interval.
Small bulbs do not always mean the fertilizer failed. The most common causes are the wrong day-length group, late planting, crowding, drought, root competition from weeds, or a plant that bolted early. If the leaves grew well but the bulbs never swelled, review variety fit and planting date before simply adding more feed. If the bulb is firm and edible, harvest it as a small fresh onion rather than leaving it in stressed soil indefinitely.
Harvest green onions or mature dry bulbs
Harvest goals change the rule. Green onions can be pulled as soon as the stem is thick enough for the kitchen, often weeks before a dry bulb reaches maturity. Thin a crowded row and eat the thinnings, leaving the remaining plants at their final spacing. Avoid repeatedly cutting the leaves from plants you want to store as dry onions; healthy foliage is still feeding the bulb.
For storage onions, start checking when the oldest leaves yellow and a meaningful portion of the tops begins to fall naturally. One fallen leaf is not a diagnosis, and you do not need to force every top down. A mature bulb is firm, close to its expected size, and beginning to form a dry wrapper and a narrowing neck. Penn State Extension describes the common harvest cue as about one-third to one-half of the tops fallen, while NC State uses at least two-thirds of the tops died down; use these as a range and let the plant, variety, and weather decide.
Reduce or stop routine watering as the crop finishes, especially if the soil is already damp. If prolonged rain or a freeze is coming and the bulbs are clearly mature, lift them and move them under cover rather than waiting for a perfect collapse of every top. Use a garden fork a few inches away from the bulb to loosen soil, then lift without bruising the bulb or tearing the neck.
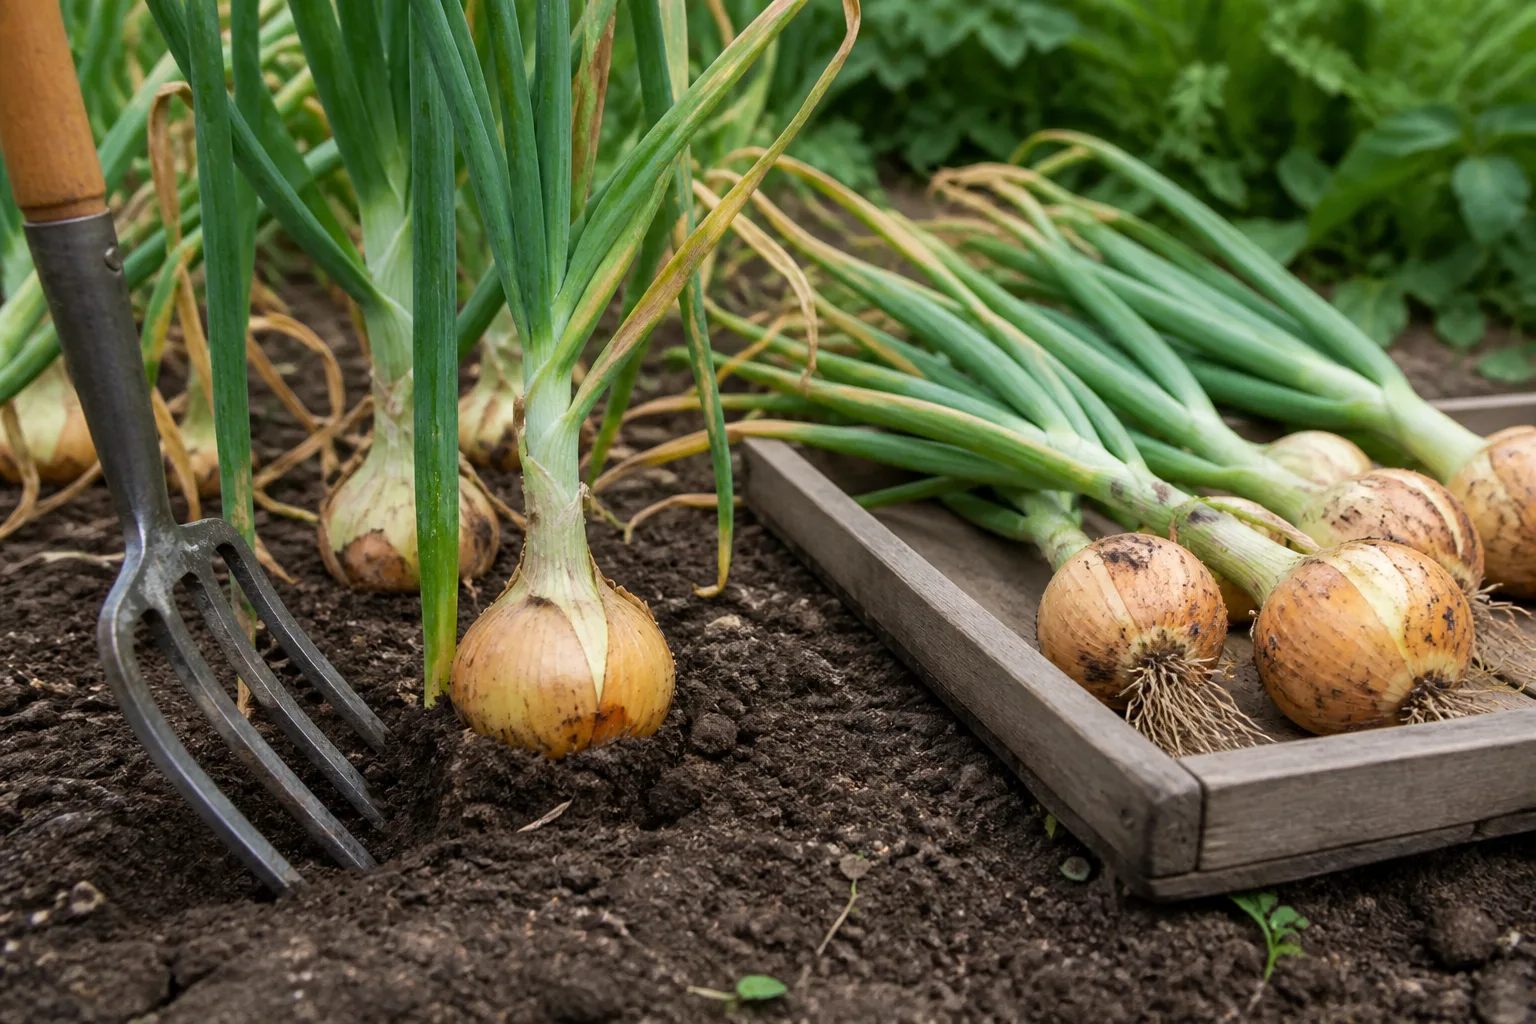
Do not throw freshly lifted onions into a deep bucket or wash them before curing. Shake off loose soil gently, keep the outer wrapper and tops attached for the first drying stage, and separate any cut, split, soft, or insect-damaged bulbs for immediate use. When to harvest onions covers the weather and maturity decisions in more detail, but the essential rule is simple: harvest for the use you want, not for a number of days printed on a label.
Cure, sort, and store onions successfully
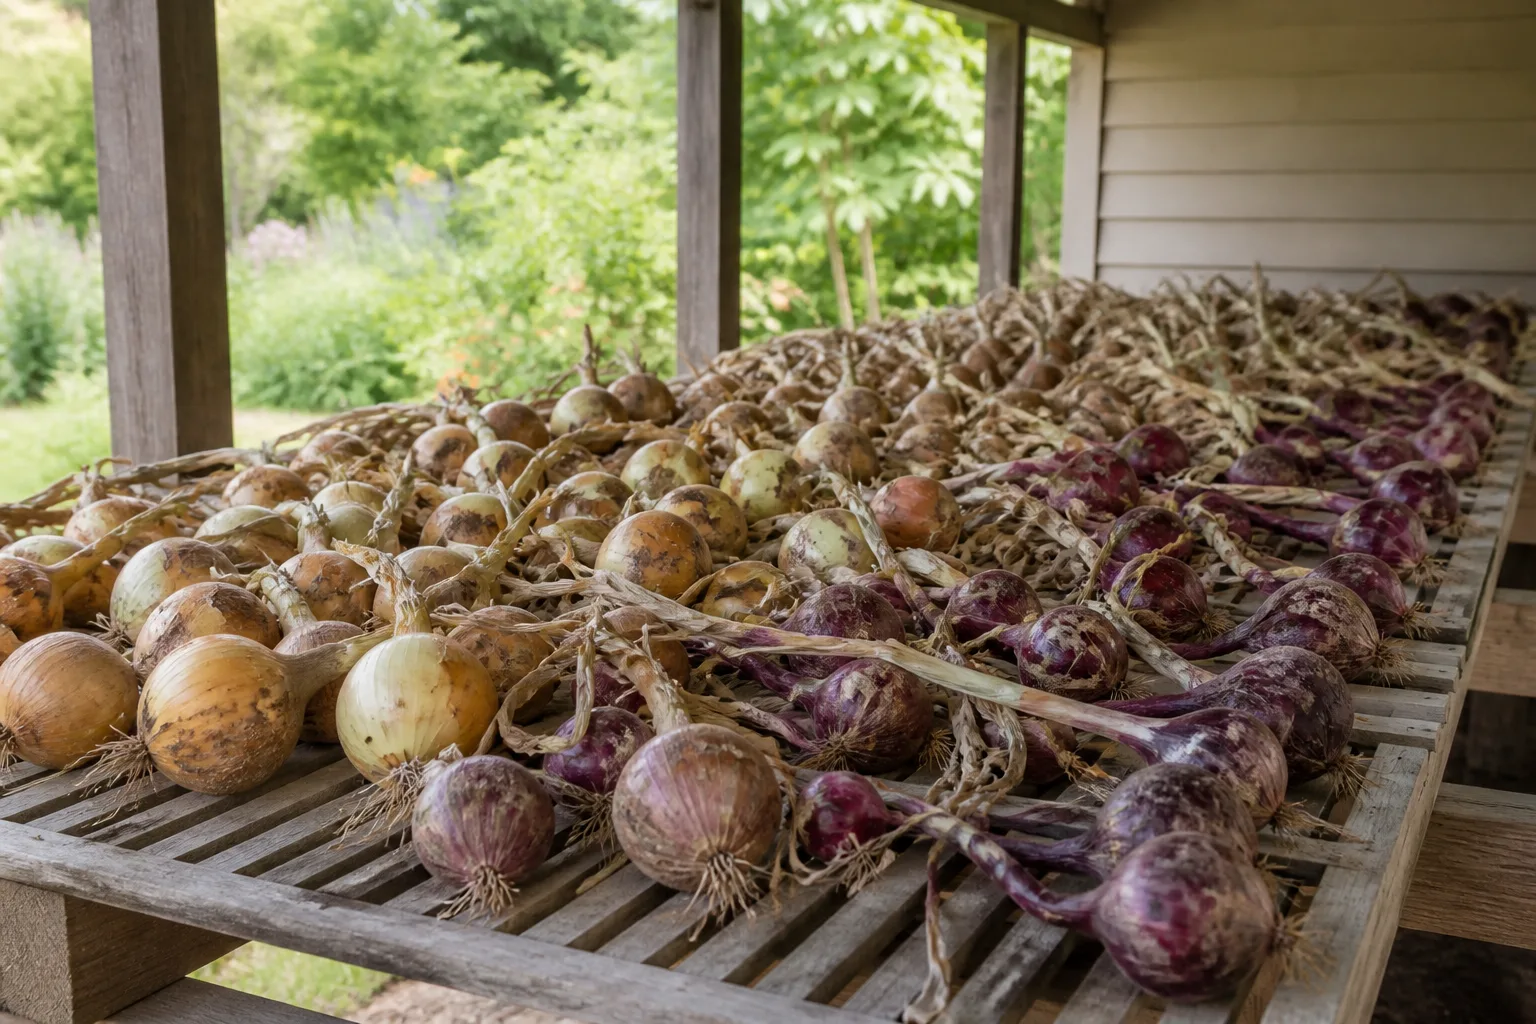
Curing dries the neck and outer scales so storage organisms have fewer wet entry points. It is what turns a freshly dug onion into a storage onion. Spread bulbs in a single layer on a rack, screen, slatted tray, or dry surface with air moving around them; keep them protected from rain and away from a sealed plastic tote.
Plan on roughly two to four weeks for a storage crop, depending on humidity and airflow. The Penn State onion production guide gives that range and notes that wet regions often require curing under cover. In a dry climate, a protected outdoor rack may work. In humid or rainy weather, use a roofed porch, ventilated shed, greenhouse with airflow, or another dry space. Heat alone is not the goal—dry, moving air is.
An onion is ready for trimming when the leaves are shriveled, the outer skin is papery, the roots are dry, and the neck is tight rather than green, thick, or spongy. Cut the dried tops about 1–2 inches above the bulb and trim roots without slicing into the basal plate. Do not peel away every wrapper; the clean, intact outer scales are part of the storage barrier.
Sort before storage. Put firm, fully cured bulbs into a mesh bag, open crate, slatted tray, or single layer on a shelf. Move thick-necked, lightly bruised, sprouting, undersized, or bolted onions into a use-soon group. Discard bulbs that are leaking, moldy, foul-smelling, badly soft, or internally watery. One failing bulb can make its neighbors damp, so inspect the storage crop every couple of weeks.
Keep cured onions cool, dry, and well ventilated. Penn State Extension gives about 32–40°F and 65–70% relative humidity for long storage, but the possible storage period varies widely by cultivar and curing quality. A mild sweet onion may never store as long as a pungent storage type, even when both were grown perfectly. If you do not have a stable cold room, choose the coolest dry place available and use the onions in order of softness or sprouting.
Can you regrow an onion from kitchen scraps?
You can often regrow green shoots from the rooted base of a kitchen onion, but that is not the same as growing another full onion from a set. Put the clean basal plate in shallow water or soil and it may produce leaves and roots. Once the base is divided into several growing points, you may get small bulbs, but grocery onions can be treated, old, damaged, or a poor variety match for your climate.
Use scraps as a low-stakes experiment or a source of greens, not as a reliable replacement for planting sets. If the base is soft, slimy, moldy, or smells sour, compost or discard it. For a full-size onion harvest, start with healthy sets, seeds, or transplants; for a steady supply of scallion-like greens, closer spacing and repeated thinning are more predictable than trying to force one old kitchen onion to reproduce.
Conclusion
To grow another onion from an onion bulb, plant a firm onion set with its flat root end down, pointed tip up, and only about 3/4–1 inch deep. Give it full sun, loose fertile soil, room to swell, and steady moisture while the leaves are building. Choose the day-length group and planting season for your climate, and treat fall planting as a variety-and-drainage decision rather than a universal shortcut.
The rest of the crop depends on restraint: weed shallowly, feed only while growth needs it, stop routine watering as the bulb matures, and respond to bolting or rot early. Harvest green onions when useful or dry bulbs when tops and necks naturally finish, then cure gently until the neck is tight and papery before sorting for storage. That sequence turns a small dormant set into a useful onion crop—and gives you a clear answer when the garden does not follow the calendar perfectly.