When to Harvest Onions: Signs, Curing & Storage
Find the right harvest window for green and storage onions, plus a careful lifting method, curing checklist, storage temperatures, and fixes for soft bulbs.
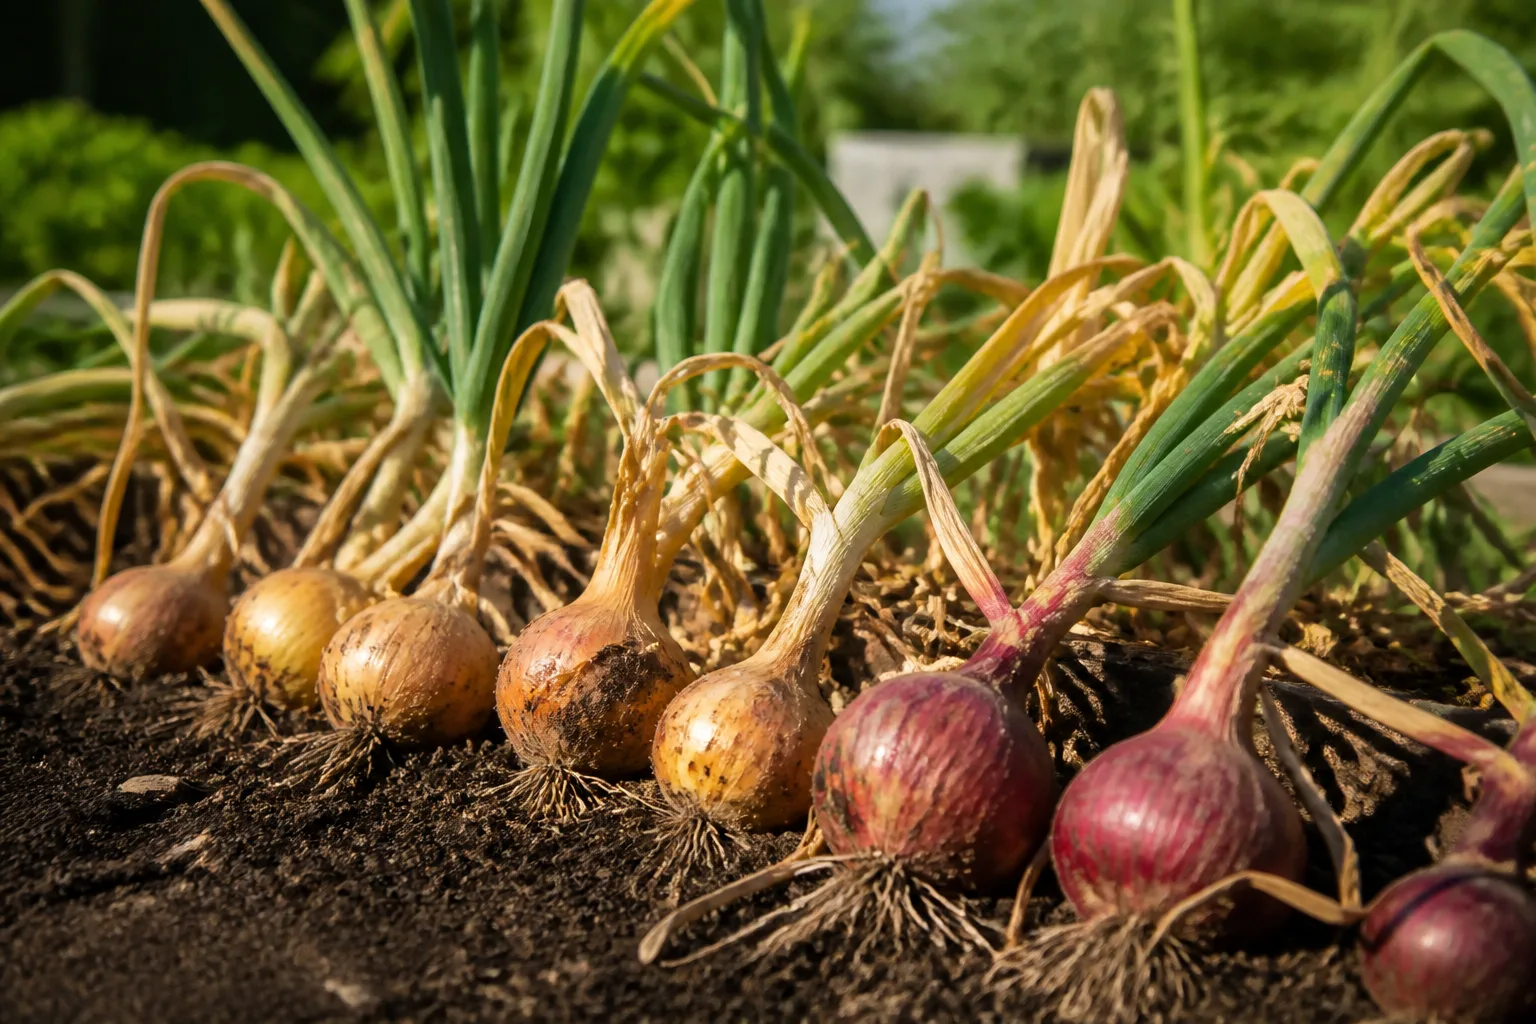
Harvest onions when the crop has reached the purpose you planted it for—not simply when a calendar says July, August, or September. Pull green onions as soon as the stems and roots are a useful size; wait longer for dry storage onions, watching the tops, neck, outer skin, soil moisture, and weather together.
For a storage crop, start checking when roughly half of the tops have begun to soften, yellow, or fall over. That is a harvest window, not a command to wait until every leaf is flat and completely dry. A tight, drying neck and papery outer skin matter more than a single percentage, especially if rain or a freeze is approaching.
The short answer: harvest for use, storage, or seeds
There are three different endpoints that gardeners commonly call “harvest.” A scallion or green onion is harvested for its tender leaves and narrow white base, so it can be pulled while the foliage is fully green. A dry bulb onion is harvested for a firm bulb covered by dry protective scales, so it needs time to finish bulbing and then time to cure. An onion saved for seed is not harvested as a bulb at all; it must remain in the garden long enough to flower in its second year.
Days to maturity can help you plan the first inspection, but it cannot choose the exact day. Variety, day length, planting method, heat, water stress, and soil all move the finish line. As a useful home-garden reference, Utah State University Extension places green onions at about 50 days from seeding and bulb onions at about 100–120 days, while also emphasizing physical maturity signs such as fallen tops and papery skin (Utah State University Extension’s onion guidance).
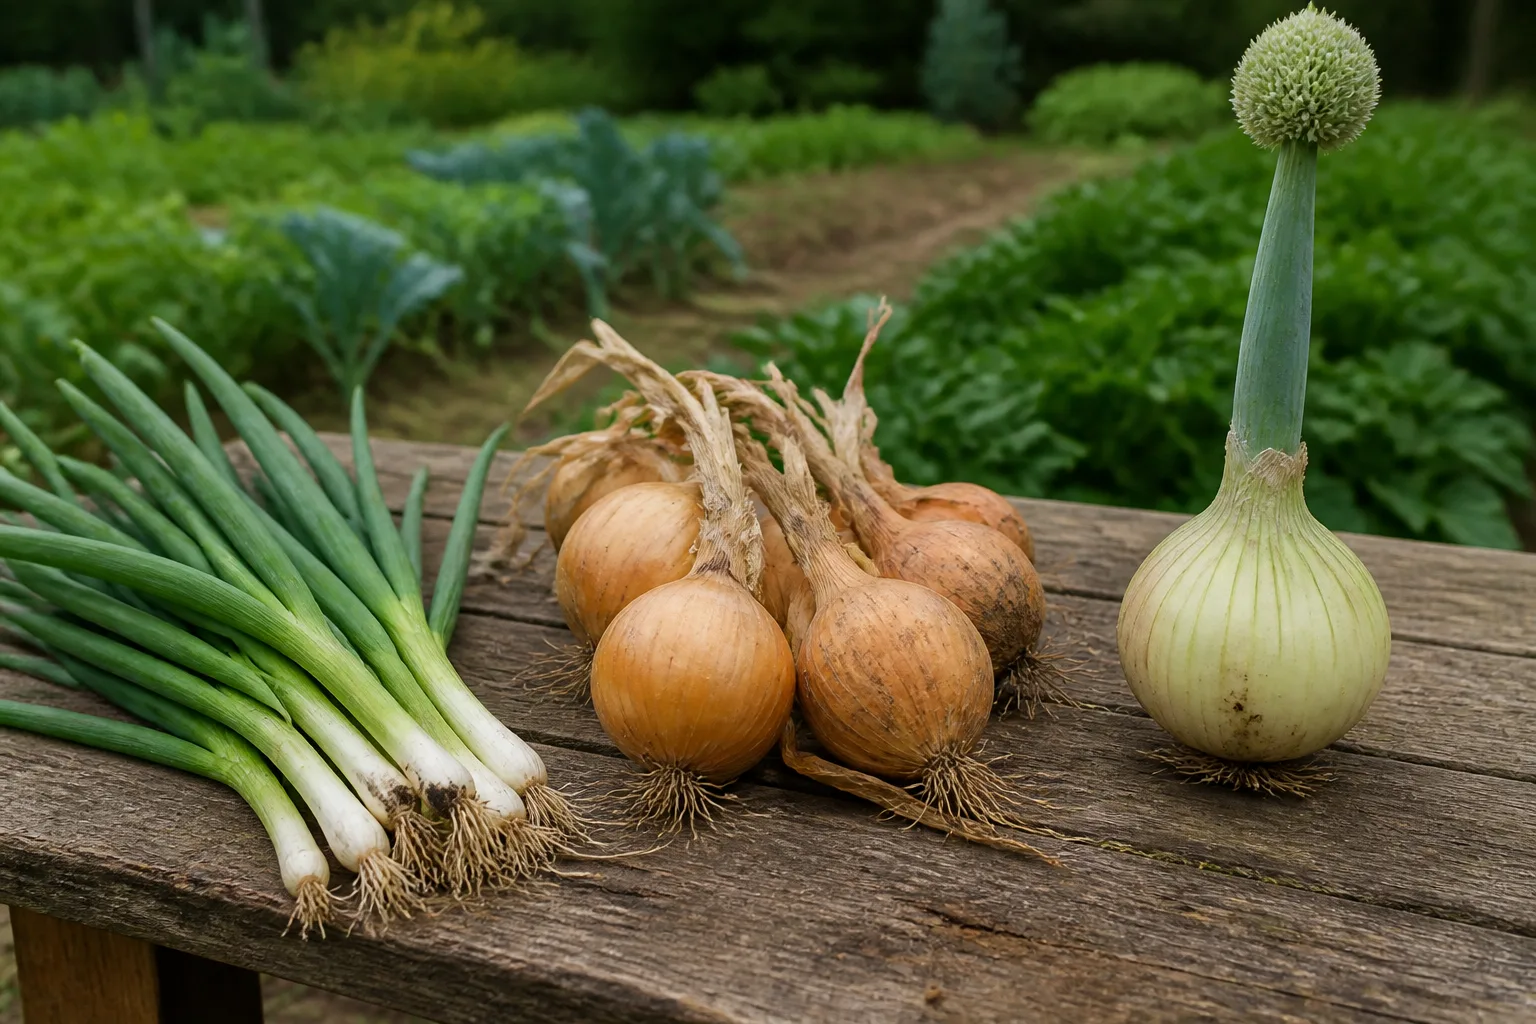
The variety label is worth keeping. Day length triggers bulbing differently in short-day, intermediate-day, and long-day onions, and a sweet, mild onion generally has a shorter storage life than a pungent storage cultivar. Your planting date and local growing conditions still matter, but the cultivar tells you what the crop was bred to do.
Read three signals before you pull
One tired leaf does not prove that an onion is mature, and a completely collapsed top can be a sign of disease, drought, or storm damage rather than a perfect harvest. Check the whole row and use these three signals as a sequence: tops tell you when to inspect, the neck tells you whether growth is ending, and the skin tells you whether the bulb is ready to dry down.
Use the tops, neck, and skin together
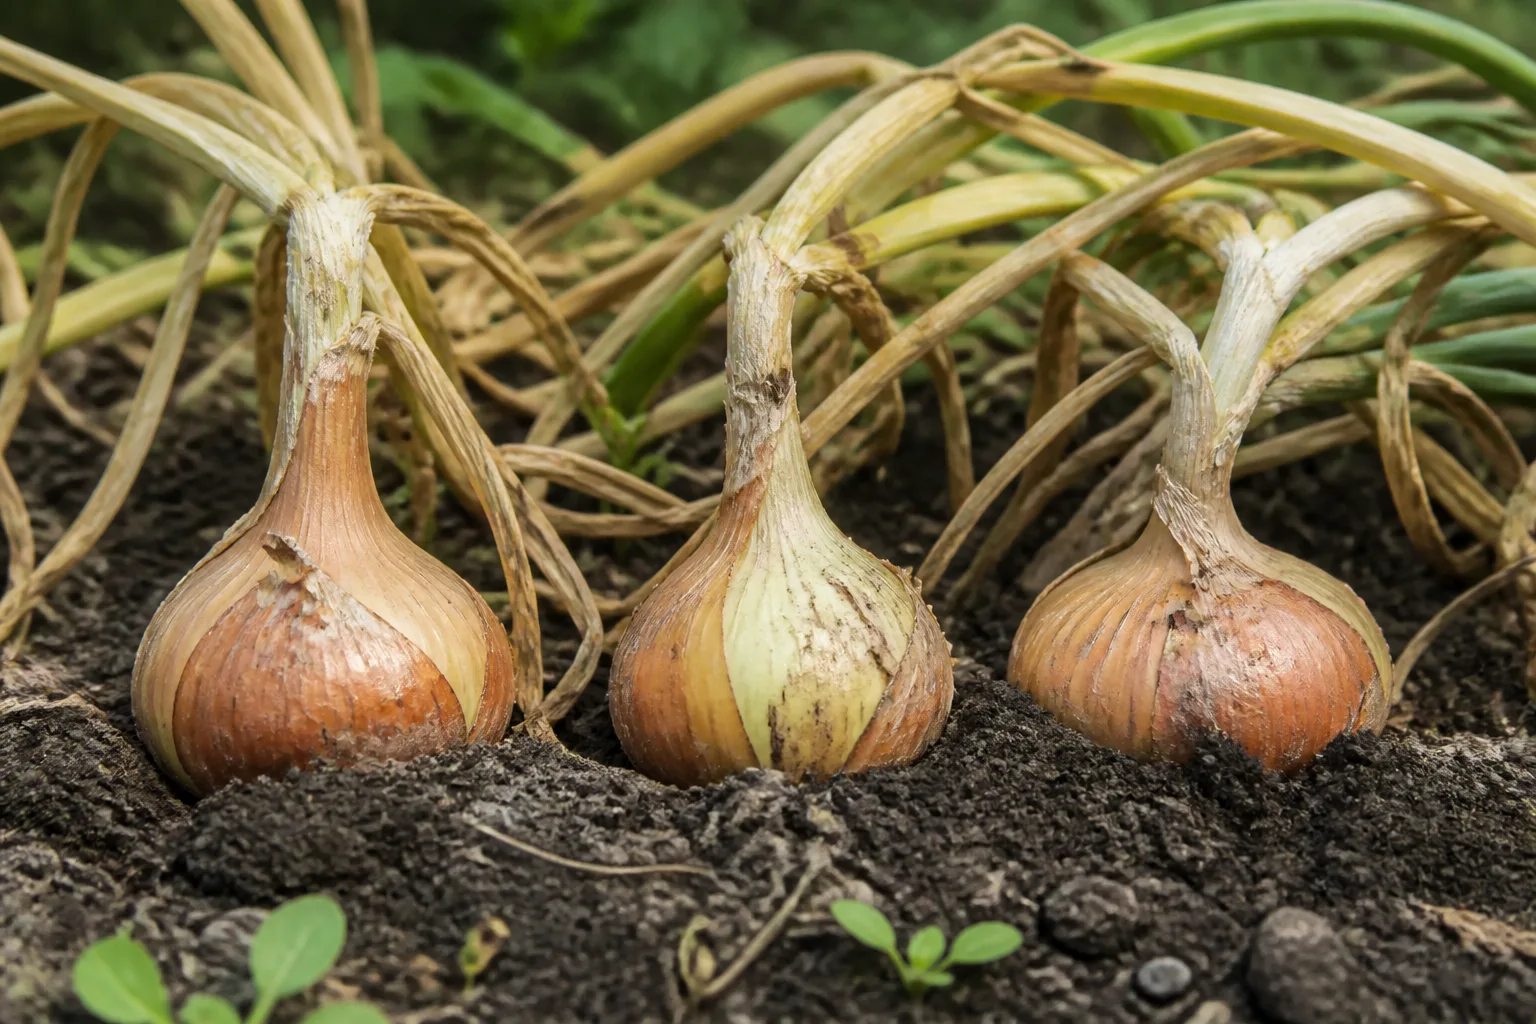
Healthy onion tops begin to lose their upright posture as the bulb finishes filling. When about one-third to one-half of a planting has tipped or the oldest leaves are turning yellow at the ends, stop treating the crop as an open-ended growing project and start checking individual plants. Penn State Extension describes dry onions as commonly harvested when one-third to one-half of the tops have fallen, while other home-garden guidance uses about half the planting as the cue.
The point of the range is flexibility. If the forecast is dry and the necks are still green and thick, a little more time can add size. If the crop is mature enough and a prolonged wet spell is coming, leaving every bulb underground to wait for perfect top collapse can expose it to rot and reduce the time available for curing.
Do not bend, fold, or cut over healthy green tops to force this stage. Leaves are still making carbohydrates that the bulb stores. Artificially breaking them may give you a flattened-looking row, but it removes working foliage rather than improving the bulb.
The neck is the short section where the leaves join the bulb. A growing onion has a green, juicy, substantial neck. As maturity approaches, that neck begins to soften, narrow, and dry. On some plants you can feel a distinct soft spot just above the bulb before the top fully flops; on others the most useful sign is that the neck no longer feels actively plump and rigid.
That early neck check is especially useful when rain is on the way: GrowVeg describes a soft spot above the bulb as a sign you can detect before the top fully falls, allowing a gardener to lift mature plants before moisture becomes the bigger risk (GrowVeg’s practical harvesting guide).
Check several plants rather than squeezing one repeatedly. A neck that is soft because of watery decay, a split, or a bad smell is not a maturity signal—it is a reason to pull that onion, cut it open, and use or discard it promptly. Mature is dry and closing; rotten is wet, collapsing, or foul.
Look at the bulb where it meets the soil. A mature dry onion has reached the size and shape expected for its variety, feels firm, and is beginning to show a dry outer wrapper. It does not have to be completely above the soil, and the final color may become richer during curing, so do not scrape away protective scales just to inspect it.
If the bulb is firm but the neck remains thick, green, and succulent, it is usually a poor candidate for long storage even if it is large. It can still be excellent for cooking. Harvest it with the mature crop, cure it separately, and plan to use it first rather than forcing it into a mesh bag for months.
Green onions are ready before storage onions
Green onions, scallions, and bunching onions are harvested for tender foliage, not for a fully dried wrapper. Pull them when the stems have reached a useful thickness and the base is large enough for the dish you have planned. You can harvest a few at a time, thin an overcrowded row, or pull the entire plant; there is no need to wait for the tops to yellow and fall.
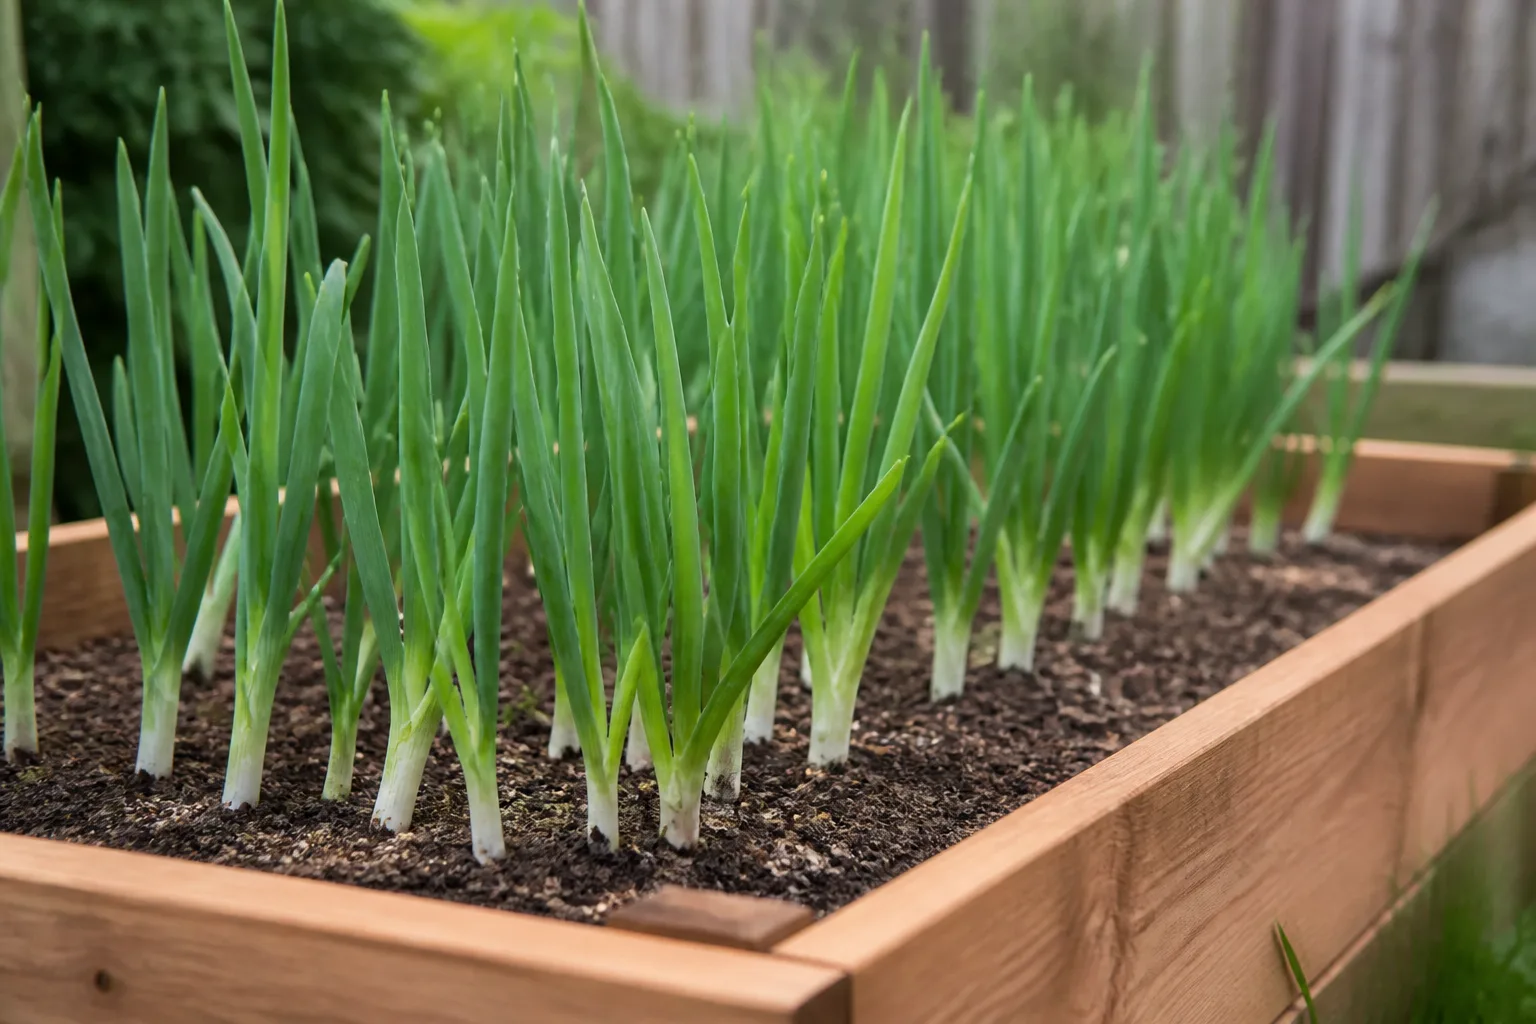
Dry bulb onions need a different test. Cutting leaves from a still-growing bulb may give you green onion tops, but it also removes photosynthetic area and can reduce final bulb size and storage potential. If your goal is a pantry crop, leave healthy foliage intact until the plant begins its natural finish.
The two harvests can share a bed. Thin crowded seedlings early and eat the thinnings as green onions, while the remaining plants continue to bulb at their final spacing. This is more useful than trying to make every plant reach the same size on the same day.
Let the weather change your harvest date
Onion maturity is a biological process, but harvest is also a weather decision. A dry bulb pulled carefully in good conditions has a much easier path to a dry neck than one lifted into a week of rain, cool days, and poor airflow.
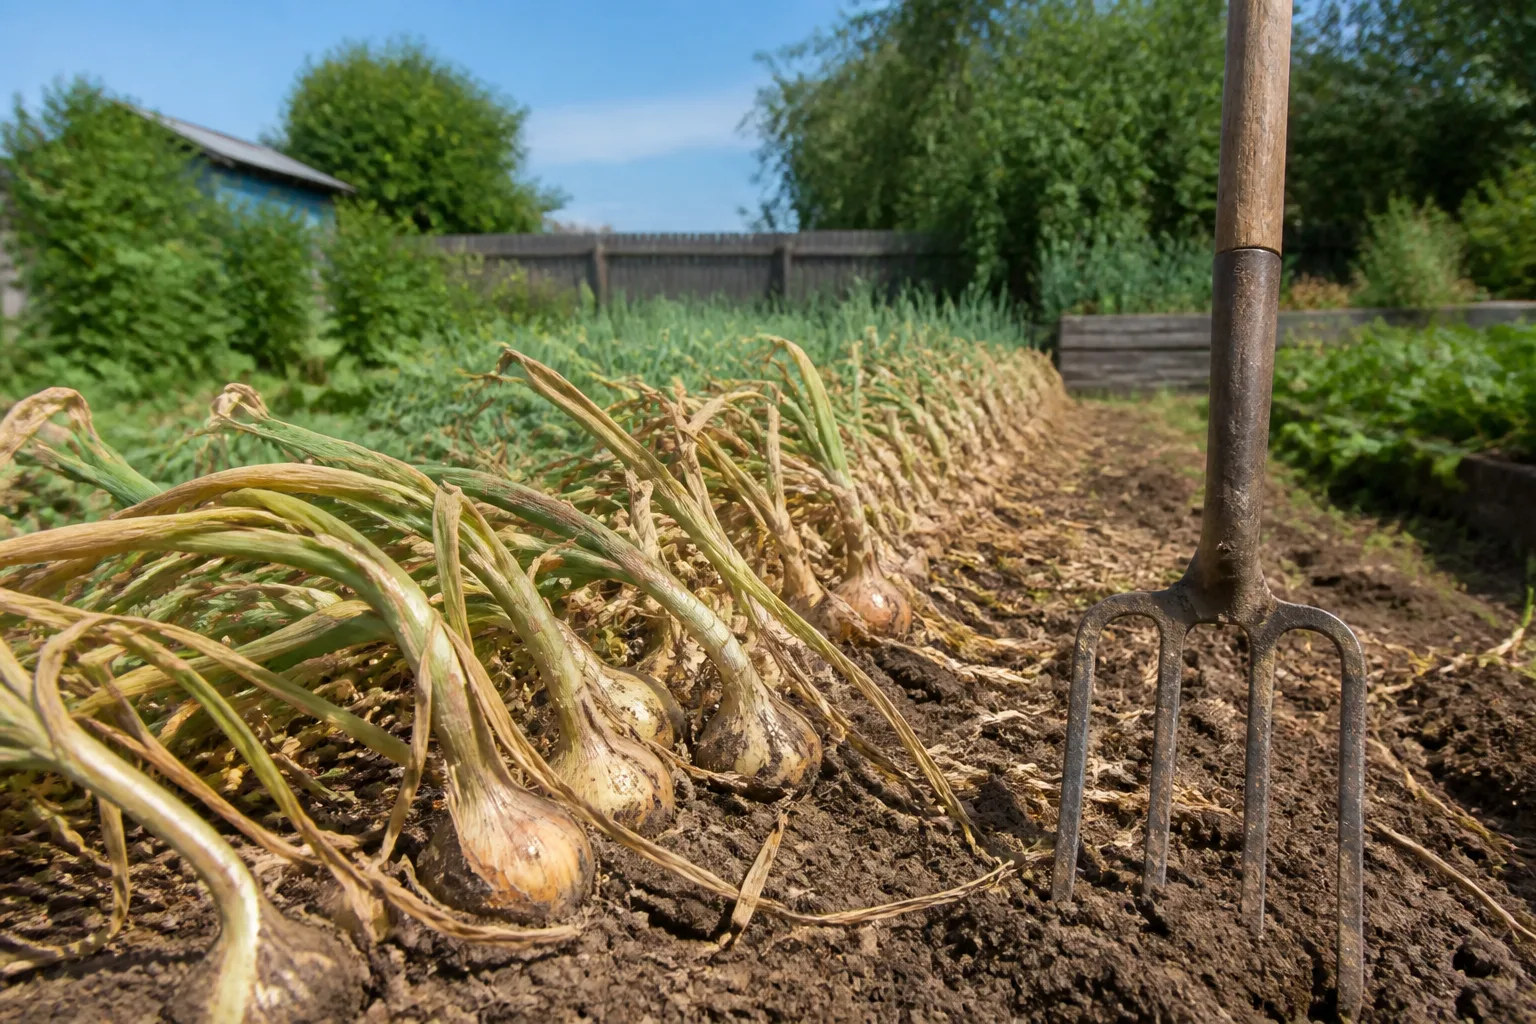
Match the harvest to dry or wet weather
When the tops are beginning to fall and the soil is workable, inspect the row every few days. If most bulbs are still firm and the necks are green, keep watering during active bulbing; drought stress reduces bulb size and can affect flavor. Once the crop is clearly entering maturity, stop routine watering so the soil surface and necks can dry instead of adding moisture that delays curing. Utah State University Extension specifically warns that excess water as onions mature can cause curing and storage problems (its home-garden onion fact sheet).
Choose a dry morning or late morning after dew has lifted for the actual lifting. Do not wash onions intended for storage. Let clinging soil dry, then brush it away gently after the bulb has dried enough to avoid rubbing grit into the wrapper.
If several mature plants have softening necks and rain is forecast, prioritize those bulbs. You do not have to pull every onion in the bed just because one plant is ready, but do not leave clearly mature, wet-weather-sensitive bulbs underground indefinitely. Lift them with a fork, move them under cover, and cure them in moving air.
Late-season rain is especially awkward because it can arrive as daytime temperatures fall. Utah State’s commercial onion guidance describes the trade-off clearly: bulbs may gain weight if left longer, but late lifting can reduce drying time and increase exposure to rot or freezing (Utah State University Extension on onion harvest and handling). In a home garden, storage quality is usually worth more than squeezing out the last increment of bulb size.
Never handle onions that are frozen solid. Let them thaw without rough movement, then inspect for water-soaked scales. A bulb damaged by freezing may look acceptable outside but deteriorate quickly once stored, so keep it for immediate use if the interior is sound.
How to lift onions without bruising them
Onions bruise more easily than they look. A small impact or torn neck can become the entry point for rot during curing, even when the bulb appears perfect on harvest day.
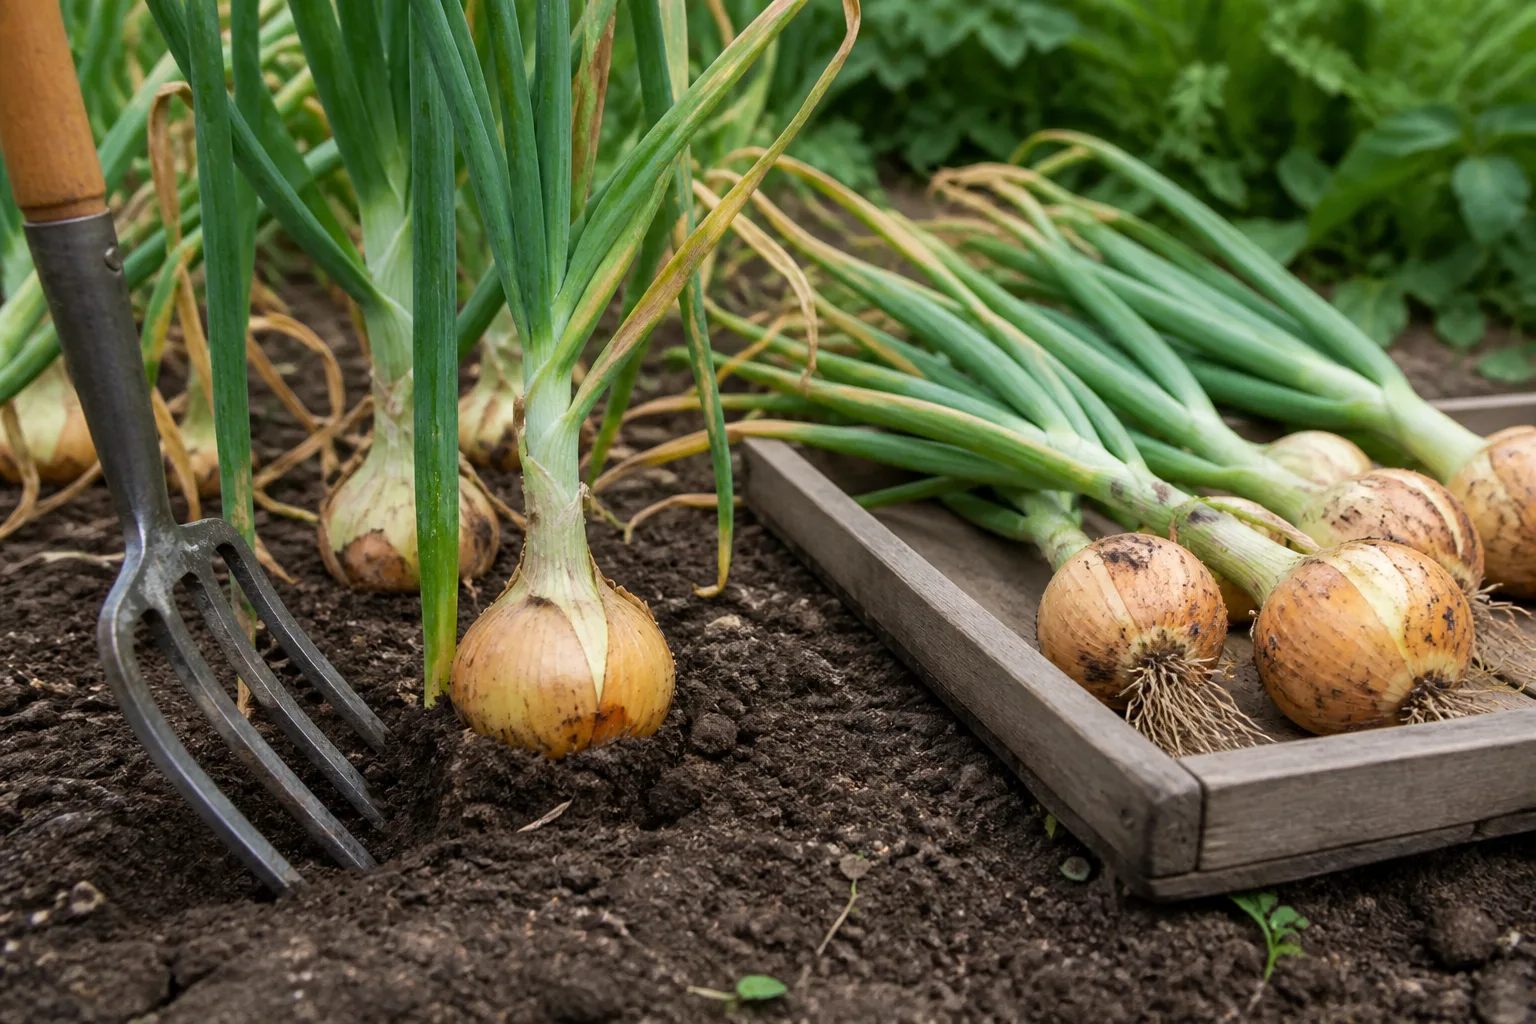
Work along the row with a garden fork or hand fork. Push it into the soil a few inches away from the bulb, loosen the soil beneath and beside it, then lift the onion from the base. If the soil is loose, you can pull gently on the neck, but do not yank a bulb free by its leaves when the ground is tight.
Shake off only the loose soil. Do not bang bulbs together, scrape them with a shovel, or throw them into a deep bucket where they bruise under their own weight. Leave the tops and outer wrapper scales attached during the first drying stage; they protect the bulb while moisture moves out through the neck.
Lay the onions in a single layer on a rack, screen, clean dry surface, or shallow crate. Keep them shaded from harsh midday sun, protected from rain, and separated enough that air can move around each bulb. A bulb with a torn neck, deep bruise, open split, or obvious disease should go into the immediate-use group before you set up the long-term crop.
Cure onions until the neck is sealed
Curing is not just letting onions sit around. It is the controlled drying of the outer scales, roots, leaves, and especially the neck until the opening at the top of the bulb is dry and protected. A properly cured onion has a much better barrier against moisture and rot in storage.
Plan on roughly two to four weeks for a storage crop, but use the bulb rather than the calendar to decide when it is finished. Penn State Extension gives two to four weeks as a typical curing range and notes that wet or humid regions often require curing under cover (Penn State Extension’s onion production guidance).
Choose outdoor or indoor curing
In a dry climate with warm days and cool, rain-free nights, onions can begin curing in the garden or on a protected rack. Keep the bulbs out of standing moisture and direct, intense sun. Turn or rearrange them occasionally so damp spots do not remain trapped beneath the bulbs.
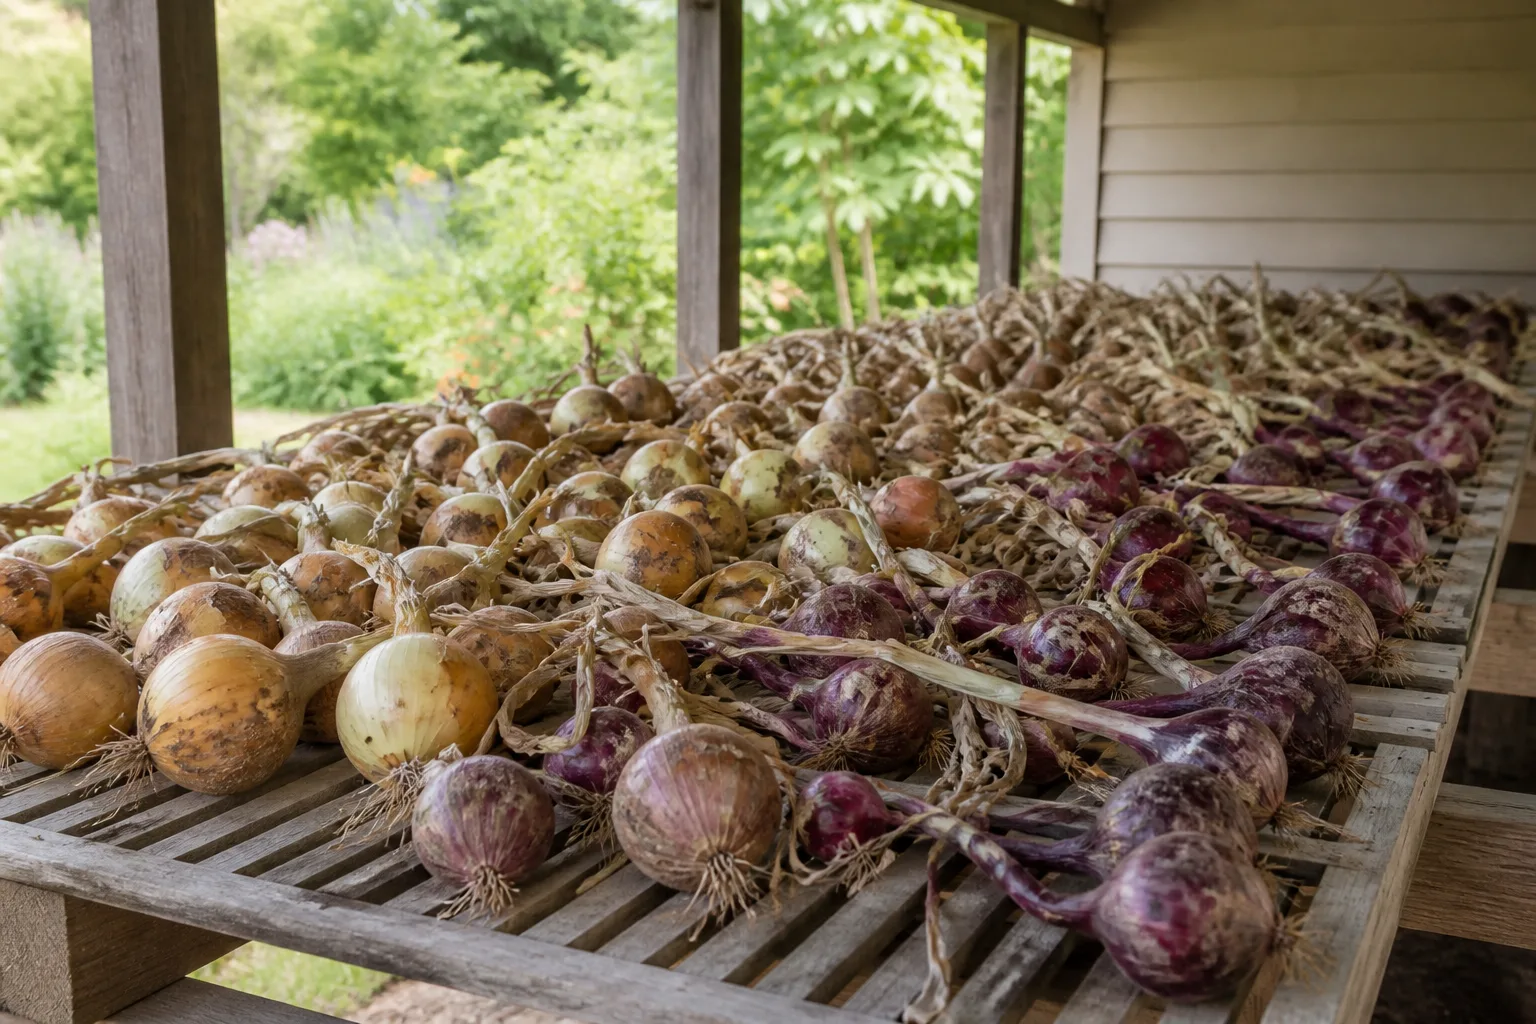
Outdoor curing works only while the conditions stay favorable. Move the crop under cover before evening dew or rain can re-wet the necks. A roofed porch, open shed, greenhouse with ventilation, or covered rack is more reliable than a sunny windowsill or a sealed plastic tote.
When humidity is high or rain is persistent, cure the onions in a garage, shed, greenhouse, or other dry space with good ventilation. Spread them on a rack or screen rather than piling them in a basket. The goal is warm, dry, moving air—not heat so intense that the outer scales scorch.
Check the crop every few days. The onion is ready for final trimming when the outer skin is papery, the roots are dry and wiry, the leaves have shriveled, and the neck is tight and dry rather than green or spongy. If one bulb remains damp at the neck, give it more time or move it to the immediate-use group.
Do not cure in a sealed bag. Moisture released from the bulbs will collect inside, and the dampest onions will infect their neighbors first. Do not wash storage onions before curing; water adds a problem the curing process must then solve.
Top and trim onions after curing
Trim only after the neck and outer scales are dry. Use clean, sharp pruners to cut the leaves about 1 inch above the bulb. Cut the roots close to the base without slicing into the root plate, and remove only loose, dirty, or obviously damaged outer skin. The firm wrapper layers are part of the storage protection, not waste to be polished away.
If you want to braid onions, leave a few inches of dry stem and use only bulbs with firm necks. Braiding is a storage method, not a substitute for curing; the stems still need to be thoroughly dry before you hang the braid. If the stems are brittle, moldy, or unevenly dry, trim and store the bulbs in a breathable mesh container instead.
Sort the crop before it goes into storage
Sorting is one of the highest-value minutes in the entire harvest. A single soft, bruised, diseased, or poorly cured bulb can release moisture into a group and create a problem that spreads before you notice it.
Make three groups:
- Longer storage: firm bulbs with dry papery scales, dry roots, and a tight neck.
- Use soon: thick-necked, lightly bruised, undersized, sprouted, or short-lived sweet bulbs that are otherwise sound.
- Do not store: soft, leaking, moldy, foul-smelling, badly split, insect-damaged, or internally watery bulbs.
Cut open a questionable onion rather than guessing. If the scales are crisp and the problem is limited to a loose wrapper, peel that wrapper and use the bulb soon. If the interior is wet, brown, slimy, or separating, discard it and keep it away from the storage crop.
Store onions by variety and conditions
A cured onion still has a natural storage life determined by its genetics. Mild, juicy, sweet onions are often delicious but do not keep as long as dense, pungent storage varieties. GrowVeg notes that cultivar differences matter even when the onions receive the same care, and recommends a cool, dry place for longer-keeping types (GrowVeg’s guide to harvesting and storing onions).
Build an airy storage setup
Store cured onions in a cool, dry, dark, well-ventilated place. A mesh bag, open crate, slatted shelf, or single layer on a screen lets air reach the necks. Keep the crop off a damp floor and avoid a closed plastic bin, which traps the moisture onions are trying to release.
For cold storage, a range around 32–40°F is appropriate when the space is dry enough to prevent condensation. Penn State Extension reports that well-cured onions stored at about 32°F and 65–70 percent relative humidity can last approximately one to eight months depending on the variety; a home gardener should treat that as a cultivar-and-condition range, not a guarantee. Utah State also warns that temperatures between 40°F and 50°F can encourage rapid sprouting and decay (Penn State’s storage guidance, Utah State’s harvest and handling guidance).
If you do not have a stable cold room, choose the coolest dry space available and inspect more often. Separate onions from potatoes and fruit in different containers: their preferred humidity and ripening behavior do not match, and a shared, poorly ventilated bin makes defects harder to spot.
Read the first signs of storage failure
Inspect the crop at least every couple of weeks, more often at first. A green shoot means an onion is breaking dormancy or was not fully mature; a soft neck suggests incomplete curing or rot; roots growing from the base point to excessive moisture; and a sour smell or watery scales means the bulb is failing.
Remove the affected onion immediately. Use a sound but sprouting bulb first if the interior is still firm, and do not put it back into the long-storage group after trimming away one soft layer. Storage is a moving process: the goal is not to make every onion last equally long, but to use each variety and condition at the right time.
What to do with bolted, soft, or oversized onions
A bolted onion sends up a stiff flower stalk instead of putting all of its energy into a smooth storage bulb. The bulb is usually edible if it is still firm, but the stalk creates a tougher center and the onion often stores poorly. Pull bolted bulbs, cut away the flower stalk, and use them soon rather than investing weeks in curing for long storage.
An oversized onion is not automatically a bad onion. Size is only a problem when it comes with a thick, green, or spongy neck, open splits, or unusually soft scales. Cure a firm large bulb as usual, but move any thick-necked specimen into the use-soon group.
An onion whose tops fell early from drought, hail, animals, or disease needs an inspection rather than an automatic harvest. If the bulb is small and the neck is still green, it may continue growing if the cause can be corrected. If the base is soft, the foliage is diseased, or the bulb is sitting in wet soil, harvest it and assess it for immediate use.
Can you save onion seed?
Onions are biennial, so a bulb grown from seed generally spends its first season building a storage organ and flowers in the second year after exposure to the right conditions. To save seed, select healthy, true-to-type bulbs and keep them growing or replant them according to the variety and your climate; do not harvest those selected bulbs as ordinary storage onions.
Let the flower heads dry on the plant, then collect them before the capsules open and scatter seed. Dry the seed indoors away from direct sun and store it cool and dry in a labeled paper packet. Seed-saving plants need isolation from other flowering onions if you want reliable variety purity, and saved seed is not the same project as curing a bulb for the kitchen.
Harvest mistakes that shorten storage life
The most common failures happen during the handoff between garden and storage, not because the gardener missed a magic date.
- Waiting for every top to collapse: This can expose mature bulbs to rain, rot, or a late freeze. Start checking when a meaningful portion of the crop begins to fall.
- Cutting green tops early: Removing working leaves can reduce bulb fill and delays the natural finish.
- Pulling against hard soil: Yanked necks tear; loosen the soil first with a fork.
- Throwing bulbs into a bucket: Impact bruises are often invisible until storage.
- Curing in a pile or sealed container: Trapped moisture encourages mold and neck rot.
- Trimming before the neck is dry: A fresh cut is an open route for moisture and rot organisms.
- Storing every bulb together: Thick-necked, soft, and damaged bulbs should be used first, not allowed to seed problems through the best crop.
- Treating a date as a diagnosis: Days to maturity tell you when to look, while the plant and weather tell you what to do.
A repeatable harvest-day checklist
Walk the crop in this order:
- Name the goal. Mark green onions, immediate-use bulbs, storage bulbs, and any seed-saving plants.
- Scan the tops. Note how many have begun to yellow, soften, or fall; do not flatten healthy leaves yourself.
- Feel the necks once. Separate dry or finishing necks from green, thick ones and from wet, rotten ones.
- Check the forecast and soil. A dry window favors curing; incoming rain or freezing weather favors lifting mature bulbs and moving them under cover.
- Loosen from below. Use a fork near the bulb, lift gently, and keep the neck and outer scales intact.
- Dry in one layer. Give the bulbs shade, ventilation, and protection from rain.
- Wait for cure. Trim only when the skin is papery, roots are dry, leaves are shriveled, and the neck is tight.
- Sort before storing. Keep only firm, well-cured bulbs in the long-storage group, then inspect that group regularly.
Conclusion
The best answer to “when do you harvest onions?” is a combination of plant signs and practical timing. Harvest green onions when they are useful; begin checking dry bulbs when the tops start to fall; confirm that the neck is finishing and the bulb is firm; then let the weather determine whether you can wait or should lift and cure under cover.
Handle every bulb gently, dry it thoroughly, trim only after the neck seals, and separate short-lived or damaged onions before storage. Those small decisions matter more than chasing one exact month, and they are what turn a row of onions into a dependable supply for the kitchen.



