How to Propagate a Cactus: 4 Ways That Fit the Plant
Learn how to propagate a cactus by pups, cuttings, seed, or grafting, with species-based method choices, callusing steps, and practical rot-prevention advice.
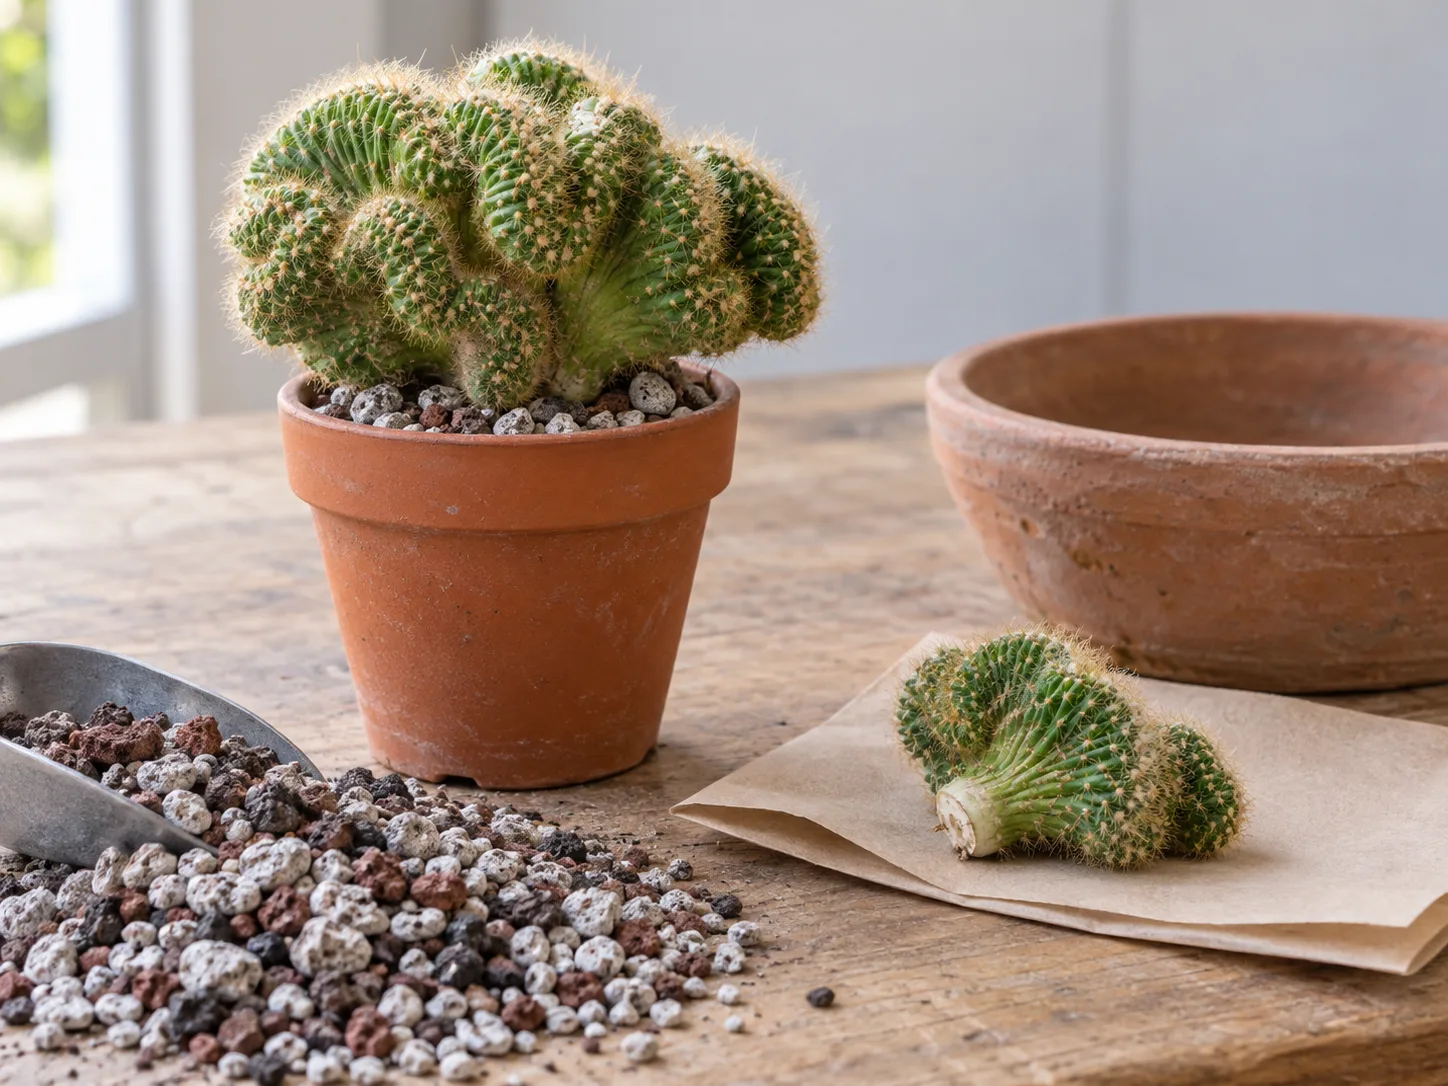
A cactus can produce a new plant from a pup, a detached stem or pad, or seed. Grafting is a fourth, more specialized route that joins one cactus to another. The right choice depends on the cactus’s shape and growth habit: a jointed prickly pear can root from a pad, while a solitary globe usually cannot be divided into neat cuttings.
Before reaching for a knife, look for offsets, joints, branching stems, and the plant’s species name. That quick check prevents the common mistake of treating every cactus like a generic succulent. It also helps you choose between making a clone of a plant you already own and raising genetically varied seedlings.
Identify Your Cactus Before Choosing a Method
Cacti belong to the family Cactaceae. Their areoles—small, cushionlike growing points—are the clearest feature that separates true cacti from many other succulents; spines, flowers, and branches emerge from areoles. Most cacti store water in their stems, but their growth forms vary widely. Some grow as clumps, some branch into tall columns, some make flattened pads, and tropical forest types grow long, leaflike stems. Britannica’s cactus overview describes how offsets, stem fragments, and grafting occur in different cactus groups.
Look closely at where new growth appears. A rounded cactus with several heads may be a clustering type that produces separable pups. A prickly pear has flattened stem pads joined at narrow points; those pads are not leaves. A columnar cactus has upright stems that can sometimes be cut into sections. Holiday cacti and Epiphyllum have flattened or segmented stems too, but their rainforest origins mean their rooting medium and moisture needs differ from those of desert cacti.
If the plant is solitary and globular, has no offsets, and does not branch, do not assume you can slice it into pieces and expect each section to root. A stem cutting needs viable growing tissue and enough stored energy to survive while roots form. For a plant that does not naturally produce removable parts, seed is often the straightforward home method; grafting is a specialist option.
Match the Propagation Method to the Plant
Use the method that matches the plant’s structure and your goal. A pup or pad is usually the fastest way to make a clone. Seed takes longer but can produce new combinations of traits. Grafting supports a scion on a separate root system; it does not turn every cut cactus into a self-rooted plant.
| What your cactus looks like | Best first method | What to know |
|---|---|---|
| Several heads or pups growing from a base or side | Offset separation | Wait until the pup is large and firm enough to handle; some detach with roots, others need time to callus |
| Flat, jointed pads such as Opuntia | Pad cutting | Use a whole mature pad and protect yourself from glochids |
| Branching or columnar stems | Stem cutting | Root only species known to tolerate stem propagation; let the cut surface dry before planting |
| Flattened or leaflike tropical stems | Stem segments | Use airy mix and a more even, gentle moisture level than for desert species |
| Solitary, slow-growing cactus with no offsets | Seed, or specialist grafting | A cutting may not be a viable option |
| A colorful cactus that lacks enough chlorophyll to grow alone | Grafting | The scion depends on a compatible, healthy rootstock |
The University of Arizona Cooperative Extension’s guide to propagating agaves and cacti from cuttings and seed lists genera such as Cereus, Cylindropuntia, Echinopsis, Mammillaria, Opuntia, and Trichocereus among cacti that are readily propagated vegetatively. That is a useful starting list, not a promise for every species or every specimen. If you have a named cultivar or an uncommon collector cactus, check a species-specific source before removing tissue.
Prepare Tools, Timing, and a Safe Work Area
Propagate a healthy cactus during active growth, when it can repair a wound and begin rooting. For many desert cacti, that means a warm period in spring or early summer, not a cold, dark dormancy. Avoid taking cuttings during a heatwave, after the plant has been severely stressed, or when a fresh wound would stay damp in rainy weather. Indoor plants can follow their own light and growth cycle, so judge the plant rather than the calendar.
Use a small pot with an open drainage hole and a loose, fast-draining medium. A commercial cactus mix may work as sold, but if it stays wet for days, blend in more pumice, perlite, or horticultural grit. You want water to pass through and air to return to the root zone quickly; a heavy, fine-textured potting soil can stay wet around an unrooted cutting long enough for rot to start. Choose a container only slightly wider than the cutting so the mix does not remain damp in a large volume of unused soil.
For cutting or grafting, use a sharp blade that can make one clean cut, then wipe it with 70% isopropyl alcohol and let it dry before use. Clean the blade again between plants and after cutting through diseased tissue. A ragged crush or a dirty blade leaves a larger wound and can move decay organisms from one plant to another.
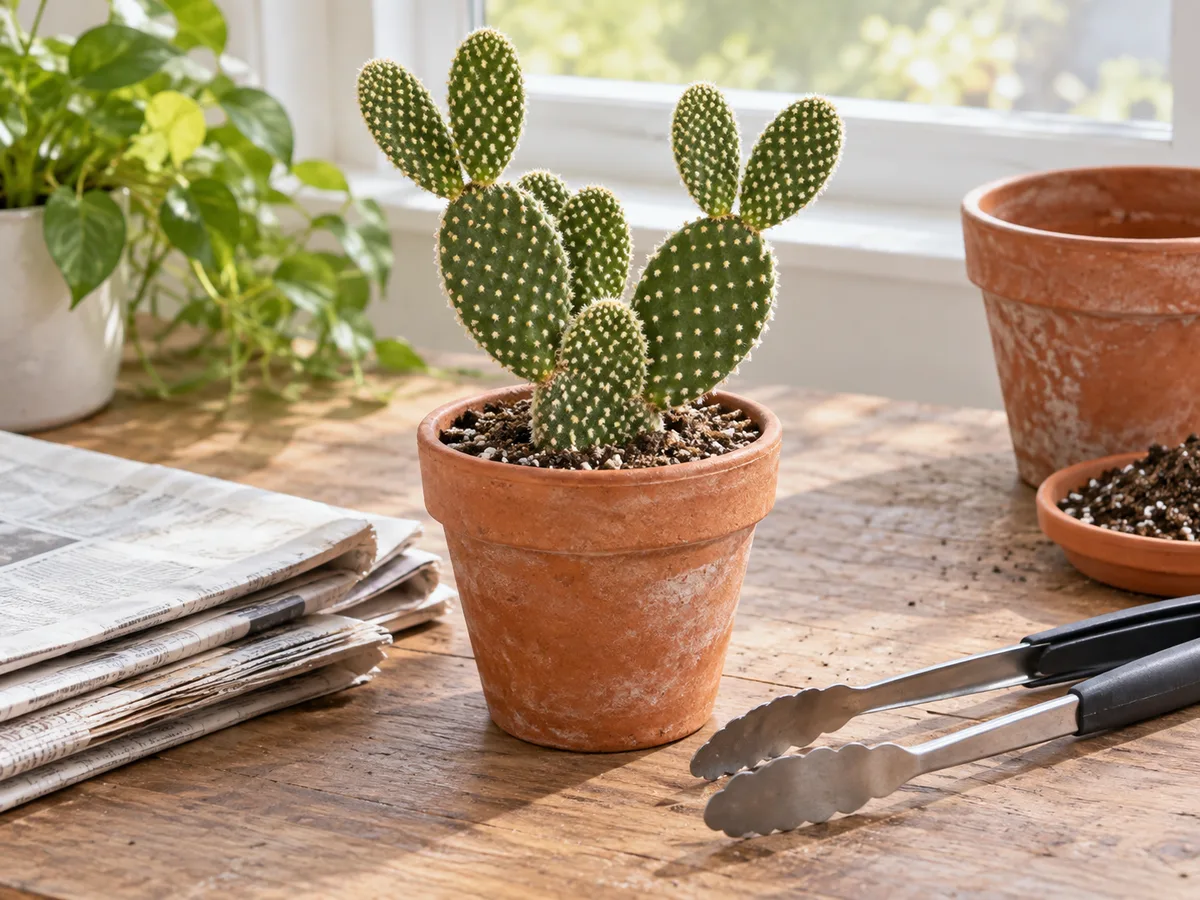
Spines and glochids require different precautions. Long spines can pierce thick gloves; tiny backward-barbed glochids on some Opuntia can detach and lodge in skin with little warning. Use long sleeves, eye protection, folded newspaper or cardboard, and long-handled tongs that grip without squeezing the pad. Keep children and pets away from the work surface, and never rub a suspected glochid into your skin or eyes. Gloves are an extra barrier, not permission to handle a spiny plant casually.
Method 1: Separate a Cactus Offset or Pup
Offsets, often called pups, are small shoots that form beside or around a mature cactus. They are usually the simplest choice when a healthy parent plant already produces them, because the pup is a young vegetative plant rather than an arbitrary piece of stem. Cacti such as some Mammillaria and Echinopsis form clumps, while other species rarely or never make pups.
Choose a pup that is firm, has a recognizable growing point, and is large enough to handle without crushing it. If it already has roots, separation may be straightforward. If it has no roots, it can still root if the species makes offsets, but a very tiny pup has less stored water and a smaller base to stabilize in the mix. There is no universal inch measurement that works across all cactus species.
First inspect the attachment. If the pup twists away with light pressure at a natural narrow joint, use tongs or a padded grip and support both plants so the parent is not wrenched out of its pot. If it resists, use a clean blade to cut through the connection rather than pulling. Set the pup in a dry, shaded spot with good air movement until any fresh wound feels dry and sealed. A pup that detached cleanly with no open wound can be potted sooner.
Set the base of the offset just into dry cactus mix, deep enough that it stands upright but not buried to its shoulders. If it rocks, brace it with a few clean stones or a temporary support; do not tamp the soil into a dense plug. Keep the pot warm and bright but out of harsh direct sun while roots are absent. Once roots begin taking up water, increase light gradually to match that species.
When to Leave the Pup Attached
A very small pup can benefit from staying on the parent until it has a thicker base or a few visible roots. Separation is also a poor choice when the parent is actively declining, recently repotted, or recovering from rot. A healthy parent supplies water and carbohydrates while the offset grows; taking several pups at once can stress a small plant and leave it with multiple open wounds.
Some species form clusters as part of their normal habit. You do not need to divide them for the plant’s health unless the clump is crowded, damaged, or difficult to manage. If your goal is to share plants, take one mature offset and let the parent recover before repeating the process. Mark the label with the species and date so you can compare how quickly that particular cactus roots.
Method 2: Root a Cactus Stem or Pad Cutting
Cuttings work when a cactus species can produce roots from a cut stem section or detached pad. The Arizona Extension list is helpful, but the growth form matters: a cleanly detached pad from an Opuntia is a different kind of cutting from a long columnar section or a short segmented piece of an epiphytic cactus. Use a healthy, hydrated parent that is actively growing, not a soft, discolored, or pest-damaged stem.
Make the cut just above a sound joint or at the point where the piece can be removed cleanly. For a broken piece, keep the original base end down; planting a columnar segment upside down can prevent rooting or lead to decay. Let the cut surface dry in shade with airflow until a firm, dry callus covers it. A thin piece may seal in a few days, while a thick column or a wide pad can need a week or longer. Humidity, temperature, and the size of the wound change the timing, so plant by the wound’s condition rather than a countdown.
Propagate Flat Pads Without Touching Glochids
Prickly pears and related cacti in the Opuntioideae group can root from a whole pad, also called a cladode. The pad is a flattened stem segment, not a leaf, and it has areoles capable of producing new growth. Fine Gardening’s Eastern prickly pear profile describes the plant’s flattened pads and the tufts of glochids that make careful handling important.
With tongs, steady a mature, healthy pad and separate it at its joint. If it does not release cleanly, use a sharp sterilized blade to cut through the joint. Lay the pad in dry shade until the base has formed a dry, corky callus; do not leave it on a sunny windowsill where it can scorch or wrinkle before planting.
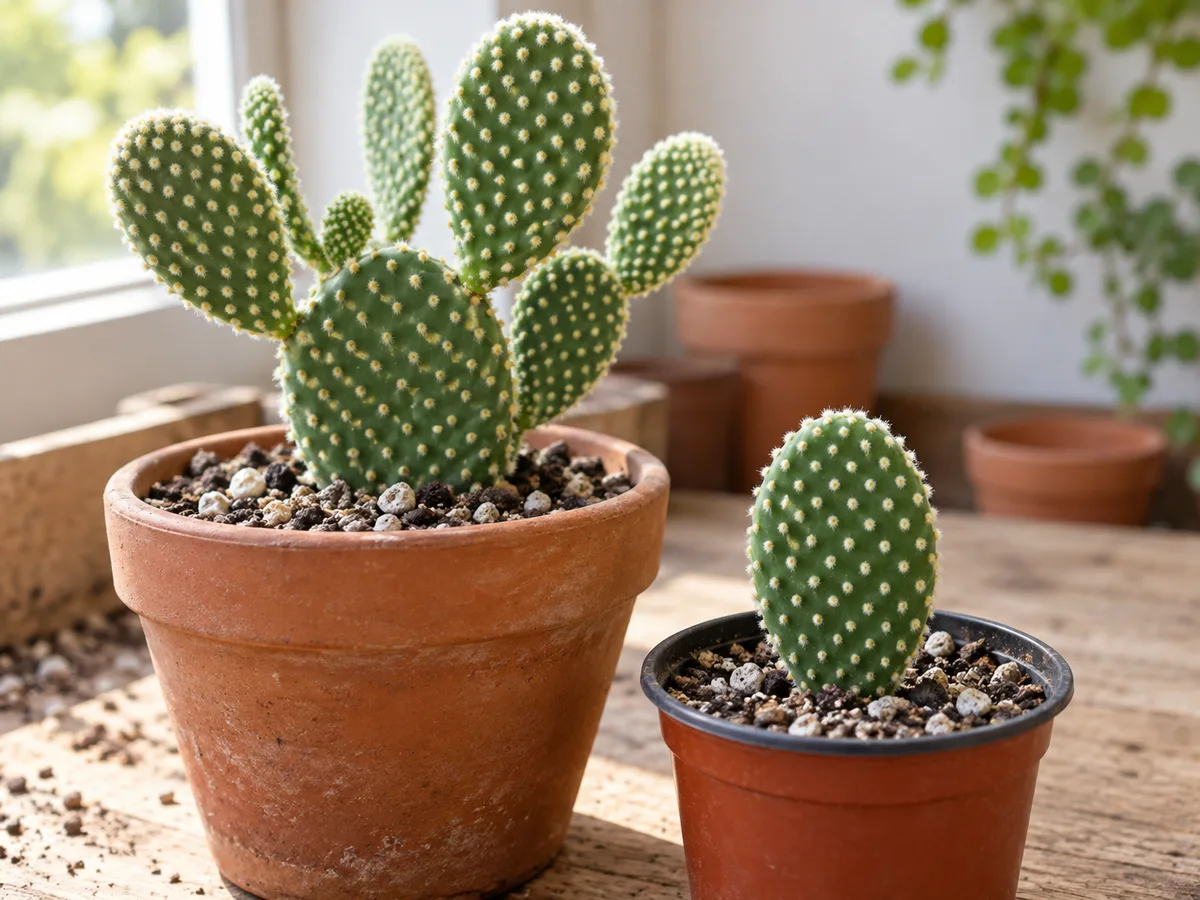
Stand the pad on its cut edge in dry, gritty cactus mix. Bury only enough of the base to keep the pad upright, and use a support if it wants to topple. Do not water the pot just because the pad looks thirsty: its stored moisture is what keeps it alive while roots develop, and wet mix against an open cut is the rot-prone combination you are trying to avoid. Once it resists a very gentle sideways nudge or produces new growth, begin watering in a small amount, then allow the mix to dry completely before the next irrigation.
Root a Columnar Stem Segment
Some branching columnar cacti can be rooted from a clean section of stem. Take a cutting only from a healthy, established plant and remove a branch that can be spared; a severed top may change the parent’s shape and expose it to infection. If the parent is one tall unbranched column, consider whether you are willing to shorten it and whether the species is known to root from cuttings before making the cut.
Mark the base end before setting the cutting down. A long section can be awkward to handle, so support the stem with a folded towel or tongs rather than gripping the spines. The cut should be flat and clean, and the cutting should rest horizontally in shade while the wound dries. A thick cut can take longer to seal than a small offset; do not mistake a surface that looks dry at the edge for a fully callused center.
After callusing, place the base end into dry mix and stabilize the section. Bury only a shallow portion; planting too deeply traps moisture against the stem and can cause the base to rot. Stake the piece or wedge it gently against the pot’s edge so it cannot shift as roots begin to form. Keep the pot warm, ventilated, and in bright filtered light until it is anchored. Do not keep pulling it out to inspect for roots, since repeated disturbance can tear the first roots that form.
Treat Leaflike Epiphytic Cacti Differently
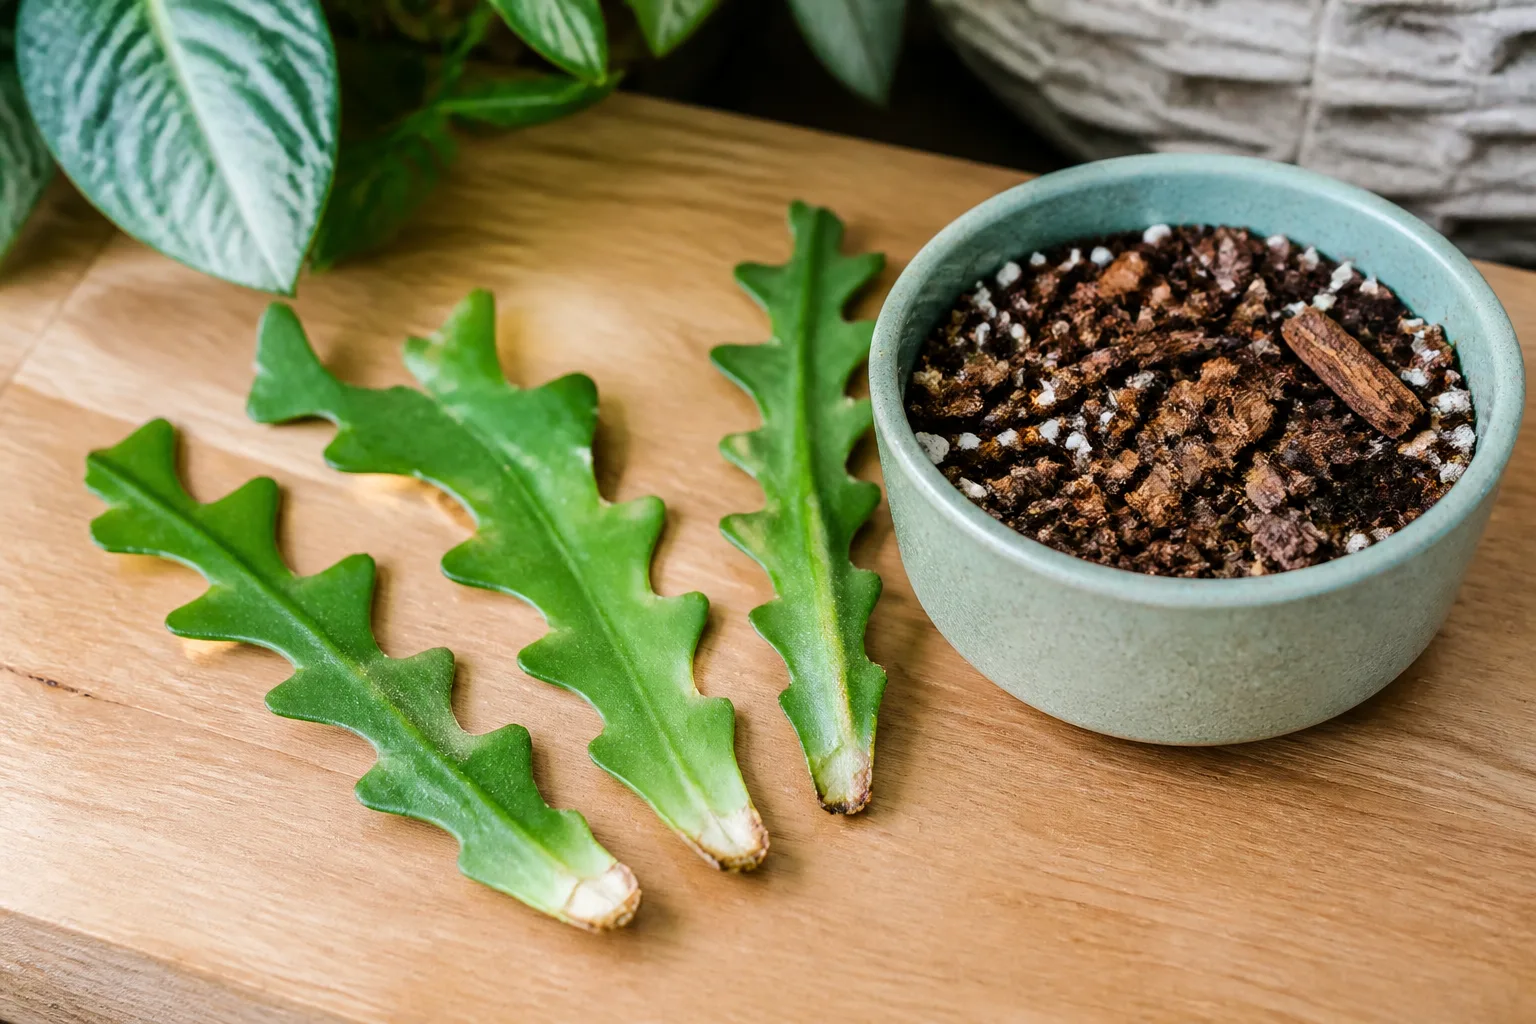
Epiphytic cacti—including Epiphyllum, Rhipsalis, and holiday cacti—grow on trees or rocks in humid habitats rather than in open desert soil. Their stems may look like leaves, but they are stems with areoles. They can root from short stem sections, yet a routine meant for a thick desert column can leave these thinner, moisture-adapted cuttings badly dehydrated.
Use a clean piece with at least one or more intact segments and let the cut end dry briefly, until it is no longer wet, rather than leaving a thin segment out for an unnecessarily long desert-style callus. Set it in an airy medium such as cactus compost loosened with grit or perlite. Keep the medium barely and evenly moist—not saturated—and give the cutting bright indirect light and warmth. The RHS guidance for Epiphyllum recommends callusing stem sections for several days, keeping the compost just moist at 18–24°C (65–75°F), and checking for roots after roughly three to six weeks. Those specific conditions apply to Epiphyllum; other epiphytic species and room conditions can differ.
Method 3: Grow Cacti From Seed
Seed is the broadly applicable method when a cactus does not make offsets or cuttings. It is also the route to raising plants with new combinations of traits, because seedlings may not look or flower exactly like the parent. Vegetative methods make clones; seed creates genetic variation. That is an advantage if you enjoy selection and a drawback if you want an exact copy of a named cultivar.
Seed-grown cacti demand more patience. Some species germinate quickly under favorable conditions, while others have dormancy or specific temperature and moisture cues. A peer-reviewed review in Scientia Agricola explains that cactus seeds can exhibit dormancy and that slow growth makes propagation a long process for many species. Do not promise yourself a mature flowering plant on a fixed schedule: species, seed freshness, light, and culture all affect the timeline.
Use fresh, correctly identified seed from a reputable cultivated source where possible. If harvesting from a fruit, wait until it is ripe and soft, then clean away the pulp and sow promptly or dry and store the seed as appropriate for that species. Fruit set may require pollination; for Epiphyllum, the RHS notes that two plants flowering at the same time may be needed for cross-pollination. Do not collect wild cactus seed or plant material casually, since some cacti are protected and collection rules vary by location.
Sow Seed in a Clean, Humid Setup
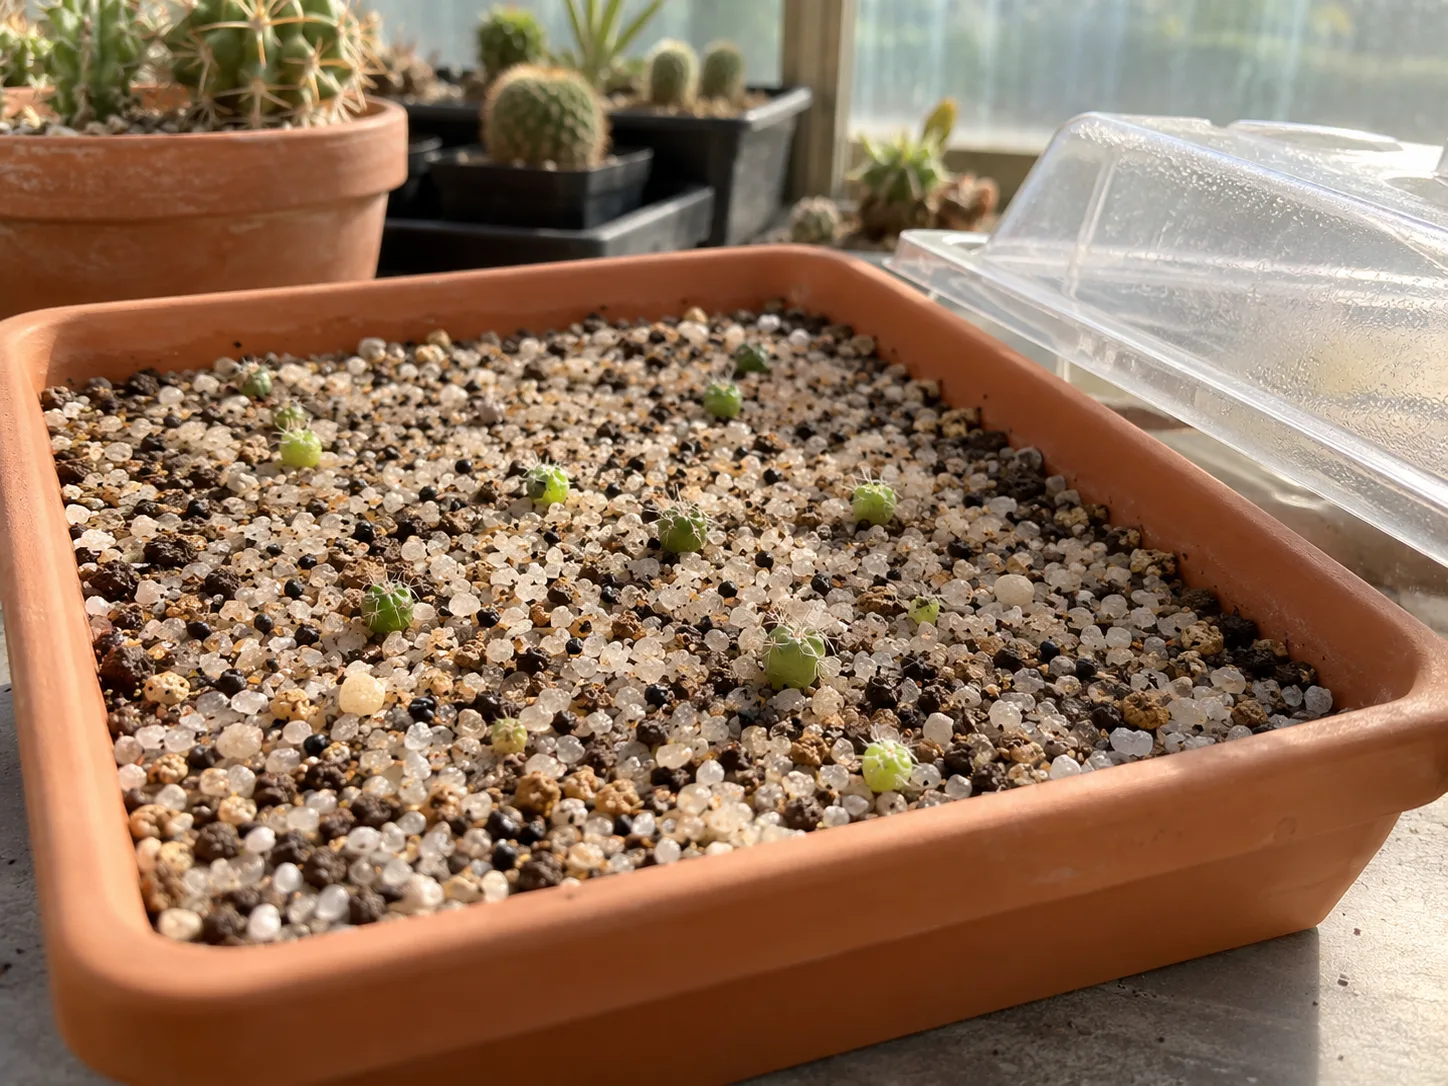
Start with a clean shallow tray or small pot with drainage and a fine, porous seed-starting mix. Moisten the medium evenly, let excess water drain, and scatter the tiny seeds on the surface or cover them only as the species’ instructions recommend. Many cactus seeds need light to germinate; burying them under a thick layer of soil can make emergence harder. A fine grit top layer can help keep the surface stable without smothering the seed.
Cover the container with a clear lid or place it in a clear bag to hold humidity, but leave some air exchange and avoid letting condensation drip constantly onto the mix. Keep it warm and in bright indirect light rather than baking it in direct sun beneath plastic. The surface should stay slightly moist while seeds germinate, not waterlogged. That balance is different from rooting a desert cactus pad: tiny seedlings have shallow roots and dry rapidly, while an unrooted mature cutting stores more water and is vulnerable to rot at its wound.
Check daily for algae, mold, or seedlings that collapse at the soil line. Remove a cover gradually after germination so the seedlings acclimate instead of going from a humid enclosure to dry room air in one jump. When they have grown enough to handle safely and are crowded, transplant carefully into small pots or a larger seed tray. Keep early seedlings protected from strong sun and abrupt drying while they establish.
Method 4: Graft a Cactus for a Specific Reason
Grafting joins a piece of one cactus, the scion, to the rooted base of another, the rootstock. It is useful for plants that cannot survive on their own because they lack sufficient chlorophyll, for a difficult-to-root piece, or for a cactus whose growth you want to support on a vigorous base. A familiar example is a red or yellow moon cactus sold atop a green cactus rootstock.
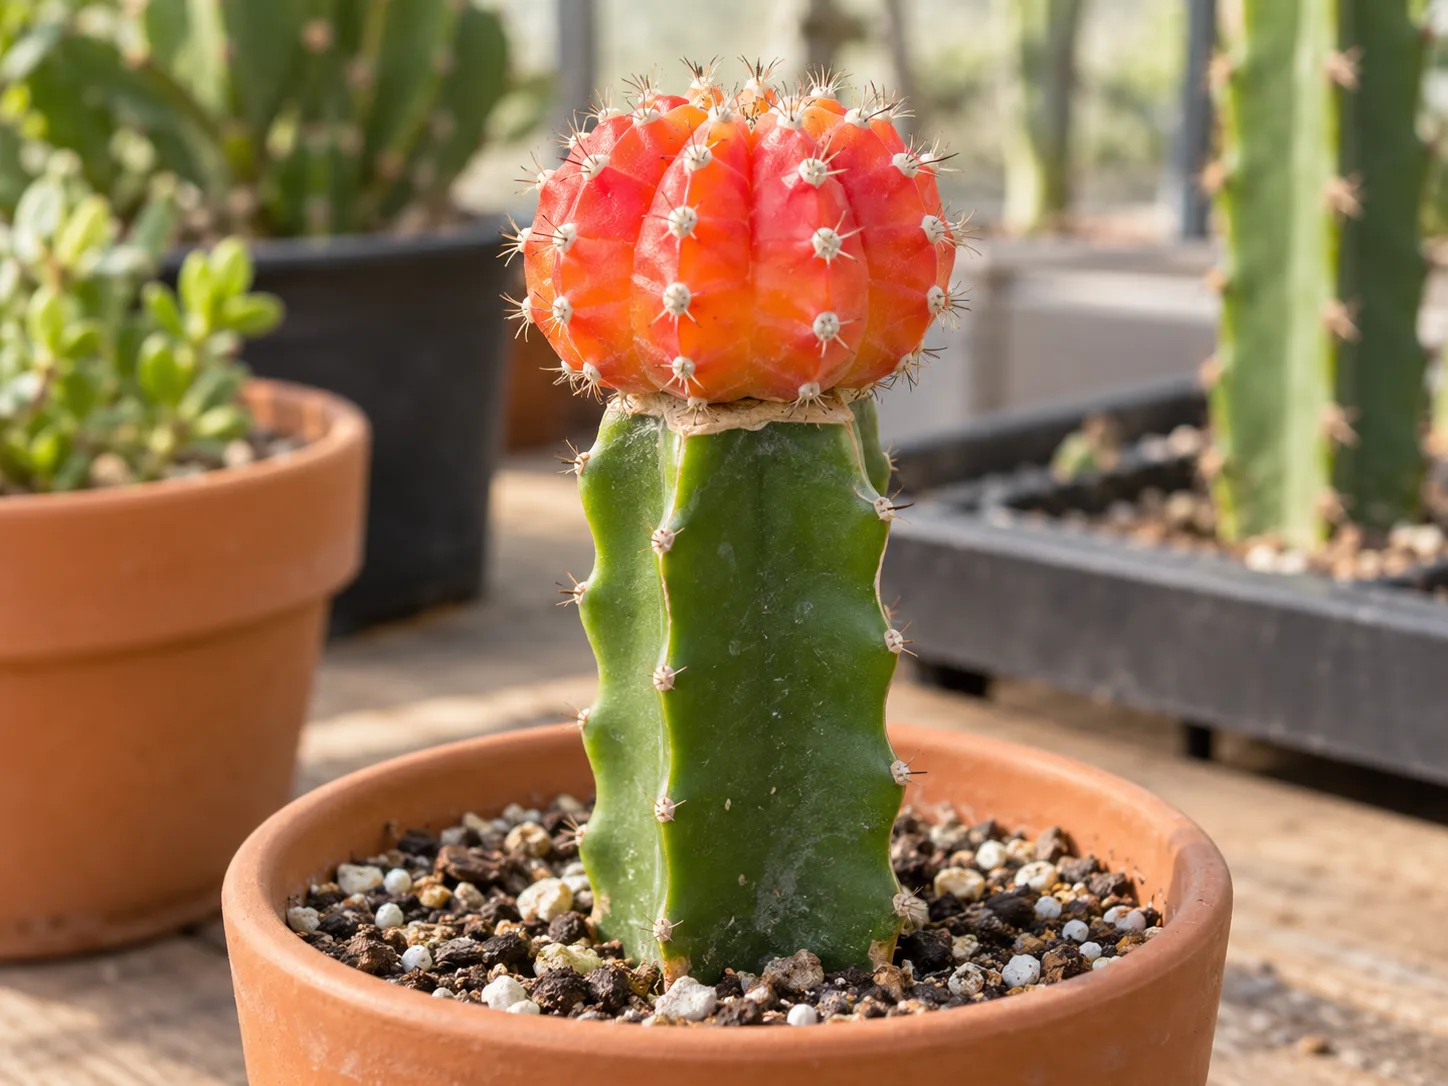
Grafting is not the easiest way to multiply a routine houseplant, and it does not produce an independent rooted cactus. The scion continues to rely on the rootstock for water and minerals. Choose this method only when there is a clear reason and you can identify a compatible pair; an attractive scion will not take on just any rootstock. The Henry Shaw Cactus and Succulent Society’s grafting guide emphasizes that the vascular tissues must meet and that incompatible plant tissues can fail to unite.
What a Graft Can and Cannot Do
For a simple flat graft, use a clean, sharp blade to make a fresh horizontal cut on a vigorous, actively growing rootstock. Make a matching fresh cut on the scion, then place the two cut faces together promptly so their vascular rings overlap at least at one point. The rings do not need to match like two identical circles, but they must make contact; centering a much smaller scion so its vascular tissue misses the rootstock’s ring can leave the pieces joined only superficially.
Hold the scion with gentle, even pressure so it cannot slide while the union forms. A loose rubber band or a clean support can help, but do not crush the tissue. Keep the graft warm, dry, and shaded from intense sun for several days, and avoid watering over the fresh union. Check for a stable attachment and continued firmness before removing the support. If the scion shrivels or shifts, the union may not have taken.
A graft can accelerate growth or preserve a graft-dependent cactus, but it also creates two plants with different needs in one system. The rootstock may outgrow the scion, fail in cold conditions, or decline before the scion does. A successful graft is therefore a managed partnership, not a maintenance-free shortcut.
Rooting Conditions, Watering, and Signs of Success
Keep unrooted desert cactus cuttings in a warm, ventilated location with bright filtered light. Strong midday sun can dehydrate or scorch a piece that has no roots to replace lost moisture. Once it has rooted and is growing, acclimate it to the brighter light appropriate for its species over several days rather than moving it abruptly from shade to intense sun.
For most dry-land cacti, begin with dry mix and wait until the cutting is stable or shows clear new growth before watering. Then water enough to moisten the root zone and let the mix dry fully before watering again. This is safer than frequent sips, which can keep the base damp without encouraging a healthy wet-dry cycle. Epiphytic cacti are the exception: they generally need an airy mix that stays slightly more evenly moist, though never waterlogged. A pot with no drainage hole is a poor choice for either type.
Do not expect every cutting to show top growth before roots. A cutting may spend weeks building roots first, and the time varies with species, piece size, temperature, and season. Better signs include a cutting that stays firm, resists a very light sideways nudge, or begins producing a new areole shoot. Avoid repeatedly tugging upward; that can break delicate new roots. If the piece is still firm and the base is not dark or soft, give it time instead of unpotting it to check.
Troubleshoot Rot, Shriveling, and Stalled Growth
A soft, darkening, or translucent base is more concerning than mild wrinkling. It often signals that moisture reached a fresh wound or that the mix stayed wet too long. Remove the piece from the pot, cut back to firm, clean tissue with a sterilized blade, and let the new cut callus completely before trying again. Discard tissue that is extensively soft or foul-smelling, and replace contaminated medium rather than reusing it around another cutting.
A cutting that wrinkles slightly but remains firm may be using stored water while it has no roots. Check for cold drafts, excessive heat, and harsh direct sun before adding water. Watering a rootless cutting every time it looks less plump can make the rot problem worse; first check whether the base is callused and whether the medium is dry. If the species is an epiphytic cactus, though, a completely dry mix for a prolonged period may also stall or desiccate it.
If nothing happens after several weeks, do not immediately assume failure. Check that the cutting is planted base-down, stable, warm, and in fast-draining mix. A thick stem or dormant plant can take longer than a small offset in active growth. If there is no progress after a few months, inspect once for a healthy base and viable tissue; if it is still firm, reset the plant in fresh dry medium and review whether this species roots from that kind of cutting at all.
Protect the Parent Plant and Preserve Its Identity
A propagation project starts with the plant you already have. Do not remove a large share of a small parent’s growing tips, and do not cut a plant that is weakened by pests, rot, or recent root disturbance. If you remove a branch to shape a columnar cactus, make the cut where the parent can heal cleanly and keep the wound dry and protected as it seals. The parent’s ability to recover matters as much as the new cutting’s chance of rooting.
Keep a label with the scientific or nursery name, the method, and the date. Pads and offsets can look similar once separated, especially among unlabeled seedlings or cultivars. If your cactus was purchased with a cultivar name or came from a specialist grower, preserve that name with the clone; seedlings from it may not be genetically identical. For an uncommon or protected cactus, propagate only legally sourced plants and check local restrictions before moving or sharing plant material.
Conclusion: Let the Cactus Form Guide the Method
Start by identifying how your cactus grows. Separate a firm offset from a clumping plant, root a pad or stem only when that species supports vegetative propagation, raise seed when you want a new plant from a solitary type, and reserve grafting for a genuine grafting need.
The steps that prevent most failures are simple: handle spines and glochids with care, use a clean blade, let desert-cactus wounds callus, plant in airy draining mix, and keep unrooted pieces out of both harsh sun and standing moisture. Give the cutting time to root before changing the routine. A patient, species-matched start gives each new cactus the best chance to establish on its own terms.



