How to Winterize Pepper Plants Before Frost
Learn how to winterize pepper plants before frost: choose indoor or outdoor methods, pot and prune correctly, prevent pests, and restart growth in spring.
Quick answer: choose a winter method before frost
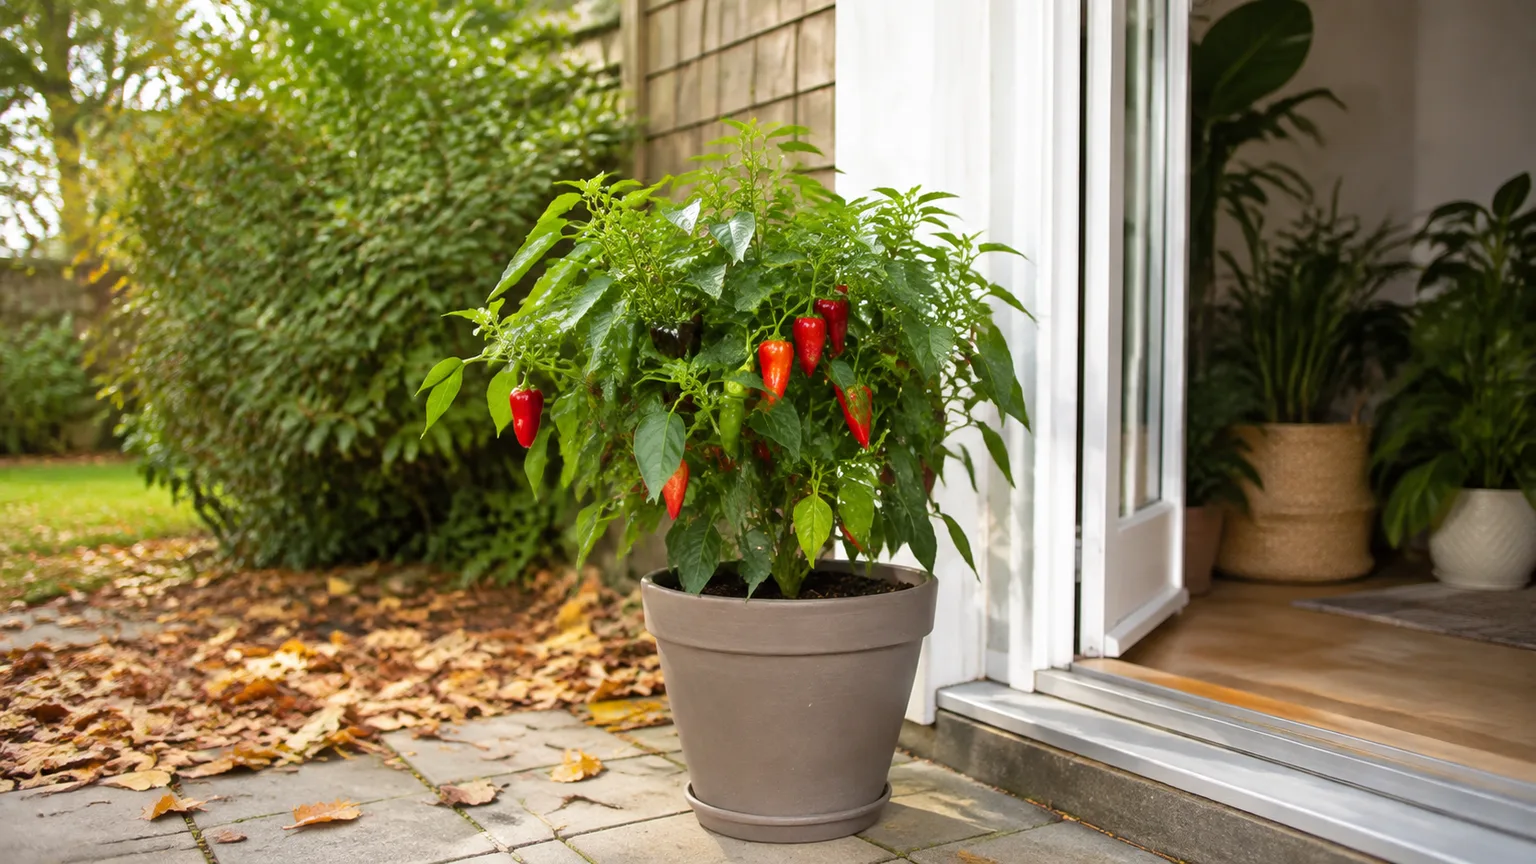
The safest way to winterize a pepper plant is to decide where it will spend the cold season before frost arrives. When nights begin trending toward 50–55°F, harvest the mature-size fruit, inspect the plant closely, and choose between keeping it growing indoors, storing it dormant, taking cuttings, or protecting it outside only if your climate is genuinely mild.
Peppers are warm-season Capsicum plants, not cold-hardy perennials. A light chill can slow growth and cause injury, while freezing temperatures can kill the top growth and damage the roots. The Royal Horticultural Society’s pepper-growing guidance recommends putting peppers outside only when overnight temperatures are reliably above about 54°F, which is a useful reminder that a plant can be stressed well before the first hard freeze.
The job is more than cutting off the leaves. Successful overwintering is a sequence: move the plant without destroying the roots, keep pests from entering your home, match light and water to either active growth or dormancy, and reintroduce outdoor conditions gradually in spring.
Why overwinter pepper plants at all?
In frost-free or nearly frost-free regions, a pepper can keep living and producing for more than one season. In colder regions, bringing a plant inside lets you preserve a particularly productive, unusual, or sentimental plant instead of starting from seed again. The payoff is often a larger plant and earlier flowers when spring returns.
Overwintering is especially useful when the plant is healthy and still has a strong framework of stems. A plant covered in disease, heavily infested with insects, or weakened by drought is a poor candidate because the stress of digging and a new indoor environment may finish it off. Starting with a clean, vigorous specimen gives you a much better chance of success.
There is also a practical limit. A large bell pepper can demand more floor space and stronger light than it is worth, while a compact hot pepper may fit easily beneath a grow light. If you have limited indoor space, saving a few cuttings or buying a new seedling may be more sensible than moving a huge, declining plant.
Which pepper plants are easiest to save?
Hot pepper plants are generally the easiest candidates because many stay relatively compact and tolerate container culture well. Bell and other sweet peppers can be overwintered, but their larger size, softer growth, and higher light demand can make them less convenient indoors. That is a tendency, not a rule: the healthiest plant with the best root system is usually the best candidate regardless of fruit heat.
Choose a plant with firm stems, healthy green leaves or recently ripened fruit, and no spreading disease. Avoid taking a plant indoors if you see stem cankers, mushy roots, extensive leaf spotting, or a pest population you cannot control. One problem plant can spread insects or disease to seedlings and houseplants throughout the winter.
Think about your goal before you begin. If you want peppers through winter, preserve the plant as a live houseplant and provide strong light. If you mainly want an early start next year, cool dormancy takes less space and energy. If you have a rare plant but no room for the whole root ball, cuttings preserve the genetics in a small package.
Pick one of four wintering methods
Each method asks the plant to do something different. Use the table as a starting point, then adjust for the cultivar, your indoor temperatures, and the amount of light you can provide.
| Method | Best for | Winter conditions | Main trade-off |
|---|---|---|---|
| Live indoor plant | Harvesting or maintaining active growth | Bright light, warm room, regular but careful watering | More space, pests, and light demand |
| Cool dormancy | Getting an early spring head start | Frost-free, cool location around 45–60°F, little water | No winter harvest and some leaf drop |
| Cuttings | Preserving a favorite plant in limited space | Bright indirect light and airy rooting medium | Requires healthy stems and spring potting-up |
| Outdoor protection | Frost-free or very mild climates | Sheltered position, protected container, cold-weather cover | A single freeze can end the experiment |
The live and dormant methods begin with the same careful inspection, but their follow-up care differs. Do not put a dormant plant under intense grow lights and then water it like a summer plant; that combination often produces weak, pale growth and root problems.
When to start winterizing pepper plants
Start planning when nighttime temperatures are moving toward the low-to-mid 50s, before the plant is visibly damaged. A potted pepper can be moved as soon as nights regularly approach 50°F, and an in-ground pepper should be dug before cold soil and a hurried forecast make the job harder. If a forecast calls for temperatures near 40°F or any frost, move the plant immediately rather than waiting for a more convenient weekend.
The exact calendar date depends on your garden. A sheltered urban patio can stay warmer than an exposed vegetable bed, and a container loses heat faster than the surrounding ground. The RHS winter-damage guidance also emphasizes that containers are particularly vulnerable and should be grouped in a sheltered place, with the pot insulated when necessary.
Do not wait for a freeze and assume the plant can be rescued afterward. Cold injury may not look serious until the tissue thaws, but the plant has already lost valuable time and may have damaged roots. Winterizing while the pepper is still turgid and actively functioning makes transplant shock easier to manage.
Harvest and assess the plant before moving it
Pick ripe fruit first, and harvest any fruit that has reached nearly full size even if it still needs color. Mature-size peppers can often finish coloring off the plant, but very immature fruit is unlikely to keep developing normally once the plant is under winter stress. Removing the crop also reduces the energy demand during the move.
Next, look at the whole plant from the soil line to the newest leaves. Check stems for soft spots, leaves for spots or stippling, the leaf axils for insects or webbing, and the soil surface for fungus gnats or other activity. If the plant is badly compromised, discard it responsibly rather than carrying the problem indoors.
For a container-grown pepper, remove dead leaves and weeds from the pot and check that the drainage holes are open. For an in-ground pepper, water the soil lightly the day before digging if the ground is bone-dry; a slightly cohesive root ball is easier to lift than dusty soil, but saturated soil is heavy and more likely to collapse.
Pot up an in-ground pepper plant
Use a clean container with a real drainage hole and enough room for the root ball, but do not jump to an enormous pot. A container only modestly larger than the roots is easier to carry, dries more predictably, and reduces the chance of wet soil lingering around a plant that is about to slow down. Fill it with fresh, quality potting mix rather than garden soil, which can compact indoors and carry pests.
Dig a circle around the plant wider than the visible stem base, then slide a spade underneath and lift as much of the root ball as practical. Keep the main roots intact, trim only roots that are badly torn or too long to fit, and set the plant at the same depth it was growing. Do not bury the stem deeply just to make a tall plant look shorter.
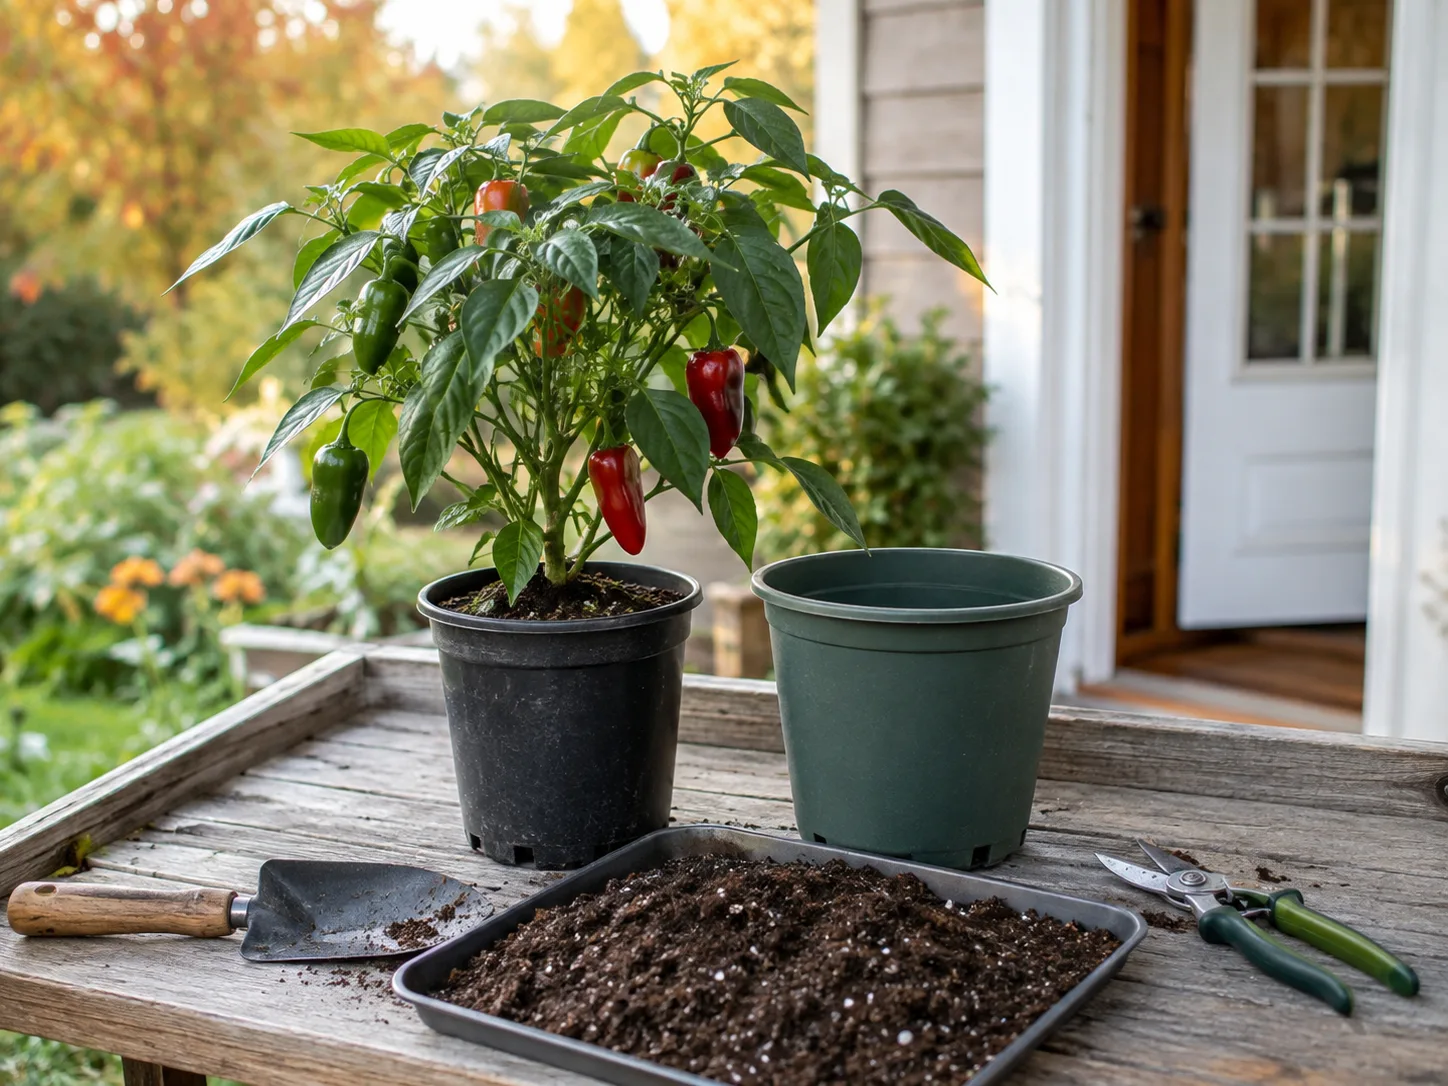
Backfill around the roots, press the mix gently to remove large air pockets, and water thoroughly once so the mix settles. Let excess water drain completely. A freshly dug pepper may wilt for several days, so place it in bright shade or filtered light while it recovers instead of immediately exposing it to hot glass or a powerful grow lamp. The potting sequence described by Gardenary similarly starts with careful digging, fresh mix, watering, and a protected recovery period.
Do not fertilize during this first recovery. The roots have been disturbed, and added nutrients can push tender growth before the plant has re-established. Wait until you know whether you are maintaining active growth or preparing the plant for dormancy.
Clean, quarantine, and inspect for pests
Treat every plant coming indoors as a possible pest carrier, even if it looks healthy from across the patio. Inspect both sides of every leaf, the newest growth, branch joints, and the rim and underside of the container. Aphids, whiteflies, mites, scale, and soil-dwelling insects can hide in small numbers and multiply quickly in warm, sheltered air.
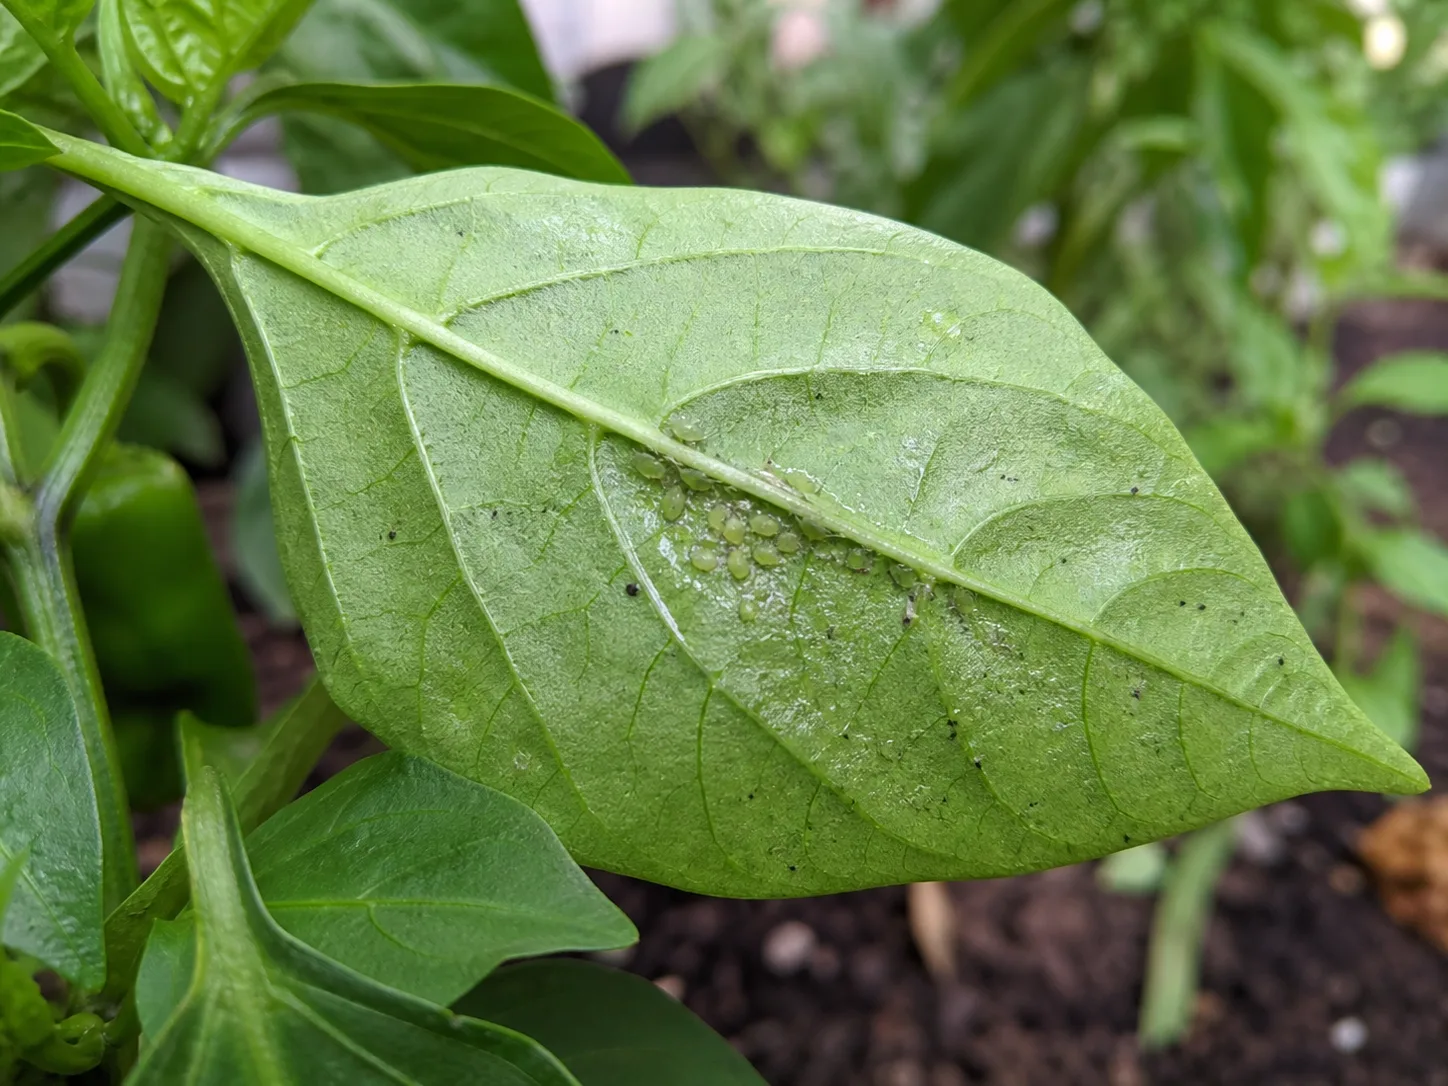
Rinse the foliage with a gentle stream of water if the plant can tolerate it, remove badly damaged leaves, and wipe the outside of the pot. A yellow sticky card can help monitor flying pests, but it is a monitoring tool rather than a complete treatment. If you need insecticidal soap or horticultural oil, use a product labeled for the plant and pest, follow its label exactly, test a small area first, and avoid spraying in strong light or heat.
Keep the pepper separate from seedlings and houseplants for two or three weeks when possible. Recheck it several times during that period because eggs can hatch after the first inspection. Isolation also gives a recently dug plant time to recover without competing for the best light in your indoor growing area.
Frost and pest damage can look alike. The N.C. Cooperative Extension notes on frost injury describe cold-damaged foliage as potentially water-soaked at first, then shriveled and brown or black after thawing. Look for actual insects, feeding marks, webbing, or sticky residue before assuming every discolored leaf needs a pesticide.
Choose live growth or dormancy indoors
The best indoor location depends on the method. A live pepper wants warmth and strong light, while a dormant pepper wants a cool, frost-free place where it will not be tempted into weak growth. Both need excellent drainage and occasional inspection.
Choose live indoor growth if you have a sunny south- or west-facing window or a suitable grow light and want to harvest, flower, or maintain foliage. Choose dormancy if you want to conserve space and are willing to wait for spring. The four-method comparison from Savvy Gardening is useful here because it treats live plants, dormant plants, and cuttings as separate strategies rather than one universal routine.
Live indoor pepper care
Put a live pepper in the brightest practical location, but keep leaves from pressing against cold glass. A sunny window may be adequate for a small plant in a bright home, though a grow light is often more reliable when winter days are short or cloudy. Aim for a consistent daily light period in the roughly 12–16 hour range if the plant is actively growing, following the fixture’s instructions for placement.
Keep the room comfortably warm and away from heating vents, cold drafts, and doors that open directly to winter air. Turn the pot occasionally so one side does not stretch toward the window. Remove yellowing leaves promptly, but do not strip healthy foliage simply to make the plant look sparse.
Water when the top inch or two of mix is dry and the pot feels noticeably lighter, then water thoroughly and let it drain. The surface can dry faster near a window while the middle of a large pot stays wet, so use the plant and pot as your guide rather than a fixed calendar. Get Busy Gardening’s indoor-care guidance likewise stresses strong light, checking the upper soil, and watching for pests.
Do not feed a live pepper on a routine schedule if it is barely growing. Once it is producing fresh leaves or flowers under strong light, a diluted fertilizer labeled for vegetables can be used according to its label. If blooms appear indoors, gentle hand pollination may be needed because there are no outdoor pollinators moving between flowers.
Dormant pepper plant storage
To store a pepper dormant, place it in a cool, frost-free area such as a bright garage window, enclosed porch, or utility room. A range around 45–60°F works as a practical target; the plant may lose leaves, and that is acceptable as long as the stems remain firm and the roots do not stay wet.
Harvest fruit, remove flowers and tiny developing peppers, and clear away leaves that are diseased or badly damaged. The goal is to reduce the plant’s demand while preserving healthy stems and roots. Give the plant ambient light or gentle indirect light; complete darkness is unnecessary, and a little light makes inspection easier.
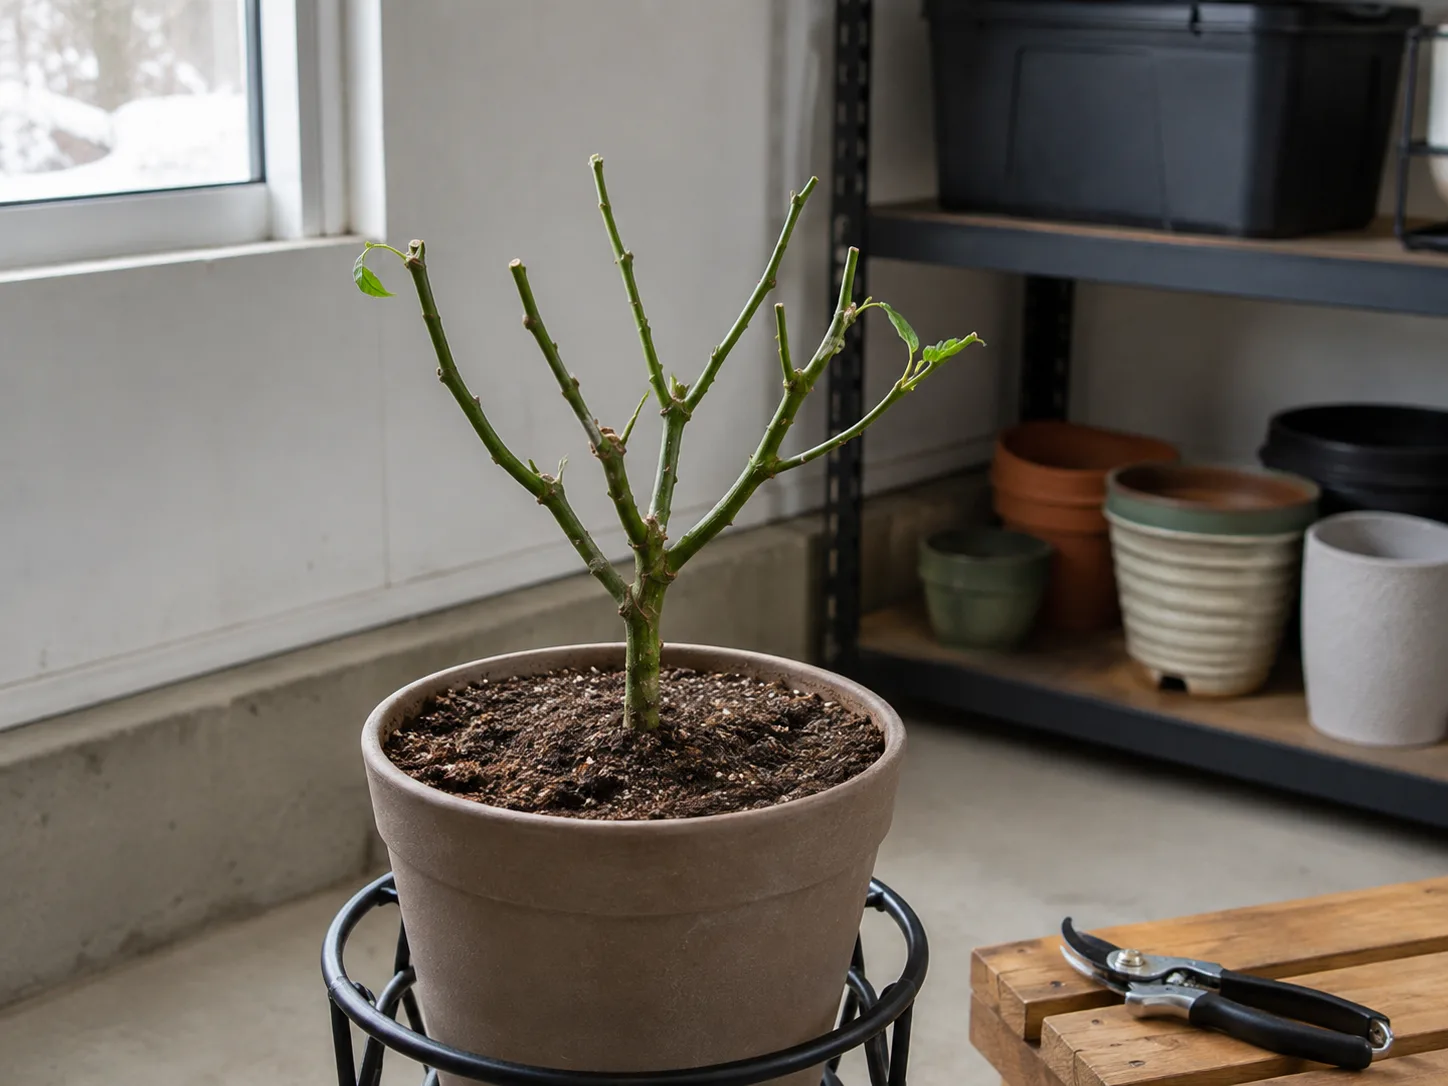
Water deeply after potting or after the final active-season harvest, then allow the mix to dry substantially. Check the plant every two or three weeks and add only enough water to keep the roots from becoming bone-dry. A dormant pepper does not need the weekly irrigation it received in summer, and soggy soil is one of the fastest ways to lose it.
Do not fertilize a truly dormant plant. New shoots produced in a dim, cool room are usually weak and more vulnerable to pests. If it keeps pushing long pale growth, move it cooler or accept that it is waking and switch to an active-care setup with more light.
Prune a pepper plant for winter without overcutting
Pruning should support the winter method, not be an automatic haircut. For a live indoor plant, remove dead, diseased, crossing, or awkwardly long branches and reduce the canopy only enough to fit the space. A plant that is already wilted from digging or chilled from a late move needs recovery before a hard prune.
For dormancy, you can shorten healthy branches to a compact framework with several live nodes and a stable central fork. Use sharp, clean shears and make cuts just above a node, leaving enough branching structure for spring buds to break. Remove leaves, flowers, and immature fruit if you are deliberately reducing active growth, but keep any firm green stem tissue that contributes to the framework.
Avoid pruning tissue that is merely yellow from seasonal stress until you can tell whether it is still alive. If the stem is firm and green beneath a small scratch, leave it and reassess after the plant settles. Excessive pruning removes stored energy and can turn ordinary transplant shock into permanent decline.
Overwinter pepper cuttings
Cuttings are a useful backup when the parent plant is healthy but too large to move. Before frost, take several 4–6 inch pieces from vigorous, non-flowering stems, each with multiple nodes. Remove flowers and fruit, strip the lower leaves, and keep the cuttings cool and shaded while you prepare them so they do not wilt.
Root them in a clean, airy medium such as a propagation mix or another medium labeled for cuttings. Keep it evenly moist but never saturated, provide bright indirect light, and maintain gentle humidity without sealing the cutting in stagnant air. Rooting time varies with warmth and cultivar; once you see new growth and resistance when a cutting is tugged very gently, pot it into fresh mix.
Treat a rooted cutting like a seedling at first. Increase light gradually, avoid heavy fertilizer until roots fill the small container, and keep it separate from outdoor plants until spring. Cuttings preserve the parent’s genetics, while seed from a pepper may not produce an identical plant.
Can peppers stay outdoors over winter?
Only in a climate where hard freezes are unusual and you can respond quickly to cold forecasts. A sheltered, in-ground plant in a mild region has a better chance than a pepper in a small exposed container, but outdoor protection is still a risk. Peppers do not become frost-hardy simply because they have survived one cool night.
Move potted peppers against a protected wall, group containers together, and insulate the pots while keeping drainage holes clear. Use a frost cloth or other breathable cover when cold threatens, removing it when conditions moderate so heat and moisture do not build up. Mulch around an in-ground plant without piling wet material against the stem. Avoid late nitrogen-rich feeding, which can encourage tender growth just as the weather turns cold; the RHS winter-protection advice makes the same general caution for plants preparing for winter.
If a freeze is forecast, bring the plant indoors or accept that the outdoor trial may fail. Do not use plastic touching the foliage as a substitute for a proper cover, and do not leave the pot sitting in a saucer of frozen water. Protection is a short-term strategy, not a way to make a tender pepper perennial in a freezing climate.
Water and feed from fall through winter
Winter watering depends on growth, temperature, light, and pot size. Live plants in bright light use more water than dormant plants in a cool room, while a large plastic pot may stay wet much longer than a small clay pot. Check the mix with your finger, lift the container when practical, and look for wilt in context rather than watering on autopilot.
Water slowly until some drains from the bottom, then empty the saucer. Never compensate for a dim location by keeping the soil constantly wet. A pepper with yellow leaves and wet mix may have roots under stress, not a simple nutrient deficiency.
Stop routine feeding as outdoor growth slows and do not fertilize after a move until the plant has recovered. A live pepper that resumes strong growth can receive a diluted, label-directed vegetable fertilizer, but a dormant pepper should receive none. Better Homes & Gardens’ overwintering guidance also separates active indoor growth from dormant care and recommends waiting for spring growth before returning to a regular feeding pattern.
Wake and harden off the plant in spring
Begin waking a dormant pepper about four to six weeks before your expected last frost. Move it to a warmer, brighter location, increase watering gradually as new buds swell, and wait for fresh leaves before giving a light, diluted feed. Sudden heat, heavy watering, and strong fertilizer can produce a flush of weak growth.
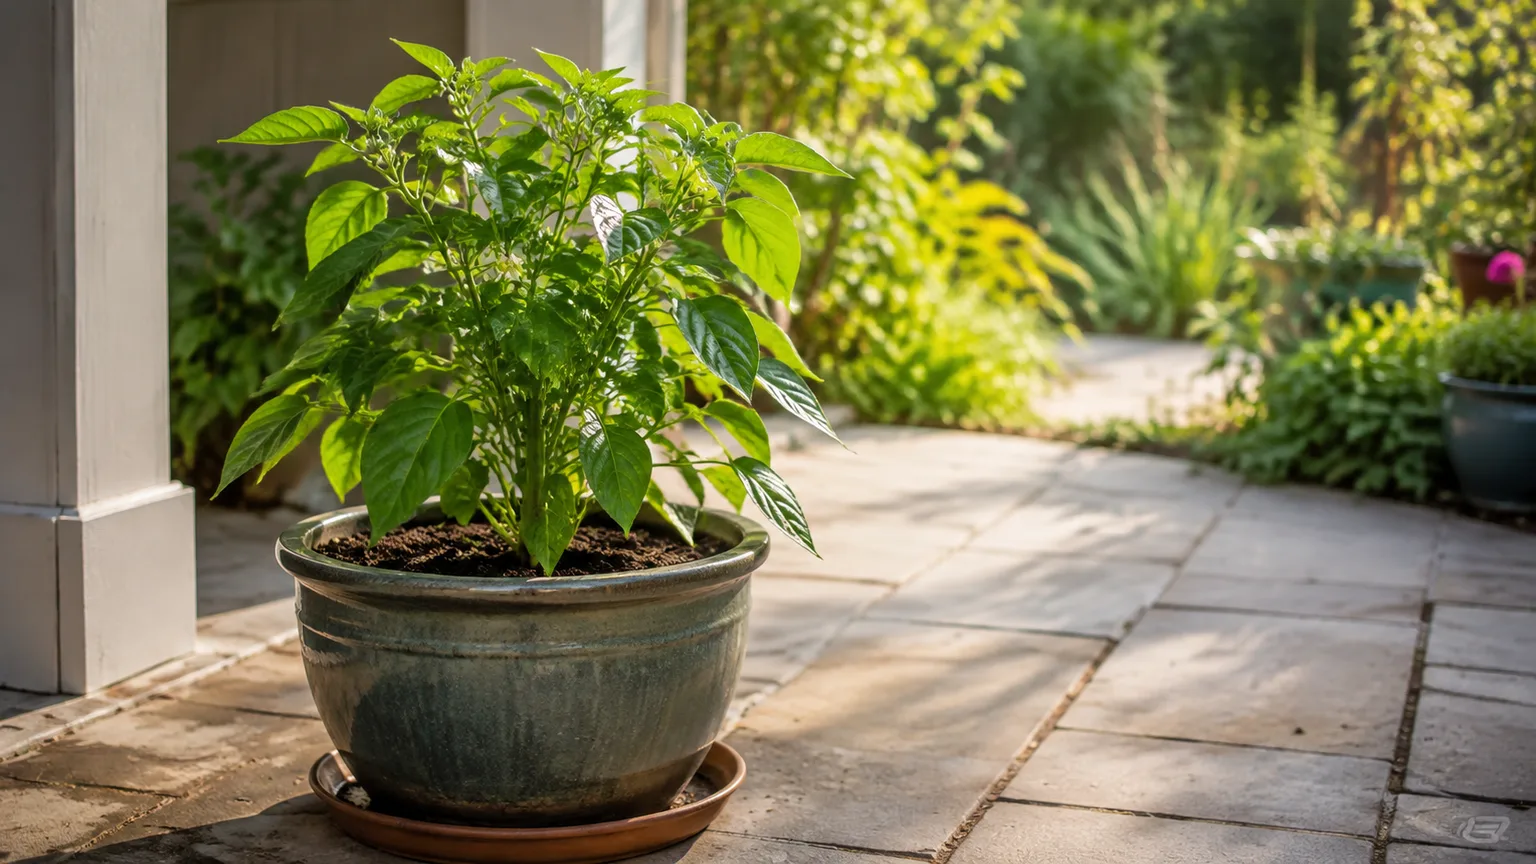
Once the plant is growing strongly and outdoor nights are consistently above roughly 50–55°F, start hardening it off. Set it outside in a sheltered, shaded spot for a short period, then bring it back in. Over the next 7–14 days, gradually increase outdoor time and morning light while protecting it from harsh wind, cold nights, and intense afternoon sun.
The RHS pepper guidance recommends hardening plants off for a couple of weeks before outdoor planting, and that gradual transition matters even for a plant that spent the winter near a bright window. A pepper can look vigorous indoors yet scorch, wilt, or stall when exposed to full sun and wind immediately.
Plant it into warm, well-drained soil or return it to its container after the acclimation period. Support tall stems, resume steady watering, and wait for reliable warmth rather than using a single warm afternoon as proof that winter has ended.
Frost damage and recovery
If a pepper was caught by cold, wait until the tissue has thawed and dried before making a full diagnosis. Cold-damaged leaves may look water-soaked at first and then become shriveled, reddish-brown, dark brown, or black. The N.C. Cooperative Extension frost-injury notes explain that symptoms can become clearer after thawing and that damaged tissue may later invite other problems.
Remove leaves that are clearly dead once they are dry, but do not cut every drooping branch on the same morning. Scratch a small area of stem to check for green tissue, and inspect roots for firmness rather than assuming a leafless plant is dead. If the main stem is alive and the root system is sound, give the plant warmth, light, and careful moisture while you wait for buds to show.
Cold-stressed plants are vulnerable to opportunistic disease and insects. Improve airflow, keep foliage dry when possible, and isolate the plant if it is near other peppers. If stems become soft or roots smell sour and collapse, recovery is unlikely and the plant should be removed before the problem spreads.
Common mistakes that kill overwintered peppers
The most common mistake is moving a plant too late. Waiting until frost turns the leaves black makes recovery much less likely, especially for an in-ground pepper whose roots are already chilled. Start the process while the plant is healthy and the forecast still gives you time to work carefully.
The second mistake is bringing garden soil indoors. It drains poorly in a pot and may contain insects, weed seeds, or disease organisms. Use a clean container and fresh potting mix, then quarantine the plant instead of assuming a quick rinse solved every pest problem.
Overwatering is another quiet failure. Gardeners often see leaf drop and respond with more water, but a dormant pepper naturally uses less moisture. Let the upper mix dry, ensure the pot drains, and adjust based on temperature and light.
Hard pruning, dark storage, and warm storage without enough light create the same kind of weak, disappointing growth. Prune for the method, keep dormant plants cool, and give active plants enough light to justify their water and fertilizer.
Finally, do not rush the spring transition. A pepper that survived winter still needs to rebuild roots and reacclimate its leaves. Give it a gradual hardening-off period, protect it from cold nights, and judge success by steady new growth rather than by how quickly it can be placed back in full sun.
Conclusion
To winterize pepper plants like a pro gardener, begin before frost, save only healthy plants, and choose a method that fits both the pepper and your available space. Pot in fresh, well-drained mix, quarantine carefully, and decide whether you are supporting active indoor growth, cool dormancy, compact cuttings, or short-term outdoor protection.
The winter routine should be restrained: bright light and measured water for live plants, cool conditions and very little water for dormant plants, and no fertilizer until growth resumes. In spring, wake the plant gradually and harden it off for one to two weeks before returning it to the garden. With good timing and realistic expectations, an overwintered pepper can give you a stronger start and an earlier harvest without turning the cold season into a guessing game.



