Fall Mulching: When It Helps and When to Skip It
Fall mulching can protect new plantings and bare soil, but more is not always better. Use this depth, timing, and material guide to decide what your garden needs.
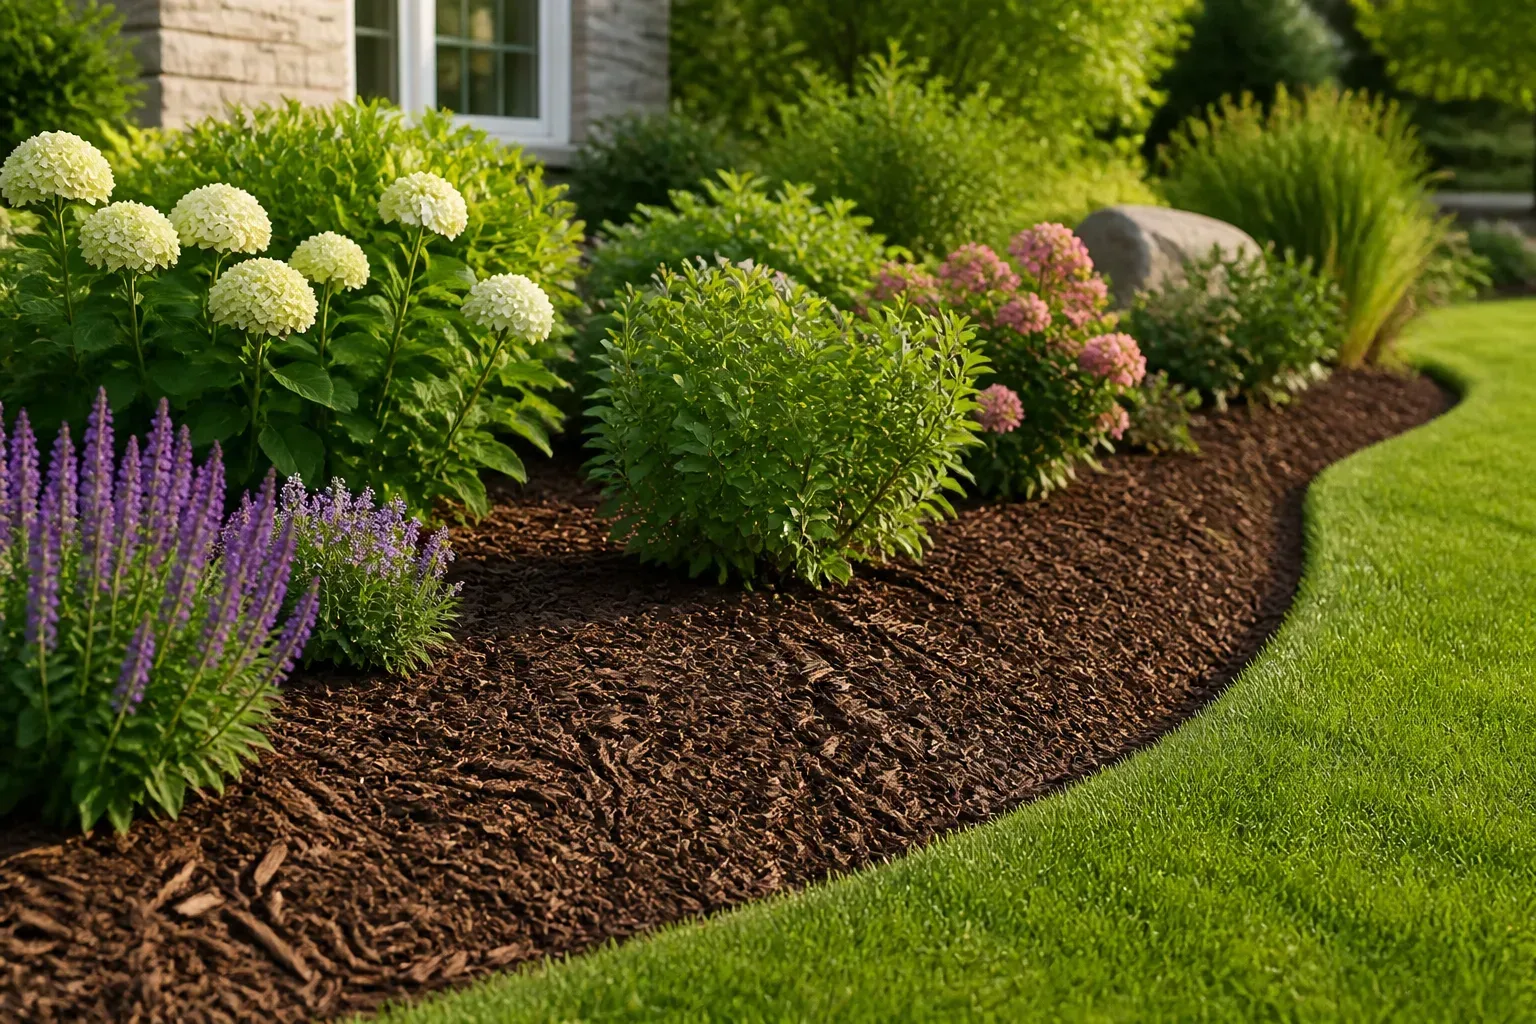
Fall mulch is not automatically a waste of money, but it is easy to pay for a second layer your garden does not need. The useful question is not “Is autumn the official mulching season?” It is “Which soil or plant problem am I trying to solve, and is mulch the right tool for it?”
If a bed has bare soil, a new tree or shrub, a recently divided perennial, or a plant exposed to repeated freezing and thawing, applying mulch before winter can be a smart purchase. Mulch slows moisture loss, softens temperature swings, reduces erosion, and can help keep shallow crowns from being pushed out of the ground. If a mature bed already has a stable, correctly applied layer, adding more just because the calendar says fall is mostly cosmetic.
That distinction saves money and prevents the commonest mulch failures: a pile against a trunk, a wet blanket over a crown, an eight-inch layer that blocks air and water, or whole leaves that turn into a slick mat. Use the guide below as a site check, not a universal command to mulch every bed.
The short answer: mulch the need, not the season
Mulch is a surface layer, not a winter sleeping bag that every plant needs in the same thickness. Its value comes from changing what happens at the soil surface: it limits evaporation, shields soil from pounding rain, moderates temperature changes, and blocks light from many weed seedlings. Those effects matter in fall only when the bed is exposed or the plants are vulnerable enough to benefit from them.
Penn State Extension separates ordinary perennial-bed mulch from winter mulch. A normal layer of roughly two to three inches conserves water and reduces weeds, while a special winter layer is used for newly planted or divided perennials and tender plants; the winter material is applied after the ground freezes and removed gradually in spring. That is a more useful rule than treating every established perennial as if it needs extra protection every November. See the Penn State Extension guidance on perennial maintenance for that distinction.
Use a three-question test before buying
Walk the bed and answer these questions before loading bags into a cart:
| Question | If the answer is yes | Best next move |
|---|---|---|
| Is soil visibly bare or washing away? | Rain and wind can move soil, and weeds can establish before spring. | Cover the exposed area with an appropriate organic mulch. |
| Is a plant newly installed, divided, shallow-rooted, or tender for your climate? | Its roots or crown have less margin for drying and freeze–thaw movement. | Apply a measured layer, with extra winter protection only if the plant and climate call for it. |
| Is the current mulch thin, displaced, or already decomposed? | The original job—moisture conservation and weed suppression—has faded. | Top up only to the target depth; do not bury the old layer under a full new load. |
If all three answers are no, leave the bed alone and spend the money elsewhere. A mature planting with healthy groundcover, a natural leaf layer, or two to three inches of intact mulch already has the basic protection people are trying to buy in fall.
What fall mulch actually does
The strongest fall benefit is buffering, not heating. Mulch keeps the soil from losing moisture as quickly and reduces the speed of temperature changes near the surface. In a cold climate, that can give roots a more stable transition into winter. It does not make a tender plant hardy, stop an extreme freeze, or replace the right plant for the site.
Freeze–thaw cycles are especially important for young or shallow-rooted plants. Water in the soil expands as it freezes and contracts as it thaws; repeated movement can lift a crown or expose fine roots. A loose mulch layer helps reduce the rapid cycling at the soil surface. Penn State Extension describes winter mulch as a way to prevent newly planted or divided perennials from being pushed out of the ground by alternate freezing and thawing.
Mulch also preserves moisture during a season when gardeners often stop checking the soil. Evergreen shrubs and some semi-evergreen plants continue losing water during winter, while frozen ground can limit root uptake. Penn State’s winter-burn guidance explains that a protective soil layer can extend the period when roots keep absorbing water, reduce evaporation, and buffer temperature swings. That matters most in exposed sites with drying wind, unreliable snow cover, or a history of winter browning.
There are less dramatic benefits, too. Mulch protects bare soil from heavy rain, reduces mud splashing onto foliage, and slows the first flush of cool-season weeds. Organic material eventually adds carbon and other decomposed matter, although it is not a substitute for a soil test or a balanced fertility plan. The value is cumulative and modest; it is not a reason to spread an unnecessarily thick layer every year.
When fall mulch is worth paying for
Fall mulch is a sensible expense when it solves a specific, visible problem. The return is clearest when a plant has recently been disturbed, the bed is exposed to harsh weather, or the existing covering has settled below a useful depth.
New plantings and divided perennials
New trees, shrubs, and perennials have not yet built a broad, well-established root system. Their roots can dry faster, and their crowns may be more vulnerable to soil movement. Mulching the root zone after planting keeps moisture more even and separates the soil from direct rain impact, lawn traffic, and temperature swings.
Recently divided perennials deserve the same attention. Division leaves smaller crowns with less stored energy and a smaller root footprint. A normal two- to three-inch layer may be enough through a mild winter, while a loose winter cover added after the ground freezes can be worthwhile in a region where repeated thaws routinely lift plants. Do not assume a newly planted shrub needs a deep mound against its stems; it needs a wide, flat root-zone ring with open air around the base.
Tender or borderline-hardy plants are another case where timing and local climate matter. The RHS notes that whether a tender plant should be lifted and stored or left in the ground under thick mulch depends on both the plant and the local climate. In milder, sheltered, well-drained gardens, a dry mulch can be enough for some plants; in colder or exposed areas, the same plant may be better lifted, stored, or protected with a different method. Read the RHS guidance on overwintering tender plants rather than treating mulch as a guarantee.
Freeze–thaw, wind, and snow-poor sites
Your yard can be colder or drier than the regional hardiness zone suggests. A raised bed, south-facing slope, windy corner, pavement edge, or site with little snow cover can expose roots to more fluctuation than a sheltered planting bed. Likewise, a newly planted evergreen beside an open lawn may lose more water to winter wind than the same species planted behind a hedge.
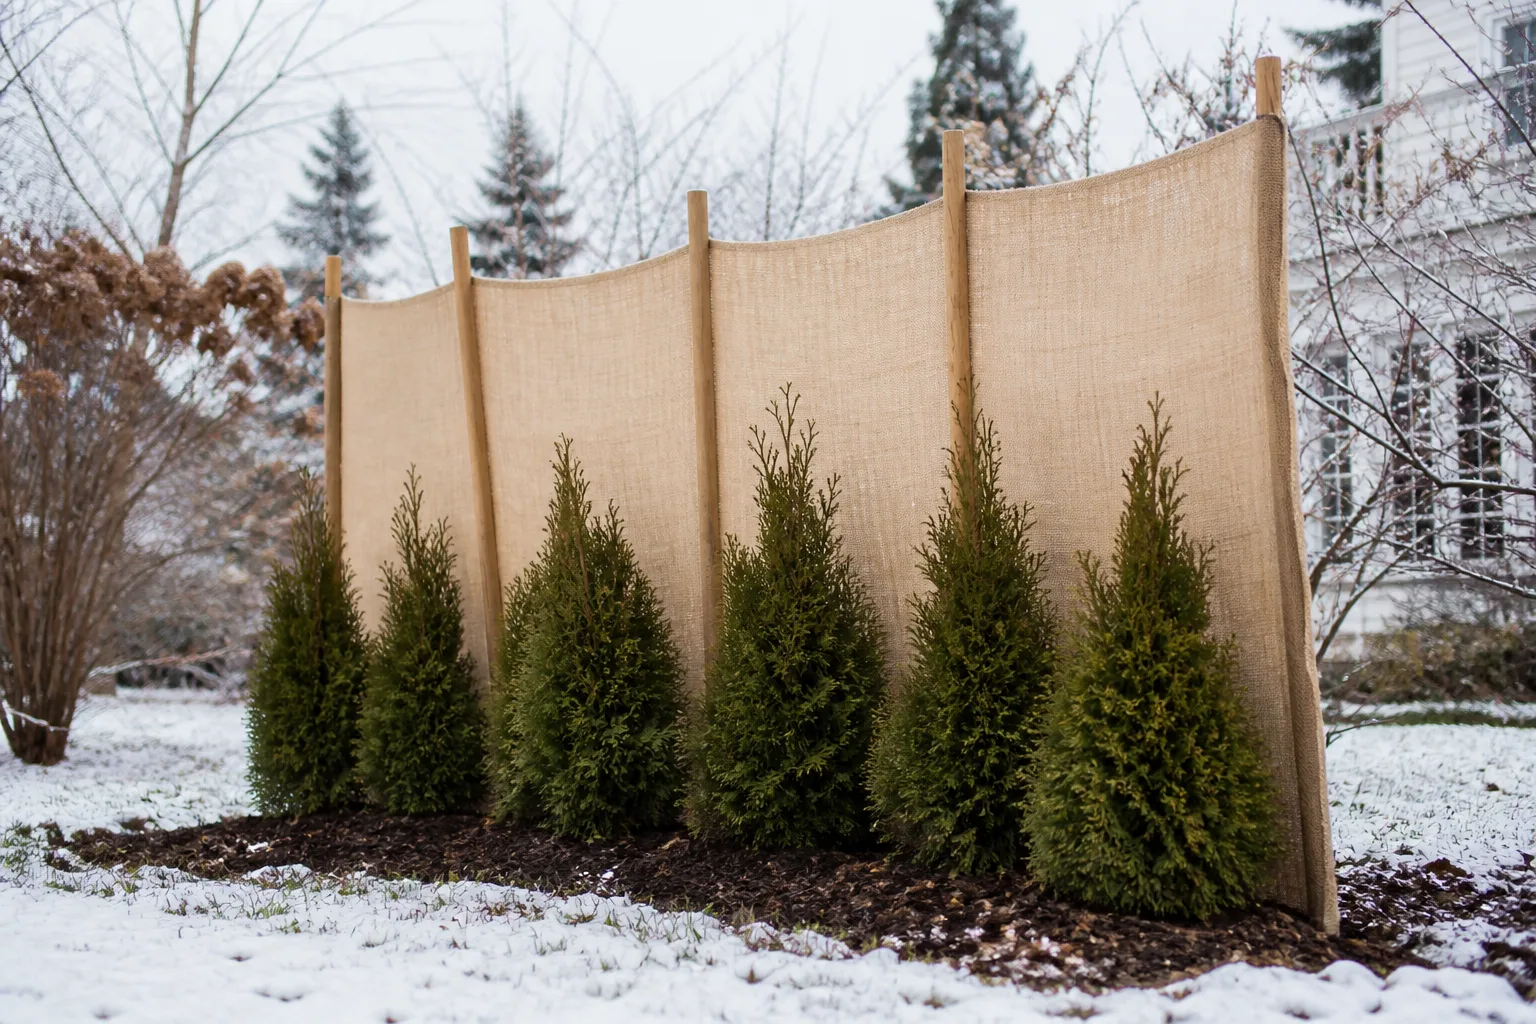
In these situations, mulch is most useful as part of a larger plan. Water the root zone deeply during dry fall weather while the soil is still workable, keep mulch off the stems, and add a windbreak or temporary shade screen for vulnerable evergreens if the site calls for it. Mulch protects roots; it does not stop foliage from drying in sun and wind.
The expense also makes sense on sloped or recently cleared soil. A cover of leaves, compost, straw, or wood chips can reduce erosion while roots are not holding the surface together. If a bed is scheduled for spring planting and will remain bare, the mulch is doing soil-protection work even if no perennial is growing there yet.
When buying more mulch is unnecessary
The most economical fall-mulching decision is often not to add anything. If you can still see a consistent layer covering the soil and it has not been pushed against plant bases, measure it in several places before shopping. A thin spot near a downspout or path can be repaired without resurfacing the entire bed.
Established beds with a sound layer
An established shrub or perennial bed that already has about two to three inches of settled mulch is generally covered for the season. The fact that the color has faded does not mean the mulch stopped working. Brown material can still conserve moisture, reduce erosion, and moderate the soil surface.
Dense groundcovers change the calculation further. Their foliage already shades the soil and slows raindrop impact, so adding a deep layer can bury crowns or encourage rot. Native plants adapted to local conditions also may not need the same winter blanket as a newly purchased plant at the edge of its hardiness range. Inspect the root zone and the plant’s growing requirements before assuming “more protection” is better.
Do not add mulch over a bed simply to hide a fall cleanup problem. If annuals are diseased, remove them according to local plant-health guidance; if weeds are setting seed, pull or cut them before covering; if soil is saturated, fix drainage and wait. Mulch can conserve water, but that is a drawback when the bed already stays wet.
An already-covered bed can still need a small correction. Rake mulch away from crowns, refill a shallow area, widen a tree ring toward the drip line, or replace a matted patch of whole leaves with a thinner shredded layer. Those targeted repairs cost less and work better than adding a uniform six-inch blanket.
Choose the right fall mulch for the job
There is no single “best” fall mulch. Material choice should follow the job, how fast you need it to break down, whether the bed drains well, and what is available without contaminants.
Shredded leaves and leaf mold
Leaves are the cheapest fall mulch because they arrive in your yard. They add organic matter as they break down and provide a natural surface cover for soil and plant roots. They are also part of the habitat used by many small animals and insects, so a tidy garden does not always require removing every leaf from every bed.
Whole leaves are not automatically wrong, but thick, wet layers can mat together and shed water rather than letting it infiltrate. The Canadian Wildlife Federation advises shredding leaves before using them as mulch because shredded material breaks down faster and is less likely to form a barrier. A mower with a collection bag, a leaf shredder, or several passes with a mulching mower can turn a deep pile into a loose, workable layer.
Keep leaves away if they are visibly diseased, contaminated with a lawn herbicide you cannot identify, or mixed with persistent weed seeds. A few blemished leaves are not a diagnosis of a garden-wide problem, but material from a plant with an active, serious disease should not be distributed around susceptible plants. If you want the fastest soil-building benefit, partly decomposed leaf mold is more stable than a fresh wet pile.
Wood chips, bark, straw, compost, and grass clippings
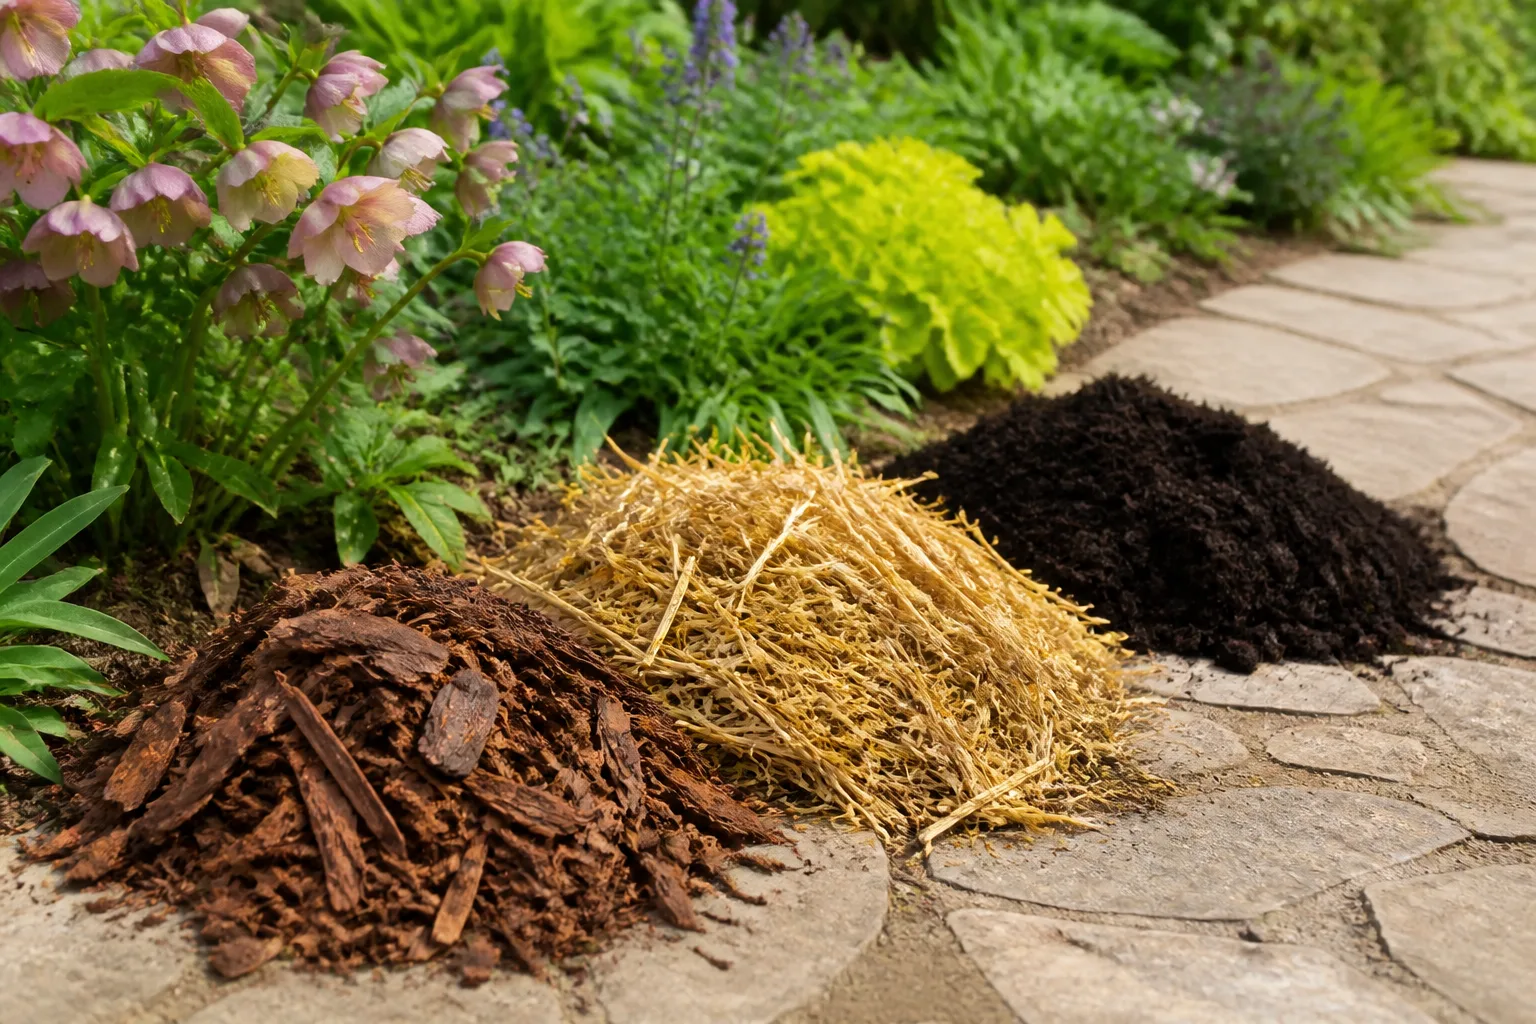
Wood chips and shredded bark are durable choices around trees, shrubs, and ornamental beds. They resist blowing and usually last longer than leaves or straw. Fresh, fine, carbon-heavy material can temporarily tie up some nitrogen at the surface as microorganisms decompose it, so keep it on top of the soil rather than mixing it into the root zone. The Canadian Wildlife Federation’s mulching guide compares bark, wood chips, pine needles, shredded leaves, and straw, including their different decomposition rates.
Straw is useful for vegetable beds, strawberries, and some tender crowns because it is airy and easy to remove. Use clean, weed-free straw when possible; hay is more likely to contain seeds. Gardening Know How’s fall mulching advice also warns gardeners to avoid herbicide-treated grass clippings and to apply clippings in thin layers so they do not turn into a slimy, oxygen-poor mat.
Finished compost works well as a thin soil-building top layer, but it is not always the best stand-alone winter blanket. Fine compost can settle and hold water, especially on heavy soil. Use it to improve the surface and combine it with a coarser mulch when you need both fertility and winter protection.
Pine needles are light, loose, and resistant to compaction. They are helpful around acid-loving plants when available, but do not choose them based on the myth that a surface layer will suddenly make alkaline soil acidic. Soil pH changes slowly and should be managed with a soil test and a crop-specific recommendation.
Rocks and rubber mulch are not automatically bad, but they solve a different problem. They do little to add organic matter and can store or reflect heat in exposed sites. For a seasonal winter decision, free shredded leaves or a modest layer of clean organic mulch usually offers more biological value than buying a decorative material solely for color.
How deep should fall mulch be?
Depth is where a good material becomes a bad application. The Canadian Wildlife Federation recommends roughly two to three inches for common garden mulch, and Penn State gives a two- to three-inch layer for perennial beds. Those are useful starting points, not permission to create a mound wherever a plant grows.
| Situation | Practical starting depth | What to watch |
|---|---|---|
| Established tree, shrub, or perennial bed | 2–3 inches | Top up only enough to restore the layer; keep the base open. |
| New or recently divided perennial | 2–3 inches routinely; add a loose winter cover only if needed locally | Do not bury the crown or trap wet foliage. |
| Tender plant left outdoors for winter | About 2–4 inches of dry, loose material, based on the plant and climate | In colder areas, lifting or another protection method may be safer. |
| Shredded leaves | Start near 2–3 inches after settling | Whole leaves may mat; revisit after rain. |
| Directly seeded or self-sowing area | A light, permeable layer or no mulch over the seed zone | A heavy layer can delay or prevent emergence. |
Measure with a ruler in at least three spots. If one area is three inches and another is less than one, redistribute before buying. A simple coverage check also prevents overspending: one cubic yard covers about 108 square feet at three inches deep, or about 162 square feet at two inches. Bag labels vary, so calculate from the bag’s stated volume rather than guessing from the number of bags.
Drainage changes the safe upper limit. Heavy clay, low spots, and beds beside downspouts need a more conservative layer and a coarser texture than a well-drained sandy bed. If the soil is already saturated, mulch will not make it drain; it can keep the root zone wet longer.
How to apply mulch without creating problems
Start by looking under the existing material. Pull back a small section and check for bare soil, matted leaves, standing water, vole tunnels, exposed roots, or a hidden plant crown. Remove diseased annual debris and perennial weeds before you cover the bed. If the soil is dry and the plants are still actively taking up water, water slowly and deeply before spreading mulch; do not irrigate a saturated bed.
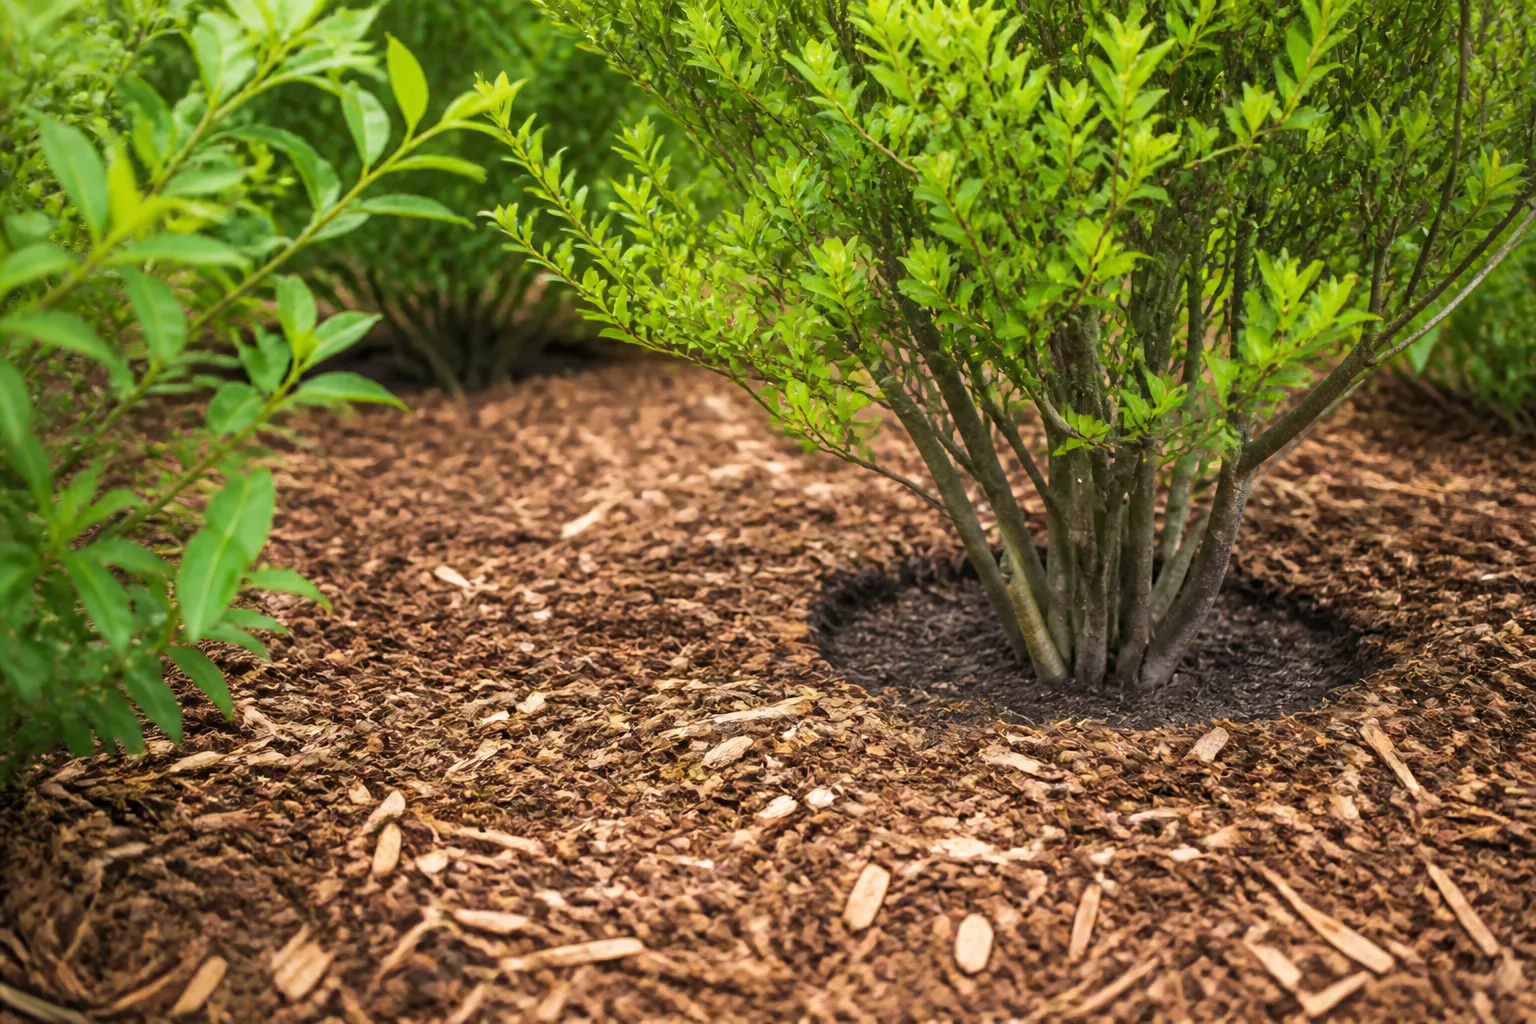
Spread the mulch in a flat, even layer over the root zone. For a tree or shrub, the ring should extend toward the drip line or beyond the trunk’s immediate base rather than forming a small decorative circle. Keep the surface loose enough for rain to pass through, and use a rake to break up compacted pockets after a storm.
Keep trunks and crowns clear
The “mulch volcano” is not a harmless style choice. Piling mulch against bark keeps the base wet, reduces airflow, can encourage decay, and creates shelter for rodents and other pests. The Canadian Wildlife Federation recommends leaving about six inches between mulch and the base of trees, shrubs, and herbaceous plants. Make a flat donut: broad coverage over the root zone, no cone at the trunk.
Perennial crowns need the same respect. The crown is the junction where stems meet roots, and it needs air. Mulch around it, not over it, unless you are deliberately applying a loose winter cover to a tender plant after dormancy. Even then, use dry, airy material and uncover gradually when growth resumes.
Do not cover low-growing evergreen foliage, emerging bulbs, irrigation valves, or the drainage path from a downspout. A “clean” edge that redirects water into the crown is not an improvement. Keep mulch below siding, vents, wooden structures, and paths where it could stay damp or invite pests.
Water, spread, and inspect
Watering before mulch is useful only when the root zone is dry and the soil can absorb the water. Apply a slow soak, wait for it to infiltrate, and then spread the layer. A light sprinkle on top of mulch can wet the mulch while leaving the soil beneath dry, especially if leaves have matted.
After the first substantial rain, inspect the bed again. Look for runoff channels, floating leaves, compressed clumps, exposed roots, and water pooling against a trunk. Correct the shape and texture while the mulch is easy to move. This second look is more valuable than a perfect-looking application on the first afternoon.
For new evergreens in windy sites, combine root-zone mulch with adequate fall moisture and appropriate physical protection. The Penn State winter-burn guidance cautions against oversaturation and notes that poor drainage in frozen soil can contribute to root rot. Mulch is one part of winter preparation, not a reason to keep watering on a fixed schedule after the ground is cold.
A fall-to-spring mulching schedule
Late summer to early fall: inspect first. Walk the garden before leaf drop and measure the existing layer. Mark new trees, shrubs, divided perennials, shallow-rooted plants, low spots, and exposed slopes. This is also the time to correct drainage, remove weeds before seed set, and water new plantings during dry spells.
As leaves fall: choose what stays. Leave a natural, loose leaf layer in appropriate beds, shred heavy accumulations, and move leaves off lawns, crowns, paths, and drainage grates. Reject material from plants with significant disease or from lawns treated with an herbicide you cannot verify. Use wood chips, bark, straw, or finished compost when they fit the bed better than leaves.
When growth slows: apply routine mulch to bare soil. If the soil is workable and the bed is exposed, a two- to three-inch layer can be applied in fall. You do not need to wait for an exact date or a particular week; the goal is to cover soil without smothering active plants. A practical fall application after frost is often convenient because annuals have finished and tender top growth is less likely to be crushed, but it is not a universal rule. Epic Gardening’s fall mulching guide uses the same practical checkpoint while also stressing that material and depth should match the bed.
After the ground freezes: add winter protection only where it earns its keep. In cold regions with repeated freezing and thawing, apply a loose winter layer over newly planted or divided perennials and tender plants if their care guidance calls for it. Penn State’s perennial schedule places winterizing after the ground freezes, while the RHS uses climate and plant hardiness to decide whether a plant should be lifted or mulched. This is the point at which a special protective layer differs from routine bed maintenance.
During winter: leave the layer loose and monitor only when needed. A storm can expose roots, pile wet leaves against a crown, or blow mulch into a path. Move material only when it is causing a problem. Avoid walking repeatedly on the bed, which compacts soil and destroys the air spaces mulch is meant to protect.
As spring growth begins: reduce excess, keep the useful layer. A normal two- to three-inch layer can usually remain and become the season’s mulch. If you used a thick winter cover over a tender crown, pull it back gradually as temperatures moderate and shoots appear. Do not strip every piece of organic matter from the bed; remove what is extra, matted, wet, or blocking emergence.
Other fall chores that may matter more
If your bed is already mulched, fall is a good time to spend effort on tasks that solve a more immediate problem. Pull weeds before they mature, remove diseased annuals, harvest remaining crops, plant spring bulbs at the right depth, and divide perennials that are overcrowded and suited to fall division. A ruler and a ten-minute inspection can tell you whether mulch is needed; a neglected disease source or a weed full of seed can create work for the entire next season.
Watering new trees and shrubs during a dry fall can be more important than changing the color of an intact mulch layer. The roots need moisture before the ground freezes, but saturated winter soil is dangerous. Check actual soil moisture rather than following a calendar.
Avoid using fall fertilizer as a substitute for mulch or winter preparation. Penn State’s winter-burn guidance warns that late fertilization can encourage tender new growth that is more vulnerable to winter injury. If plants performed poorly, use a soil test and correct the specific limitation at the appropriate time rather than adding products by habit.
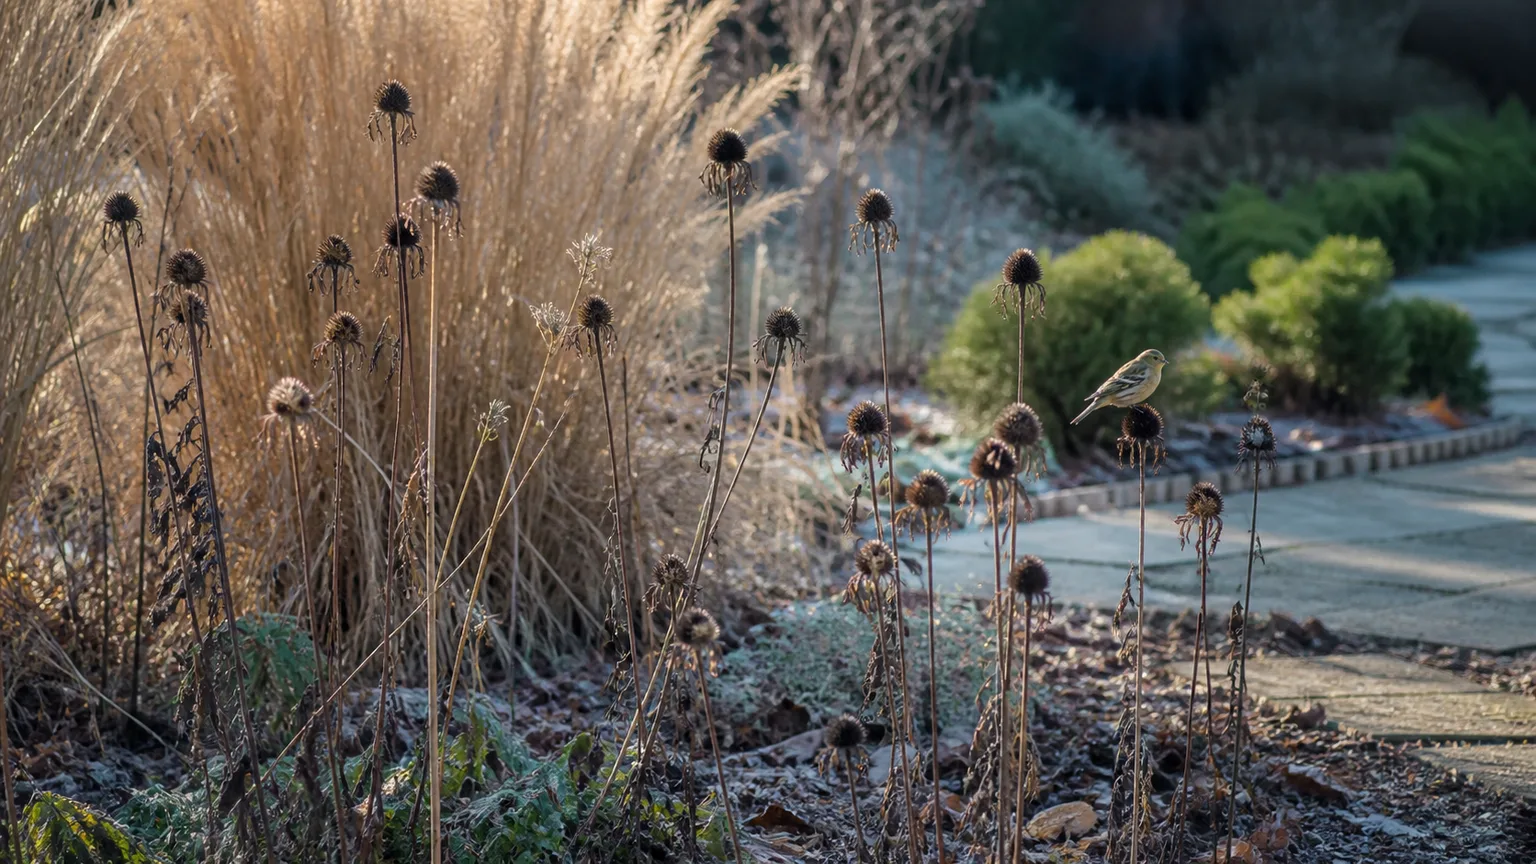
Leave some structure for wildlife where it is safe and compatible with the garden. Seed heads, hollow stems, and a natural leaf layer can provide food or shelter, while a tidy path and lawn can still be cleared. The best fall garden is not the one with every surface bare or every surface buried; it is the one where each layer has a job.
Conclusion
Fall mulching is worth the money when it covers bare soil, protects a new planting, reduces erosion, or buffers a vulnerable root zone through freeze–thaw weather. It is usually unnecessary when an established bed already has a sound two- to three-inch layer. The calendar can tell you when to inspect, but the condition of the soil and plants should decide whether you buy more.
Choose the material by job: shredded leaves for free, fast soil-building cover; wood chips or bark for durable ornamental beds; straw for airy seasonal protection; and compost for a thin soil-building layer rather than a wet mound. Apply it evenly, measure the depth, keep trunks and crowns clear, and inspect after rain.
If you make only one fall-mulching decision, make it this: top up the thin or exposed places, not the whole garden by reflex. That approach protects plants, preserves soil, supports a livelier garden floor, and keeps a useful seasonal task from becoming an expensive annual ritual.



