How to Grow and Care for Peperomia Rotundifolia
Learn Peperomia rotundifolia care: set up bright indirect light, water by soil dryness, choose an airy mix, and root trailing stems indoors with confidence.
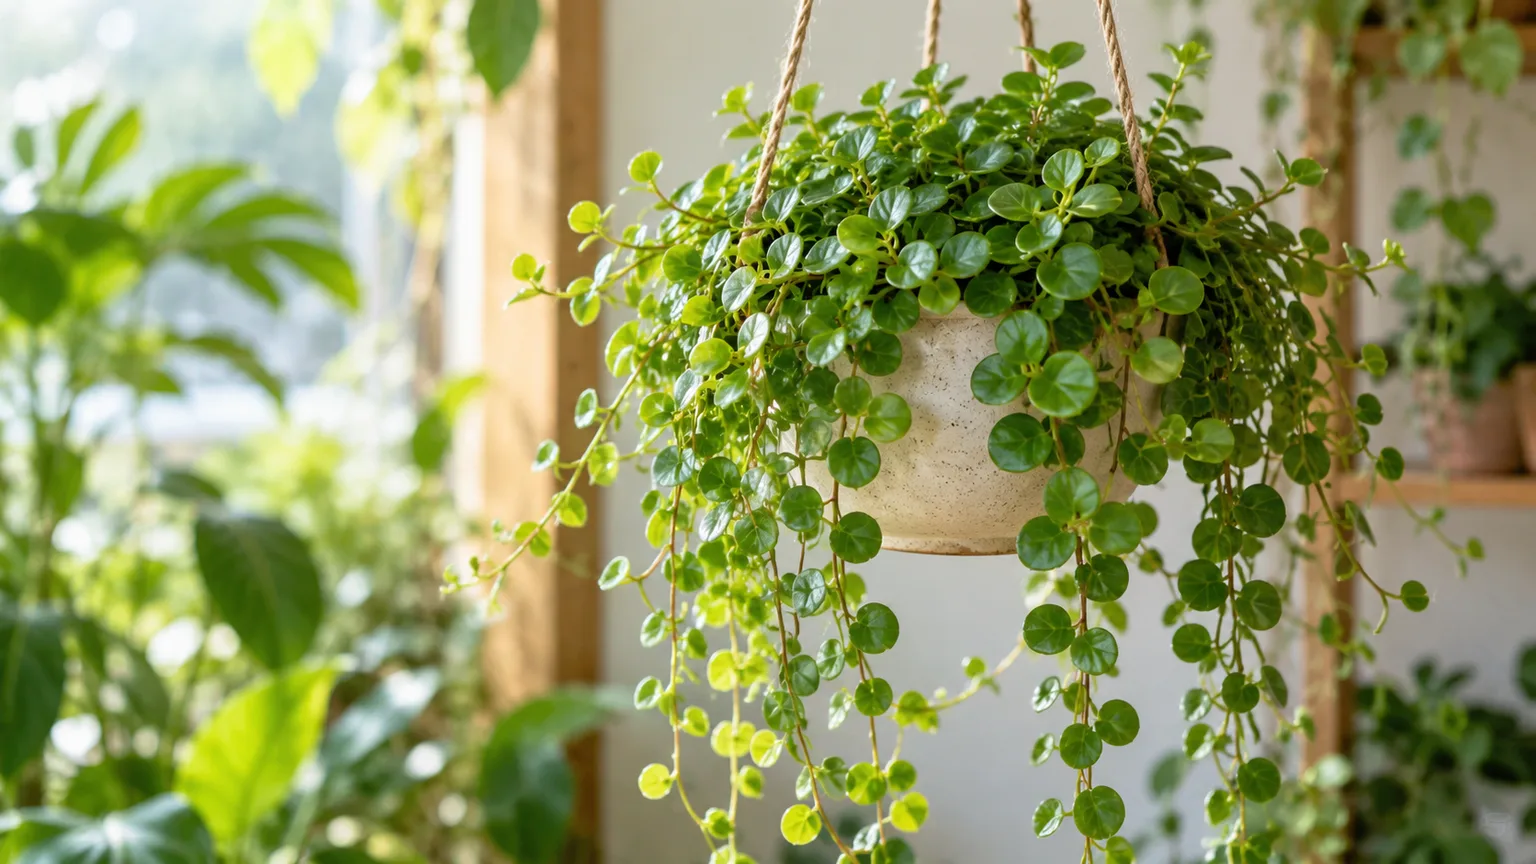
Peperomia rotundifolia is a small-leaved, trailing houseplant that does best in bright indirect light, an airy potting mix, and a container with a drainage hole. Let the upper part of the mix dry between thorough waterings, then empty the saucer. It usually adapts to ordinary household humidity, and its creeping stems can be trimmed or rooted to make the plant fuller.
This species is sometimes called trailing jade peperomia or round-leaf peperomia, though common names are used loosely in the houseplant trade. NC State Extension describes it as a creeping, semi-succulent perennial native to Central and South America. Its leaves are small, rounded, and fleshy, and its stems trail rather than forming the upright shrub-like shape of some other peperomias. The recommendations below distinguish that species profile from broader advice for the genus. (NC State Extension Plant Toolbox: Peperomia rotundifolia)
Peperomia Rotundifolia Care at a Glance
| Need | Practical starting point |
|---|---|
| Light | Bright, indirect light; protect from harsh afternoon sun |
| Water | Water thoroughly when the upper layer of mix has dried and the pot feels lighter |
| Soil | Loose, aerated indoor mix in a pot with an open drainage hole |
| Temperature | Stable, warm indoor conditions; avoid cold drafts and frost |
| Humidity | Average household humidity usually works |
| Feeding | Diluted balanced fertilizer while actively growing, if needed |
| Pruning | Trim leggy stems just above a leaf node to encourage branching |
| Repotting | Wait until roots crowd the pot or the mix breaks down |
The table is a starting point, not a calendar. A plant in a small terracotta pot near a bright window can dry much faster than one in a larger glazed pot in a cool room. Check the soil and the plant’s growth before repeating a care task.
Identify Its Trailing Growth and Round Leaves
Peperomia rotundifolia is a creeping peperomia with delicate, flexible stems and small, nearly round leaves. NC State notes that the stems can trail to about a foot long and that the plant grows slowly. Its compact leaves are plump compared with the thin stems, giving a hanging basket or shelf plant a fine, cascading texture. This is not the same plant as “trailing jade” (Crassula marnieriana) or upright baby rubber plant (Peperomia obtusifolia), despite the overlapping common names used at stores.
The species is semi-succulent: its leaves and stems retain some water. That is useful context, but it does not mean the plant should be left completely dry for long periods like a desert cactus. Its roots still need air, and the foliage can wrinkle if a small root ball dries excessively. On the other hand, a dense, wet pot can deprive roots of oxygen. The goal is a cycle of thorough watering followed by a measured dry-down.
The plant’s compact root system is one reason a modest pot is often preferable. University of Arkansas Extension notes that peperomias have small root systems and are easy to overwater in pots that hold too much mix. Its article discusses the genus broadly, so use it as context rather than a species-specific watering schedule. (University of Arkansas Division of Agriculture Extension: Peperomia)
Choose Bright, Indirect Light
Set the plant near a window where it receives plenty of daylight without prolonged, hot direct sun. An east-facing window is often a good fit; a bright north-facing window can also work. In a sunny south- or west-facing exposure, use a sheer curtain or move the pot a little back from the glass, particularly during summer afternoons.
If light is too low, new stems may lengthen between leaves, growth may slow, and the plant can become sparse on the side away from the window. Move it closer to a bright source or add a grow light rather than trying to solve stretched growth with extra fertilizer. Fertilizer supplies nutrients; it cannot replace the light the plant needs to make new growth.
Direct sun can fade or scorch small leaves, especially after the plant has been acclimated to a dim shop or room. If you see pale, dry patches on the window-facing side, shift it to filtered light and let new leaves replace damaged ones. Avoid moving it suddenly from deep shade into intense sun. Gradual changes over several days reduce stress and make it easier to tell how the plant responds.
Clemson Home and Garden Information Center recommends bright indirect light for peperomias as a group and cautions against intense sun. The exact tolerance can vary by species and by window conditions; morning light through glass is generally gentler than direct afternoon sun. (Clemson HGIC: Peperomia Indoor Plant Care and Growing Guide)
Water When the Root Zone Is Partly Dry
Water when the top portion of the potting mix has dried and the container feels lighter, not simply because a certain number of days have passed. For a typical small pot, check the top inch with a finger or wooden skewer. The surface should not feel cool and wet; deeper in the root zone, a little residual moisture is fine. In a tiny pot, the finger check can reach much of the mix, so do not wait until the entire root ball is bone-dry.
When it is ready, slowly water the soil surface until excess runs from the drainage hole. Let the pot drain completely, then tip out water collected in the saucer or decorative cachepot. This wets the full root ball and prevents the bottom from sitting in water. A small splash each time can leave dry pockets, while leaving runoff in a cover pot keeps the lower mix wet for too long.
Use a repeatable check to decide when to water:
- Feel the top layer of mix and note whether it is dry or still damp.
- Lift the pot to learn what it weighs after watering and after several days of drying.
- Check that the drainage hole is open and that no water remains in the outer pot.
- Water fully only when the mix has reached its dry-down point.
The interval changes with the season and setup. Longer days, active growth, warm air, a small pot, and a porous terracotta container tend to speed drying. Winter light, cool temperatures, a larger container, or dense mix can slow it. Clemson’s general peperomia guidance is to let the soil dry between waterings; NC State’s species profile describes the plant as preferring moist, well-drained soil. These ideas are compatible when “moist” means a healthy root zone after watering, not continuously saturated mix. (Clemson HGIC) (NC State Extension Plant Toolbox)
Do not respond to every limp or wrinkled leaf with more water. If the soil is wet, check the roots and drainage first; extra water can worsen low-oxygen conditions. If the mix is very dry and the stems remain firm, water thoroughly and observe whether the plant recovers as the root ball rehydrates. Make one adjustment at a time so the plant’s response is useful information.
Use an Airy Mix and a Pot That Drains
Choose a loose indoor potting mix that retains some moisture but does not stay compacted and soggy. A practical starting blend is two parts quality houseplant mix with one part perlite or pumice. If the base mix is dense or holds water for too long, add a modest amount of fine orchid bark. These are flexible proportions, not a species-tested formula; the right balance depends on the base mix, room conditions, and how quickly the pot dries.
The pot must have a drainage hole. Avoid garden soil, tightly packed compost, and containers much larger than the root ball. A too-large pot contains a broad volume of mix that can remain wet after the small roots have taken up what they need. A snug pot makes the moisture cycle easier to read. Terracotta can help a persistently damp setup dry faster, while glazed ceramic or plastic may suit a dry, warm room where small pots dry too quickly. Gardening Know How’s general peperomia guidance likewise recommends well-draining medium and letting soil dry somewhat between waterings. (Gardening Know How: Growing Peperomia Houseplants)
Do not add a layer of gravel at the bottom as a drainage fix. It does not make the soil above it drain better; an open hole and evenly airy medium are more useful. Better Homes & Gardens also advises using well-drained soil and notes that peperomias have comparatively shallow root systems, which supports using a suitably sized pot rather than a deep oversized one. (Better Homes & Gardens: Peperomia)
Keep Temperatures Steady and Humidity Moderate
Ordinary comfortable indoor temperatures suit this tropical plant. NC State recommends avoiding cold drafts and direct exposure to intense sun. Do not place it against a freezing window in winter, beside an air-conditioner that blows directly on the leaves, or immediately above a radiator. “Radiator plant” is a common nickname for several peperomias, not a suggestion to set the pot on a heater.
Average household humidity is usually adequate. NC State notes that the species tolerates typical indoor humidity, and Clemson’s genus-level guidance also treats peperomias as adaptable houseplants. A humidifier may be helpful if the room is persistently dry and the plant shows repeated stress, but misting leaves does not provide lasting humidity. First move the plant away from hot vents and make sure the root ball is not drying too quickly.
If you keep the plant outdoors in warm weather, use a sheltered, shaded position and only do so when nighttime temperatures are reliably mild. Acclimate it gradually to outdoor air and bring it in before cool weather. It is not frost tolerant, so in most regions it is best grown as an indoor plant year-round.
Fertilize Only During Active Growth
Peperomia rotundifolia grows slowly and does not need heavy feeding. If it is producing new leaves in spring or summer, use a balanced liquid houseplant fertilizer diluted according to the label, or weaker for a small plant. Apply it to already moist soil rather than to a dry root ball. Pause feeding when growth slows in winter, after a stressful repot, or when the plant is unhealthy until the underlying issue is understood.
More fertilizer does not make stems fuller. Excess nutrients can accumulate in a small pot and damage roots. If a white crust forms on the soil or pot rim, stop fertilizing. For a freely draining pot, an occasional thorough flush with plain water can remove some soluble salts; if water cannot drain promptly, refresh the mix instead of soaking the plant further. Clemson HGIC recommends reduced-strength fertilizer for actively growing peperomias, which is a sensible starting point for this small-rooted species. (Clemson HGIC)
Prune Trailing Stems Without Overcutting
Pruning can keep the plant compact, remove damaged growth, and provide cuttings. Use clean, sharp scissors and make each cut just above a leaf node, where a leaf attaches to the stem. New side shoots may develop from nodes below the cut, so trimming a long stem tip can encourage branching. Remove dead or yellowed leaves at the stem rather than pulling them hard enough to tear healthy tissue.
Trim a little at a time. If the plant has only a few healthy stems, avoid cutting it back severely; each leafy stem contributes energy while the plant recovers. You can shorten the longest runners and root those tips in water or mix. Rotate the pot occasionally if growth leans strongly toward a window, but stable light conditions matter more than frequent repositioning.
Propagate with Healthy Stem Cuttings
Stem cuttings are the most practical way to make more Peperomia rotundifolia. Take them in spring or summer when the parent is growing, using a clean blade. Choose a firm, healthy tip with several leaves and at least one node. The node is the small joint where a leaf meets the stem; roots form from this point. Avoid taking cuttings from stems that are soft, yellowing, or affected by pests.
There are two useful ways to root a cutting. Water lets you see root development, while a potting medium avoids a later transition from water-grown roots. Either method works best with bright indirect light, warmth, and patience. Do not keep lifting the cutting to check for roots; look for fresh growth or a cutting that stays firm.
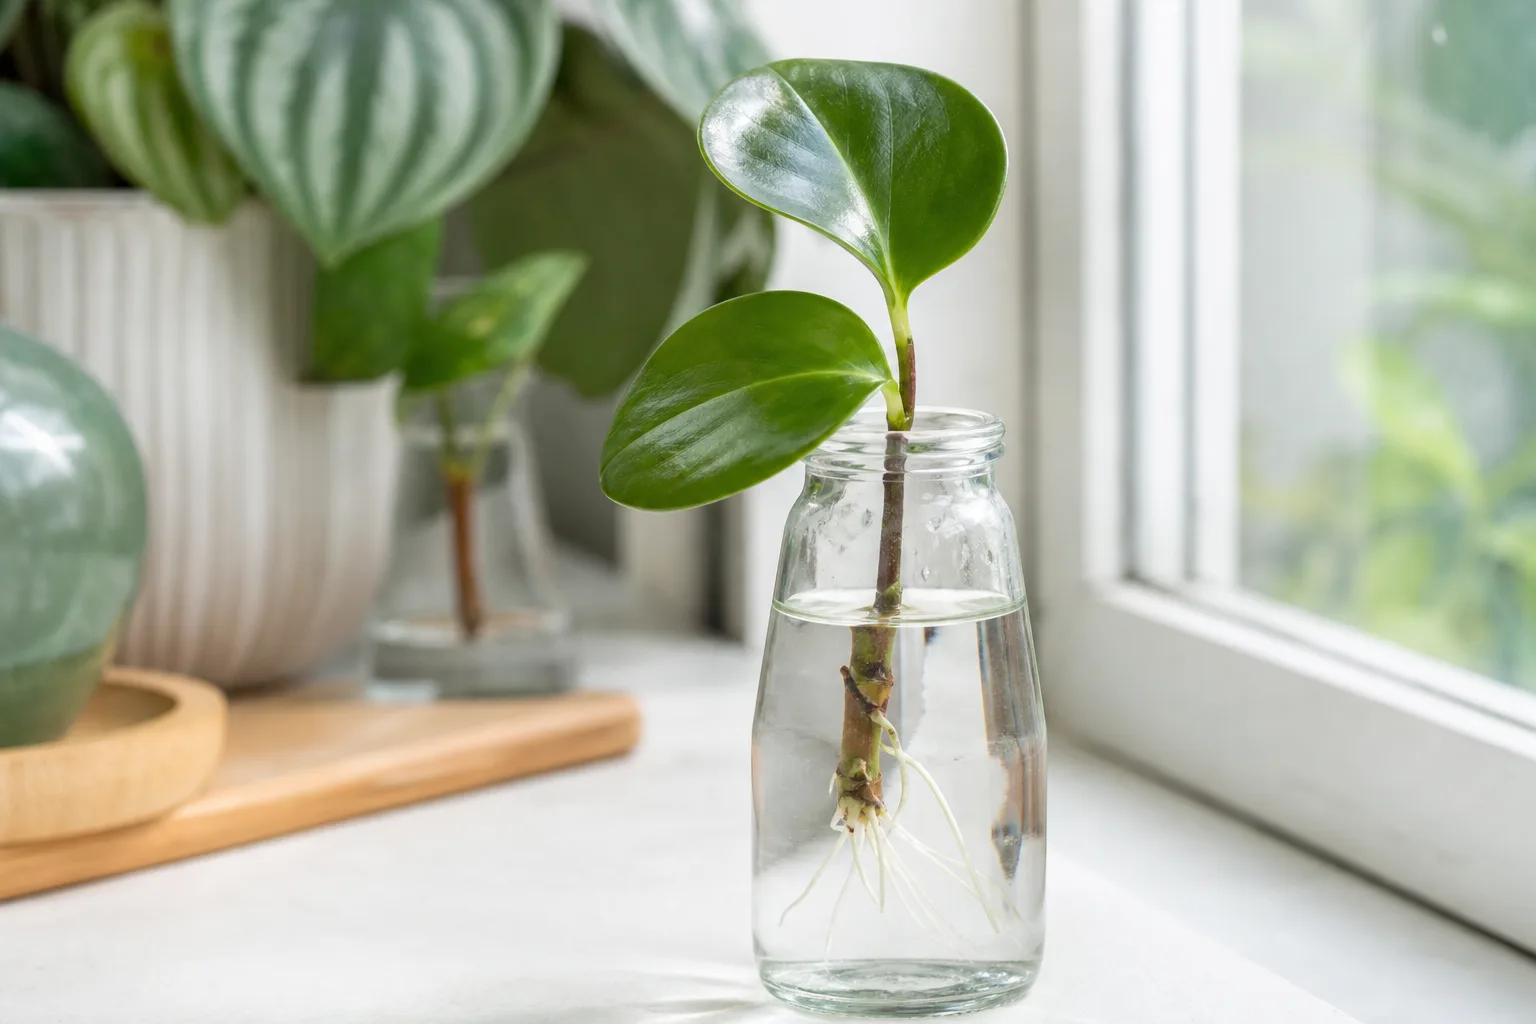
Root a Cutting in Water
Cut just below a node, leaving several leaves on the tip. Remove any leaves that would be submerged, then place the node in a clean glass of room-temperature water. Keep the leaves above the waterline and put the glass in bright indirect light. Refresh the water if it becomes cloudy and top it up as it evaporates.
Check occasionally for roots at the node. Wait until they are visible and sturdy, with some branching, before moving the cutting to soil; there is no exact number of days because warmth, light, and cutting condition affect the pace. Set it into a small pot of airy mix, cover the roots gently, water once to settle the medium, and let it drain. Keep the mix lightly moist while the new roots adjust, then return to the dry-down routine used for the parent plant.
Water roots have developed in a wetter environment, so the first days after potting are an adjustment. Use a small container and check moisture rather than keeping the new pot constantly wet. If the cutting wilts briefly but the stem remains firm, keep it in bright indirect light and give it time; do not add fertilizer or move it into direct sun to force growth.
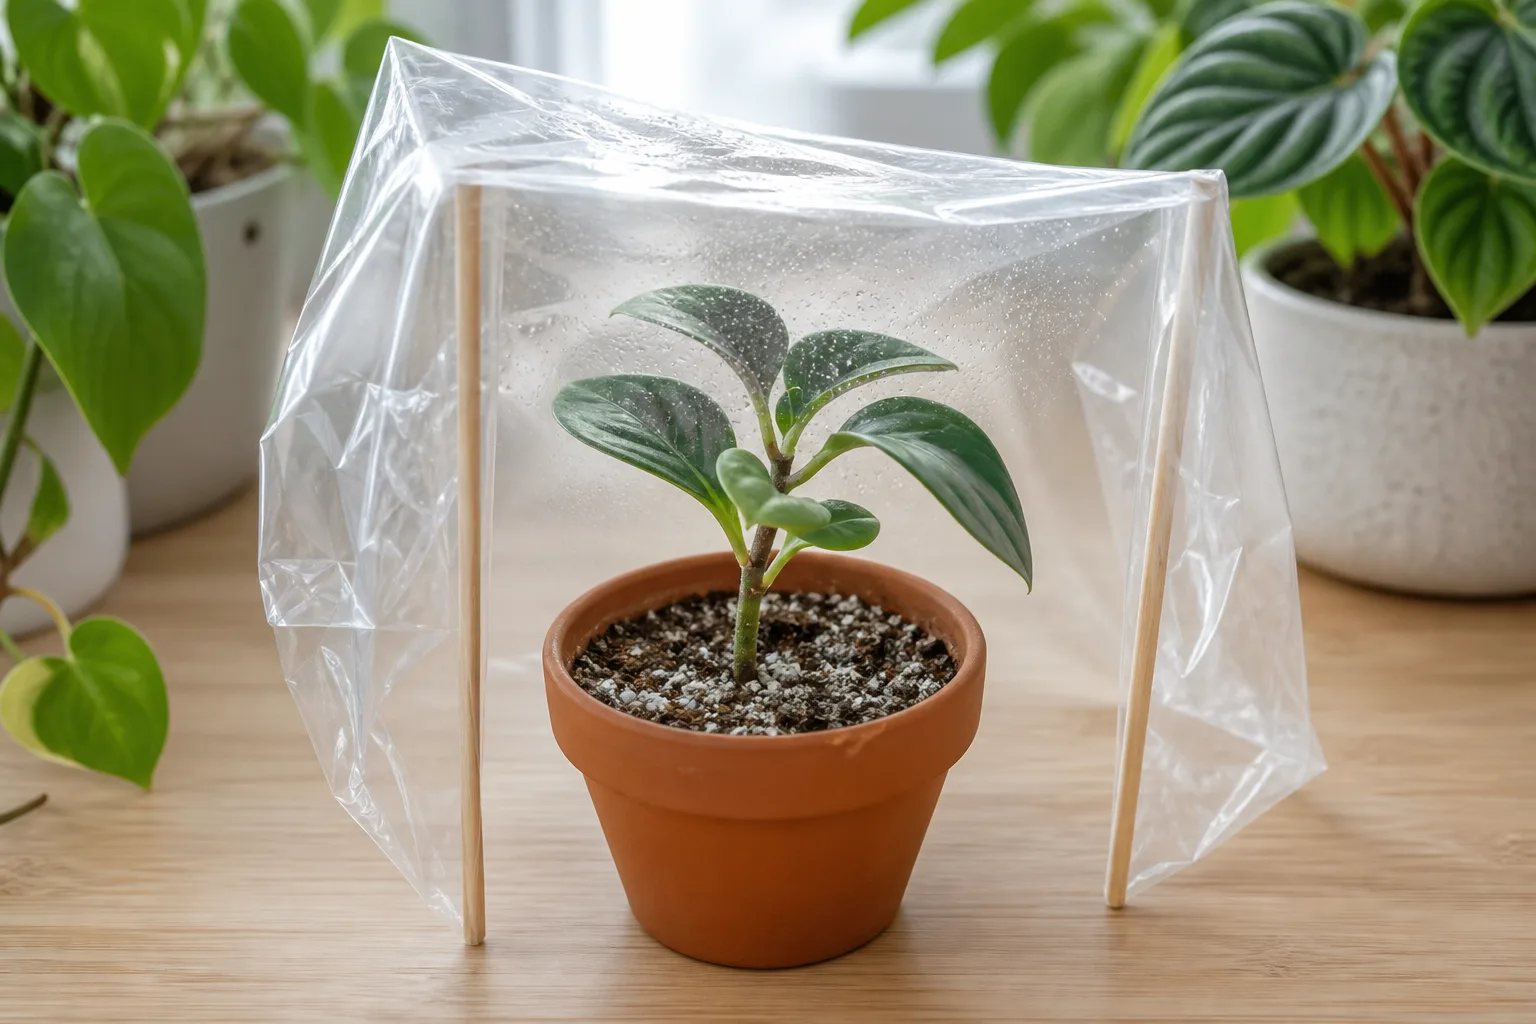
Root a Cutting in Potting Mix
Fill a small pot with loose mix and moisten it lightly before planting. Make a hole with a pencil or skewer so the stem is not scraped as it goes in. Insert the lowest node into the medium, firm it gently, and keep all leaves above the surface. If the cutting has a long runner, shorten it enough to stand without being buried deeply.
Place the pot in bright, indirect light. Keep the mix lightly moist while the cutting is establishing, but do not leave it saturated. In a typical home, a cover is often unnecessary; trapped humidity can keep leaves wet and encourage decay. If the room is exceptionally dry and the cutting wilts, use a loose, vented cover and check daily that the medium is not staying too wet.
New leaf growth, a firm stem, or gentle resistance to a very light nudge are clues that roots have formed. Avoid tugging repeatedly, since new roots are delicate. Once the cutting is growing, gradually allow a little more drying between waterings. The new plant is ready for routine care when it holds itself upright and continues to produce healthy leaves.
Repot When Roots or Mix Call for It
A slow-growing plant does not need to be repotted every year. Inspect the drainage holes and root ball if water runs straight down the pot’s sides, the mix has compacted and remains wet for a long time, or roots fill the container and the plant dries unusually fast. One root emerging from the bottom is a reason to check, not an emergency by itself.
When repotting is warranted, choose a container only one size larger, with an open drainage hole. Keep the plant at its previous depth and use fresh, airy mix. Loosen roots only if they are tightly circling or clearly dead; a small healthy root system does not need rough handling. Water enough to settle the new soil, drain fully, and wait until the upper mix dries before watering again.
If the old mix is waterlogged or the roots are soft, use a clean pot and remove only clearly decayed roots with sterile scissors. Repotting a healthy plant into a much larger pot “for room to grow” can create a slow-drying wet zone and increase the risk of root stress. Leaving a stable plant in its current container is often the better choice.
Troubleshoot Changes Before Changing Care
One leaf symptom rarely proves a single cause. Look at the pattern: Is the problem affecting one old leaf or many new leaves? Is the soil wet, dry, or compacted? Are the stems firm or soft? Check for direct-sun damage and pests before changing water, light, and fertilizer at the same time. The pot and roots often provide more useful clues than leaf color alone.
Yellowing, Dropping, or Pale Leaves
A lower, older leaf may yellow and fall occasionally without signaling a serious problem. Several yellow leaves together, especially when the soil is still damp, point first to slow drainage or overwatering. Confirm that the pot has a drainage hole and remove any standing water. Wait until the mix reaches its normal dry-down point before watering again. If yellowing continues, inspect the roots rather than simply withholding water for a long period.
If the mix is dry and the stems are firm, consider whether the plant has been under-watered, exposed to low light, or recently moved. A dry root ball can prevent leaves from receiving enough water even if you have watered the surface lightly. Rehydrate it evenly with a thorough watering, then allow excess to drain. Pale patches on the sunny side may indicate sun scorch; move it behind a sheer curtain or farther from hot direct rays.
Shriveled Leaves and Soft Stems
Shriveling can occur when a small pot has dried too far, but soft leaves and stems in wet soil may indicate root trouble. Feel the mix before adding water. If it is dry, water thoroughly and observe the plant over the next few days. If it is wet and the stem base is mushy, slide the plant from its pot to inspect the roots. Healthy roots feel firm; decayed roots are soft or slimy and may be dark.
Remove clearly rotted roots with clean scissors, discard waterlogged mix, and repot the healthy portion into fresh, airy medium in a clean draining pot. If the main stem is rotting, save firm, unaffected tips as cuttings and discard mushy material. Do not assume every wilted leaf means root rot: underwatering and root decay can look similar above the soil, so check the root zone before choosing a remedy. Clemson’s peperomia guidance warns against keeping the mix soggy, which is why drainage and root condition matter when leaves wilt. (Clemson HGIC)
Mealybugs and Other Signs of Pests
Check leaf undersides, stem joints, and the place where stems meet the soil for small white cottony clusters. Mealybugs can hide in protected nodes and leave sticky honeydew. Isolate an infested plant from nearby houseplants, then inspect surrounding plants as well. For a small infestation, wipe visible insects away with a damp cotton swab and repeat inspections; hidden insects may reappear.
UC Statewide Integrated Pest Management Program recommends physically removing mealybugs when practical and describes using a small amount of rubbing alcohol on a cotton swab for localized infestations. Test a leaf first, since alcohol can injure sensitive foliage, and do not spray it broadly. For larger problems, use only a product labeled for indoor plants and mealybugs, follow its directions, and repeat only as the label specifies. (UC IPM: Mealybugs)
Flowers and Pet Safety
Mature plants can produce thin spikes of tiny yellowish flowers, but indoor flowering is not the main attraction and may be uncommon. The small, beadlike blooms can look unusual, yet they do not mean that the plant is unhealthy or that care must change. Leave them if you like the look, or snip spent spikes near their base with clean scissors.
NC State’s profile lists Peperomia rotundifolia as non-toxic to cats, dogs, and horses. That listing is reassuring for choosing a houseplant, but it does not mean a pet should eat the foliage: chewing can still cause stomach upset or irritation, and plant identity can be uncertain when labels use common names. Keep the plant where pets are unlikely to make a meal of it, and consult a veterinarian if an animal develops concerning symptoms after chewing a plant. (NC State Extension Plant Toolbox)
Conclusion
Peperomia rotundifolia is easiest to maintain when you provide bright filtered light, a loose mix, and a pot that drains well. Water thoroughly after the upper soil dries, then let the pot empty; slow down in cool, low-light months rather than following a weekly schedule. Trim long stems to shape the plant or root healthy tips in water or mix. When leaves change, check moisture, roots, and pests before making several care changes at once. A stable setup and a small, observant routine help this trailing peperomia stay healthy without fuss.