How to Grow Elderberry for Fruit and Flowers
Plan an elderberry planting with the right species, sun, spacing, pollination partners, pruning approach, and clear rules for handling the berries safely.
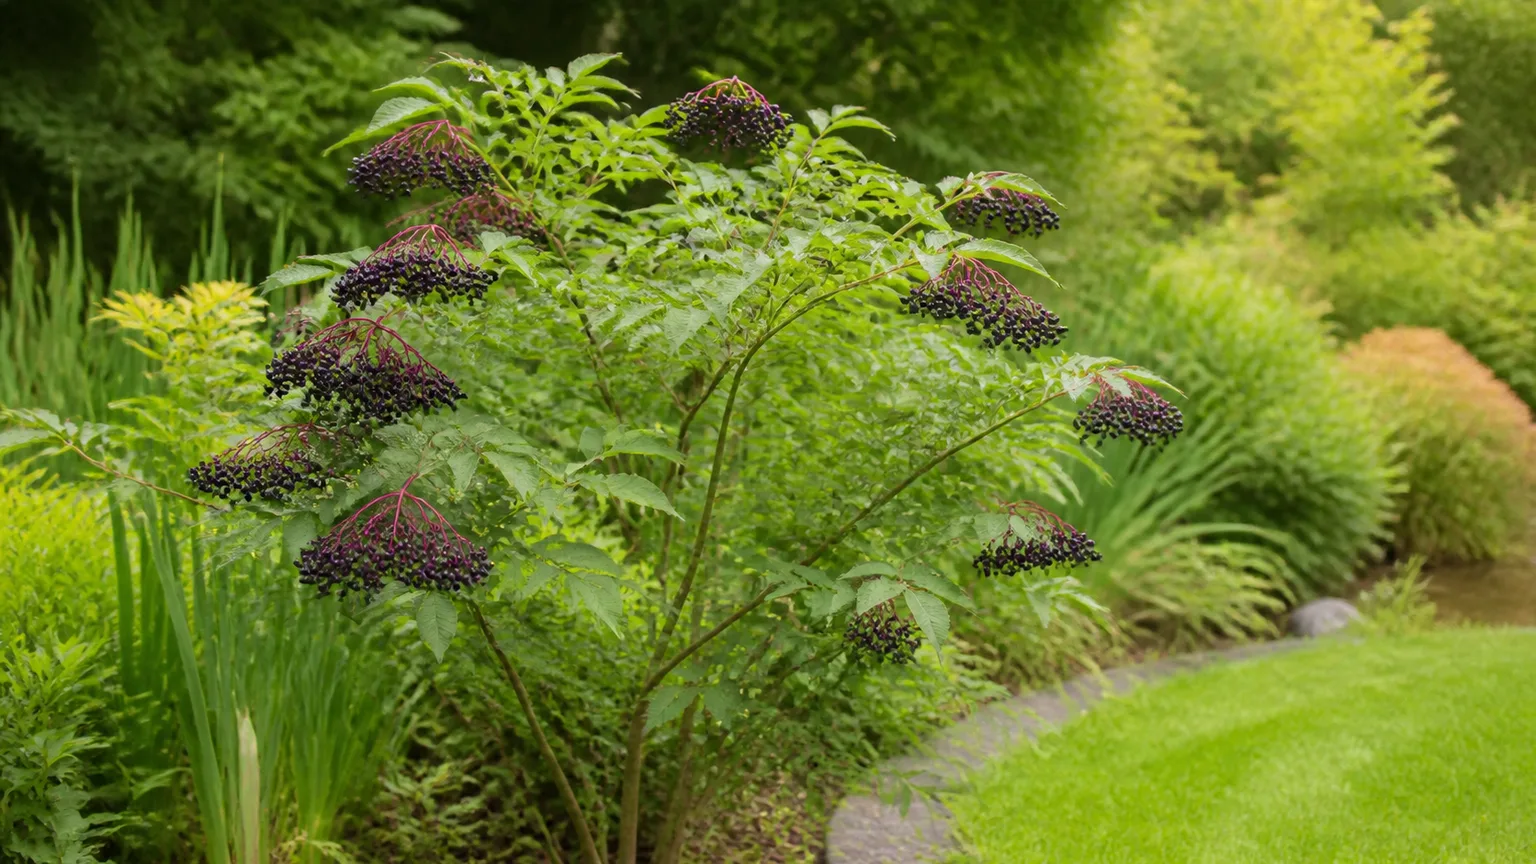
Elderberries are usually large, multi-stemmed shrubs, though mature plants can look like small trees. Their flat clusters of cream-colored flowers feed pollinators, and their dark fruit can be harvested for cooking. They are also vigorous plants: a shrub planted without room or a plan for root suckers can spread beyond the bed you pictured.
Start with the plant’s purpose. A fruiting elderberry, a purple-leaved ornamental, and a wildlife thicket may all belong to the genus Sambucus, but they do not make the same buying, pruning, or harvesting choice. Choose the species and cultivar first, then shape care around the result you want.
| Goal | A sensible starting point | Main trade-off |
|---|---|---|
| Home fruit harvest | A named fruiting American elderberry, such as Adams, York, Johns, or Nova | Needs adequate sun, compatible pollination, room, and annual cane renewal |
| Foliage or flowers | An ornamental cultivar such as Black Lace or a gold-leaved form | Fruit may be incidental; hard pruning for foliage can remove flowers |
| Wildlife and naturalized cover | A regionally appropriate native elderberry allowed to sucker | A spreading colony is harder to contain, prune, and harvest |
Choose the right elderberry for your goal
The common name “elderberry” does not identify a single species. Nursery tags may list American elderberry as Sambucus canadensis or as Sambucus nigra subsp. canadensis; either way, check the full botanical name and cultivar instead of relying on a generic label. NC State describes American elderberry as a deciduous shrub or small tree with compound, toothed leaves, clusters of small flowers, and purple-black fruit. NC State Extension’s plant profile is a useful identification and landscape reference.
American elderberry for a food garden
For a home berry crop in much of eastern North America, look for a named American elderberry cultivar selected for fruit. Adams No. 1 and Adams No. 2, York, Johns, and Nova are established choices described by WVU Extension; their mature size, ripening window, and hardiness are not identical. For example, WVU lists Adams cultivars for Zones 3–9 and York and Nova for Zones 4–8, with fruit ripening times that shift from early to mid- or late August in its regional guidance. Those dates are not a calendar promise for every climate.
Use the nursery’s cultivar name and local hardiness information to narrow the choice. Compare mature width as carefully as height: a six-foot shrub still needs space for light, air, pruning, and access to the fruiting clusters. Cultivars also differ in vigor and crop timing, so buying two random plants does not guarantee they will flower together.
American elderberry is also a strong landscape plant when a loose, natural form is acceptable. Its flowers and fruit support pollinators and birds, but the plant’s root suckers can make it look untidy in a formal border. NC State Extension recommends it for naturalized areas, hedges, woodland edges, and rain gardens, while noting its tendency to sucker. Epic Gardening’s elderberry overview likewise recommends giving this vigorous shrub a spacious place where its suckers will not crowd less competitive plants.
European elderberry and ornamental cultivars
European black elderberry, Sambucus nigra, can be grown for its flowers, fruit, or foliage, depending on the cultivar and climate. Ornamental selections such as Black Lace (‘Eva’) are valued for deeply cut, dark purple leaves and pinkish flowers; they may also set berries, but a decorative plant is not automatically the best choice for a dependable food harvest. If fruit is the priority, buy a cultivar that a nursery or local extension source specifically recommends for edible production rather than choosing by leaf color alone.
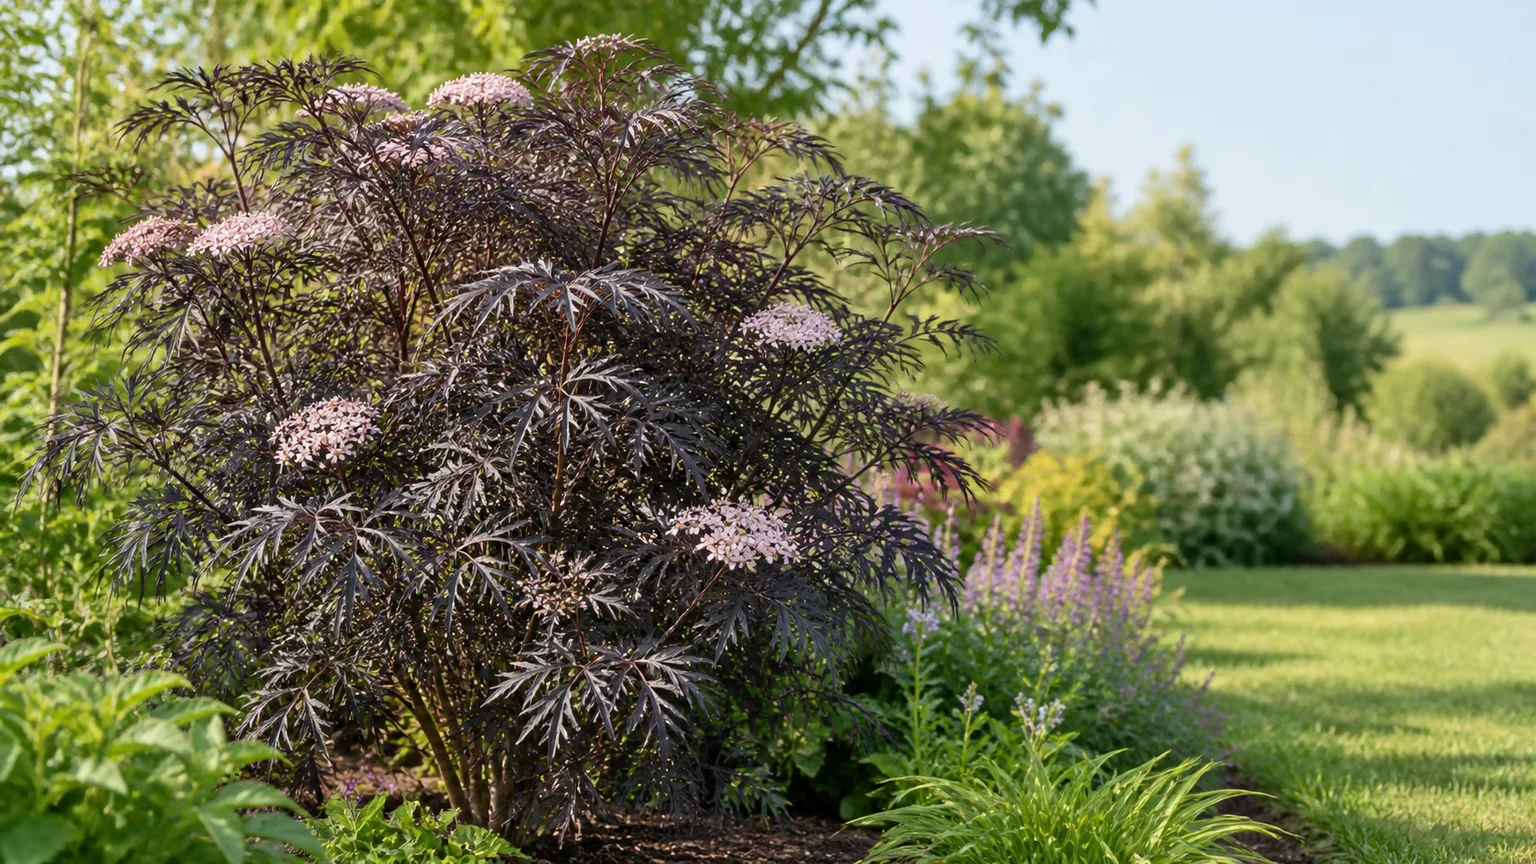
The distinction matters at pruning time. A foliage-focused cultivar may be cut back hard in late winter to encourage fresh, colorful growth, but this can sacrifice flowers and that season’s fruit. The Royal Horticultural Society’s Sambucus growing guide notes that established elders can be hard pruned to control size or encourage ornamental foliage; a gardener who wants berries should keep enough productive older canes instead.
Red and blue elderberries need separate treatment
Red elderberry, Sambucus racemosa, is grown as an ornamental and for wildlife value, not as a household berry crop. WVU Extension warns that the red elderberry found in the northeastern United States is highly toxic; do not use its fruit as a substitute for the dark berries of an identified edible elderberry. Different Sambucus species have different food-safety profiles, and the word “elderberry” by itself is not enough to identify a safe harvest.
Blue elderberry, Sambucus cerulea, is a western species adapted to different regional conditions. If you live in its native range, seek locally appropriate nursery or extension guidance on provenance and fruit use. Across all species, never forage or eat berries based on color alone; confirm the plant identity and follow reliable preparation guidance.
Pick a site for harvest access, not just survival
Elderberries tolerate a range of garden conditions, but tolerance is not the same as a productive crop. Before planting, picture the mature shrub at full width and leave enough room to walk around it, inspect the canes, and reach clusters without bending branches over a fence or path.
Sunlight and airflow
Choose full sun when your priority is flowers and berries. Elderberry can grow in partial shade, but a shaded shrub may flower less, ripen fruit later, or produce weaker growth that leans toward light. In a hot, dry climate, some afternoon shade can reduce stress; keep the site bright enough to support bloom and allow air to move through the canopy.
Airflow is a practical health measure as well as a light issue. Dense, shaded growth stays crowded, making pruning and harvest harder and giving foliar problems a more favorable environment. Avoid squeezing an elderberry between a wall and another large shrub simply because the spot is damp. Check the hardiness rating of the exact cultivar before buying: WVU Extension lists Adams selections for Zones 3–9, while York and Nova are listed for Zones 4–8, so there is no single zone range that applies to every elderberry. A plant that tolerates winter cold may still need summer irrigation or relief from harsh afternoon heat in a hot, dry site.
Soil, moisture, and drainage
Aim for soil that holds moisture without staying saturated. Elderberry naturally occurs in damp places and can tolerate wet conditions, but roots still need oxygen; standing water or repeated flooding can lead to decline. Where heavy clay drains slowly, plant on a broad berm or raised bed rather than setting the root ball into a bowl that collects water.
Sources differ on a precise ideal soil pH. WVU Extension gives 5.5–6.5 for its production guidance, while Penn State Extension’s garden article gives 6.8–7.2 for the native form it discusses. These recommendations reflect different regional growing contexts, so a soil test and local extension advice are more useful than trying to force every garden to one number. Avoid making a large pH correction unless a test shows it is needed.
Plant and space to fit the mature shrub
Plant bare-root stock while dormant in early spring, or plant container-grown shrubs in spring or early fall when the soil is workable and temperatures are mild. Skip periods when the ground is frozen, waterlogged, or baked dry. In a region with harsh winters or a short establishment season, follow local guidance on spring planting rather than assuming fall works everywhere.
Set the plant at the same depth it grew in its nursery pot, spread circling roots if needed, and backfill with the native soil. Water slowly to settle soil around the root ball; do not put a concentrated layer of fertilizer in the planting hole. A few inches of organic mulch will help retain moisture and suppress weeds, but keep it several inches away from the stems.
Space according to the cultivar’s mature width and how you will use it. For a home fruit planting, roughly 6–10 feet between plants is a practical starting range for many cultivars; choose the wider end when labels indicate a broad shrub, when you want good airflow, or when harvest access matters. WVU Extension recommends basing in-row spacing on mature spread and leaving additional room between rows, while Penn State Extension gives 5–7 feet for the native elderberry it covers. Treat those as context-dependent recommendations, not a universal rule. The practical Harvest to Table growing guide also frames spacing, mulching, and pruning around the plant’s eventual size and harvest rather than a one-size schedule.
Make the layout serve the plant’s habit. If you want a natural screen or wildlife thicket, allow root suckers to fill in a designated area; if you want individual shrubs, mow or cut unwanted shoots while they are small. Keep the planting away from narrow paths, small ornamental beds, and spots where fallen fruit would be a nuisance.
Water, mulch, and fertilizer through establishment
A newly planted elderberry needs dependable moisture while its roots spread. WVU Extension recommends 1–2 inches of water each week during the first growing season, adjusted for rainfall and soil conditions. Water the root zone deeply when the top few inches begin to dry rather than giving the shrub frequent shallow sprinkles.
After establishment, elderberries can tolerate short dry periods, but drought during flowering or fruit development may reduce the crop. Check the soil during hot spells and water if the root zone is drying; do not respond to every drooping leaf by flooding the bed, since waterlogged roots can also wilt. Mulch helps moderate soil moisture and suppresses weeds competing with the shrub’s relatively shallow roots.
Do not fertilize on autopilot. Start with a soil test, healthy new growth, and the amount of compost or mulch already applied. If growth is weak and the soil test supports feeding, use a balanced product at the labeled rate in spring; excessive nitrogen can drive long, leafy shoots at the expense of a balanced flowering and fruiting canopy. At planting, WVU Extension advises against adding nitrogen fertilizer directly; home gardeners can usually focus first on water, weed control, and establishment. For a newly planted fruiting bush, WVU also recommends removing flowers in the first year so energy goes to roots and shoots. That is a crop-establishment choice, not a rule for every ornamental plant: if flowers are the main reason you bought the shrub, accept slower establishment rather than stripping every bloom.
Pollination and a reliable crop
If you want a meaningful harvest, plant at least two different, compatible fruiting cultivars whose flowers overlap. Penn State Extension advises keeping the varieties within 60 feet of one another for cross-pollination, and notes that planting more than one can improve fruit set and stagger flowering and harvest. The exact pairing matters more than simply having two shrubs: ask the nursery which cultivars bloom together in your region.
Some elderberries may set fruit alone, so a single shrub is not guaranteed to produce nothing. But relying on that possibility is a poor plan if the harvest is the point of the planting. A pair with compatible bloom times gives pollinators a better chance to move pollen between plants and gives you a backup if one shrub flowers weakly.
Give the pair enough space to mature without crowding. Pollination distance is a maximum working range, not a reason to plant two shrubs close enough that their canopies collide. If you already have an elderberry nearby, identify its species and cultivar as far as possible before counting it as a reliable partner.
Prune to balance new canes and fruit wood
Prune in late winter while the shrub is dormant, before new growth begins. First remove dead, broken, diseased, or crossing canes. Then decide whether the remaining shrub should support a fruit crop, a compact ornamental form, or a spreading screen; pruning all elderberries the same way can work against the goal.
For fruit, maintain a mix of young, vigorous canes and remove the oldest, weakest stems at ground level. WVU Extension notes that most production occurs on one- and two-year-old wood and recommends keeping a mature bush open, with roughly five to eight canes for light and air movement. That is a useful framework for many fruiting plantings, not a rigid count for every cultivar or garden. Do not cut every cane to the ground each winter unless you are deliberately growing a cultivar that fruits on current-season growth and have verified that trait.
For foliage, flowers, or size control, a harder dormant-season cut may be appropriate once the plant is established. The trade-off is real: removing the stems that would have flowered can mean little or no berry crop that year. If spring flowers matter, wait until after flowering to do light shaping, then save major renovation for a season when you can accept losing the next crop.
Control suckers as part of the same job. Cut unwanted root shoots at ground level before they become woody, but leave selected suckers if you want a renewal cane or a wider thicket. Avoid repeatedly shearing only the outer tips: it can create a dense shell of growth while old, unproductive stems remain in the center.
Harvest, identify, and handle berries safely
Harvest only from an elderberry you can identify confidently as an edible fruiting species and cultivar. Many elderberries ripen from late summer into early fall, but cultivar and climate shift the calendar. Let the berries turn fully dark purple to nearly black; green or partly colored fruit is not ready. On a cluster, individual berries do not always ripen at precisely the same time, so wait until most of the cluster is mature rather than picking at the first dark berry.
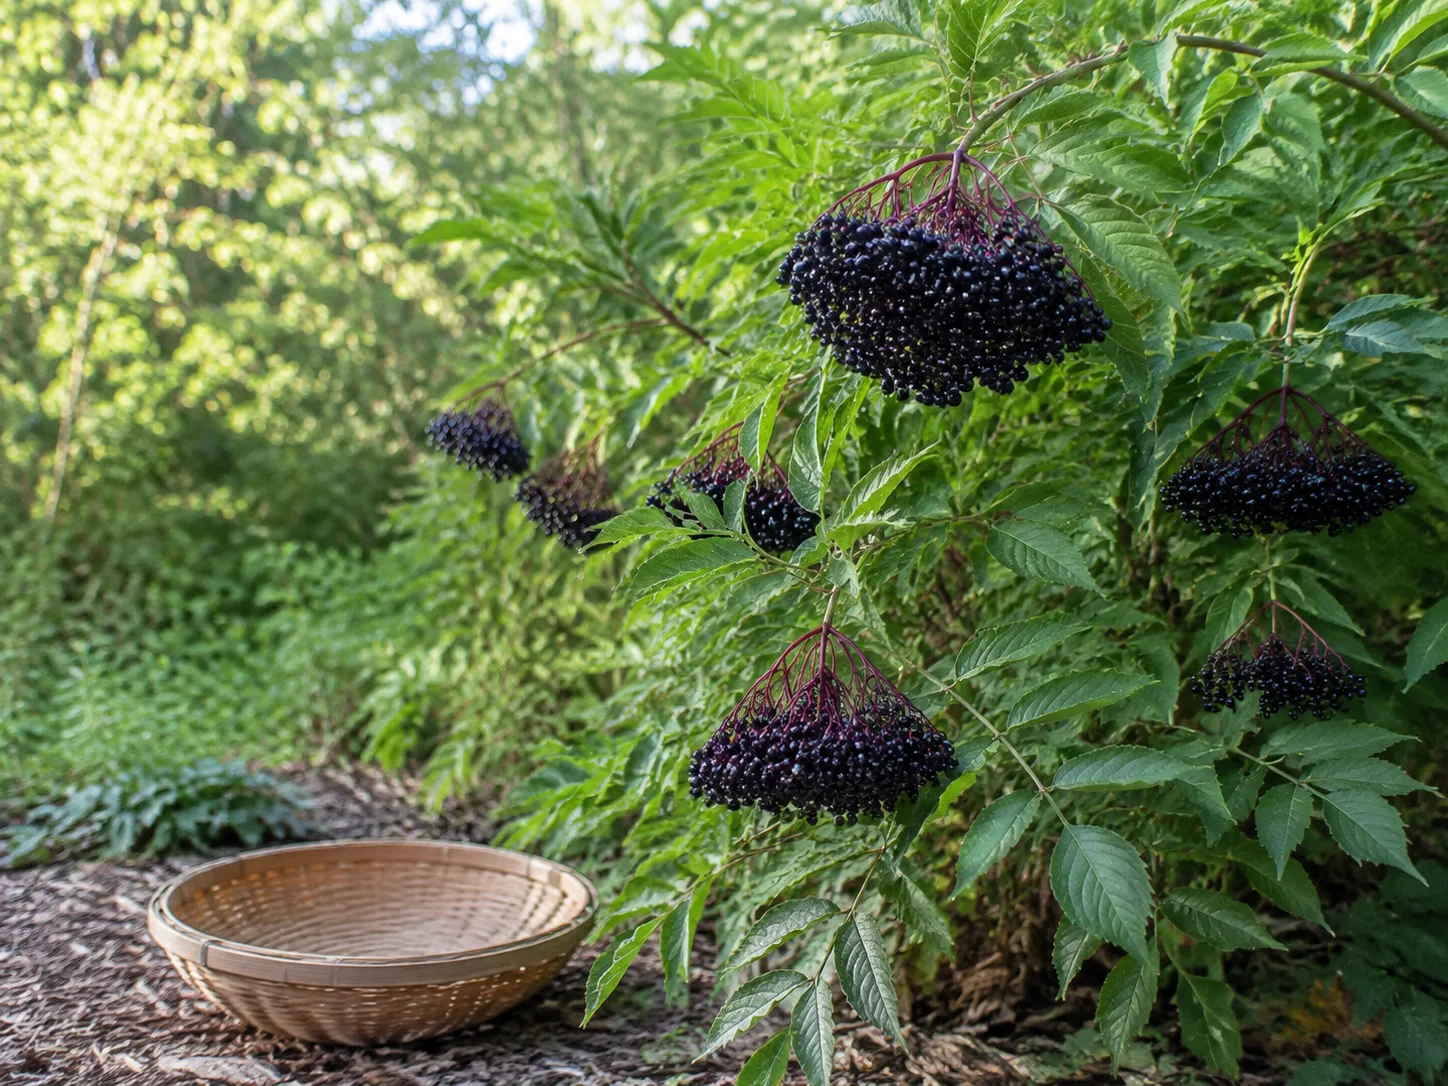
Clip ripe clusters with clean pruners and process them promptly. Remove leaves and as much stem as practical before cooking; the juice can stain, so wear gloves or use a washable work surface. A fork or berry stripper can help separate small fruit from the cluster, but inspect the bowl afterward and remove bits of stem before preparing food. The Harvest to Table guide describes clipping full clusters as a workable home-garden harvest method; inspect the fruit carefully before cooking. If you also want elderflowers, cut only a portion of the fully opened, clean flower clusters so the remaining flowers can set fruit; Penn State Extension recommends harvesting after the dew dries and before the day’s heat, then removing as much stem as possible for culinary use.
Do not eat raw elderberries or sample unripe fruit. Penn State Extension explains that leaves, stems, and seeds contain cyanogenic compounds and says the berries should be cooked before eating; it also cautions that traditional water-bath canning recipes are not supported for elderberry because the fruit is low-acid. Use a tested recipe and preservation method rather than assuming a family recipe or a long boil makes a shelf-stable jar safe. The Penn State Extension garden and kitchen guide covers these limits in more detail.
Keep harvested fruit and fallen clusters away from pets. Pet Poison Helpline reports vomiting and diarrhea after ingestion of elderberry plant material or uncooked fruit and advises contacting a veterinarian or poison service when a pet may have eaten it. Pet Poison Helpline’s elderberry guidance explains the risk; cooked human food is not a reason to let a dog or cat sample the plant.
Propagate without losing a cultivar’s traits
Root suckers and cuttings produce a plant that is genetically like the parent, which is the reliable route when you want to keep the traits of a named cultivar. Seedlings vary and may not reproduce the parent plant’s size, fruiting season, or other features. For a home garden, buy a named cultivar if consistent fruit or ornamental form matters.
A rooted sucker can be separated when it has its own roots and the plant is dormant or conditions are mild. Dig around it carefully, retain as much root as possible, and replant it promptly at the same depth; keep it watered while it re-establishes. Do not transplant an unwanted shoot from a plant whose fruit identity or health is uncertain.
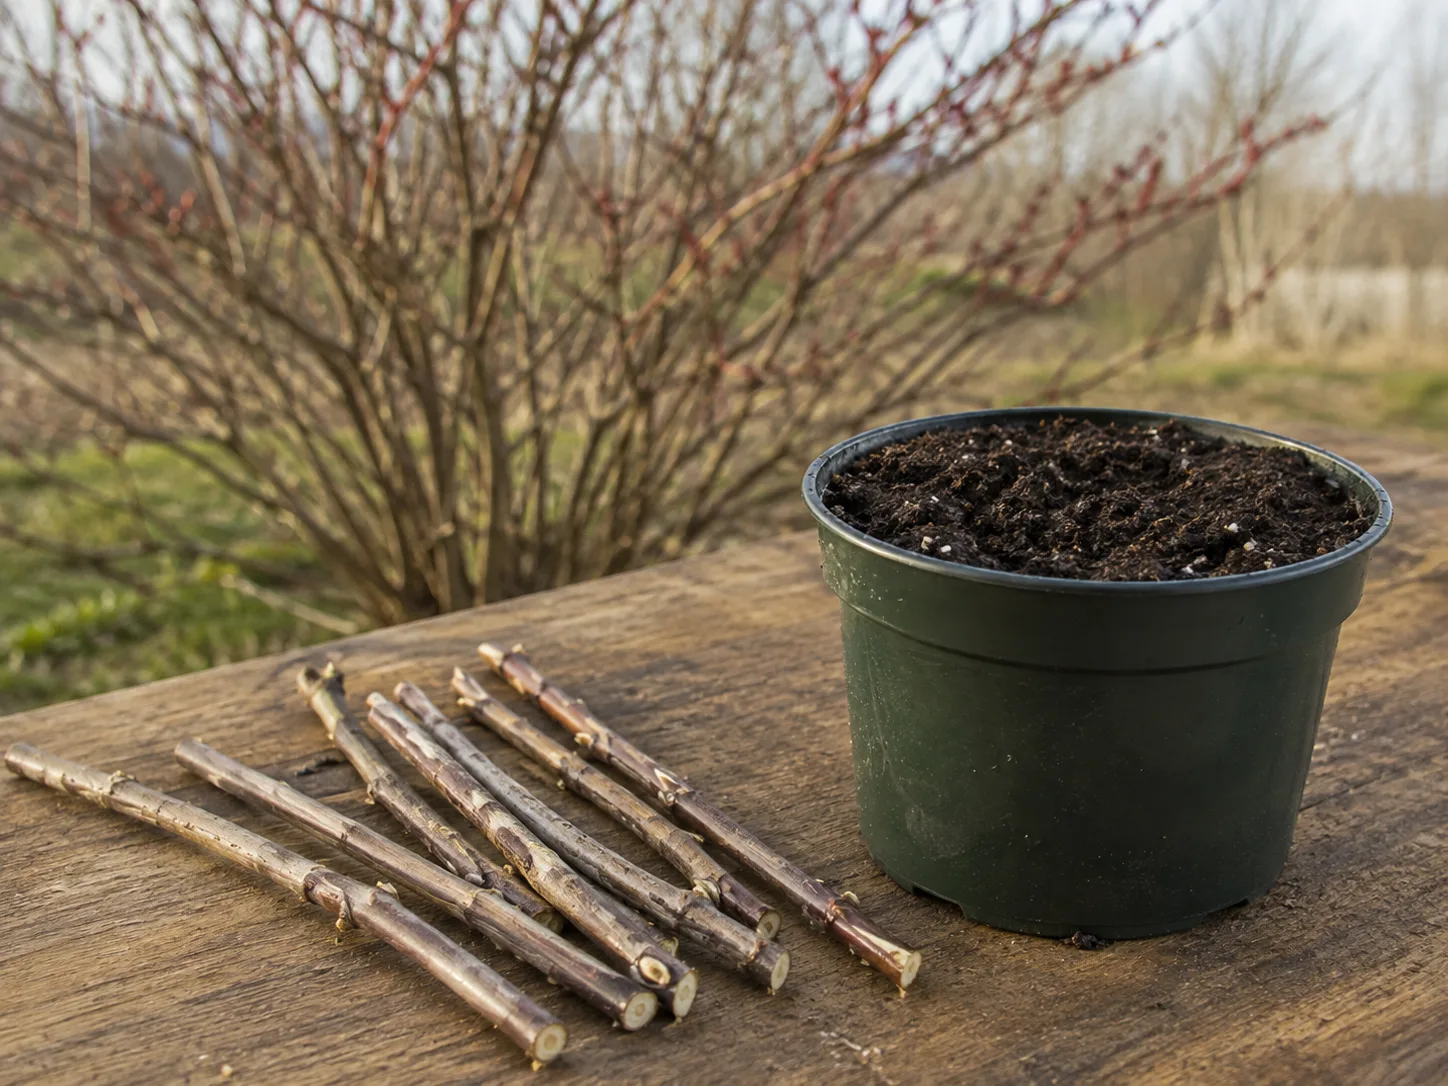
Hardwood cuttings can be taken from healthy dormant canes and rooted in a clean, well-drained medium kept lightly moist. WVU Extension describes taking sections of one-year-old wood with several nodes and rooting them in a moist medium; summer softwood cuttings are another option when shoots are actively growing. Take several cuttings because not all will root, label the cultivar, and do not let the medium become soggy.
Grow elderberries in containers only when space is limited
A container can work for a compact ornamental or a young plant, but it is a compromise for a vigorous, suckering shrub intended to produce a large crop. Start with a pot roughly 24 inches wide and 20 inches deep or larger, with multiple drainage holes, and use a quality potting mix. Harvest to Table’s container guidance suggests a pot at least 24 inches wide and deep; treat that as a starting size, not a guarantee that a full-size fruiting cultivar will stay comfortable in a pot for years. Expect to water more often than an in-ground shrub because the root ball dries faster. A small decorative pot restricts growth and makes summer moisture management difficult.
Container roots are also more exposed to winter cold than roots in the ground. In a cold-winter climate, move the pot to a sheltered location or insulate the container, and avoid letting it sit in a saucer of standing water. If fruit production is the goal, an in-ground site usually offers more room for pollination partners, renewal canes, and harvest.
Troubleshoot pests, disease, and low yields
Birds may take fruit as soon as it ripens, and their competition can be the first sign that your harvest window is open. If protecting a crop is important, use bird netting installed so it does not trap wildlife, and harvest ripe clusters promptly. A naturalized planting can instead be shared with birds, but plan for a smaller human crop.
Inspect leaves and stems before applying any treatment. Aphids cluster on soft new shoots; mites can cause stippling or distorted foliage; borers may leave holes and cause a cane to wilt or die back. WVU Extension lists these among elderberry pests and describes the value of monitoring and sanitation; remove clearly damaged canes and improve plant vigor before deciding whether a labeled control is justified.
Powdery mildew is more likely in dense, humid, poorly ventilated growth, while cankers can follow drought, flooding, or winter injury. Thin a crowded crown, remove diseased material during dry weather, and clean pruning tools between plants. Yellowing and wilting in persistently wet soil call for a drainage check, not more irrigation; repeated decline with poor drainage may require replanting on a raised site. If symptoms are severe or spread, ask a local extension office to confirm the diagnosis before treating.
When a shrub has leaves but few flowers or berries, review the decisions in order: Is it a fruiting cultivar? Does it receive enough sun? Was it pruned after flowering buds formed? Is a compatible cultivar nearby and flowering at the same time? Did drought, heavy nitrogen, or late frost interrupt growth? That sequence is more useful than changing fertilizer before you know what failed.
Make an elderberry patch easier to maintain
The easiest elderberry to care for is the one planted where its mature habit fits. Reserve a sunny, moisture-retentive but drained edge for fruiting cultivars, group compatible bloomers within pollination range, and leave a path for pruning and harvest. If you want a wild-looking screen, mark the area where suckers may spread and mow the boundary rather than trying to keep every shoot trimmed individually.
Keep a small seasonal record. Note the cultivar names, first bloom, first ripe clusters, irrigation during dry spells, and which canes you removed; after two seasons, that record helps you choose a better pollination partner or correct a pruning schedule. It also reveals whether the shrub is late because of local climate or because the site receives too much shade. If pollinator habitat matters, NC State Extension notes that native bees use dead elderberry stems for nesting; where practical, leave a few healthy stems standing 12–24 inches high in a separate, low-traffic patch until they break down. Remove diseased or infested canes rather than keeping them for habitat.
Do not promise yourself a large harvest from a single plant in a difficult site. A well-sited elderberry can provide flowers, wildlife value, and fruit, but those benefits depend on species, cultivar, weather, and how much space you can give it. If the plant is mainly ornamental, let that be its job and avoid eating any fruit you cannot identify and prepare safely.
Conclusion
To grow elderberry successfully, identify the species and cultivar before buying, then match it to the reason you want the shrub. Choose a fruiting American or European black elderberry for an edible crop, use two compatible cultivars for stronger fruit set, give the mature plants room and sunlight, and keep roots moist without leaving them waterlogged.
Prune fruiting bushes to renew old canes while preserving productive wood; hard-prune only when foliage or size control matters more than that season’s flowers and fruit. Harvest only fully ripe berries from a known edible plant, remove stems and leaves, cook the fruit, and keep raw plant material away from pets. Those few decisions prevent most of the disappointment that comes from treating every elderberry as the same kind of shrub.