When to Plant Daffodil Bulbs for Spring Blooms: A Guide
When to plant daffodil bulbs depends on cool soil and your local first freeze. Use this timing guide for depth, spacing, drainage, pots, and spring care.
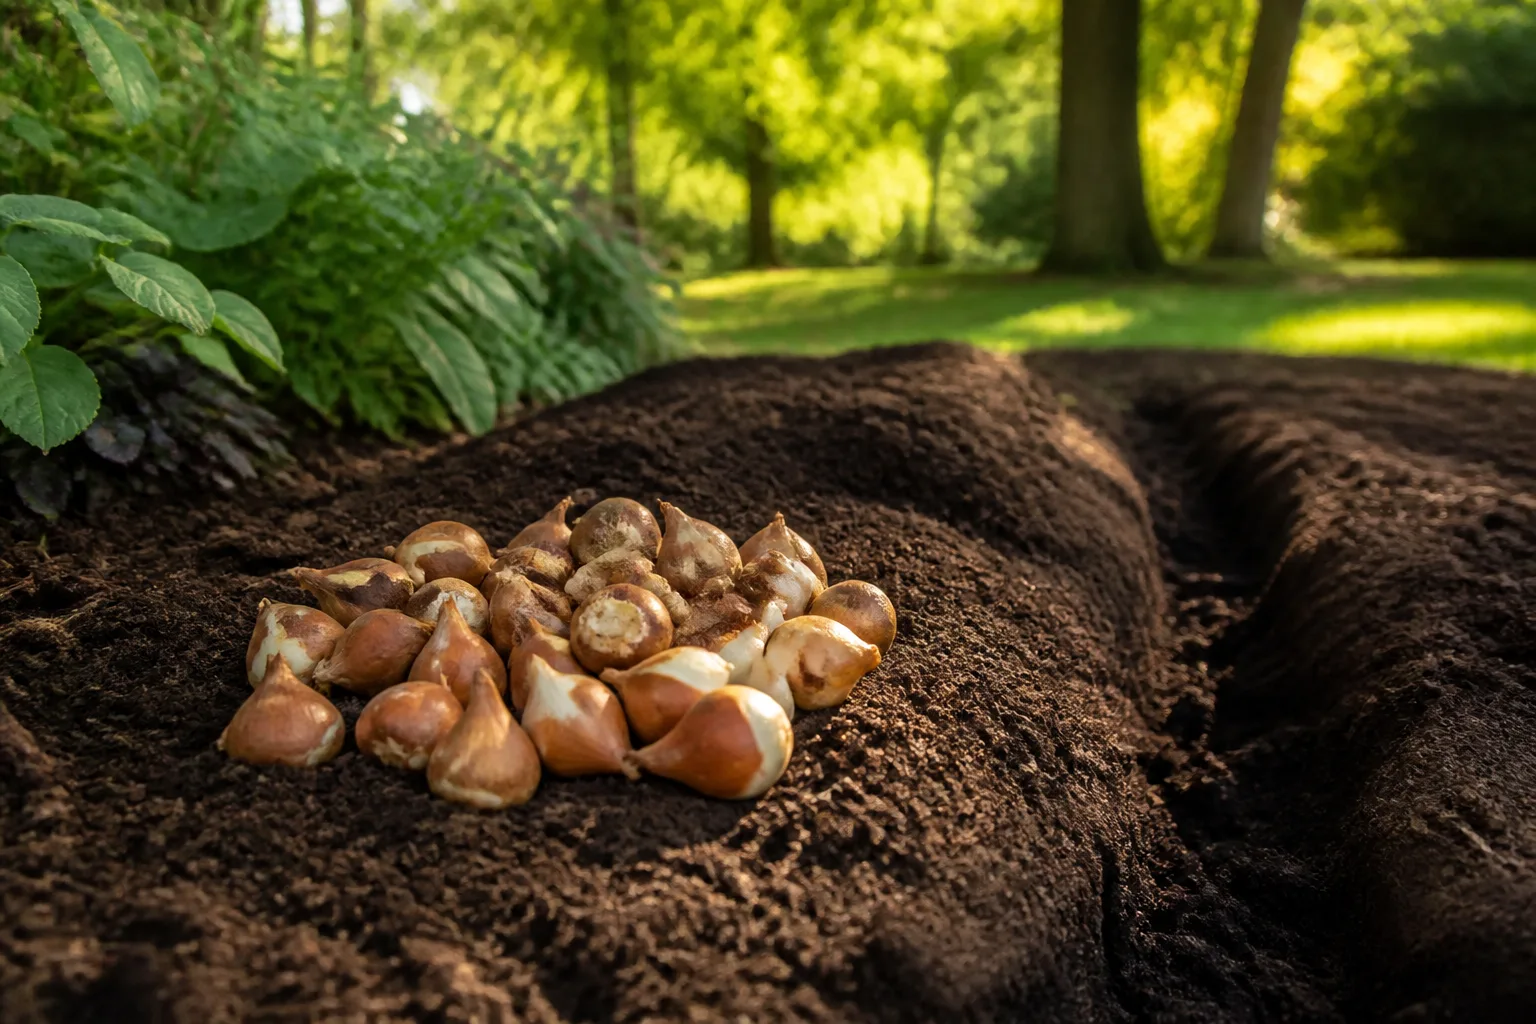
Plant daffodil bulbs in fall, after summer heat has left the soil and while the ground is still workable. In many North American gardens, that means September through November, but the right week shifts with climate: use cool soil and the expected ground-freeze date to guide you, not a date on a calendar. A common benchmark is soil around 55 to 60°F, with enough time for roots to begin growing before winter settles in.
Getting the timing right is only part of the job. A sunny spring site, dependable drainage, correct depth, and foliage left to mature after flowering all help daffodils return. The steps below cover those details, plus what to do if you live in a warm-winter region or have missed the usual planting window.
The best planting window follows soil, not just the calendar
Daffodil bulbs are planted dormant. They need autumn conditions that encourage root growth without pushing a flush of tender leaves, then winter cold followed by spring warmth to bring on flowers. Plant too early in warm soil and some bulbs may send up shoots before winter; wait until the ground is frozen and roots cannot establish until it thaws. The useful window is the stretch between those extremes.
For most gardeners, begin checking conditions as nights cool and autumn rain returns. The goal is not to hit one magical temperature for one afternoon. You want soil that has begun cooling consistently and a workable bed where water drains away. The RHS daffodil growing guide recommends early-autumn planting, ideally September in its UK context; the month is a useful seasonal cue, not a universal North American deadline.
Use a soil thermometer—or local weather cues
If you have a soil thermometer, measure at roughly bulb depth, around four to six inches below the surface, in the morning. Sources commonly place the planting range near 55 to 60°F; Better Homes & Gardens gives 55 to 60°F, while a regional article from N.C. Cooperative Extension uses about 60°F for Eastern North Carolina. Treat that as a practical signal that summer heat has eased, not a precise biological switch shared by every cultivar and soil. A practical Longfield Gardens timing guide likewise prioritizes cool soil over a fixed month and suggests allowing a few weeks before a local hard freeze when possible; use that as a planning buffer, not a guarantee.
Without a thermometer, look at the pattern: hot afternoons have become less common, nights are regularly cool, and deciduous trees are beginning to drop leaves. Check a local extension calendar for bulb planting in your area and use the forecast to avoid planting into a heat wave. If the soil is still warm and dry, wait a little; if it is cool, moist but not saturated, and easy to work, plant.
Adjust the calendar by winter pattern
Approximate windows help you plan a shopping trip, but latitude, elevation, exposure, and soil all move the season. A sunny, sandy bed may cool and dry differently from a sheltered courtyard with heavy clay. These broad North American ranges are starting points, not rules:
| Winter pattern | Common planting window | What to watch |
|---|---|---|
| Cold, early-freezing regions | September through October | Finish while the soil is workable; ground can freeze early. |
| Temperate regions | October through November | Wait for cooler soil, then plant before a sustained freeze. |
| Mild-winter regions | November into December, sometimes later | Match the cultivar to local winters and check whether pre-cooled bulbs are recommended. |
Gardeners in USDA Zones 3 to 5 often work earlier than gardeners in Zones 6 to 7. In warmer Zones 8 and above, winter chill can be the bigger constraint than frost: choose narcissus types recommended for your region, such as locally proven jonquil selections, and ask the grower whether the bulbs were pre-cooled. BHG’s regional guidance notes that some warmer-climate gardeners succeed with jonquils or pre-cooled bulbs. A hardiness zone describes average winter lows, though, so it cannot tell you by itself whether a particular daffodil will flower reliably in your microclimate.
If planting runs late
If the ground is still workable and the bulbs are firm, plant them as soon as the soil cools. A bulb planted late may have less time to root before hard freezing, so its first spring display can be weaker or delayed. It is still generally more useful to plant a healthy bulb than to leave it exposed, but no late-season method can guarantee flowers the following spring.
If the bed is frozen solid, wait for a thaw rather than forcing a spade through frozen soil or leaving bulbs in a warm room. Keep unplanted bulbs cool, dry, and ventilated while you wait, following the supplier’s storage directions; inspect them before planting and discard any that have become soft or moldy. If winter is already well underway, think of the planting as an investment in later seasons and be patient with the first bloom.
Choose firm bulbs with a sound growing point
At the garden center or when unpacking an order, choose bulbs that feel firm and heavy for their size. Avoid bulbs that are mushy, badly shriveled, split open, or covered in active mold. A dry papery outer skin or a little loose soil is normal; soft tissue at the base is not. Larger bulbs usually have more stored energy and are more likely to produce a substantial flower in their first season, although bulb size and flowering potential vary by cultivar.
Plant soon after purchase rather than storing bulbs for weeks in a warm shed or sealed plastic bag. If you must wait for the soil to cool, keep them in a cool, dry place with air circulation and out of direct sun. Keep the bag away from children and pets: the ASPCA lists daffodils as toxic to dogs, cats, and horses, and the bulb is the most poisonous part. Secure stored bulbs before planting; if a pet eats one, contact a veterinarian or animal poison service promptly.
Pick a location that works through spring and summer
Choose a place that gets full sun in late winter and spring, when the foliage is growing. Daffodils can flower in light shade, especially beneath deciduous trees that are bare while bulbs are actively growing, but deep shade often produces fewer flowers over time. A spot that looks sunny in autumn can become shaded by nearby trees once their leaves return, so consider the whole spring growing season rather than the day you plant.
Look for a site that stays reasonably dry during summer dormancy and does not collect standing water in winter. A slope, raised border, or open bed often works better than the lowest point in a lawn. Avoid planting right beside a downspout, in a boggy pocket, or in a bed that stays saturated after rain. Daffodils tolerate a range of soils, but persistent wetness can rot bulbs before you ever see a shoot.
Plan around future mowing and other spring chores, too. If you naturalize daffodils in grass, choose a part of the lawn you can leave unmown until the leaves yellow. In a border, leave enough room for the foliage to remain visible after flowers fade; plants that will later disguise the leaves should not smother the daffodils’ spring light.
Prepare soil for reliable drainage
Before opening planting holes, check the bed after rain. If water sits for hours or the soil stays sticky and airless, correct the drainage first or choose another spot. Daffodils are not a good match for chronically waterlogged ground. In dense clay, improve the whole planting area with organic matter and loosen the soil broadly, or build a raised bed; changing only the soil inside each hole can create a small pocket that holds water.
Compost can improve soil structure and support root growth, but daffodils do not need a rich, heavily fertilized planting hole. Work mature compost into the bed before planting if the soil is poor. Do not pile concentrated fertilizer against the bulb or add a high-nitrogen feed simply to force growth. For a large established bed, a soil test is a better way to decide whether any amendment is needed.
Avoid assuming that a layer of gravel at the bottom of a hole will fix poor drainage; it does not make a waterlogged site suitable. In a container, use an actual drainage hole and a free-draining potting mix. Outdoors, the practical fix is to raise the bed, improve the soil profile, or relocate the bulbs.
Set each bulb at the right depth and spacing
Use the bulb’s height as your measuring stick. A dependable general rule is to plant the bulb about three times its height, measured from the soil surface down to the base of the bulb. For a bulb about two inches tall, that puts the base roughly six inches below the finished soil line, leaving about four inches of soil above its tip. The RHS planting guidance uses the three-times-height rule; check the supplier’s instructions for unusually small or large cultivars and for heavy soils.
Set the pointed nose upward and the broader, flatter basal plate downward. If you cannot tell which end is up, place the bulb on its side; the shoot can curve toward the surface. Do not press it forcefully into compacted soil, which can damage the basal plate or roots. Measure from the final soil surface, not the bottom of a mulch layer.
Spacing depends on whether you want a dense first-year effect or a drift that fills in gradually. About four to six inches between bulb centers makes a fairly full group for many standard daffodils; wider spacing gives offsets more room to expand. Bulbs should not touch. Instead of planting a single straight row, set a cluster of several bulbs in an irregular group and repeat that group across the bed. A bulb planter works for a few bulbs, while a shallow trench is faster for a mass planting.
Design for a natural, longer-lasting display
Daffodils look more convincing in loose drifts than in evenly spaced dots. Lay out several groups along a path, beneath deciduous trees, or near a border edge, then plant the bulbs where they fall within each group. For a naturalized lawn, scatter bulbs and plant them in place rather than arranging them in a rigid grid. Choose early-flowering types in grass if you want a longer interval before the first mow.
You can stretch the spring display by mixing cultivars that flower early, in midseason, and late. Bloom weeks shift with local weather, so use the labels as a sequence rather than a promise for exact dates. Crocuses can open before many daffodils; tulips and hyacinths can overlap them; low perennials such as hostas or daylilies can hide fading foliage later. Give each plant room and keep the daffodil leaves in spring light. The BHG guide recommends mixing bloom times for a longer succession, while the N.C. Cooperative Extension planting guide describes naturalizing in lawns and woodland edges.
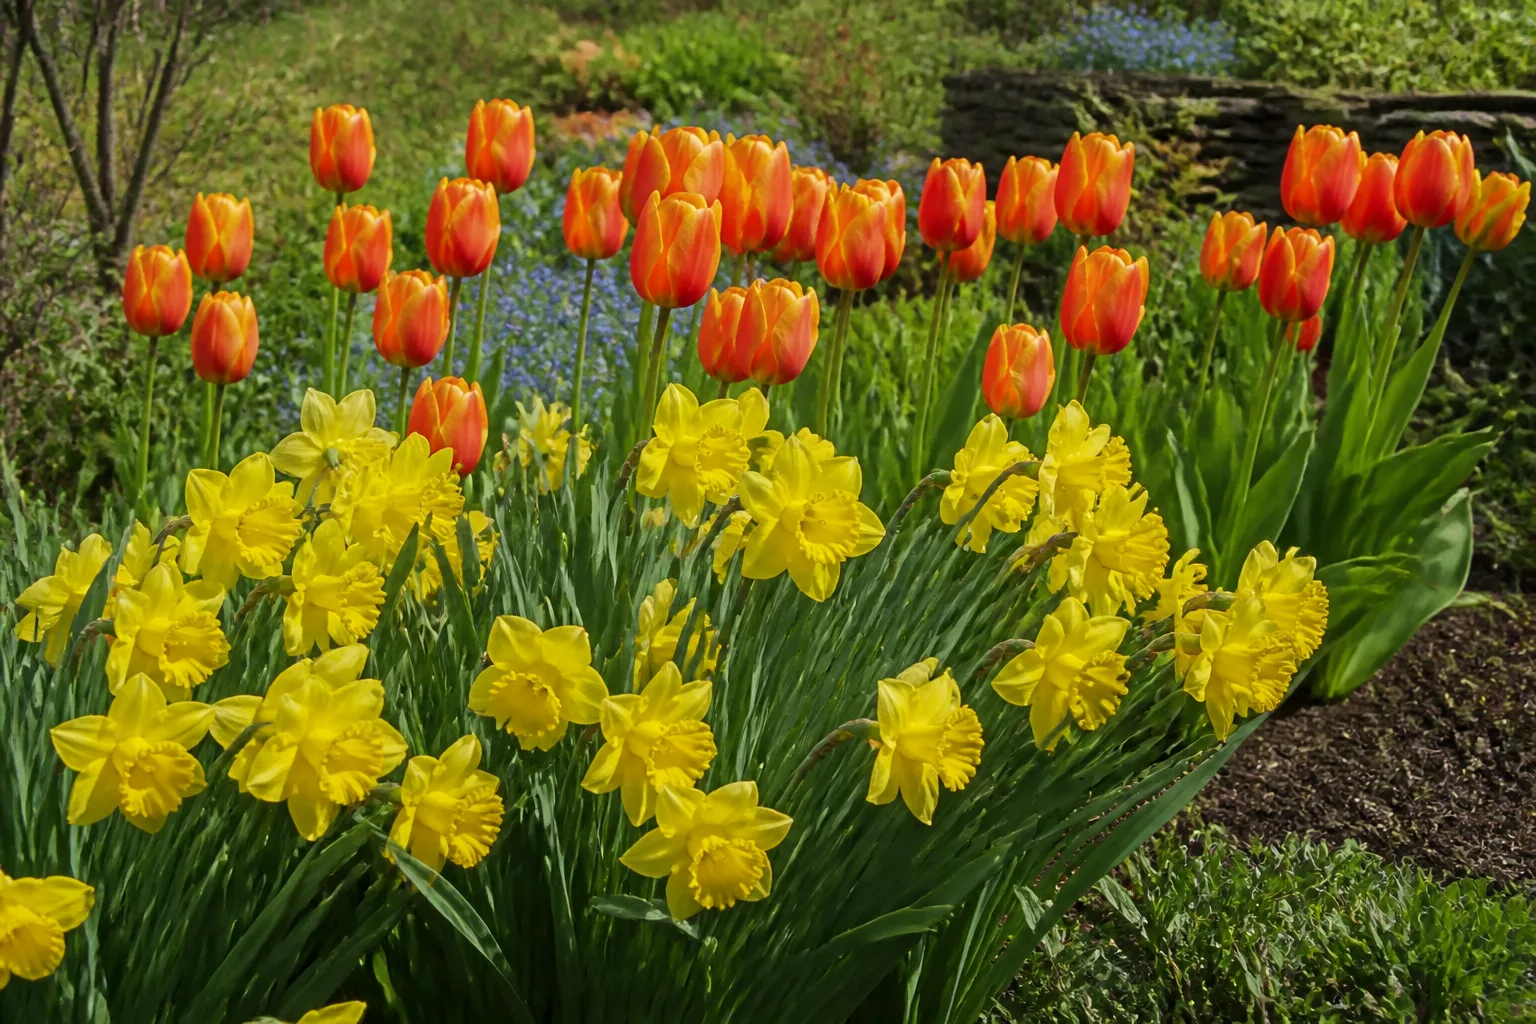
Do not pair daffodils with plants that need a constantly wet summer bed. Their bulbs are dormant after the leaves die back, and a site irrigated heavily for thirsty companions can become too wet. When in doubt, group plants with similar moisture needs and let daffodil foliage senesce before mowing or tidying the surrounding area.
Plant the bulbs in a simple sequence
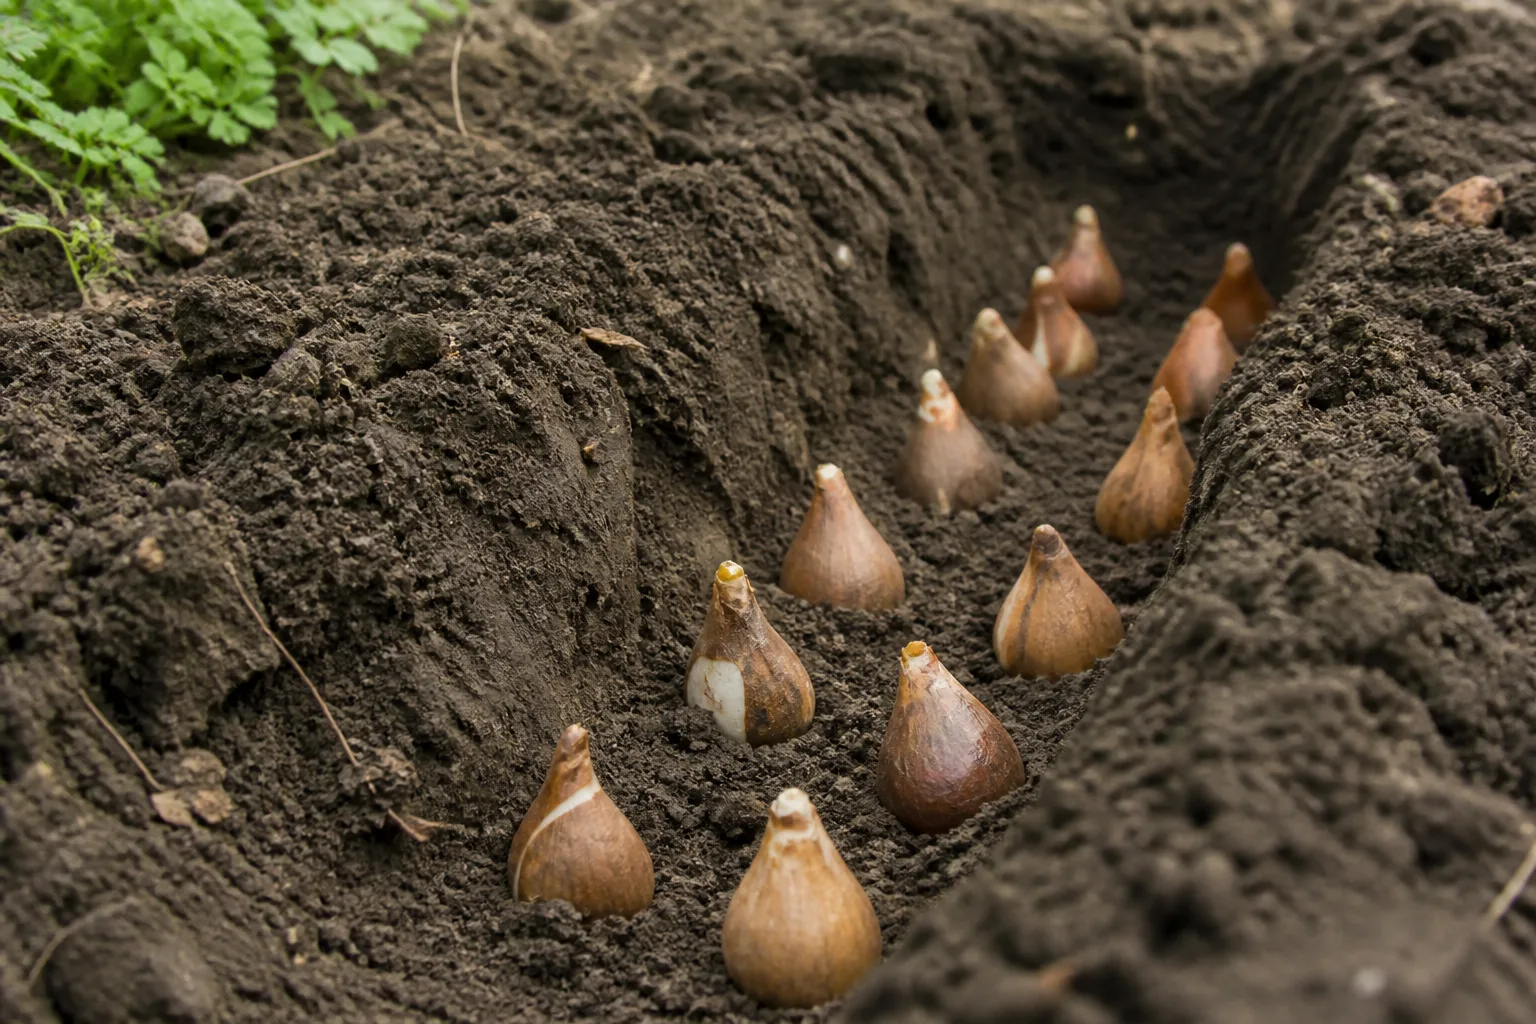
For a small planting, dig individual holes. For a dozen or more, remove a strip of soil as a trench, arrange the bulbs, then replace the soil. The trench method makes it easier to keep bulbs at an even depth and is often faster than punching one deep hole at a time. Before you begin, mark the area and make sure the final layout leaves access for spring foliage.
Set each bulb pointed end up, check that its base is at the planned depth, and space it from its neighbors. Backfill with the soil you removed, crumble large clods, and firm gently with your hand rather than stamping the bed. Water once after planting to settle soil around the bulbs and close large air pockets. If the bed is already damp from rain, a light watering is enough; the aim is moist contact, not a saturated planting hole.
If you plant several cultivars, label each group before covering it. The labels help you recognize bloom order in spring and identify which varieties do well in your site. Keep a simple note or map if labels are likely to be moved by mowing, pets, or winter cleanup. Once you have planted, leave the bulbs alone; repeated digging to check for roots can injure them.
Planting daffodils in containers
Daffodils grow in pots when the container is deep enough for the bulbs and roots and has unobstructed drainage holes. Use a sturdy, frost-resistant pot and a free-draining potting mix. A pot that is too shallow dries quickly and gives roots little room; a pot without drainage can stay cold and wet, which is a common reason container bulbs rot.
For a permanent container planting, follow the same general depth rule as in the ground and space bulbs so they are not touching. For a temporary spring display, the RHS container guidance notes that bulbs can be planted more shallowly and closer together for impact, then moved into a garden bed after flowering. That close planting is a display technique, not the best long-term spacing for a container you want to keep year after year.
Leave pots outdoors so bulbs experience the cool season they need; do not keep them in a warm living room through winter and expect a reliable spring bloom. Place the pot where excess rain can drain, and protect it from repeated hard freeze-thaw if your climate is severe by moving it to an unheated sheltered spot or insulating the container. Check moisture occasionally. Pots dry faster than garden beds, but winter rainfall can also saturate them, so water only when the mix is becoming dry rather than on a fixed schedule.
Water once, then manage moisture by conditions
After planting, water enough to settle the soil around the bulbs. In ordinary outdoor beds, autumn and winter rain usually supply the moisture roots need. If the fall is unusually dry and the soil is dry below the surface, water occasionally while the ground remains unfrozen. Once the soil freezes, stop watering; do not keep a bed constantly damp in an attempt to speed growth.
In spring, water during a long dry spell while leaves and flowers are actively growing. Container bulbs need closer attention because their mix has less volume and can dry out between rains. Use the soil as your guide: water when it is dry several inches down, then allow excess to drain away. When the leaves yellow and die back, the bulb is moving into dormancy and needs much less water.
Protect the bed without over-mulching
A light organic mulch can buffer temperature swings, slow weeds, and reduce moisture loss. Apply it after the soil has cooled, using a loose layer of shredded leaves, compost, or fine bark. Do not bury the bed under a thick, wet mat that prevents air movement or keeps the bulbs saturated. In regions with mild winters, mulch may be unnecessary; in colder sites, it can help moderate freeze-thaw cycles.
Mulch does not stop every squirrel or vole, and daffodils are not immune to animal digging. If rodents are a persistent problem, plant bulbs beneath a protective mesh or use appropriate bulb cages that still allow roots and shoots through. Avoid burying food-scented amendments such as bone meal in a bed where animals are already digging; N.C. Cooperative Extension cautions that bone meal may attract animals in its regional planting advice. Do not use a pest-control product unless its label permits that use and you can follow it safely.
Keep spring foliage long enough to recharge bulbs
When flowers fade, snip off the spent flower head if you do not want seed pods. Leave the leaves standing until they turn yellow and pull away easily, often several weeks after blooming ends. The leaves use sunlight to replenish the bulb’s stored energy for next year. Cutting them while they are still green, tying them in knots, or mowing them flat too early can reduce the next display even if the bulbs were planted perfectly.
In a lawn, delay the first cut over the daffodil patch until foliage has yellowed; if that is impractical, plant in an unmown border or choose a location where the leaves will not interfere with lawn use. In a border, let nearby perennials grow around the leaves rather than folding or braiding them. A few weeks of untidy foliage are part of the maintenance cost of a repeat spring bloom.
Decide when to divide or move established clumps
Daffodil bulbs multiply by forming offsets, so a clump can become crowded after several years. Do not dig them on a routine three-year schedule if they are flowering well. Move or divide a clump when it has stopped blooming well, outgrown its space, or needs a different location. Overcrowding is one possible cause of weaker flowering, but shade, early mowing, wet soil, and bulb depth can also matter.
Wait until the foliage has yellowed and died back, usually in late spring or early summer. Use a garden fork to loosen soil around the clump rather than pulling on the leaves. Separate offsets gently, discard any soft or damaged bulbs, and replant healthy bulbs at the proper depth as soon as possible. If you must hold them for fall, let them dry in a shaded, airy place and store them cool and dry in a breathable container; replant before the next ground freeze. The RHS guide advises dividing crowded clumps and replanting at a depth of about three bulb heights.
Troubleshoot a weak or missing first bloom
If you planted fresh bulbs last autumn and see no flowers, first check whether the foliage is healthy and whether the bed is still shaded, wet, or disturbed. Newly planted bulbs sometimes need another season to settle, especially after a late planting, but a repeated leaf-only display points to a condition that needs attention. Do not immediately add fertilizer; identify the pattern before changing the soil.
| What you see | Likely cause to check | Next step |
|---|---|---|
| Leaves but no flowers on a new planting | Late planting, small bulbs, or a mild winter unsuited to the cultivar | Let foliage mature; confirm the variety fits your region before replacing bulbs. |
| Fewer flowers each year in an older patch | Crowded offsets, increased shade, or leaves removed too early | Let foliage yellow, assess spring sun, and divide after dieback if crowded. |
| Shoots appear in fall | Planting while soil was still warm or an unusually warm autumn | Leave shoots in place; avoid trampling them and keep the bed draining well. |
| Bulbs fail, smell, or feel soft | Waterlogged soil or damaged bulbs | Remove rotten material and correct drainage before replanting. |
One season of leaves without flowers is not proof that the bulbs are dead. Keep the leaves intact, note the planting conditions, and reassess after the next bloom cycle. If the same problem repeats, change the cultivar, site, drainage, or depth rather than repeating the same planting and expecting a different result.
Conclusion
Plant daffodil bulbs in autumn when the soil has cooled but remains workable, using local weather and the expected ground freeze to refine the calendar. Choose sound bulbs, give them a sunny spring site with reliable drainage, measure depth from the base, and water after planting. In mild-winter regions, select cultivars for local conditions and ask whether pre-cooling is needed.
Then let the bulbs do their seasonal work: protect the bed from standing water, leave the foliage until it yellows, and divide only when clumps become crowded or bloom declines. Those decisions matter as much as the planting date—and they give the bulbs a better chance to return with spring flowers for years to come.



