Black Pepper Propagation: Stem Cuttings Guide
Black Pepper Propagation: Stem Cuttings Guide
Black Pepper Propagation: Stem Cuttings Guide
Black pepper propagation is a cutting project, not a seed lottery. Piper nigrum—the climbing spice vine behind kali mirch—clones from stem pieces with live nodes, because adventitious roots and new shoots form at those joints. Kew treats the species as an accepted climbing shrub of the wet tropics, historically tied to India’s Western Ghats and Sri Lanka and now grown across the humid tropics. Missouri Botanical Garden describes the same plant as a woody evergreen vine that wants part shade or bright indirect light, a support, rich well-drained mix, frequent misting, and protection from winter temperatures below about 50°F (10°C). (Missouri Botanical Garden)
That biology sets the home method: take firm green stem with two or three nodes, bury at least one node in moist (not soggy) mix, keep warmth and high humidity while roots form, then give the young vine a stake or trellis. Seeds can germinate, but seedlings are slower and more variable than a cutting that copies a vigorous parent. Indoor vines often stay foliage-first even after successful rooting—fruiting usually needs a long warm tropical season outdoors. Pair this page with the plant’s light, watering, and soil habits once roots exist; propagation only works if the new plant can live in the same filtered-light, evenly moist culture the parent needs.
Why Black Pepper Clones Best From Stem Cuttings
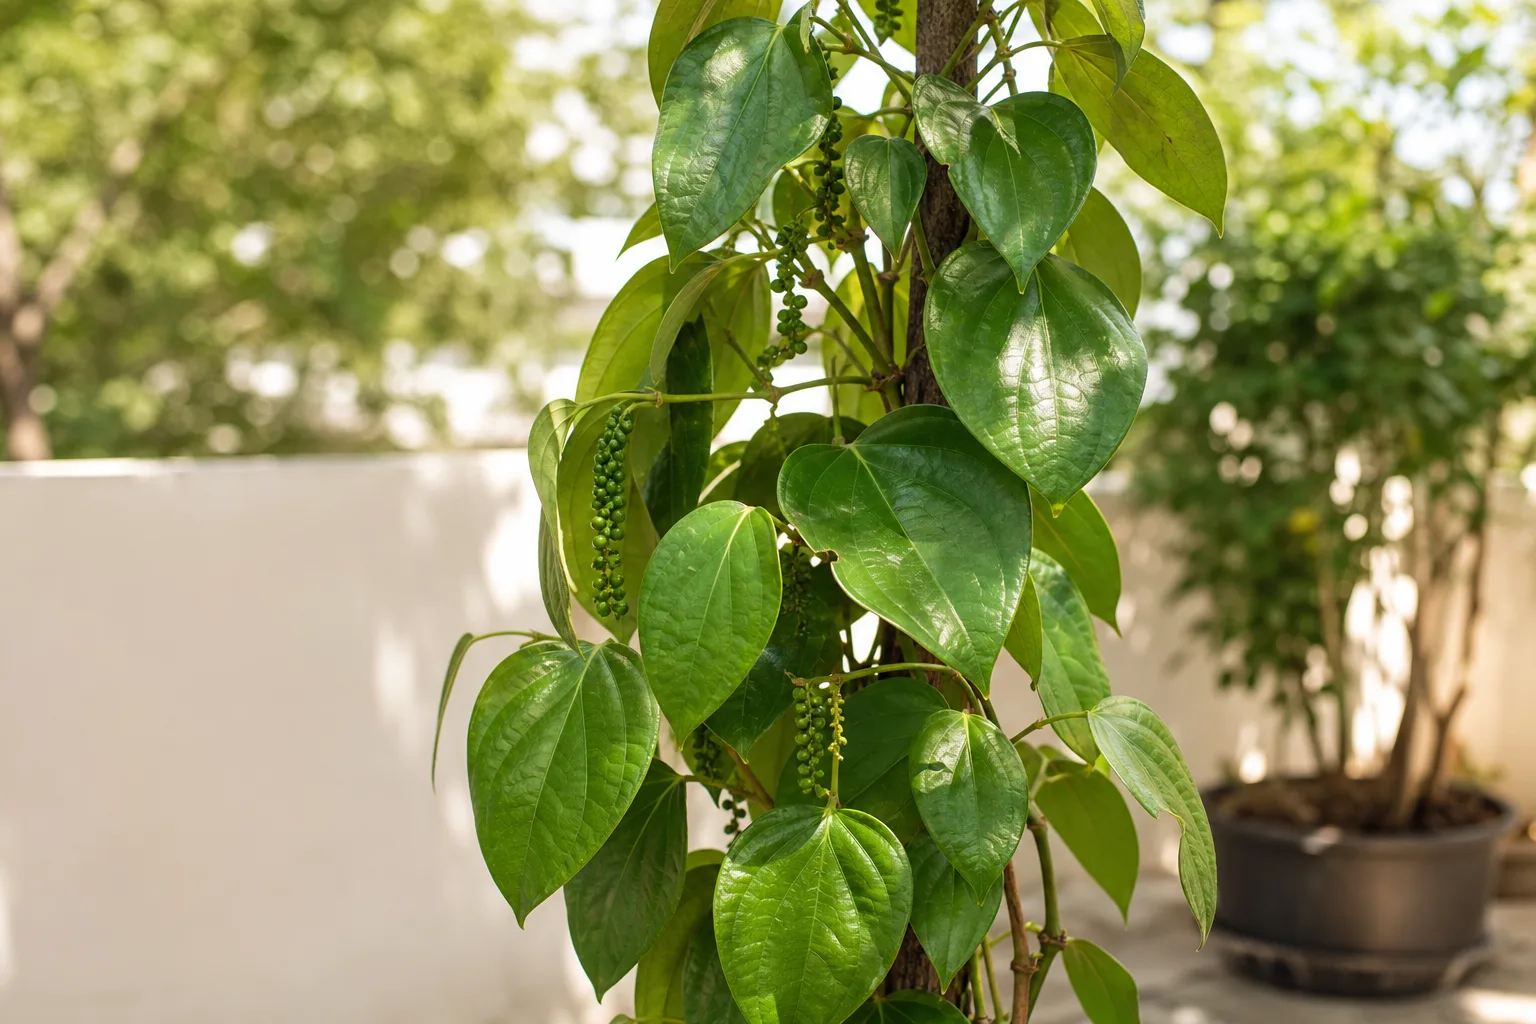
Black pepper is grown for glossy foliage and, where climate allows, peppercorn spikes. Commercial and homestead growers almost always multiply it vegetatively so each vine matches the parent line. A field survey of homestead black pepper gardens found that the large majority of farmers used stem cuttings for multiplication rather than seed. (European Journal of Agriculture and Food Sciences) Cuttings skip the genetic reshuffle of seed and start with stem tissue that already knows how to climb and cling.
At every healthy node, the vine can push new leaves, side shoots, and adventitious roots—the same clinging roots that help it grip a prop tree or moss pole. Your job is not exotic technique. It is clean cuts, node contact with moist medium, filtered light, and steady warmth without drowning the stem. Leaf-only pieces without a node will not become a new vine. Mid-internode scraps without a bud rarely help either.
Arkansas Extension lists terminal (tip) cuttings—a stem piece with one or more buds, cut just below a node—as the most common commercial houseplant method for vining plants, and notes that material should not wilt after removal. (University of Arkansas Division of Agriculture) RHS guidance for semi-ripe cuttings on climbers likewise trims just below a leaf node, because that is where new roots typically sprout. (Royal Horticultural Society) Black pepper follows that same node rule.
Orthotropic shoots vs runner wood
Pepper vines produce different shoot types. Orthotropic wood grows more upright along the main climbing axis; plagiotropic runners or lateral fruiting branches grow more sideways. Research on orthotropic shoot propagation of Piper nigrum tested cuttings with two, three, or five nodes and reported high rooting success—about 87–89% for two- and three-node pieces—especially when cuttings were treated with a PGPR powder formulation or a brief dip in 2% sugar solution. The authors recommended two-node orthotropic cuttings (without leaves) for higher nursery success in that trial system. (Journal of the Indian Society of Coastal Agricultural Research / ICAR)
Home growers can use either healthy tip wood or vigorous runner sections as long as nodes are green and firm. Orthotropic material is preferred when you want a vine that climbs a support cleanly; runner cuttings often root readily and suit foliage plants and “bush pepper” style pots. For a balcony vine, choose the greenest, least woody stems with visible nodes—and keep one or two leaves on home cuttings unless you are mirroring a bare-node nursery protocol under very high humidity.
Best Time to Propagate Black Pepper
Propagate when the parent is in active warm growth and nights stay mild. On most Indian balconies and shade houses that means late winter through monsoon—roughly February to August depending on region—when humidity rises and stem tissue roots before soft rot sets in. Homestead plantings in humid South Asia often favor July–August planting windows for new vines. (European Journal of Agriculture and Food Sciences) Match that idea to your microclimate: warm and humid beats a single calendar date.
Avoid starting cuttings in a cold dry AC room, after a cold snap below about 13°C (55°F), or when the parent is soft at the collar from waterlogging. Missouri Botanical Garden notes houseplant pepper vines are intolerant of winter temperatures below 50°F, so winter batches in temperate homes need supplemental warmth or they stall and rot. (Missouri Botanical Garden) Take cuttings in the morning when stems are firm, and prepare pots the same day.
Choosing Healthy Parent Material
Start with a vine that already shows glossy unspotted leaves, firm green nodes, and steady extension on a stake. Reject stems with sticky residue (scale or mealybugs), black soft spots at nodes, or a sour smell from the pot. Indian Institute of Spices Research work on black pepper repeatedly flags Phytophthora pressure in wet conditions—another reason not to multiply from a vine already showing collar soft rot or chronic waterlogging. (ICAR-IISR)
Prefer tips or runners that still feel slightly flexible rather than thick corky basal wood. Nodes with small aerial root nubs are a good sign: those tissues are already primed for adventitious growth. If the parent is recovering from a hard repot or a drainage failure, wait until you see new tip growth before cutting again. Propagation will not repair a mix that never dries or a plant kept in harsh midday sun—fix light and moisture first.
Stem Cutting Propagation Step by Step
Soil (or a soilless mix) is the most reliable home path because roots form already adapted to a solid medium. Use a small pot with drainage holes, a sterile or fresh mix, and a clear bag or humidity dome you can vent daily. NC State’s propagation handbook frames stem cuttings as a core asexual method: you remove a stem section with buds and provide conditions that encourage roots while the cutting still photosynthesizes. (NC State Extension)
Preparing 2–3 node cuttings
Select a healthy tip or runner and cut with sterilized shears just below a node. Aim for a piece about 10–20 cm long with two or three nodes—the range that performed well in orthotropic nursery trials. (JISCAR / ICAR) Remove the lowest leaf so one node can sit cleanly in the mix. Keep one or two upper leaves for home cuttings; if leaves are large, trim half the blade to reduce water loss without removing every photosynthetic surface.
Optional aids: a light dusting of rooting hormone (IBA) on the basal cut, or—following the coastal research recommendation—a brief dip in a mild sugar solution or a labeled PGPR formulation when available. Hormone is helpful but not mandatory if warmth and humidity are right. Do not let cuttings wilt on a hot windowsill before potting; Arkansas Extension stresses keeping terminal cuttings from drying out after removal. (University of Arkansas Division of Agriculture)
Soil mix, humidity, and light while rooting
Use a fertile but open mix similar to the parent’s container blend—something that holds moisture without turning anaerobic. A practical rooting media is peat-free potting mix or coco coir blended with perlite or coarse sand so water drains freely, in the spirit of RHS cuttings compost that pairs potting mix with sharp sand for drainage. (Royal Horticultural Society) Insert the cutting so at least one node is buried, firm the mix gently, and water until a little drains—then stop.
Place the pot in bright filtered light—the same dappled or bright-indirect placement Missouri Botanical Garden recommends for the species—not harsh midday sun that cooks a leafless-looking cutting. (Missouri Botanical Garden) Cover loosely with a clear bag or dome to hold humidity near 60–80%+, vent daily for airflow, and keep temperatures in the comfort zone around 23–32°C (73–90°F) when you can. Mist foliage lightly if the air is dry, but never leave the mix waterlogged.
Expect three to eight weeks before a gentle tug shows resistance or new tip growth resumes in warm humid conditions. Cool rooms stretch that timeline. Do not yank the cutting weekly to “check roots”; look for firm stems, new nodes, and a pot that dries on a sensible rhythm instead.
Water Rooting as a Secondary Option
Water rooting works for curious growers who want to watch roots form, but soil rooting is still the better default for long-term establishment. Submerge one clean node in room-temperature water, keep leaves above the waterline, change the water every few days, and keep the jar in bright indirect light. Pot up when roots are about 2–5 cm long into the same well-draining mix you use for soil cuttings, then keep humidity high for a week so water-grown roots can adjust.
If the submerged stem turns mushy or the water smells sour, discard and restart in fresh mix. Water culture hides early soft rot less well than soil once you are attentive—but it also invites bacteria if you forget water changes. Treat water as a teaching tool, not the only path.
Growing Black Pepper From Seed
Seeds are possible but rarely the best home route. Fresh peppercorns (not heat-treated kitchen spice) can germinate, yet seedlings are slower, less uniform, and will not clone a favorite vine’s habit the way a cutting does. Kew notes that Piper nigrum seed collections are held for conservation and research, which underscores that seed is a genetic resource—not the standard nursery clone path. (Kew POWO)
If you try seed anyway, sow in a warm, sterile, free-draining seed mix, keep evenly moist, and protect seedlings from the cool wet conditions that favor damping-off fungi such as Pythium and Phytophthora. NC State Extension stresses sanitized trays, good drainage, and avoiding chronically wet, crowded seedbeds. (NC State Extension) For almost every home goal—sharing a plant, filling a second pot, or replacing a tired vine—cuttings win.
Aftercare: Support, Water, and First Months
Once roots hold and a new tip extends, treat the plant as a young black pepper vine, not as a cutting forever under plastic. Remove the humidity dome gradually over several days. Give it a bamboo stake, trellis, or moss pole early so adventitious roots can cling; Missouri Botanical Garden notes the species needs a support structure such as a wooden frame or prop tree. (Missouri Botanical Garden)
Water when the top 2–4 cm of mix feels dry but the pot is not bone-dry for days—follow the same evenly moist pattern described in the watering guide. Keep filtered light and high humidity; dry AC air browns tips fast. Hold fertilizer until you see steady new nodes, then feed lightly per the fertilizer guidance. Move up only one pot size when roots fill the starter container—see repotting rather than jumping into a huge tub that stays wet.
Indoor plants often remain foliage plants after propagation. Do not expect peppercorn spikes in a cool apartment; that is a climate limit, not a propagation failure. Train new growth onto the support every couple of weeks as the vine climbs, and prune only after the plant is established—see the pruning page for shaping mature vines.
Common Propagation Failures and Fixes
Soft, black base with a sour smell usually means the mix stayed saturated while the cutting had no roots. Trim to firm green tissue, restart in fresher, freer-draining mix, and water less often while humidity stays high in the air rather than in the pot. Chronically wet media also invites damping-off and foot-rot organisms; NC State’s damping-off guidance emphasizes drainage, sanitation, and reducing wetness once trouble starts. (NC State Extension)
Firm stem but no roots after six weeks often means the buried section had no live node, light was too dim, or temperatures were too cool. Restart with a fresher tip and confirm a node is underground. Yellow collapse under a sealed bag points to heat cooking the cutting or zero airflow—vent daily and move out of direct sun.
Mealybugs or aphids on new growth transfer from dirty parent stock. Quarantine cuttings, wipe pests early, and never multiply from an infested vine. If the parent had Phytophthora-style collar wilt, do not take cuttings from that plant; fix drainage and culture first using the overview and watering pages.
When to use this page vs other Black Pepper guides
Use this page when you are multiplying a healthy vine or restarting from a salvageable tip. It covers cutting selection, node rules, rooting conditions, seed limitations, and the first weeks after roots form.
Switch to other guides when the question is not “how do I make more plants?”:
- Black pepper overview — identity, placement, and whole-plant expectations
- Light — window, balcony shade, and scorch vs legginess
- Watering — moisture rhythm once roots exist
- Soil — mix recipes and drainage
- Fertilizer — feeding after establishment
- Repotting — upsizing rooted plants
- Pruning — training and cutting back mature vines
If a cutting fails because the mix never dries or the parent was already rotting, fix culture before you take another batch of cuttings.
Related Black Pepper guides
- Black Pepper care overview — start here for placement and growth habit
- Black Pepper light needs — filtered light for parents and cuttings
- Black Pepper watering — evenly moist without waterlogging
- Black Pepper soil mix — drainage that protects new roots
- Black Pepper fertilizer — light feeding after new growth
- Black Pepper repotting — moving rooted cuttings up a size
- Black Pepper pruning — training established vines on supports
Conclusion
Black pepper multiplies most reliably from stem cuttings with two or three live nodes, rooted in warm, humid, filtered light with moist but never stagnant mix. Orthotropic tips climb supports cleanly; healthy runners also root well for foliage plants. Seeds work slowly and unevenly, so use them only for experiments. Give every new vine a stake early, keep the same evenly moist culture the species demands, and treat soft rot as a drainage problem—not a reason to water more. Once roots hold and a tip extends, you are no longer propagating—you are growing black pepper.