Parijat Repotting Guide: Pot, Soil and Aftercare
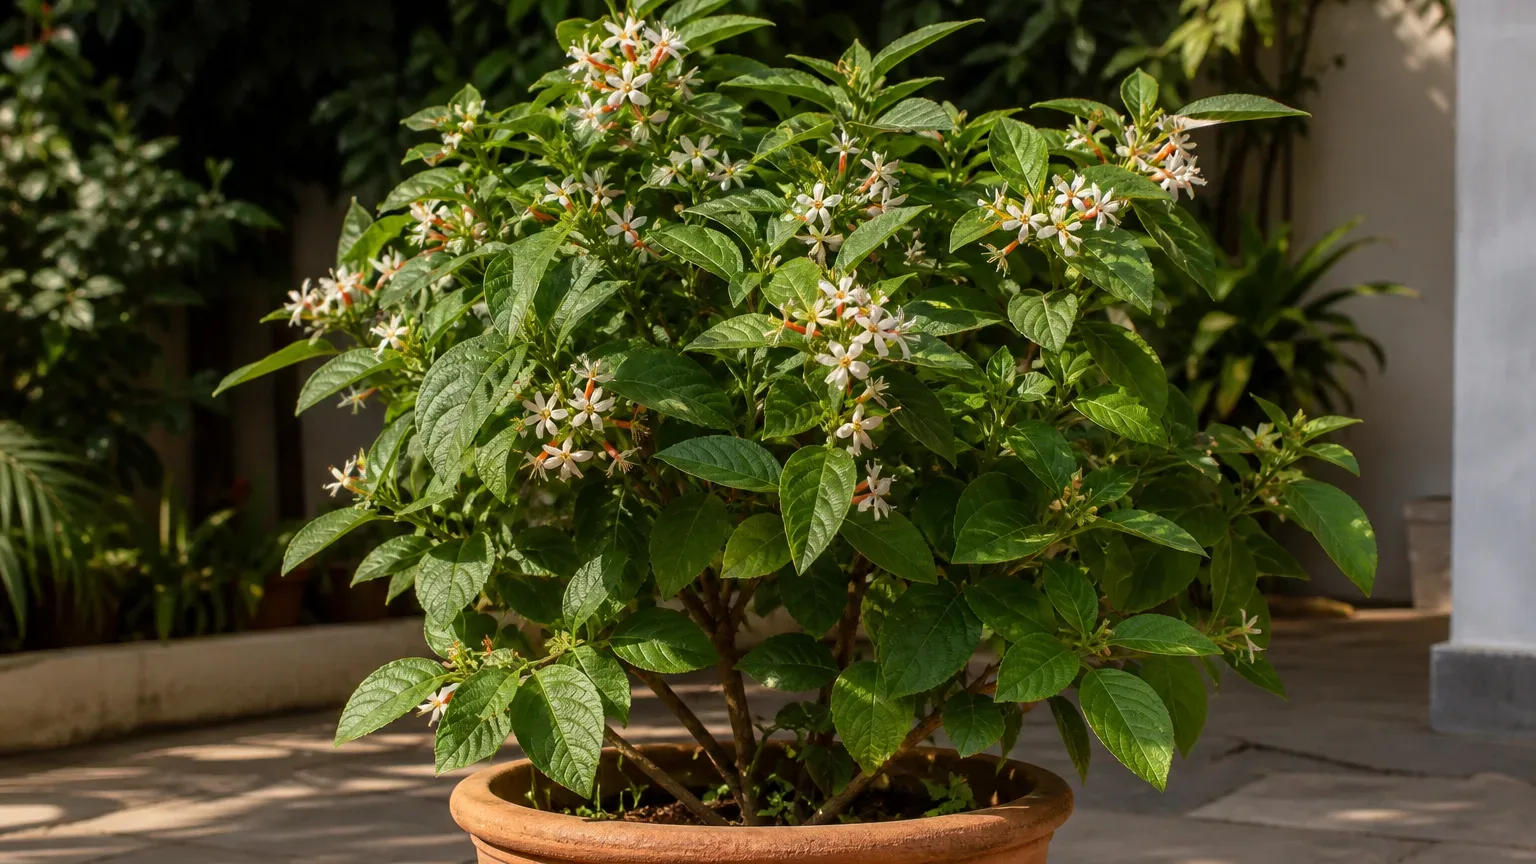
Parijat Repotting Guide: Pot, Soil and Aftercare
Parijat Repotting Guide: Pot, Soil and Aftercare
A Parijat that needs repotting rarely needs the largest container you can lift. This is a woody shrub or small tree, not a true jasmine vine, and the Singapore National Parks species profile describes Nyctanthes arbor-tristis as a full-sun plant with moderate water needs. In a container, its canopy can become large and top-heavy while the root system still benefits from a measured increase in soil volume.
The practical goal is to restore space, drainage and stable moisture without surrounding the roots with a deep reservoir of wet mix. Repot when the root ball or old soil gives you a reason, move up one useful pot size, keep the trunk at its original depth, and make only the changes the plant actually needs.
Why repotting Parijat requires restraint
Parijat naturally develops into a substantial shrub or small tree; Pha Tad Ke Botanical Garden records a potential height of about 10 m in the ground. A container limits that growth, which is useful on a balcony or terrace, but it also means roots eventually circle the wall, consume the organic fraction of the mix and leave less buffering against hot-weather drying.
Repotting corrects those constraints, yet it also breaks fine feeder roots and changes the amount of water held around them. The RHS notes that trees and shrubs kept in pots for years are especially vulnerable as compost loses its structure. Its repotting guidance says lifting the root ball is the best way to confirm congestion, an evidence-first approach that suits Parijat better than automatic annual potting.
The quick answer: when to repot
Check a young, actively growing Parijat each year, but expect a full repot roughly every two to three years rather than every season. Repot sooner when roots form a dense spiral around the bottom, emerge through several drainage holes, lift the root ball, or leave so little mix that water races down channels and exits almost immediately.
Late winter to early spring, just before a strong flush of growth, is the safest planned window. Choose a pot about 5–8 cm wider than the old one for a medium or large woody specimen, use fresh porous soil, and keep the root crown at the same height. If the plant is healthy and the root ball is only lightly occupied, put it back and wait.
Repot by evidence, not only the calendar
Roots visible at one drainage hole do not prove that Parijat is pot-bound. Slide the plant out when the root ball is slightly moist: a congested plant shows a firm outer mat with roots repeatedly circling the base and sides. The RHS warns that spiralling roots and roots growing through drainage holes can interfere with drainage and contribute to root problems.
Other signals need context. Slow growth during cool weather, brief seasonal leaf drop, or sparse flowering in shade is not a repotting diagnosis. First compare light with the Parijat light guide, moisture with the Parijat watering guide, and feeding with the Parijat fertilizer guide. Repot only when the container, roots or degraded mix is part of the problem.
Old mix can justify repotting even before roots are tightly packed. Replace it if it has collapsed into a dense mass, remains sour and wet long after watering, repels water when dry, or carries persistent mineral crust despite flushing. These conditions reduce the useful balance of moisture and air that roots need.
Choose the best season in India
For most Indian growers, late winter to early spring is a reliable target because temperatures are rising but severe pre-monsoon heat has not arrived. Visible bud movement is more useful than a fixed month: repot shortly before or as fresh shoots begin, when the plant can rebuild roots under warm, lengthening days. The RHS likewise identifies spring, as plants start into growth, as the general best time to repot.
Avoid the hottest part of a dry inland summer unless the root system is in immediate danger. Avoid a spell of continuous monsoon rain too, because fresh mix may remain saturated while damaged roots have reduced water uptake. In humid coastal climates, you can repot during a mild growth period if the plant has shelter from heavy rain and the pot drains freely.
When not to repot Parijat
Do not repot immediately after purchase merely to replace an unattractive nursery container. Let the plant adjust to its new light and watering rhythm unless the pot has no working drainage, the mix smells rotten, or roots are failing. Changing location, sun exposure and root conditions together makes later symptoms difficult to diagnose.
Delay a routine move if Parijat is wilted from drought, actively dropping leaves after relocation, heavily infested, or carrying a full flower flush you want to preserve. Correct the urgent stress first. Emergency repotting remains justified when the root zone is persistently waterlogged or decay is advancing; waiting for an ideal season will not repair dying roots.
Choose the next pot
Select the next container according to the root ball, not the canopy. A healthy medium specimen usually needs an internal diameter only 5–8 cm greater than its current pot. A very small plant needs a smaller increase. This leaves enough fresh mix for root extension without creating a broad wet zone that the existing roots cannot use quickly.
The RHS explanation of overpotting describes the risk of placing a plant in a container that is too large, especially when growth is slow: excess compost stays wet, oxygen becomes limited and roots can rot. Do not jump from a 25 cm nursery pot to a 45 cm decorative planter because the crown looks large.
Drainage, material and stability
Use at least one unrestricted drainage hole; several holes are better in a broad pot. USDA container-gardening guidance also prioritizes a container with good drainage. Cover large holes with rigid mesh or a pottery shard only to retain mix, never with a sealed layer, and do not rely on gravel at the bottom to compensate for a pot without an outlet.
Terracotta dries faster and adds useful weight on a sunny terrace, but it demands closer watering in hot wind. Plastic retains moisture longer and is easier to move. For a tall Parijat, choose a wide, heavy base or place the draining nursery pot inside a stable cachepot, removing it for watering so runoff never remains trapped.
Use a fresh, airy soil mix
A practical Parijat container mix is 40% quality potting soil or screened loam, 30% mature compost and 30% coarse aeration material such as perlite, fine bark or washed coarse sand. Adjust the coarse fraction upward in humid, rainy conditions or for a plastic pot; reduce it slightly in very hot, dry locations where terracotta dries within a day. The finished mix should crumble when moist rather than smear like clay.
Root systems need both water and oxygen. Virginia Cooperative Extension explains that a good medium should be porous enough for aeration and drainage while retaining water and nutrients. Garden clay alone compacts in a pot, while a very compost-heavy recipe can slump and remain airless after repeated watering.
For more detail on ingredients and drainage behavior, use the Parijat soil guide. Moisten the new mix before use until it is evenly damp but not dripping; dry mix is difficult to settle evenly, while saturated mix makes it easy to overwater damaged roots.
Prepare the plant and workspace
Water a dry Parijat one day before the move so the root ball holds together, but do not soak already-moist soil. Gather the cleaned pot, damp fresh mix, gloves, mesh, a bamboo stake, soft ties and disinfected pruners. Large woody plants are safer with a second person supporting the trunk and pot.
Spread the canopy gently and tie branches loosely if needed. Never lift Parijat by its trunk alone. Lay a stubborn pot on its side, tap the wall and ease out the intact root ball; cut a disposable nursery pot rather than tearing roots by force.
Step-by-step: how to repot Parijat
- Confirm that the new pot drains, then add enough mix to keep the root crown at its former level.
- Slide out the root ball and inspect all sides in bright shade.
- Tease only the dense outer and bottom layer. Do not strip away healthy soil from every root.
- Cut dead, black, hollow or mushy roots back to firm tissue with clean pruners.
- Centre the plant upright. Backfill in small amounts, working mix into large voids without compacting it hard.
- Keep the trunk flare and old soil line visible; burying woody stem tissue can hold moisture against it.
- Water once to settle the mix, let the pot drain fully and add a little mix only where settling exposed roots.
- Stake a wobbly plant with soft ties, then move it to protected bright light for initial recovery.
Inspect and manage the roots
Healthy Parijat roots should feel firm rather than slippery and smell earthy rather than sour. Pale new roots and tan older woody roots can both be normal. A few circling roots can be directed outward; a hard mat may need several shallow vertical cuts so new roots do not continue following the old pot wall.
Be conservative. Transplant stress follows root loss because the reduced root system temporarily supports the same canopy. The South Carolina Forestry Commission explains this root-to-shoot imbalance for transplanted trees; a pot-grown Parijat experiences it on a smaller scale when roots are heavily cut. Remove decay, congestion that cannot be teased apart, and little else.
Keeping a mature Parijat in the same pot
When the plant has reached the largest manageable container, repotting does not have to mean moving up again. The RHS describes replanting into the same container after compost refreshment or root pruning as a valid option. Remove the plant in early spring, trim a modest, even layer from the outer and lower root ball, replace exhausted mix, and return it at the same depth.
Do not combine severe root pruning with hard canopy pruning, heat exposure and fertilizer. For an old or valuable specimen, divide the work across seasons or ask a local horticulturist to assess the root ball. Top-dressing the upper few centimetres with fresh mix in non-repot years is a lower-stress way to replenish the surface.
Watering and placement after repotting
Water once after a routine repot so fresh mix contacts the root ball, then empty the saucer. Check 3–5 cm below the surface before watering again; a larger pot usually dries more slowly than the old one. Do not continue the pre-repot calendar as if the soil volume had not changed.
Keep Parijat in bright shade or gentle morning sun for roughly a week, then return it gradually to its normal sunny placement. Protect it from harsh afternoon heat, strong wind and pounding rain while fine roots recover. Do not fertilize immediately; wait for clear new growth, then resume the light feeding pattern in the Parijat fertilizer guide.
Read the recovery signs
A small amount of drooping or leaf drop can follow root disturbance, especially if repotting coincides with hot weather. Stable stems and buds, mix that dries progressively, and fresh shoot expansion over the following weeks indicate recovery. Avoid “helping” with repeated watering or fertilizer when the root zone is still moist.
Persistent wilt in wet soil, a sour smell, a soft stem base or rapidly blackening roots are not normal settling. Waterlogged roots lose access to oxygen; Missouri Botanical Garden’s overwatering guidance links saturated soil with root injury, yellowing and wilt. Inspect drainage and roots instead of adding another drink.
Emergency repotting for wet or rotting roots
Move a failing plant out of saturated mix immediately, whatever the season. Wash or tease away only enough soil to locate damage, cut soft dark roots to firm tissue, and clean the pot before reuse. Repot into a smaller or same-size draining container if root loss has substantially reduced the root ball; a large pot would keep too much mix wet around the remaining roots.
Use fresh porous mix, keep the plant warm in bright shade and water cautiously after the initial settling drink. Do not promise a fixed recovery time. Survival depends on how much firm root and stem tissue remains, and a plant with decay extending into the trunk may not recover.
When to use this page vs other Parijat guides
- Use the Parijat overview for identity, placement and whole-plant care priorities.
- Use the Parijat soil guide to compare mix ingredients and drainage problems before changing containers.
- Use the Parijat watering guide when the pot size is suitable but moisture timing is wrong.
- Use the Parijat light guide when sparse growth or poor flowering may come from shade rather than root congestion.
- Use the Parijat propagation guide when your goal is to make a new plant, not maintain the existing root ball.
Related Parijat guides
- Parijat care overview — the starting point for its outdoor light, warmth and flowering habit.
- Parijat watering — how to judge dryness in the new container.
- Parijat soil — detailed mix choices for wet monsoons and hot terraces.
- Parijat fertilizer — when to restart feeding after roots recover.
- Parijat pruning — canopy management for a mature container shrub.
- Parijat propagation — seed and cutting methods for additional plants.
Conclusion
Successful Parijat repotting is a measured root-zone upgrade, not a yearly ritual. Confirm congestion or failing mix, work just before active growth when possible, increase the pot by one useful size and preserve the original planting depth. A stable container with free drainage matters more than decorative scale.
Use a loose mix that balances moisture with air, disturb healthy roots as little as possible and let the larger pot change your watering rhythm. After the move, protect the plant from weather extremes, withhold fertilizer until growth resumes, and treat wet-soil wilt as a reason to inspect rather than water. Those choices give this woody South Asian shrub the room it needs without exchanging root restriction for waterlogging.