How to Prune Peas: Harvest Cuts, Vine Cleanup & Pod Timing
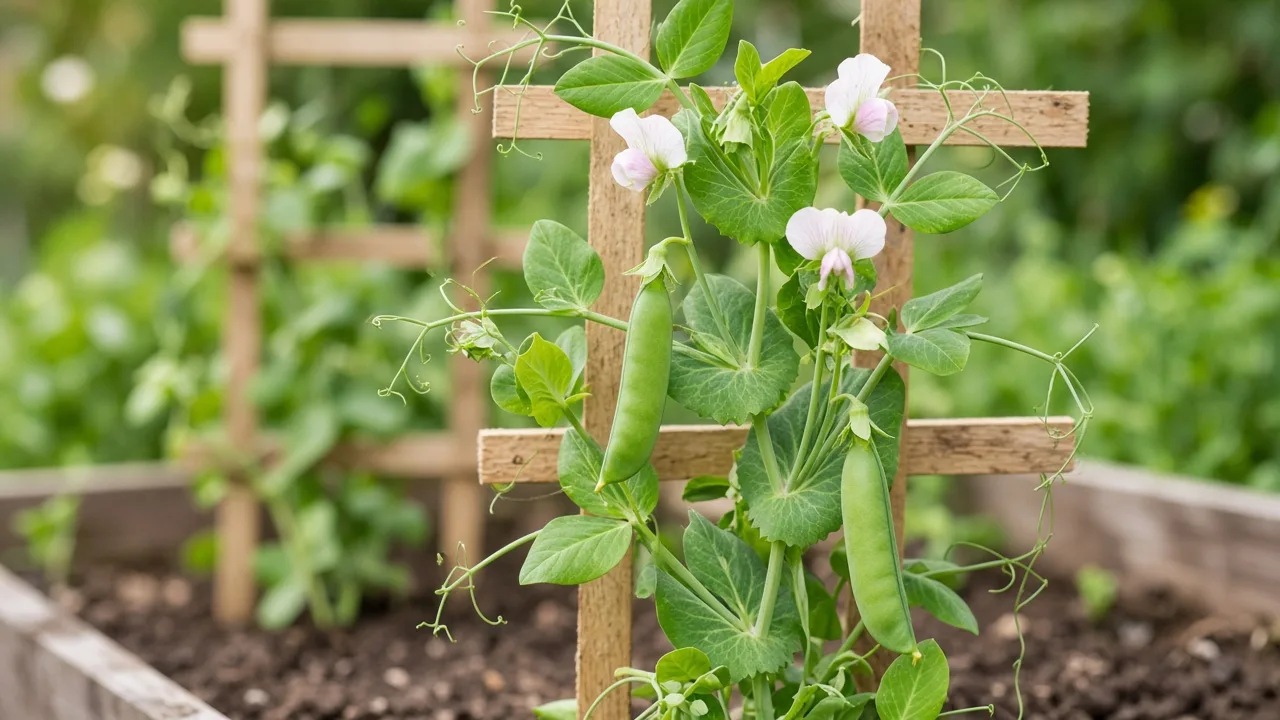
How to Prune Peas: Harvest Cuts, Vine Cleanup & Pod Timing
How to Prune Peas: Harvest Cuts, Vine Cleanup & Pod Timing
First, remove only dead, yellow, or clearly diseased leaves—and any stems coated in powdery mildew or heavy aphids—with clean scissors or snips. Work from the bottom of each vine upward, bagging failing tissue instead of composting it beside healthy rows. Do not pick kitchen pods or pinch shoot tips until that sanitation pass is done and you know whether any plants are being saved for dry seed.
Garden peas (Pisum sativum—matar, shelling peas, snow peas, sugar snap peas) are fast annual legumes, not woody shrubs you reshape year after year. Home “pruning” is really harvest discipline, vine sanitation, trellis training, optional shoot harvest, and end-of-season cleanup: you pick pods on schedule so vines keep flowering, open dense stands for airflow, tie climbers to supports installed at sowing, and cut spent plants at the crown when the cool-season crop is finished. For sowing windows, trellis height, and variety choice, start with the Peas overview.
Quick answer
After failing tissue is gone, harvest pods every few days at the stage that matches your type—NC State Extension notes that garden, snow, and snap peas differ in when pods and seeds are best eaten, and that sweetness drops quickly once pods are picked. RHS guidance stresses that if you stop picking, plants stop producing flowers and pods; work from the bottom of the vine upward as lower pods mature first. Light canopy cleanup removes mildewed or yellow leaves to improve airflow, but avoid stripping healthy foliage during active flowering. Pruning cannot fix summer heat, waterlogged soil, or shade—stabilize Peas light and watering before expecting a thinned vine to refill with pods.
What pruning does for peas
Unlike perennial ornamentals, pea cuts serve four practical jobs:
Sanitation removes yellow leaves, powdery-mildewed foliage, and aphid-heavy tips before problems spread on crowded vines. Harvest cuts detach pods at the stem, signaling many cultivars to set more flowers when picks stay frequent. Spacing management thins overcrowded seedlings so stems do not mat together in damp weather. Season-end removal clears finished vines so you can rotate the bed and sow a warm-season crop.
NC State Extension recommends growing vining types on a trellis or fence to minimize disease—training is part of pruning judgment because tangled, soil-touching vines hold humidity. RHS adds that generous row spacing and sturdy supports improve air circulation, which helps deter powdery mildew on leaves and pods in warming weather.
Pruning cannot substitute for sowing too late into heat—NC State notes that peas stop growing when temperatures rise above about 85°F (29°C)—or for heavy nitrogen feeding that pushes leaves over pods. Match cuts to the crop goal: kitchen harvest versus dry seed—seed crops need pods left to mature on the plant, not weekly kitchen picks.
Shelling, snow, and snap peas — different “cut” targets
| Type | What you are cutting | Ready signal | Regrowth expectation |
|---|---|---|---|
| Garden (shelling) peas | Whole pods | Pods well filled; peas sweet but not starchy | Repeated picks for weeks in cool weather |
| Snow peas | Flat pods | Pods ~7.5 cm (3 in) long, peas just starting inside | Frequent picks; tender pods do not store long |
| Sugar snap peas | Crisp pods + seeds | Pods plump but still snap cleanly | Same as snow; pick before strings toughen |
| Pea shoots (optional) | Top 5–10 cm of young tips | Plants 10–15 cm tall for shoot-only sowings | May re-sprout once if you cut ~2.5 cm above the base |
NC State also notes that flowers and the top ~6 inches (15 cm) of shoot tips are edible on garden peas—distinct from the pod harvest that drives most kitchen production.
Garden pea vs ornamental sweet pea
Do not apply this page to ornamental sweet pea (Lathyrus spp.), which is a different genus with separate poison-control listings. Edible Pisum sativum is a human food crop, not verified pet forage—bag trimmings if animals chew houseplants, especially where seed was fungicide-treated. The Peas overview separates matar from look-alike sweet pea seed packets.
When to prune or harvest peas
Best window for pod harvests
Peas are a cool-season crop. Sow and harvest during the local cool window so vines can flower and set pods before sustained heat—growth and flowering slow as temperatures climb past roughly 21°C (70°F) and shut down near 29°C (85°F) on many sites (NC State Extension). In hot lowlands, that often means winter or very early spring sowing so picks finish before summer.
Begin pod harvests once fruit on lower nodes reaches the right size for your variety. RHS advises harvesting every few days and working up the plant as upper pods size up. Gardening Know How echoes steady picking so plants stay productive through the cool season.
What you can remove anytime
Yellowing lower leaves, frost-nipped tips, and stems with obvious powdery mildew or aphid clusters can be removed whenever you see them—preferably on dry mornings so wet foliage is not splashed around. NC State lists aphids and powdery mildew as common issues; removing a limited infected shoot early is safer than waiting until the whole row is coated.
Defer heavy leaf stripping if seedlings are still establishing, soil stays waterlogged, or vines are heat-stressed and wilting despite moist soil. Stabilize Peas soil drainage and watering first, then resume cleanup.
When to stop cutting for seed
On plants reserved for dry seed, stop pod harvests once pods begin to yellow and dry on the vine. Removing green pods for the kitchen steals energy from seed fill. Finish seed crops by uprooting or cutting mature plants after pods are fully dry—not by repeated tip pruning.
End-of-season cut
When harvests end, RHS recommends cutting plants down to the base and composting healthy residue. That clears trellis space and reduces carryover of aphids and mildew on old vines. Follow with a non-legume crop in rotation, as noted on the Peas propagation guide.
What to check before you cut
Inspect the bed or container in good light:
- Variety and goal — shelling vs snow/snap vs shoot-only vs seed; label rows if you grow more than one.
- Pod stage on lower nodes — are kitchen-ready pods present, or are you only seeing flowers?
- Stem bases — soft, darkened crowns near wet soil suggest rot; fix drainage before aggressive harvest traffic.
- Leaf coating — white powder on upper leaves signals mildew; yellow-only lower leaves may be normal senescence, not a cue to strip the vine bare.
- Support integrity — are climbers tied to the trellis, or are vines pulling stems sideways?
- Tool cleanliness — wipe blades with 70% isopropyl alcohol if you recently cut diseased legumes.
Plan the session before you cut. Peas are annuals with one productive cool-season window per sowing; repeated picks work only while weather and plant vigor cooperate.
Tools and handling
Use sharp scissors, harvest snips, or small bypass pruners for clean stem cuts. Dull blades crush tender pea stems and slow regrowth on shoot crops. Carry a bucket for pods and a separate bag for diseased trimmings.
Old Farmer’s Almanac notes that peas want full sun and cool roots—harvest in the morning when pods are crisp, and avoid handling vines when foliage is wet from irrigation or rain.
Wash pods soon after picking; sweetness fades quickly off the vine (NC State Extension).
The first cut to make
On a vine headed for the kitchen, snip one clearly failing leaf or short stem segment at its base after your eyes confirm the rest of the plant is worth keeping. If the whole shoot is mildewed or aphid-coated, remove that shoot back to a healthy node and bag it.
Do not start by pinching every growing tip or harvesting every visible pod in the first pass—mixed sanitation and heavy harvest in one rushed session hides whether vines are actually healthy enough to keep producing.
If the row is overcrowded, the first action may instead be thinning: cut weak duplicate seedlings at soil level to open airflow, then return for pod picks once survivors stabilize.
How to prune peas step by step
1. Sanitation pass (any growth stage)
- Work on dry foliage when possible.
- Remove yellow, brown, or mildew-coated leaves at the petiole base.
- Cut out aphid-heavy tips; rinse is not a substitute for removing heavily infested tissue.
- Bag diseased material; compost only healthy vine residue.
2. Pod harvest — the main recurring “prune”
- Start at the lowest ripe pods and move upward (RHS).
- Hold the pod and cut or snap the stem just above the pod, leaving the vine intact.
- Pick shelling peas when pods are full but peas are still sweet; pick snow and snap types while pods are tender and bright green.
- Harvest every two to three days in peak season—longer gaps let pods over-mature and slow flowering.
- Refrigerate promptly; quality drops within days for many types (NC State).
3. Trellis training (climbing types)
- Gently tuck new tendrils into netting or twine—do not tear tendrils off unless they are wrapping neighboring plants into a mat.
- Tie only loose, sliding loops on soft stems; peas do not need tight strapping.
- Redirect vines that block air at the row center; aim for an open column up the support.
4. Optional pea shoots
For shoot crops or a small salad garnish from pod plants, snip the top few inches of tender growth with scissors. RHS warns not to take too many shoots from pod plants because it can reduce cropping—reserve shoot-heavy cutting for dedicated shoot sowings, and leave plenty of leaf area on vines you need for pods.
On shoot-only trays, cut stems about 2.5 cm (1 in) above the base; a second flush may follow if light and moisture stay steady.
5. End-of-season removal
When pods stop forming and vines yellow in heat, cut plants at soil level, clear trellis netting, and compost healthy tops away from next year’s pea row.
How much you can safely remove
Pods: Pick every ready pod each session—that is desirable, not risky, while weather stays cool.
Leaves: Limit canopy cleanup to failing tissue only during flowering and pod fill. Removing large amounts of healthy leaf area during active production steals photosynthate from pod development.
Shoot tips: On dual-purpose vines, treat shoot harvest as a light garnish—never strip the top growth from every plant in one day.
Seedlings: When thinning, remove only the weakest duplicates until plants stand roughly 5–7.5 cm (2–3 in) apart in the row (adjust to seed-packet spacing for your cultivar).
If vines look pale, sparse, or drop flowers after a heavy cut, pause structural work and review Peas fertilizer—excess nitrogen often shows up as leafy vines with few pods.
Where to cut
- Yellow or diseased leaves: at the petiole base where the leaf meets the stem.
- Infected shoots: back to the first healthy node or main stem junction; bag the removed section.
- Kitchen pods: at the pod’s stem, leaving the vine and any smaller upper pods in place.
- Crowded seedlings: straight across at soil level—do not tug and disturb neighboring roots.
- Spent season vines: within a centimeter of the soil line once production is finished.
Avoid cutting into woody-looking lower stems on mature vines unless removing the entire dead shoot; peas are herbaceous, but crushing thick stems invites rot at the wound.
What not to cut
- Every growing tip at once on vines you still need for pods—side branching is limited compared with tomatoes; energy is already allocated to flowers.
- Open flowers and tiny pods unless you are deliberately reducing yield.
- Main climbing stems during peak harvest unless the stem is clearly broken or diseased along its full length.
- Healthy tendrils that are actively attaching to the trellis—removing them increases tangling and wind damage.
- Pods on seed-crop plants once you commit to dry seed.
Aftercare after pruning and harvest
Water lightly at the base after a heavy pick if soil dried out, but avoid soaking crowns—NC State warns that wet, cold soil invites seed rot and seedling damping-off, and chronic wetness stresses mature roots too. Mulch lightly in windy balcony beds to keep moisture even.
Do not fertilize heavily immediately after stripping leaves; peas fix much of their own nitrogen when rhizobia are present (Peas fertilizer). A light compost top-dress is enough if regrowth looks pale after many harvests.
Check trellis ties after windstorms and resume every-few-day picking—the main maintenance that keeps peas productive.
Recovery timeline and signs pruning worked
In mild cool weather with even moisture, new pods often appear within days of a thorough pick as upper flowers open. Vines should stay upright on supports, show bright green new tendrils, and keep setting flowers at the top of climbing types.
Optional shoot cuts may show new side growth within one to two weeks when enough leaf area remains.
Signs you cut too hard or timed poorly:
- Flowers drop without pod set after a heavy leaf strip or heat spike
- Vines wilt at midday despite wet soil—possible root issue, not solved by more cutting
- Powdery mildew spreads after cleanup because spacing and airflow were not improved
- Plants stall completely as temperatures pass the mid-20s °C (70s °F)
When heat ends the season, succession sowing beats harder pruning—see Peas propagation for the next cool window.
Mistakes to avoid
- Skipping picks because pods are not perfect—over-mature pods slow production (RHS).
- Composting mildewed vines at the edge of the active bed.
- Harvesting wet plants after overhead watering—splashing spreads fungal spores.
- Confusing sweet pea seed with edible pea seed when labeling shoot or pod crops.
- Stripping leaves to “let sun in” during pod fill instead of fixing row spacing at sowing.
- Leaving finished vines on the trellis, which shelters aphids into the next crop.
When not to prune
Delay non-essential cuts when:
- Seedlings have only cotyledons and no true leaves yet
- Soil is saturated and stems look waterlogged at the base
- A heat wave is forecast and vines are already shutting down—harvest what is ripe, then plan replacement
- You are within a few days of transplanting young starts—let roots settle (Peas repotting covers why mature plants rarely move)
Emergency removal of broken stems after wind is always appropriate; routine shaping is not.
Conclusion
Pea pruning is sanitation first, then steady pod harvest, light airflow cleanup, trellis training, and a final crown cut when the cool season ends. Match pick timing to shelling, snow, or snap types; use shoot tips sparingly on pod vines; and replace heat-stressed sowings instead of fighting biology with heavier scissors. That rhythm—not aggressive leaf stripping—is what keeps matar sweet from first pick to last cool-week flush.
Related Peas guides
- Peas overview — species identity, cool-season sowing, and variety choice
- Peas light — full sun for flower and pod set
- Peas watering — even moisture during bloom and pick days
- Peas soil — drainage that supports roots after harvest traffic
- Peas fertilizer — feeding without excess nitrogen after heavy picks
- Peas propagation — direct sowing and succession crops
- Peas repotting — why mature plants stay in their sowing container