Peas Repotting Guide: Pots & Transplant Limits
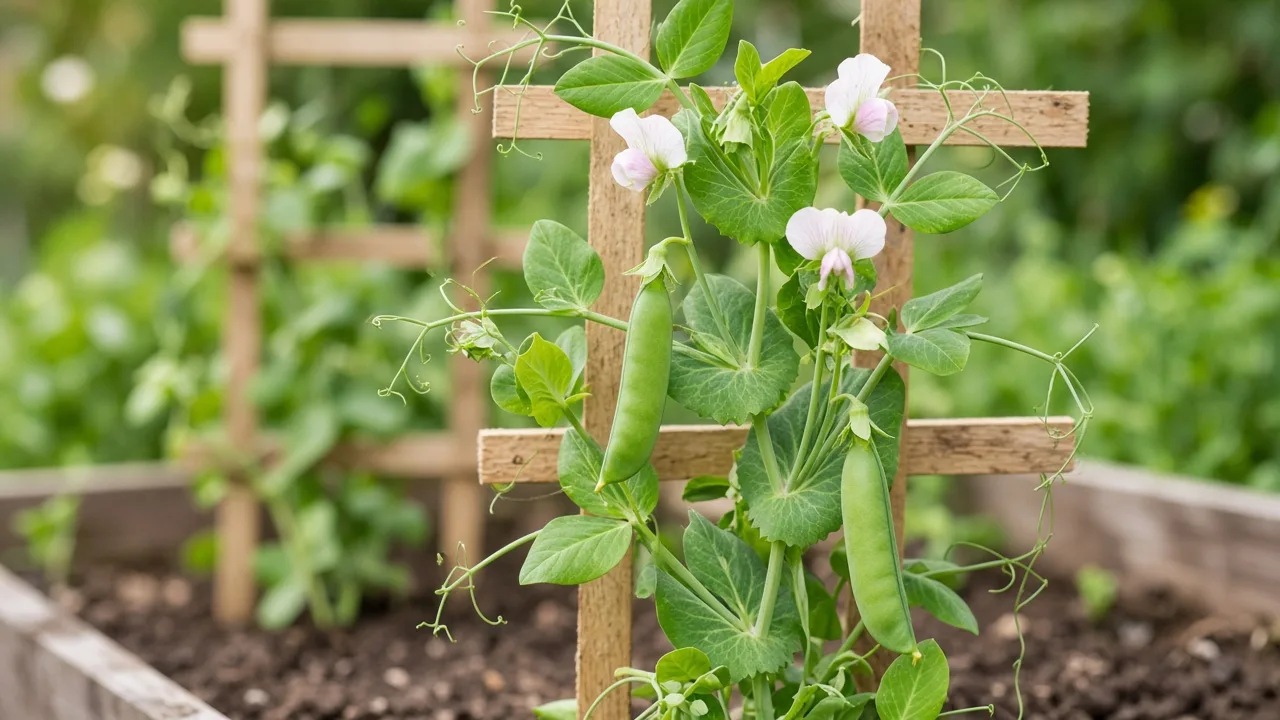
Peas Repotting Guide: Pots & Transplant Limits
Peas Repotting Guide: Pots & Transplant Limits
If you searched for peas repotting after lifting a tray of leggy seedlings into a bigger pot, you are already bumping into how Pisum sativum actually grows. Garden pea—matar, shelling types, flat snow peas, and crisp sugar snaps—is a fast cool-season annual legume, not a long-lived houseplant that rewards yearly upsizing. NC State Extension describes peas as a crop you plant directly in the soil as soon as ground is workable, with young plants frost-tolerant but growth shutting down above about 85°F (29°C). The practical job is picking a deep enough final container (or bed), installing a trellis at sowing, and refreshing mix between harvests—not stepping vines up mid-season the way you would a pothos.
This guide explains when a pea setup truly needs a change, how deep troughs should be for climbing cultivars, why direct sowing beats transplanting for most home growers, and what to do when seedlings are root-bound in shallow cells before the cool window closes.
Peas repotting: the quick answer
There is no yearly repotting schedule for peas. Plan the final pot or bed at sowing time, keep drainage open, and when the crop finishes empty, scrub, and refill the container for the next cool-season sowing rather than upsizing while vines flower. NC State lists a workable minimum container of about two gallons and 12 inches (30 cm) deep for peas—enough for a trial, but a climbing matar on a 1.5–2 m trellis for regular harvest usually needs a deeper, wider trough or grow bag so roots and moisture buffer match the vine.
If seedlings are overcrowded, thin in place or succession-sow a second pot instead of transplanting established vines. Only attempt to move very young starts—ideally before roots lace a shallow cell—using the whole soil plug and minimal handling. Epic Gardening notes that transplanting disturbs pea roots and slows growth, which is why direct sowing is preferred in most climates.
Why garden peas are not a “repot every year” crop
Annual legume vs houseplant repotting logic
Peas may cover a trellis in weeks when air stays cool and light is strong, then senesce as heat arrives. Utah State University Extension notes seedlings emerge in 7–10 days when soil is about 55–65°F, but peas do poorly when temperatures exceed about 80°F—a tight clock on terraces as well as in-ground beds. Houseplant repotting assumes months of recovery; a week of transplant shock during flowering can erase pod set for an annual crop.
Roots are relatively shallow compared with deep taproot vegetables, but they still resent disturbance once tendrils attach and nodules form. Gardener’s Path warns that peas do not withstand root disturbance easily, which is why extension-style culture emphasizes direct sowing and supports installed at planting so you are not driving stakes through wet mix later.
Signs your container—not the vine—needs attention
Repotting language still helps when the vessel or mix is wrong, even if individual plants should stay put. Watch the pot and drainage, not only leaf color.
- Water runs down the gap between mix and pot wall while the centre stays dry—a sign the root ball never filled the volume or the mix collapsed. Cross-check moisture habits on the Peas watering guide.
- The planter is too shallow for a climbing cultivar; vines dry out twice daily on a hot railing even when you water faithfully.
- Drainage holes are blocked or missing, leaving mix soggy while stems wilt at the base—fix the container before blaming seed variety.
- Seedlings are root-bound in cells before you have a cool week to transplant—see the transplant section, not a mid-vine upsize.
- Crowded tops with few pods often mean density or heat, not that the pot is “too small” for one more upsize. Thin rows and match sowing to the Peas light placement first.
If poor drainage and midday wilting appear together, address the container or mix even when you are not lifting plants.
Choose the final pot before you sow
NC State minimums vs real climbing-vine volume
NC State cites two gallons and 12 inches deep as a minimum for container peas. Treat that as a floor for bush trials, not the whole story for balcony matar on a tall trellis. Shallow window boxes tip in wind once netting catches a full vine and dry out faster than a deep trough. Match depth and width to cultivar class on the seed packet: bush shelling peas tolerate smaller volumes; climbing snow and snap types need root room and moisture stability for 60–70 days of active growth.
Depth, width, drainage holes, and trellis at sowing
Install trellis, netting, or pea brush at sowing so roots are not torn when you add supports at flowering. Gardener’s Path recommends spacing rows and putting supports in when you plant to avoid disturbing shallow roots later. Use multiple open drainage holes and pot feet so monsoon runoff or saucer water does not re-saturate the mix.
Fill with the loose blend from the Peas soil guide—about 50% potting mix or screened loam, 30% mature compost, and 20% perlite or coarse sand—not dense garden clay that compacts in containers. Epic Gardening stresses loose, well-draining mix; compacted or soggy soil invites rot and nutrient problems in pots.
Direct sowing in the finishing container
The dependable path is sow 2–3 cm deep in the final bed or container once mix is cool enough to germinate but not waterlogged. NC State advises planting seeds about 1 inch deep and 2–3 inches apart in drainable soil. Epic Gardening adds that peas germinate faster in place and that direct sowing usually outperforms indoor starts unless your cool season is extremely short.
Soak seed overnight if your packet recommends it, then sow into moist but not muddy mix. On Indian terraces, that usually means the cool bright window—often autumn–winter in hot lowlands or late winter–early spring where frost is mild—so vines flower before summer heat. Detailed soak, inoculant, and spacing steps live in the Peas propagation guide.
The narrow window for transplanting pea seedlings
Biodegradable cells and gutter rows
Sometimes you must start indoors or in a nursery tray to beat slow germination or birds on open beds. Gardener’s Path calls indoor starts a compromise because of root sensitivity, but notes biodegradable cells as a workable option when outdoor sowing is not yet practical. RHS describes sowing one seed per module or using a gutter filled with peat-free compost so you can slide a ready-made row into a trench with minimal root disturbance at planting-out time.
Move plants only while stems are still soft and roots have not circled a shallow tray for weeks. If you see a solid root mat when you squeeze the cell, treat that as a failed timing signal—direct-sow the next batch in the final pot instead of “repotting” stressed vines twice.
Hardening off before the one allowed move
USU Extension notes that for very early plantings, germinating seeds indoors can help establishment, but outdoor direct sowing is standard once soils warm. If you hardened off indoor starts, increase outdoor sun gradually so vines are not leggy when they reach the trellis—leggy transplants rarely catch up to stocky direct-sown peers in the same cool window.
At planting-out, RHS advises watering modules thoroughly, setting plants about 7.5 cm (3 in) apart, and taking care not to disturb the roots when firming in. That is the entire “repot” for peas: one careful move into the finishing container, not a series of upsizes.
Container depth for bush, snap, and climbing matar
Bush cultivars (many shelling types) may live in smaller pots with a short stake or pea brush, provided depth still meets the NC State 12-inch minimum and you accept a shorter harvest window on a cramped root zone. Climbing snow and snap peas need vertical support 1.5–2 m tall on many balconies; pair that height with a deep trough or grow bag so the root zone does not dry out every sunny afternoon.
Epic Gardening highlights container portability—you can roll pots to morning sun and slide them to lighter afternoon shade on heat spikes. That mobility replaces mid-season repotting: adjust placement using the Peas light guide instead of upsizing while flowers open.
Best season to set up or refresh pea pots in India
Peas are a cool-season crop in warm climates. Scrub and refill containers at the start of your local cool sowing window, not during peak summer when disturbed roots and hot mix recover slowly. NC State ties yield to cool temperatures and notes growth stops above 85°F; USU Extension similarly warns that peas struggle when air and soil heat exceed about 80°F.
Match pot setup to the same calendar as propagation: if nights are still mild and days are bright but not punishing, sow into a pre-filled trough with trellis ready. If only the seed tray fits your schedule, plan one transplant into the final cool-season station within days of true-leaf stage—not a chain of “bigger pots” indoors while heat builds outside.
How to refresh a container between pea crops
Between harvests, full soil replacement is the closest analogue to repotting peas. Old mix may hold salt, collapsed structure, or disease inoculum on legume debris. Empty the planter, brush away roots and labels, wash with mild soap, rinse, and dry. Refill with fresh, compost-enriched blend before the next sowing.
Do not simply top-dress a exhausted trough and expect another heavy snap-pea crop on the same nitrogen-fixed residue without refreshing organic matter. Light fertility belongs in the prep blend; see the Peas fertilizer guide before pouring high-nitrogen feed onto refreshed mix. Rotate so peas do not follow peas in the same container soil year after year on a small balcony—alternate with a non-legume family when space is limited.
Spacing work: thinning is not repotting
When direct-sown rows come up thick, thin to packet spacing by snipping extras at soil level rather than lifting plants. Pulling one seedling disturbs neighbours’ shallow roots and is a common reason growers think they need to “repot” overcrowded trays. If the trough is still too dense after thinning, harvest young shoots as microgreens or start a second container on a staggered cool-season schedule instead of transplanting survivors.
Aftercare if you had to move young vines
If you planted a whole biodegradable cell or gutter row into a larger trough, water immediately with room-temperature water, firm mix gently around the plug without burying the crown, and keep plants out of harsh midday sun for several days. Hold bottled fertilizer until new tendrils climb steadily. Expect a brief pause in growth; if the cool window is short and flowers should have opened already, a fresh direct sowing in refreshed mix may outperform nursing stressed vines.
Wilting despite moist mix after a move often signals root damage, not thirst—probe drainage and compare with the Peas watering checklist before assuming the new pot was too small.
Common balcony mistakes that look like repotting problems
Starting in tiny cups “to repot later” repeats the failure mode blogs warn about: roots lace the cell before the weather is right for planting-out. Decorative outer pots without holes trap water—use them as cachepots only. Upsizing during flowering disturbs roots exactly when pods need steady moisture. Driving trellis stakes through established root zones causes the same stall as a repot. Leaving old pea vines and roots in mix invites disease in the next sowing—refresh fully instead of “gentle repotting.”
Black plastic pots on west-facing concrete heat the root zone; moving the entire intact planter to morning sun often fixes wilting without any repot. Confusing garden pea with ornamental sweet pea (Lathyrus) leads to wrong safety and culture assumptions—edible Pisum sativum culture is what this page covers; see the Peas overview for variety choice.
When not to upsize or disturb pea roots
Skip disturbance when vines are actively flowering or filling pods—you risk blossom drop and empty trellises. Avoid moves during heat waves when containers already dry twice daily. Do not transplant leggy, overdue tray seedlings that should have been direct-sown weeks ago; sow anew in refreshed mix.
If the only goal is a prettier outer pot, slide the entire inner planter inside a cachepot without touching roots. Yellowing lower leaves late in the cool season may be normal senescence as heat arrives, not a call for a bigger pot. Training and selective removal of damaged shoots belong in the Peas pruning guide, not in repeated repotting.
When to use this page vs other Peas guides
Use this page when the question is container choice, soil refresh between crops, overcrowding, transplant limits, or post-move wilting—not daily watering or feeding. Use Peas watering for moisture checks through pod fill. Use Peas soil for mix ratios, pH, and bed preparation. Use Peas light for full sun placement and heat-wave shade moves. Use Peas propagation for soak times, inoculant, and sowing depth. Start at the Peas overview if you have not matched cultivar to trellis height and season length.
Related Peas guides
- Peas overview — shelling vs snow vs snap types, cool-season timing, trellis height
- Peas watering — germination moisture and container check depth
- Peas soil — 50/30/20 blends, drainage, and minimum pot depth context
- Peas light — moving pots for morning sun and heat relief
- Peas fertilizer — why extra nitrogen after repot refresh backfires
- Peas propagation — direct sowing, inoculant, and indoor-start exceptions
- Peas pruning — airflow and training without root disturbance
Conclusion
Peas repotting is really final-container planning and between-crop soil renewal, not periodic upsizing of a perennial houseplant. Choose a deep enough trough for your cultivar before you sow, direct-seed into that mix whenever the cool window allows, install trellis at planting, and refresh the entire container after harvest. Treat transplanting as a one-time, whole-plug exception for very young starts—not a mid-season rescue for vines already on a trellis. That approach matches how Pisum sativum grows on terraces and in kitchen gardens, and it keeps matar flowering before heat shuts the crop down.