Brown Leaves on Spider Plant: Causes, Checks & Fixes
Quick answer
Brown leaves on Spider Plant are dead tissue—existing blades do not re-green. First step: touch the brown area and probe soil 2 inches (5 cm) deep. Crispy dry brown with a light pot usually means severe underwatering or low humidity; soft dark brown on wet heavy soil points to tuber damage or advancing root stress.
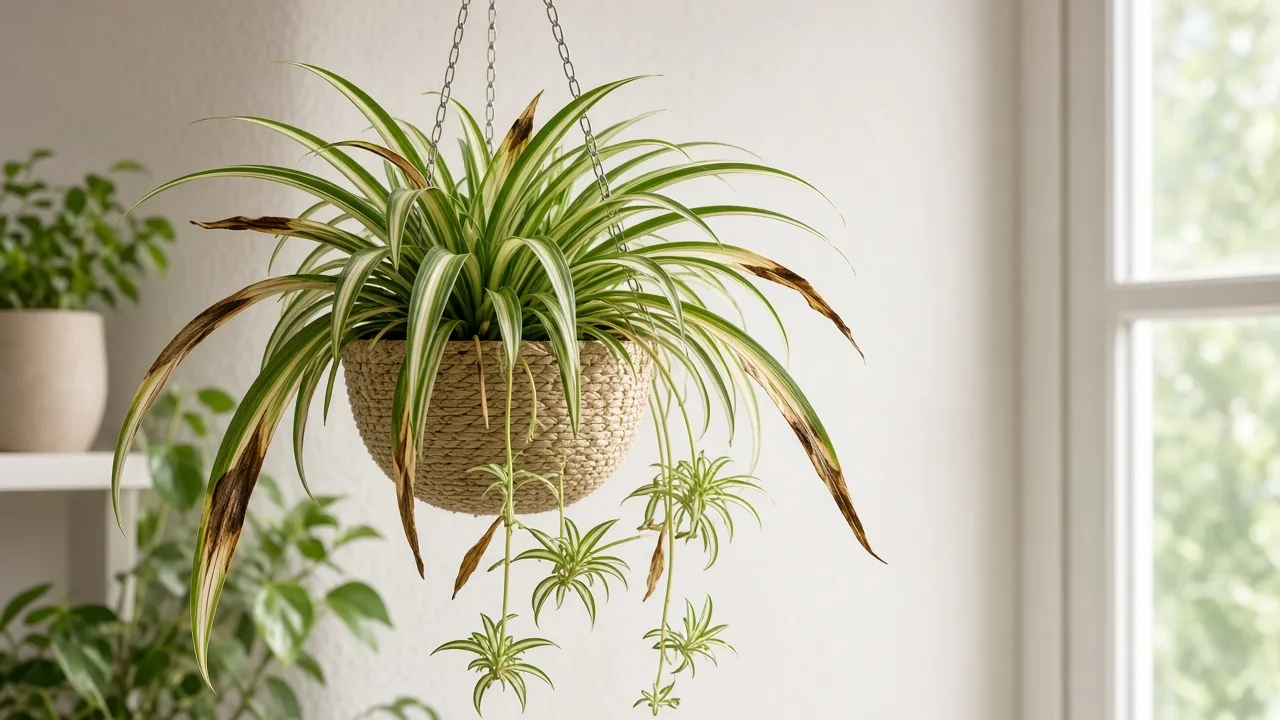
Brown Leaves on Spider Plant: Causes, Checks & Fixes
This guide covers brown leaves on Spider Plant. See also the general Brown Leaves guide, watering, and light pages for this plant.
Brown Leaves on Spider Plant: Causes, Checks & Fixes
Quick answer
Brown leaves on Spider Plant (Chlorophytum comosum) mean tissue has died—whether from drought, tuber failure, sun scorch, salt burn advancing past the tips, or normal aging of outer rosette blades. On this arching clump with trailing stolons, one browned strap leaf can look alarming even when the crown still pushes green foliage and spiderettes. For general causes of whole-leaf browning, see our brown leaves guide. On Spider Plant, texture and soil moisture matter more than color alone: crispy dry brown differs from soft dark brown on a heavy wet pot.
First step: touch the brown tissue and probe soil 2 inches (5 cm) deep. Crispy, papery brown with a feather-light pot points to severe thirst or chronic low humidity. Soft dark brown on cool wet mix with limp arching blades points to overwatering on Spider Plant or tuber stress. Tan patches only on the window-facing side of long blades point to direct sun—NC State Extension notes Spider Plant is intolerant of direct sunlight.
What brown leaves look like on Spider Plant
Healthy Spider Plant holds firm, arching green-and-white strap leaves from a central rosette, often with trailing stolons bearing small plantlets. Browning breaks that pattern in distinct ways:
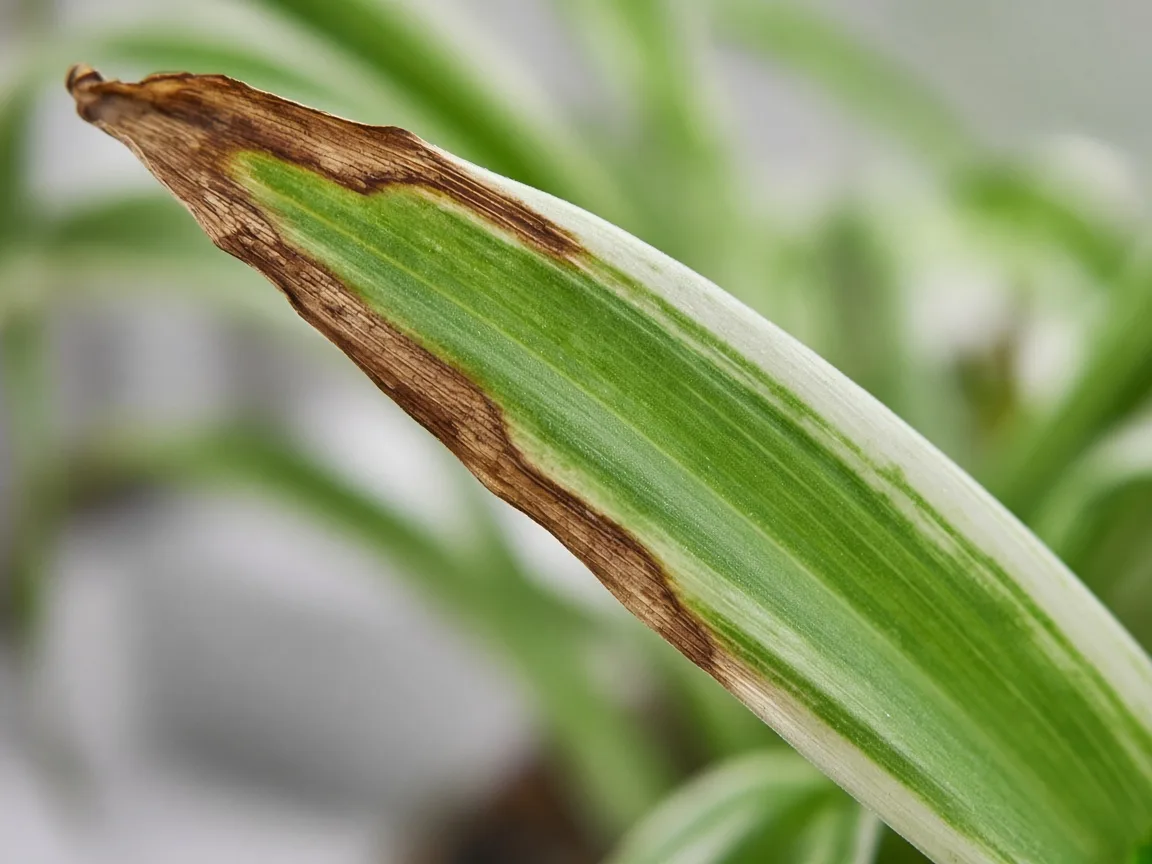
Brown leaf symptoms on Spider Plant—compare crispy necrotic sections with healthy green tissue on the same arching blade.
- Crispy brown margins or whole dry blades, light dry pot — Edges desiccate before the center; tissue feels like paper. Severe underwatering on Spider Plant or low humidity on long exposed blades in hanging baskets.
- Soft dark brown lower leaves, wet heavy soil — Limp arching foliage even though mix feels damp. Tuber oxygen loss from chronic wet mix on fleshy roots.
- Tan or brown patches on the sun-facing side only — Papery bleached areas where afternoon rays hit strap foliage. Direct sun on shade-adapted leaves.
- Brown advancing inward from tips on multiple new blades — Often fluoride or salt toxicity that started as tip burn. See brown tips on Spider Plant when margins alone are affected.
- Yellowing that progresses to brown on several blades at once — Classic overwatering or root-bound stress before rot advances. Yellow leaves on Spider Plant often precede this pattern.
- Single oldest outer rosette leaf browning slowly — Often normal senescence while the crown and stolons stay green.
Always check the newest leaves at the rosette center and young spiderettes on stolons. Brown on new growth is more urgent than one aging outer blade fading out.
Reading brown along arching blades and stolons
Spider Plant grows as a dense rosette with long arching leaves and trailing stolons that carry baby plantlets. That growth habit makes where brown appears as diagnostic as how it looks.
Oldest-rosette senescence: On a healthy mature clump, the lowest one or two outer blades may turn fully brown and dry while the crown stays firm and stolons keep producing spiderettes. That is normal aging—not a crisis.
Bottom-up spread on wet soil: When several lower arching leaves turn soft dark brown within a week and the pot stays heavy, suspect tuber stress. Spider Plant can look thirsty while soil is saturated because damaged tuberous roots cannot move water upward.
Spiderette dieback before the mother: Brown appearing on plantlets at stolon tips while older mother blades stay mostly green often means fluoride sensitivity, salt buildup, or drought stress hitting tender new tissue first. Detached spiderettes rooted in fresh mix with clean water often show cleaner margins within two to four weeks.
Crown dieback: Brown on the newest central leaves while the whole pot feels wet points to active tuber rot or crown failure. Treat this as higher urgency than one spent outer blade.
Variegated blades and whole-leaf brown
Solid green Spider Plant types tolerate dim corners slightly better than heavily variegated cultivars, but all forms scorch in direct sun. Variegated white zones bleach to tan before solid green tissue browns on the same blade.
Variegated leaves also transpire faster and have less chlorophyll buffer—so whole-blade brown from drought may hit pale-striped sections first while a solid-green neighbor on the same shelf still looks fine for another week. When only one basket browns, compare light exposure and dry-down speed before assuming disease. Details: Spider Plant light guide.
Why Spider Plant gets brown leaves
Severe dehydration
Extended dryness on a plant with thick tuberous roots causes irreversible margin death that can engulf entire arching blades before you notice limp foliage. Spider Plant survives missed waterings better than many ferns, but a very light pot with bone-dry mix throughout can crisp several long leaves at once—especially on hanging baskets mounted above radiators where heat pulls moisture from exposed blades.
Tuber injury from overwatering
NC State Extension notes Spider Plant grows best in moist soil yet is tolerant of drought—the danger is stagnant wetness, not occasional dryness. Compromised tubers fail to supply water evenly. Lower arching leaves turn soft dark brown while mix stays damp—the classic wilt-on-wet-soil paradox. See root rot on Spider Plant when tubers feel mushy.
Sun scorch on strap-shaped foliage
Spider Plant wants bright indirect light, not direct sun. NC State lists it as intolerant of direct sunlight. Afternoon rays through south or west glass bleach exposed tissue into tan necrotic patches on the longest arching blades. Hanging baskets near unfiltered windows are especially vulnerable.
Low humidity and heat drafts
Winter heating and AC vents desiccate leaf edges until whole sections necrose on firm arching blades with otherwise appropriate watering. NC State recommends medium air humidity for this species. See low humidity on Spider Plant when margins crisp in dry air.
Fluoride and salt burn advancing past tips
When tip burn from fluoridated tap water goes untreated, necrosis can creep inward until most of a blade is brown. White crust on the pot rim or soil surface points to fertilizer salt buildup. Heavy feeding on dry soil is a common trigger—hold fertilizer until new growth looks clean.
Pests and disease progression
Spider mites on Spider Plant stipple tissue until patches brown in dry heated rooms. Untreated lesions can merge into larger necrotic areas on arching blades. Inspect stolon joints and leaf bases where pests hide on this species.
How to confirm the cause
- Texture — Crispy = dry stress, sun, or salts. Soft = rot, disease, or wet-tuber failure.
- Soil moisture at 2 inches (5 cm) — Dry throughout with light pot = thirst. Wet and heavy = pause watering.
- Position on the plant — Lowest outer blade only, slowly = senescence. Multiple lower blades on wet soil = tubers. Crown or spiderette brown = active stress.
- Leaf location on the blade — Window-facing patches = sun. Uniform margins vs circular lesions with halos.
- Recent changes — Moved to brighter window, skipped waterings, repotted into oversized pot, heavy fertilizer dose, switched to fluoridated tap water.
- New growth — Green rosette center and firm stolons = lower urgency. New leaves or spiderettes opening brown = escalate.
First fix for Spider Plant
Touch the brown tissue and probe soil at 2 inches (5 cm) depth—then match treatment to crispy-dry versus soft-wet, not to panic over one browned blade.
- If dry and crispy: Water thoroughly once, drain fully, and move out of direct hot sun while rehydrating. Raise humidity if edges were desiccating in heated air.
- If wet and soft: Stop watering until the top 2 inches of mix dry. Improve airflow; unpot only if browning spreads after appropriate dry-down and tubers feel soft.
- If sun-facing patches only: Move to bright indirect light; add sheer curtain on south or west glass.
- If brown advancing inward from tips on new blades: Switch to rainwater, distilled, or RO water and flush the pot once—see brown tips on Spider Plant for the full water-chemistry protocol.
Do not fertilize burned or rotting foliage on day one.
Salvaging spiderettes when mother blades brown
Unlike single-stem houseplants, Spider Plant backs up through stolons and plantlets. If brown has killed several mother blades but stolons stay firm and spiderettes look green, the clump can recover from corrected care—or you can propagate insurance copies.
- Identify stolons with firm green spiderettes showing small aerial root nubs.
- Trim fully brown mother blades at the base with clean scissors; leave partial green tissue in place.
- Pin healthy spiderettes onto moist mix in a small pot, or snip and root in water with low-fluoride water.
- Give corrected light and watering; watch for clean new rosette leaves within two to four weeks.
If tubers feel soft at the crown on wet mix, skip propagation optimism and shift to root rot on Spider Plant protocol instead.
Step-by-step recovery
Drought recovery
- Soak dry mix thoroughly or bottom-water 20–30 minutes, then drain.
- Trim fully brown blades; leave partial green tissue in place.
- Resume watering when top 2 inches dry—full rhythm on the watering guide.
- Run a humidifier if margins were crisp in dry winter air.
Wet-tuber recovery
- Stop watering; empty saucers.
- If brown spreads on still-wet soil after a week of corrected dry-down, inspect and trim mushy tubers.
- Repot into fresh airy mix—same size or one step up, not a huge decorative pot. See soil guide.
- Hold fertilizer until new growth looks healthy for two weeks.
Sun scorch recovery
- Relocate to filtered light within a few feet of east or shaded south window.
- Trim fully necrotic patches if unsightly; green tissue will not refill bleached areas.
- Acclimate gradually if increasing light later.
Pest-related browning
- Rinse leaf undersides and stolon joints in lukewarm water.
- Raise humidity slightly and follow spider mites on Spider Plant if webbing is present.
- Do not apply oil sprays in direct sun.
Recovery timeline
Thirst brown: Existing crisp tissue stays brown; turgor returns in 12–48 hours after soaking. The next rosette leaf should open green within one to two weeks.
Overwatering brown: Spread should halt within three to seven days once mix dries appropriately. Tuber-trim repots may need two to four weeks before confident new growth and spiderette formation resume.
Sun scorch: Bleached patches are permanent; new blades should avoid scorch within two to three weeks in corrected light.
Normal senescence: One outer blade browning and drying while the crown stays green needs no recovery timeline—beyond routine care.
Lookalike symptoms
| Pattern | Likely cause | Page |
|---|---|---|
| Brown tips only, firm blades | Fluoride, salts, dry air | Brown tips |
| Yellow before brown, wet soil | Overwatering | Overwatering |
| Crisp edges, dry soil | Underwatering | Underwatering |
| Stippling before brown patches | Spider mites | Spider mites |
| One old outer rosette blade | Normal senescence | No action if crown green |
| Rapid crown collapse on wet soil | Tuber rot | Root rot |
What not to do
Do not assume all browning means underwatering and soak a plant in wet soil.
Do not leave scorched baskets in afternoon direct sun hoping blades will recover color.
Do not fertilize heavily to “green up” brown leaves—salts worsen edge burn on fluoride-sensitive blades.
Do not remove every partially green arching leaf—the rosette needs photosynthetic surface during recovery.
Do not mist instead of watering when the whole pot is bone dry—misting does not rehydrate tuberous roots in a heavy hanging basket.
How to prevent brown leaves next time
Water when the top 2 inches of well-drained general-purpose mix dry. Keep Spider Plant in bright indirect light, not baking glass. Maintain 40–60% humidity through heating season. Use low-fluoride water if tips keep burning inward. Flush salts periodically if you feed regularly. Remove spent outer blades promptly and avoid overhead watering on crowded shelves at night.
When to worry
Urgent if new rosette leaves or spiderettes open brown, tubers feel soft at the crown on wet soil, brown spreads across most of the clump within days, or mix smells sour. Slow browning of one lowest outer blade while the crown pushes green is lower urgency.
When to use this page vs sibling guides
| Your question | Best page |
|---|---|
| Whole blades or large brown patches | This page |
| Tips and margins only | Brown tips |
| Crispy texture, drought | Underwatering |
| Yellow before brown, wet soil | Overwatering |
| Bleached patches from hot windows | Not enough light (for placement) or sun scorch pattern above |
| Stippling and webbing | Spider mites |
Related Spider Plant guides
Conclusion
Brown leaves on Spider Plant will not turn green again—focus on stopping spread and growing clean new foliage from the rosette and stolons. Feel the brown tissue, probe soil depth, note where brown sits along arching blades, then fix the matching cause. Prevention comes from predictable dry-down, filtered light, stable humidity, low-fluoride water when needed, and early response while damage is still marginal.
Related tool
Use the Plant Problem Diagnosis Tool to narrow causes for brown leaves on this plant before changing multiple variables at once.