Sponge Gourd Repotting Guide: When & How
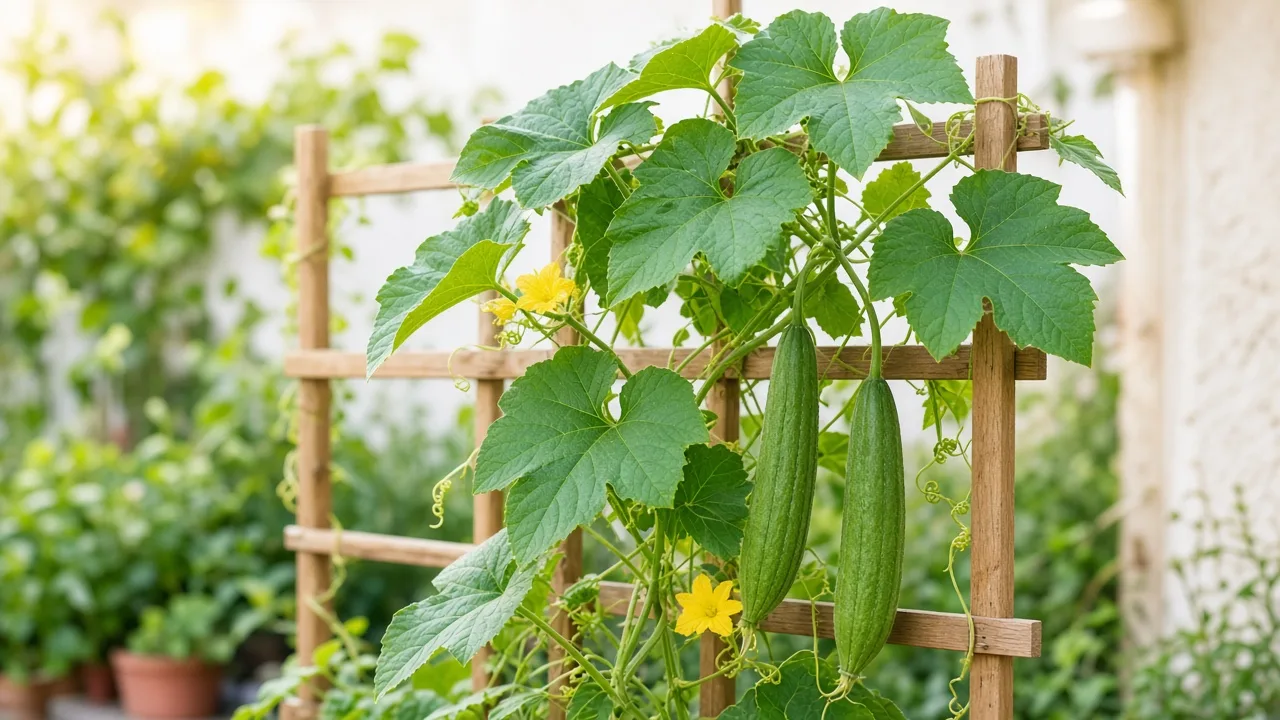
Sponge Gourd Repotting Guide: When & How
Sponge Gourd Repotting Guide: When & How
Sponge gourd repotting for terrace and kitchen gardeners is really potting on: shifting young Luffa cylindrica—nenua, galka, or smooth loofah—from cramped seed trays into progressively larger containers until the vine sits in a final pot large enough to carry flowers, tender gourds, or fibrous sponges through a long warm season. Unlike a peace lily or rubber plant, sponge gourd is a fast annual tendril climber that does its best work in one frost-free run. Once it occupies roomy mix with a trellis ready, you are finished upsizing for the year.
That framing keeps you from refreshing the same vine on a houseplant calendar. It also explains why the highest-value moves happen before tendrils lock onto a railing and why a seedling drowning in an oversized wet tub can stall as badly as a root-bound plug. This guide covers when to pot up, how big the final container should be on Indian balconies, transplant timing for both kitchen and sponge harvest goals, and how to settle roots without inviting cucurbit trouble.
Sponge gourd repotting: the quick answer
Plan for at most two purposeful container moves: (1) pot up seedlings when they show two to three true leaves and roots fill the cell—UF/IFAS luffa production guidance describes seedlings at that stage as ready for transplant—and (2) shift into a final large pot (often about 40 litres for one strong terrace vine) before the main stem attaches to a trellis. On Indian plains, sow in February–March for summer harvest or June–July when nights stay warm for monsoon production; season framing lives on the Sponge gourd overview.
Use open drainage holes, fertile well-drained mix aligned with the Sponge gourd soil guide, and only a modest size jump at the seedling stage. After the final potting, focus on even moisture, pollination, and harvest timing—not another mid-season upsize. When a late-summer vine is root-bound, sow fresh seed next warm window instead of forcing a third repot on a declining annual.
Why sponge gourd is not a perennial repot
Sponge gourd behaves like a cucumber-family annual, not indoor foliage you upsize every spring on habit alone. UF/IFAS Gardening Solutions notes stems can reach up to 30 feet on support, with vertical trellises six feet or taller recommended so fruit hangs cleanly. RHS lists mature climbing height around 2.5–4 m for Luffa cylindrica and stresses a long growing season for fruits to mature—especially if you want dry loofah sponges, not just tender nenua for the kitchen.
Annual vine, one warm season
Because the plant finishes after seed maturity, yearly repotting of the same specimen is not part of sponge gourd culture. You either sow anew or pot up a young plant until it reaches its final container. Repotting fixes cramped seedlings and exhausted starter mix; it does not reverse poor pollination, bitter fruit from stressed plants, or shade that limits flowers. If blossoms drop because the root zone dried out, fix Sponge gourd watering before disturbing roots again.
Vegetable harvest vs loofah sponge goals
Your repotting timeline still follows warm soil and root space, but harvest intent changes how long the vine must stay healthy in that final pot. Pick young, tender fruit for curries while skin is still soft; leave chosen gourds on the vine until rinds brown and dry if you want fibrous sponges. Mixing both goals on one plant is possible, yet fewer fruits reach sponge quality when many are picked young—plan container size and trellis height for the longer season sponge production needs. Discard any fruit that tastes bitter; cucurbit bitterness is a safety issue, not a repotting problem.
Signs sponge gourd needs potting up
Read the container and roots, not a decorative houseplant schedule.
Seedling and plug cues
Pot up when:
- Two to three true leaves are open and the stem is sturdy enough to handle by the root ball, matching transplant-ready luffa seedlings in extension guidance.
- Roots circle the plug, peek through tray holes, or lift out as a tight mat when you tip the cell.
- Seedlings dry out within a day in warm weather despite careful watering—often the first sign cells are too small for fast cucurbit growth.
- Leaves look pale or stalled while weather is warm and sun is adequate; rule out a Sponge gourd light shortfall before repotting.
Final-container stress cues
Move into the final pot when an interim container dries almost daily during active vine growth, drainage holes clog with roots, or you must water twice a day to prevent midday wilt. If the plant is already climbing a trellis with tendrils wrapped tightly, postpone upsizing unless you can detach and retie without snapping the leader—usually it is cleaner to have sized the final pot earlier.
The two container moves that matter
Potting up from cells or small cups
The first move is potting on, not planting straight into a terrace half-barrel. Slide plugs out gently; hold the root ball, not the cotyledons. Choose a pot one step larger—enough fresh mix for roots to explore without leaving a huge ring of cold, wet compost the seedling cannot use. UF/IFAS Gardening Solutions recommends waiting until two to three true leaves before moving transplants to the garden or a larger container, which applies equally to balcony culture.
Keep seedlings warm and bright after the move. Luffa roots resent cold, saturated mix; extension production guides note damping-off risk for young seedlings in wet, cool conditions (HS1285).
Landing in the final large pot
The second move sets the vine up for flowering and fruit. For one strong plant on a terrace, aim for roughly 40 litres of mix—wide enough for moisture stability and deep enough for cucurbit roots—with a 1.8–2.4 m trellis installed at the same time. UF/IFAS Gardening Solutions lists two- to five-gallon containers as a minimum reference for luffa, which suits short trials; Savvy Gardening suggests roughly 20-gallon grow bags or 18–24 inch pots for a full-season container vine—closer to what hot Indian balconies usually need so mix does not crash mid-summer.
Space multiple container plants so leaves do not overlap—extension spacing for luffa is about three feet between plants and six feet between rows (HS1285), which translates to one vine per large pot on most balconies.
Direct sowing to skip an extra move
You can direct-sow two or three seeds per large pot, thin to one vigorous seedling, and skip the plug stage when bench space is tight. This mirrors field practice where direct seeding and transplanting are both valid for luffa. Sow only when soil in the pot stays above about 20°C for reliable germination—cold mix slows emergence and invites rot.
Best timing for potting up in India and warm climates
Sponge gourd potting tracks warm soil and active growth, not a cool-season houseplant rhythm.
Summer and monsoon sowing windows
On Indian plains, February–March sowing targets summer harvest; June–July sowing can extend production through monsoon where nights remain warm. Complete the final pot move while seedlings are still small enough to handle and before the main vine attaches to supports. Luffa needs a long warm season for mature sponges—often roughly 90 days or more of frost-free growth (UF/IFAS Charlotte County)—so delaying potting until midsummer shortens the harvest window for fibrous fruit.
Heat, cold snaps, and wet soil risks
Avoid potting up during an unexpected cool spell or when monsoon rains keep mix soggy for days. Cucurbit transplants wilt easily when roots sit in cold water; wait for a clear warm stretch and morning or late-afternoon work to reduce immediate stress. If a heat wave follows transplant, shade the pot for two to three days and check moisture at 2–3 cm depth rather than watering on autopilot.
Choose pot volume, drainage, and trellis support
Why large final pots beat undersized tubs
Sponge gourd is a high-water, fast-draining crop: it needs steady moisture but rots in stagnant mix. Wide pots dry more evenly than tall, narrow columns. Multiple open drainage holes are mandatory; saucers should be emptied after watering. Dark plastic on hot concrete can overheat roots—elevate pots on feet if the surface bakes in afternoon sun.
If you are unsure about volume, the Pot Size Calculator with sponge-gourd pre-selected offers a starting point, then adjust upward for a full-season terrace vine.
Install the trellis before vines attach
Plan vertical support before the final repot. UF/IFAS Gardening Solutions recommends vertical trellises six feet or taller so fruit hangs cleanly. Position the trellis so you will not need to lift a root-bound pot later. Train the main stem upward, then manage laterals with tips from Sponge gourd pruning once side shoots run.
Soil mix to refresh at each step
Repotting is your chance to replace compacted, salt-heavy, or pest-carrying starter mix. Use fertile loam or quality potting soil with mature compost and perlite, coarse sand, or coco chips for aeration—roughly the blend detailed in the Sponge gourd soil cluster target (50% mix or loam, 30% compost, 20% coarse amendment). Aim for pH 6.0–7.0; HS1285 ties successful luffa culture to well-drained soil with high moisture availability, not waterlogged beds.
Never reuse mix from a previous cucurbit that showed sudden collapse at the stem base unless you are certain disease was not involved. Fresh compost supplies nutrients for the first weeks; hold concentrated feeds until roots recover (see below).
How to repot or transplant sponge gourd step by step
Lift, inspect roots, and set planting depth
- Water lightly a few hours before so the root ball holds together without being mud.
- Support the stem and tip the pot; slide the plant out. Tease only the bottom circled roots—avoid shredding the delicate tap region.
- Choose the next pot one size up at the seedling stage, or the prepared final tub with trellis ready.
- Set the plant at the same depth it grew before—cucurbits are not tomatoes; burying the crown invites stem rot. RHS advises planting under glass in large pots with climbing support and notes outdoor planting in early summer against a sunny fence—same depth discipline applies in containers.
- Firm mix gently around the ball and water once to settle voids.
Water in without drowning warm-season roots
Water thoroughly once, let excess drain freely, then return to even moisture checks—not constant sogginess. Containers dry faster than ground beds; wind on high terraces accelerates wilting the first week after potting. If leaves flag while mix stays wet, pause watering and verify drainage holes are open.
Care after repotting for the first week
Expect mild wilt for a day or two while roots contact new mix. Keep full sun if temperatures allow; sponge gourd needs strong light for fruit set, as covered in the Sponge gourd light guide. Delay heavy fertilizer for about a week so disturbed roots are not burned; resume gentle feeding per the Sponge gourd fertilizer page once new growth looks steady.
Watch for male and female yellow flowers as vines mature; hand-pollinate on insect-poor balconies if young fruit aborts. If you need more plants rather than a bigger pot, sow additional seed or follow Sponge gourd propagation rather than dividing vines.
When repotting will not fix the problem
Skip or postpone potting when:
- The vine is already climbing and pot upsizing would break tendrils or snap the leader.
- Cool nights or waterlogged mix make transplant shock likely—wait for warmth and drainage.
- The plant shows stem rot at soil line with sour-smelling mix; fresh soil helps only after you correct drainage and remove affected tissue.
- Late-season decline has begun; an annual vine will not reboot like a perennial houseplant—start new seed next sowing window.
- Bitter fruit or suspected cucurbit stress appears; repotting does not reset off-flavour chemistry—discard bitter fruit and review seed source.
Common repotting mistakes with sponge gourd
Jumping to a giant final pot from a tiny cell leaves a reservoir of cold, wet mix that roots never reach—the classic stall that looks like “fertilizer deficiency” but is really oxygen and temperature stress. Repotting mid-climb tears tendrils and sets the vine back during peak flowering. Planting too deep invites crown rot in warm, wet monsoon weather. Reusing diseased cucurbit mix moves pathogens into a clean pot.
Pulling seedlings by leaves breaks the growing tip you need for a long vine. Fertilizing immediately after repot scorches cut roots. Forgetting the trellis until the vine is metres long forces a disruptive move; install support at the final potting instead.
When to use this page vs other Sponge Gourd guides
- Sponge gourd overview — Identity, sowing seasons, trellis basics, and harvest stage before you choose pots.
- Sponge gourd soil — Mix recipes and drainage when repotting is really a soil-quality fix.
- Sponge gourd watering — Moisture checks after transplant when wilt could mean drought or excess water.
- Sponge gourd light — Sun and heat stress that no pot size corrects alone.
- Sponge gourd propagation — Starting new plants instead of upsizing a finished crop.
- Sponge gourd fertilizer — When to resume feeding after a successful move.
Related Sponge Gourd guides
- Sponge gourd overview
- Sponge gourd watering
- Sponge gourd light
- Sponge gourd soil
- Sponge gourd fertilizer
- Sponge gourd propagation
- Sponge gourd pruning
Conclusion
Sponge gourd repotting is warm-season potting on, not a perennial houseplant ritual. Move seedlings at two to three true leaves, step up one container size at a time, then settle the vine into a large, well-drained final pot with a tall trellis ready before tendrils attach. Use compost-rich mix, water in thoroughly, hold off strong feed for about a week, and keep even moisture while roots establish. Match container commitment to your goal—tender nenua for the kitchen or a longer run for homegrown loofah sponges—then sow again next warm window rather than chasing another mid-summer repot on an annual climber.