Crystal Anthurium Care: Light, Water, Soil, and Humidity
A complete crystal anthurium care guide to light, watering, soil, humidity, feeding, repotting, propagation, common problems, and safe handling at home.
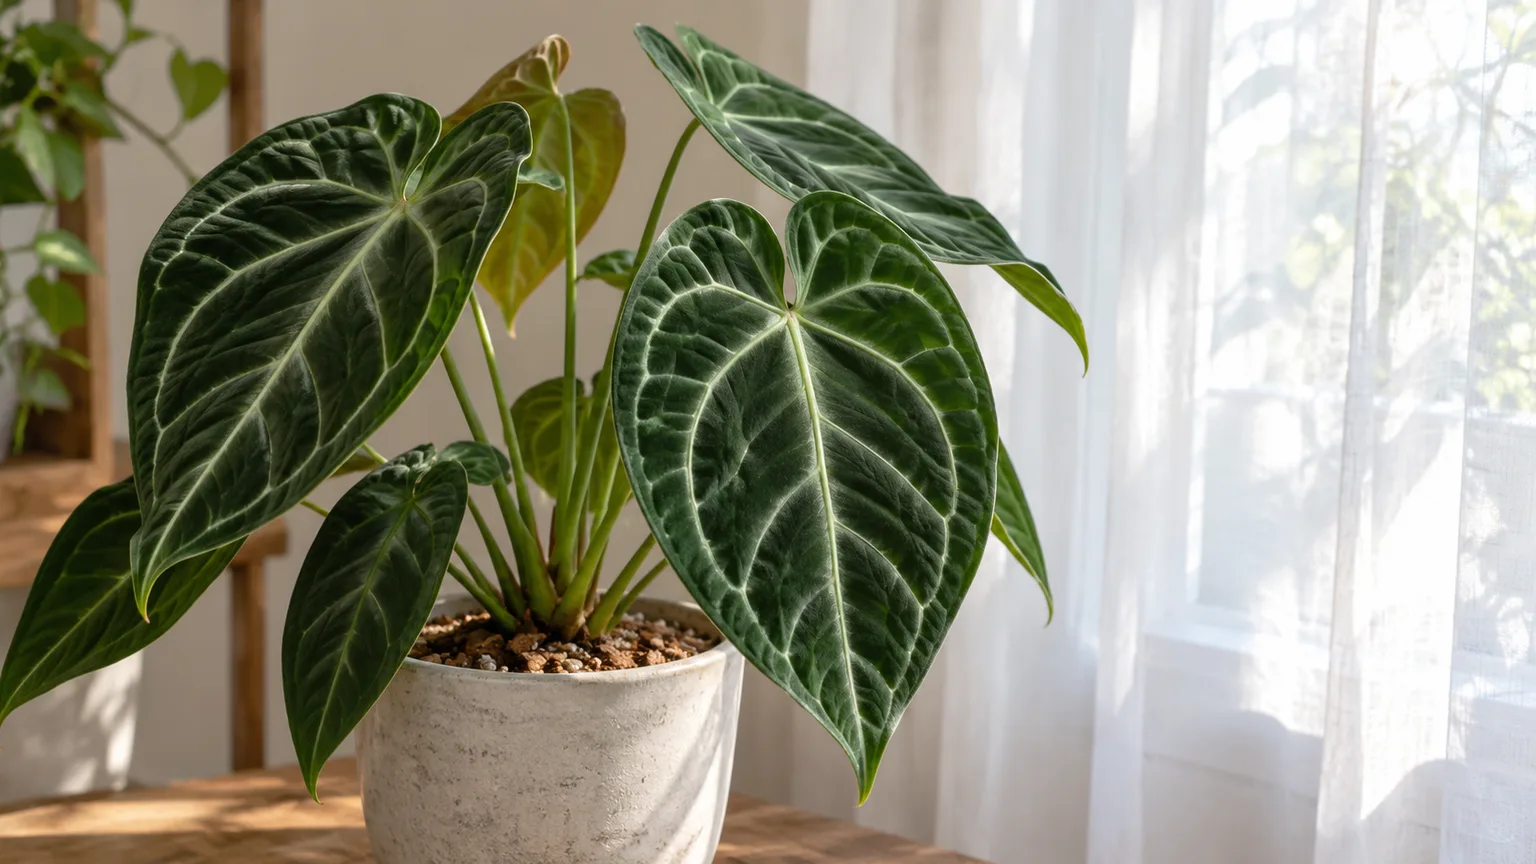
The silvery veins and dark, velvety leaves of crystal anthurium are the reward; its roots are the part that decides whether those leaves keep coming. Anthurium crystallinum grows best when its root zone stays lightly moist but aerated, while the foliage gets warmth, filtered light, and enough humidity to avoid chronic edge crisping. A weekly watering rule or a sealed, constantly damp pot can miss that balance in either direction.
Start with three checks: how bright the spot is through the day, how quickly the pot dries after a full watering, and whether new leaves emerge clean and firm. Those observations tell you more than a fixed schedule. They also help you change one condition at a time, so a yellow leaf does not prompt a stack of unnecessary fixes.
Identify the right anthurium before changing its care
Crystal anthurium is a foliage species in the arum family, Araceae. The RHS describes A. crystallinum as an epiphytic, clump-forming perennial with broadly oval to heart-shaped, dark green velvety leaves and pale, prominent veins; mature leaves can reach about 45 centimeters (18 inches) long. Its small, narrow green spathe and yellow spadix are quite different from the bold red or pink spathes of many florist anthuriums (RHS species profile; NC State Extension Plant Toolbox).
That distinction matters because flower-shop Anthurium andraeanum and velvet-leaf species do not look alike, even though they share a genus. A. clarinervium is another close look-alike with velvety, pale-veined leaves; the two species overlap in appearance, so a nursery label or a single leaf is not always enough for confident identification. Fortunately, both are grown for foliage and benefit from bright indirect light, warm air, and an open root mix.
Do not assume that every epiphytic plant needs to climb. RHS describes anthuriums as often epiphytic and sometimes climbing, but A. crystallinum is typically grown as a self-heading or clumping plant. A moss pole is optional support for an unusually tall, leaning specimen; it is not a basic care requirement for a compact plant.
Build a stable home setup first
Place the plant where it can receive bright, filtered light for much of the day, away from a heating or air-conditioning vent and cold window drafts. Use a pot with unobstructed drainage holes, remove any nursery sleeve that traps runoff, and set it on a saucer that you empty after watering. These simple choices make it easier to see whether the mix is draining and drying as expected.
For the first couple of weeks after bringing it home, keep the plant separate from other houseplants and inspect leaf undersides and petiole joints for webbing, cottony insects, or sticky residue. Let it acclimate before you repot or fertilize unless the existing mix is waterlogged, sour-smelling, or already breaking down. Moving, unpotting, changing the mix, and increasing light all at once makes it harder to tell which change helped or hurt.
If you grow it outdoors in a frost-free tropical climate, use a sheltered, bright-shade position and acclimate it gradually. In a temperate climate, treat it as an indoor plant and bring it back inside before nights become cool; the RHS recommends keeping it above 18°C (about 64°F). A sheltered patio is a summer option, not evidence that the plant is cold hardy.
Give bright, filtered light
Choose a bright room with indirect light rather than a deep corner or a window where hot afternoon sun sits on the leaves. An east-facing window is often easy to manage. At a south- or west-facing window, set the plant behind a sheer curtain or farther from the glass, then check the leaves on the window-facing side for bleaching or tan patches. The RHS species profile specifies bright indirect light, and NC State Extension warns that direct sun can scorch anthurium leaves (RHS; NC State Extension).
A north-facing room can work if it is genuinely bright; if the plant stretches toward the window or produces much smaller leaves, move it closer or add a grow light. Do not respond to slow winter growth by placing it directly in strong sun. Increase brightness gradually over several days, especially if the plant came from a shaded nursery display, because mature indoor leaves can scorch after an abrupt move.
Judge the location by new growth, not by the oldest leaf. A healthy new leaf should expand without persistent paling or crisped margins. If it emerges small and the plant is otherwise firm, improve usable light before adding more fertilizer; extra nutrients cannot compensate for too little light.
Water when the mix is partly dry
Crystal anthurium likes steady moisture, not a saturated root ball. Water thoroughly when the upper 2 to 4 centimeters (about 1 to 1½ inches) of mix has started to dry, then let excess water drain away. The RHS says to water freely in active growth but more sparingly in winter; NC State Extension’s broader anthurium advice is to water when the soil is dry to the touch (RHS; NC State Extension).
Use more than one cue, especially if the surface dries faster than the center of the pot:
- Press a finger or wooden skewer into the top inch or two. If it comes out cool and damp, wait; if it is nearly dry, continue checking.
- Lift the pot and compare its weight with how it feels just after watering. A much lighter pot usually means the root zone has used more of its available water.
- When it is time, water across the whole surface until runoff appears. Empty the saucer and do not leave the nursery pot standing in collected water.
A small pot in a warm, bright room and a coarse mix may need water more often than a large glazed pot in winter. That is why “every three days” or “once a week” is not a dependable rule. If water races down the sides and the center stays dry, the mix may have become hydrophobic; water in two slow passes, or briefly bottom-water, then allow the pot to drain completely.
Change the watering interval with the season
In spring and summer, longer days and active leaf growth often shorten the dry-down interval. Check the pot regularly rather than preemptively increasing the amount of water; the goal is to rewet the root zone fully, then give it time to regain air. If a new leaf is unfurling, do not let the entire potting mix become bone dry for days.
In fall and winter, lower light, cooler rooms, and slower growth usually make the mix stay wet longer. Wait for the same moisture cues, but expect a longer pause between waterings. A humidifier does not mean you should water more: air humidity affects leaf moisture loss, while the potting mix still needs oxygen between soaks.
Choose an airy, moisture-holding mix and a snug pot
A dense, fine potting soil can remain wet around roots that need air. The RHS species-specific recipe is two parts peat-free ericaceous compost, one part horticultural grit, and one part orchid bark; the practical aim is acidic, moisture-retentive material with coarse spaces that drain and re-aerate. Do not use garden soil in a houseplant pot, and avoid a mix that collapses into a muddy plug after a few waterings (RHS species profile).
A simple volume recipe for a home grower is:
| Ingredient | Approximate share | What it contributes |
|---|---|---|
| Peat-free ericaceous potting mix or fine coco-based mix | 2 parts | Holds a modest reserve of moisture and anchors fine roots |
| Medium orchid bark | 1 part | Keeps the mix open and slows compaction |
| Horticultural grit or coarse perlite | 1 part | Adds drainage and air spaces |
Blend the ingredients evenly and moisten the mix before potting. If the room is dry or the pot dries very quickly, keep the moisture-holding component at two parts; if the mix stays wet for many days, improve light and ventilation first, then increase the coarse bark or grit slightly. A premade aroid mix can work if it remains chunky after watering and does not contain a large amount of fine peat.
Use a pot only a little wider than the root mass, with drainage holes. An oversized container surrounds a small root system with mix it cannot use quickly, extending the time it stays wet. Plastic holds moisture longer than unglazed terracotta, so choose based on your room and watering habits rather than assuming one material is best for every home. Do not put a gravel layer in the bottom; it does not replace drainage holes or correct a compact mix.
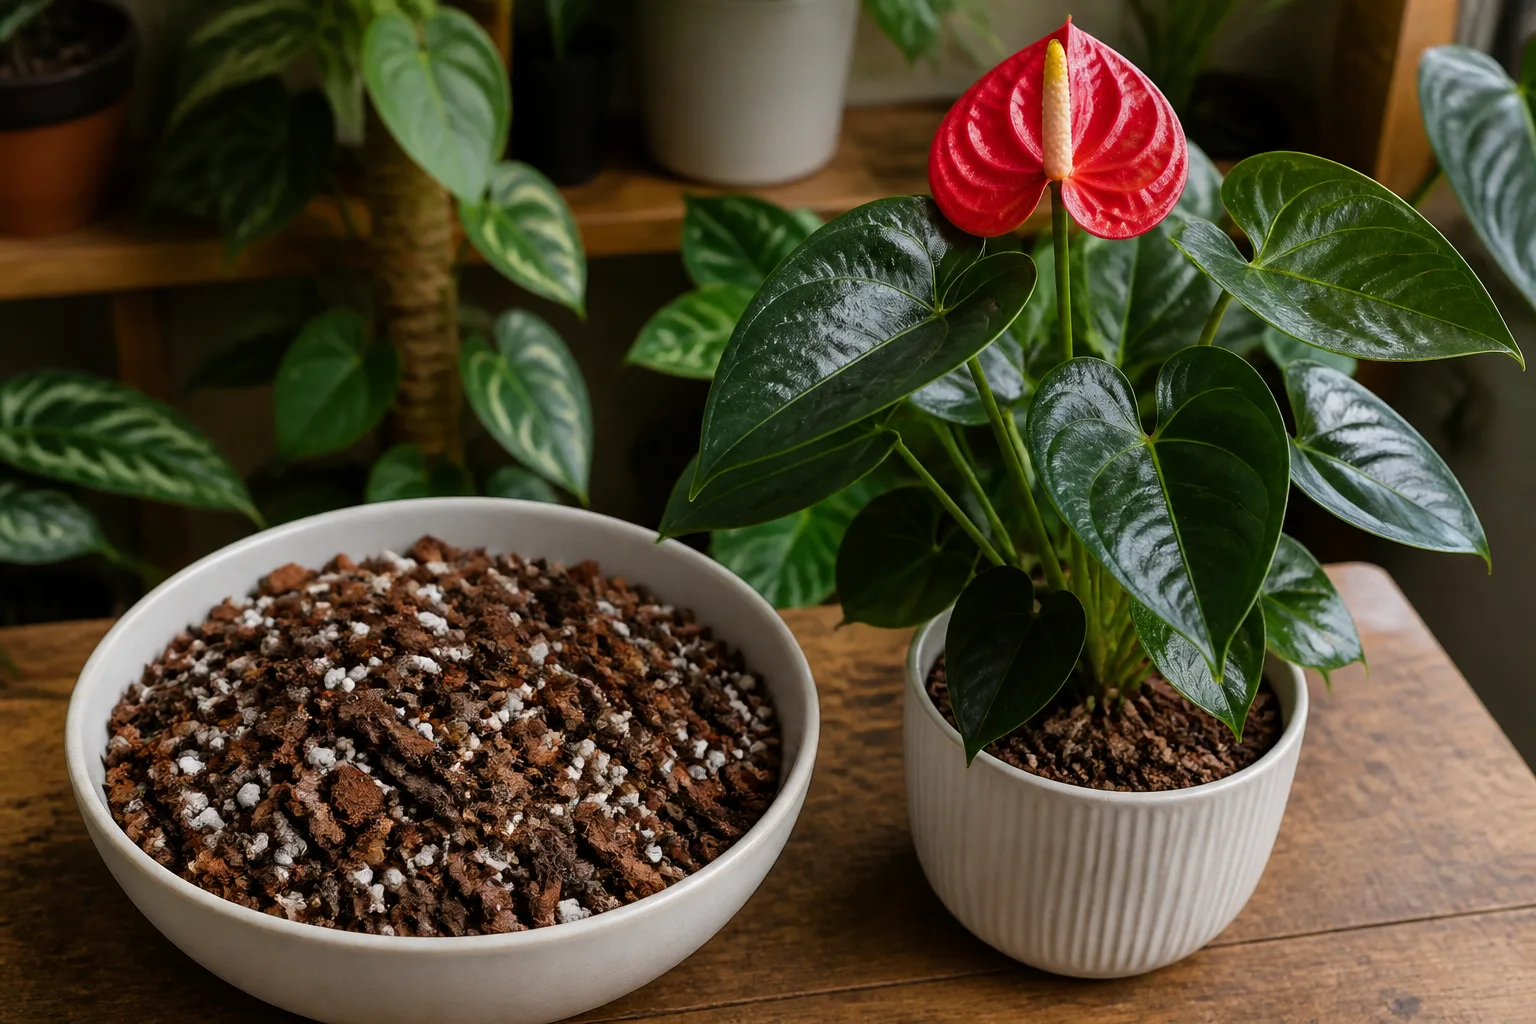
A related velvet-leaf anthurium is shown; its root ball illustrates the same airy-mix goal.
Balance humidity with warmth and airflow
Warm, humid air helps tropical foliage expand without repeated crispy edges, but a room does not need to feel like a greenhouse. Keep the plant comfortably warm and avoid cold drafts; the RHS species profile says to maintain a temperature above 18°C. A practical indoor humidity target is around 60% or higher if you can maintain it, while 70% to 80% may help a plant that keeps making smaller or crisp-edged leaves. Treat those figures as helpful ranges, not a pass/fail threshold; stable conditions and active growth matter more than chasing an exact number.
Use a small hygrometer near leaf height to see what the plant actually experiences. If winter heating drops the reading, a room humidifier is usually more effective than daily misting. Grouping plants can slightly soften the immediate microclimate, but it is not a substitute for enough light or airflow. A pebble tray makes a modest local change at best; keep the pot base above the waterline so the roots are not sitting in water. The RHS recommends high humidity and discusses moist gravel trays for anthuriums (RHS cultivation guide).
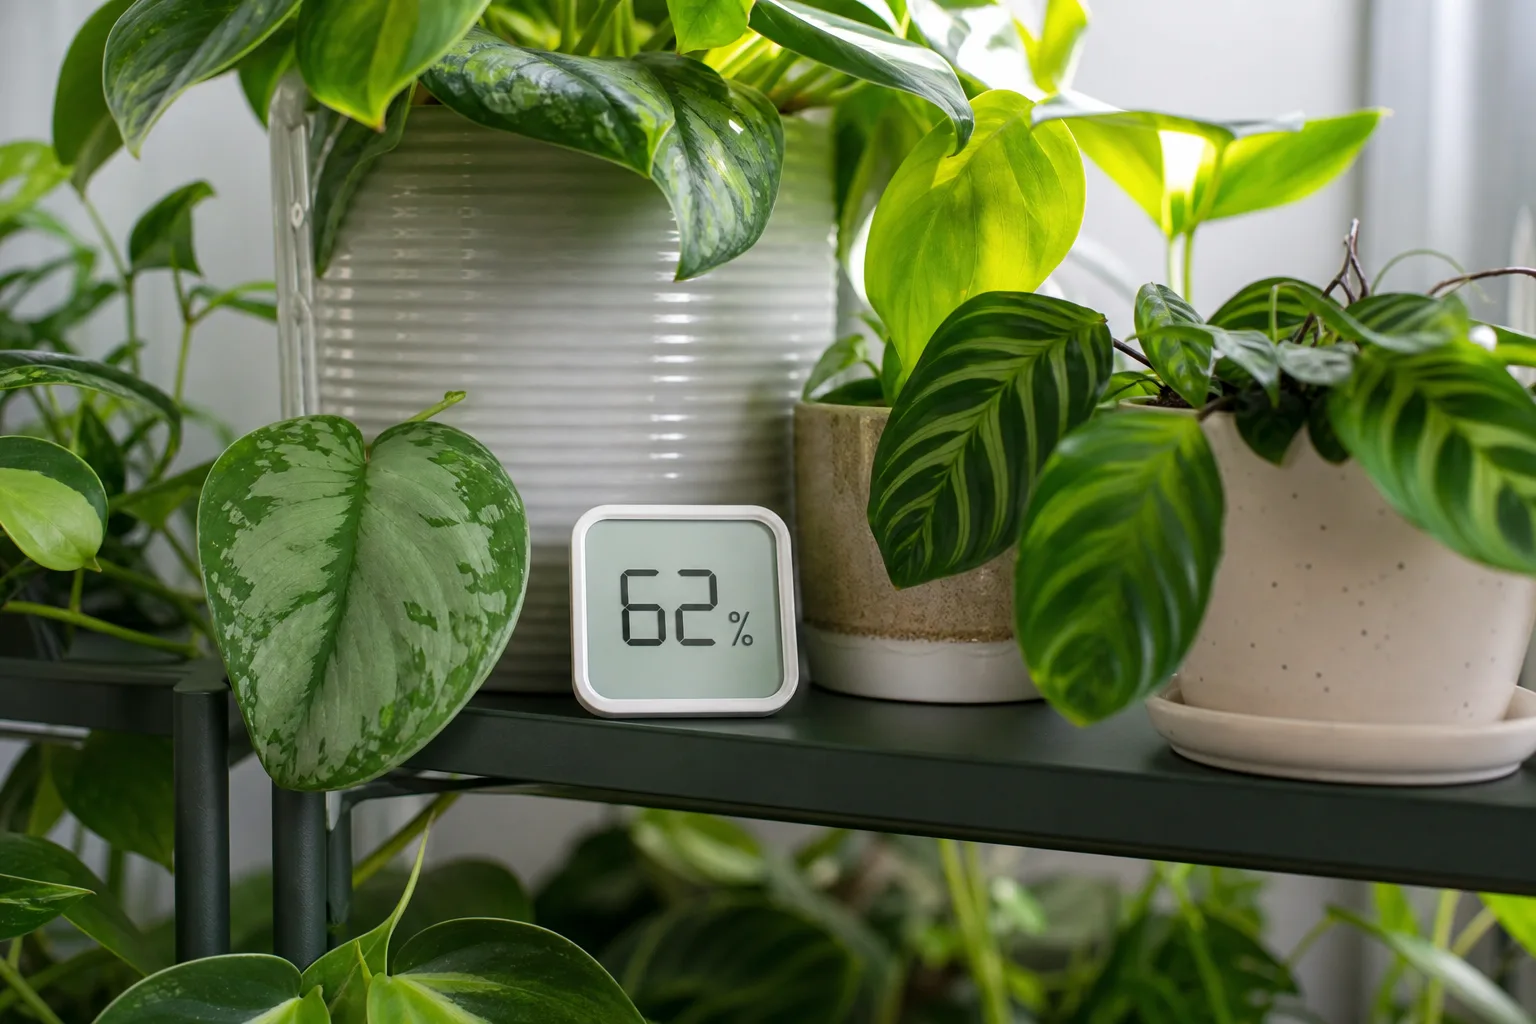
Measure near the foliage instead of assuming that a bathroom or pebble tray is humid enough.
Air movement matters when humidity is high. Keep leaves from touching damp glass, leave space between plants, and avoid leaving the crown wet overnight. If spotting appears and spreads, isolate the plant, keep water off the foliage, and improve airflow rather than assuming every spot is a humidity problem.
Feed lightly while it grows
Feed only when the plant is actively producing leaves and receiving enough light to use the nutrients. The RHS recommends orchid fertilizer every two weeks from spring to autumn, while practical grower guidance ranges from monthly feeding to lighter schedules. For a houseplant in a chunky mix, a cautious starting point is a balanced liquid fertilizer at half the label strength every four weeks during active growth. If it is growing steadily, stay there; do not increase the dose just because the leaves are large or because it has not flowered.
Apply fertilizer to already moist mix, not to a dry root ball, and stop or reduce feeding when growth slows in winter. White crust on the mix, browning after fertilizing, or worsening root stress are reasons to pause and flush the pot with plain water. Fertilizer is not a fix for low light, soggy soil, or a plant that has just been divided. The RHS describes A. crystallinum’s narrow green spathes; most indoor growers value the foliage, so do not chase florist-style blooms with a high-phosphorus product (RHS species profile).
Repot only when the root zone calls for it
Repot when roots circle densely, push through drainage holes, or the mix has compacted and no longer wets and drains evenly. A plant that dries unusually fast may be root-filled, but it may also be in a small terracotta pot in a warm room. Check the root ball before deciding. A few visible roots are not an emergency, and crystal anthurium does not need a larger pot every year simply because a calendar says so.
Repot during active growth when possible. Slide the plant out, remove loose or broken-down mix without tearing healthy roots, and trim only roots that are mushy or hollow with a clean blade. Move it into a container just one size larger, set the crown at the same height, and refill around the roots with fresh airy mix. Water the mix in, let it drain, and wait for the plant to resume growth before feeding again.
For a healthy plant, avoid washing every root bare or aggressively untangling a root ball. If the old mix is sour and wet, however, a closer inspection is justified: remove the failing medium, check for soft roots, and repot into a clean pot and fresh mix. Afterward, keep the plant warm and in bright indirect light, but do not keep adding water to compensate for temporary transplant droop.
Prune leaves without sacrificing healthy growth
Routine shaping is unnecessary. Remove a fully yellow, dead, or damaged leaf by cutting its petiole cleanly near the base with sanitized shears; leave a partly green leaf in place if it is still supporting the plant. Old leaves naturally decline as new ones emerge, so one aging lower leaf does not mean the whole plant needs a rescue routine.
Wipe dust from the leaf surface with a soft damp cloth and support the blade underneath so its long petiole does not twist. Avoid polishing products, rough rubbing, or frequent leaf wetting in a cool room. Wear gloves if you are sensitive to plant sap, and wash the shears and your hands after pruning.
Propagate a mature plant carefully
The least risky route is to divide a mature plant that already has more than one rooted growth point. The RHS lists division, stem or rhizome cuttings, offsets, and fresh seed as propagation options for spring or summer; Plantophiles and Sumo Gardener also describe division and stem cuttings for home growers (RHS; Plantophiles; Sumo Gardener). Their care articles also place preferred humidity around 70% to 80%, a useful target rather than a mandatory minimum (Plantophiles; Sumo Gardener). That does not mean every large leaf can become a new plant: a successful division or cutting needs a viable growing point, and often roots or a node.
Do not divide a small, single-crown plant just to make a second one. The cut may remove the only active growth point, while a leaf blade without a node has no point from which to make a new shoot. Plan propagation for spring or early summer, use a clean sharp knife, and prepare snug pots with fresh, lightly moist mix before lifting the plant.
Divide only rooted growth points
Water the plant the day before so the root ball is easier to handle, then ease it from the pot. Look for distinct crowns or offsets attached to the main stem. Separate them by gently teasing roots apart; if they are firmly joined, use a disinfected blade to make one decisive cut through the connection rather than pulling until roots tear.
Keep at least one healthy growth point and a usable bundle of roots with each division. Pot each piece at its original depth, firm the mix gently, and water enough to settle it without leaving the pot saturated. Place the divisions in warm bright indirect light, keep the mix lightly moist, and hold fertilizer until you see stable new growth. Some older leaves may droop while roots re-establish; repeated unpotting to check progress causes more stress than patience does.
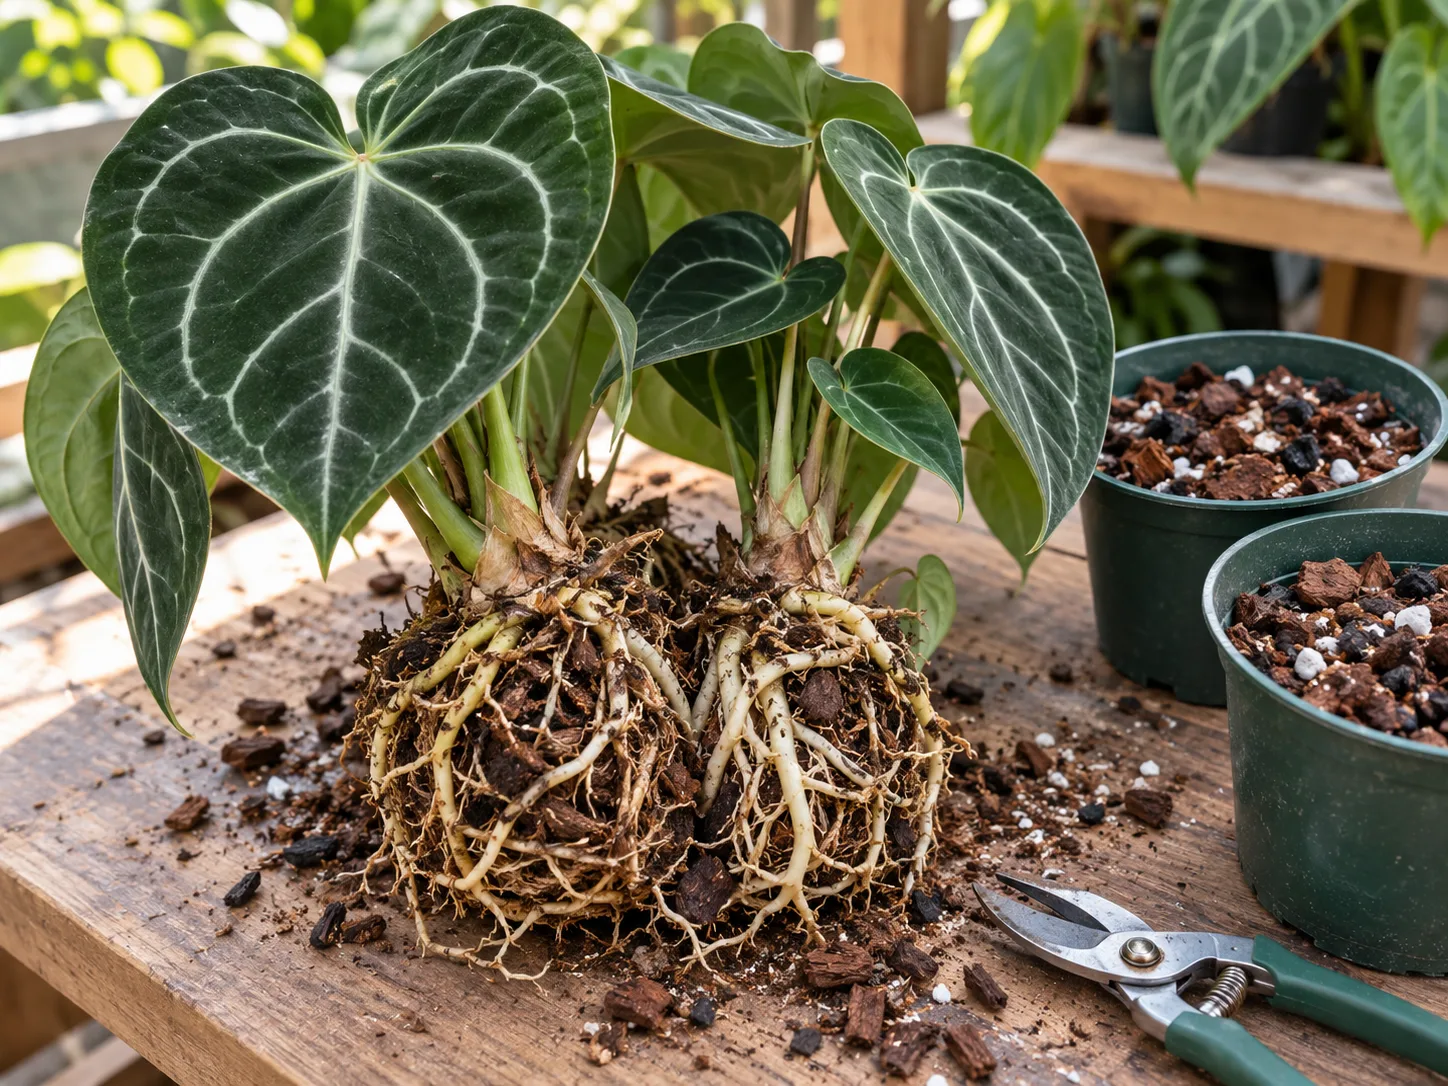
Divide only a multi-crown plant, and make sure each new section retains a growing point and roots.
Use stem or rhizome cuttings when there is a node
A stem or rhizome section can work when it includes a viable node or growing point. Take a cutting only from a healthy mature plant, use a sterile blade, and place the node in a warm, airy rooting medium that stays lightly moist rather than wet. A clear propagation box can hold humidity, but vent it so condensation does not sit on the cutting and inspect often for rot.
Success is not guaranteed, and a leaf-only cutting is not a reliable shortcut. The plant may take weeks or longer to resume growth, especially in cool or dim conditions. Seed propagation is still more demanding: it requires fresh seed, pollination or access to seed, steady warmth, and patience, so division is the sensible home method when the plant has enough crowns.
Diagnose trouble from leaves and potting mix together
A leaf symptom is a clue, not a diagnosis. Before changing care, note which leaves are affected, whether the damage is dry or soft, what the pot weighs, and whether the soil is moist, dry, or sour-smelling. One isolated old leaf can be normal turnover; several new leaves declining at once call for a closer check.
Yellow, curling, or drooping leaves
Yellowing on lower older leaves with firm new growth may be ordinary aging. If several leaves yellow while the pot stays heavy, the mix smells sour, or the base feels soft, stop watering and inspect the roots; prolonged saturation and root rot are known anthurium problems (RHS species profile). Healthy roots should feel firm, not collapse when touched. Trim only dead or mushy roots, then move the plant into a clean pot and fresh open mix.
If the leaves are limp and the mix is dry well below the surface, water slowly and thoroughly, then let the pot drain. If the mix is wet, adding more water can make wilt worse because damaged roots cannot take it up. Curling can also follow abrupt temperature or light changes; check where the plant sits before concluding that it needs extra water.
Brown edges, spots, pests, and slow growth
Crispy margins may reflect dry air, inconsistent watering, mineral buildup, or fertilizer salts. Look for a pattern: damage along many leaf edges after the heating season points toward dry air; a white crust or a recent feeding points toward salts; a pot that swings from bone dry to soaked suggests inconsistent moisture. Correct the likely cause and judge the next leaf, since old brown tissue will not turn green again.
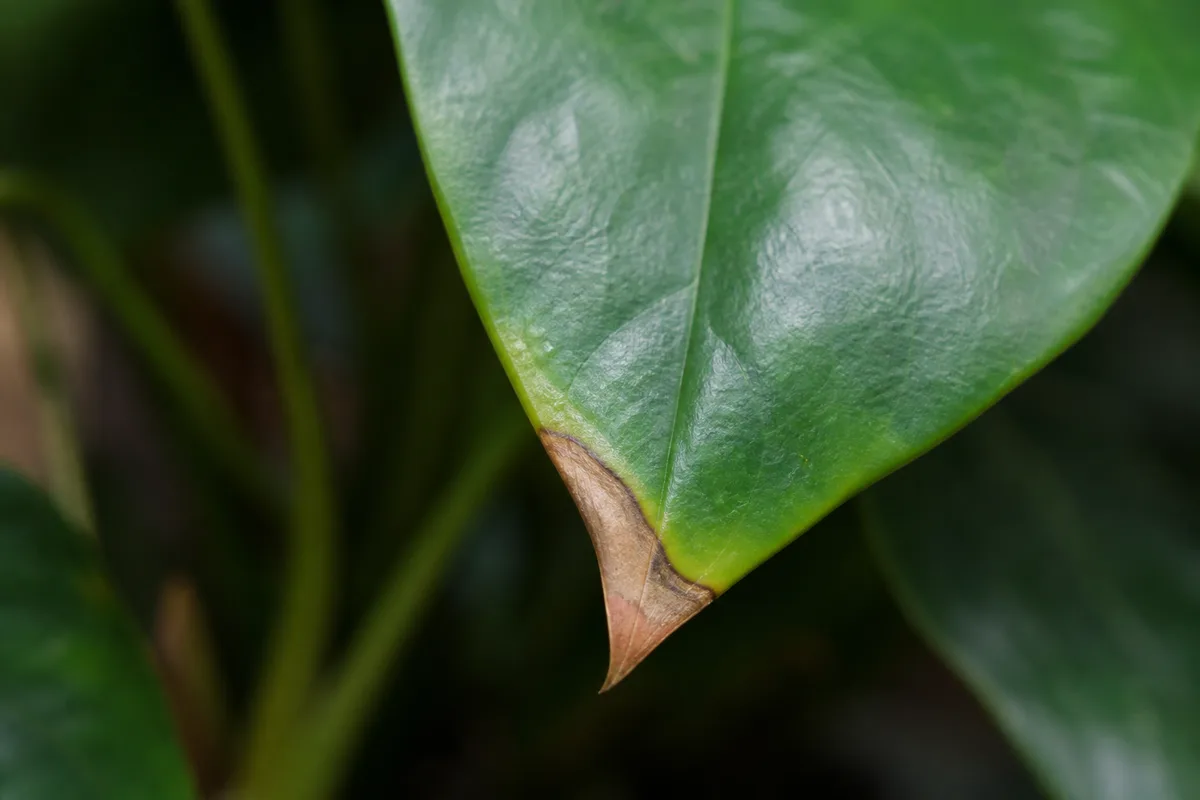
This genus-level example shows a brown tip; its location alone cannot identify whether dry air, uneven watering, or salts caused it.
Small tan or dark spots that spread, especially when leaves stay wet and air is still, deserve isolation and closer inspection. Remove badly damaged tissue with clean shears, avoid splashing water between plants, and keep new plants quarantined. Check leaf undersides and stems for spider mites, mealybugs, aphids, and scale; NC State Extension lists these among pests that can affect anthuriums (NC State Extension Plant Toolbox). If you use a pest-control product, choose one labeled for the plant and pest and follow its label.
Slow growth alone is not a reason to fertilize more. Check light, warmth, root condition, and whether the plant is in its low-light winter pause. The RHS notes that A. crystallinum can take two to five years to reach its listed mature size; a slower leaf rhythm is not necessarily failure. Compare new leaves over time rather than expecting a fixed number each month (RHS species profile).
Keep people and pets from chewing the plant
Keep leaves, cuttings, and berries away from children and pets that chew plants. The RHS lists A. crystallinum itself as harmful if eaten and a skin and eye irritant. NC State Extension also flags poison characteristics for the anthurium genus. ASPCA’s separate flamingo-flower listing names A. scherzerianum, not A. crystallinum, and describes insoluble calcium oxalates and oral irritation; use that listing as genus context, not a species-specific treatment guide (RHS species profile; NC State Extension; ASPCA). Wear gloves if sap irritates your skin and wash after pruning or repotting. If a person or pet chews the plant, contact a medical professional or veterinarian for advice; do not induce vomiting or rely on a home remedy.
Conclusion
For healthy crystal anthurium, keep the leaves in bright filtered light and the roots in a chunky mix that stays lightly moist but never waterlogged. Let the pot’s weight and moisture, not a calendar, decide when to water; adjust slowly when the seasons change. Repot only when roots or old mix warrant it, divide only rooted growth points, and treat yellowing or crisp edges as clues to investigate rather than diagnoses by themselves. Consistent conditions usually do more for this foliage plant than extra fertilizer, a moss pole, or constant tinkering.



