Brain Cactus Care: Light, Water, Soil, and Repotting
Learn brain cactus care with clear advice on bright light, dry-down watering, gritty soil, safe repotting, propagation, and spotting rot before it spreads.
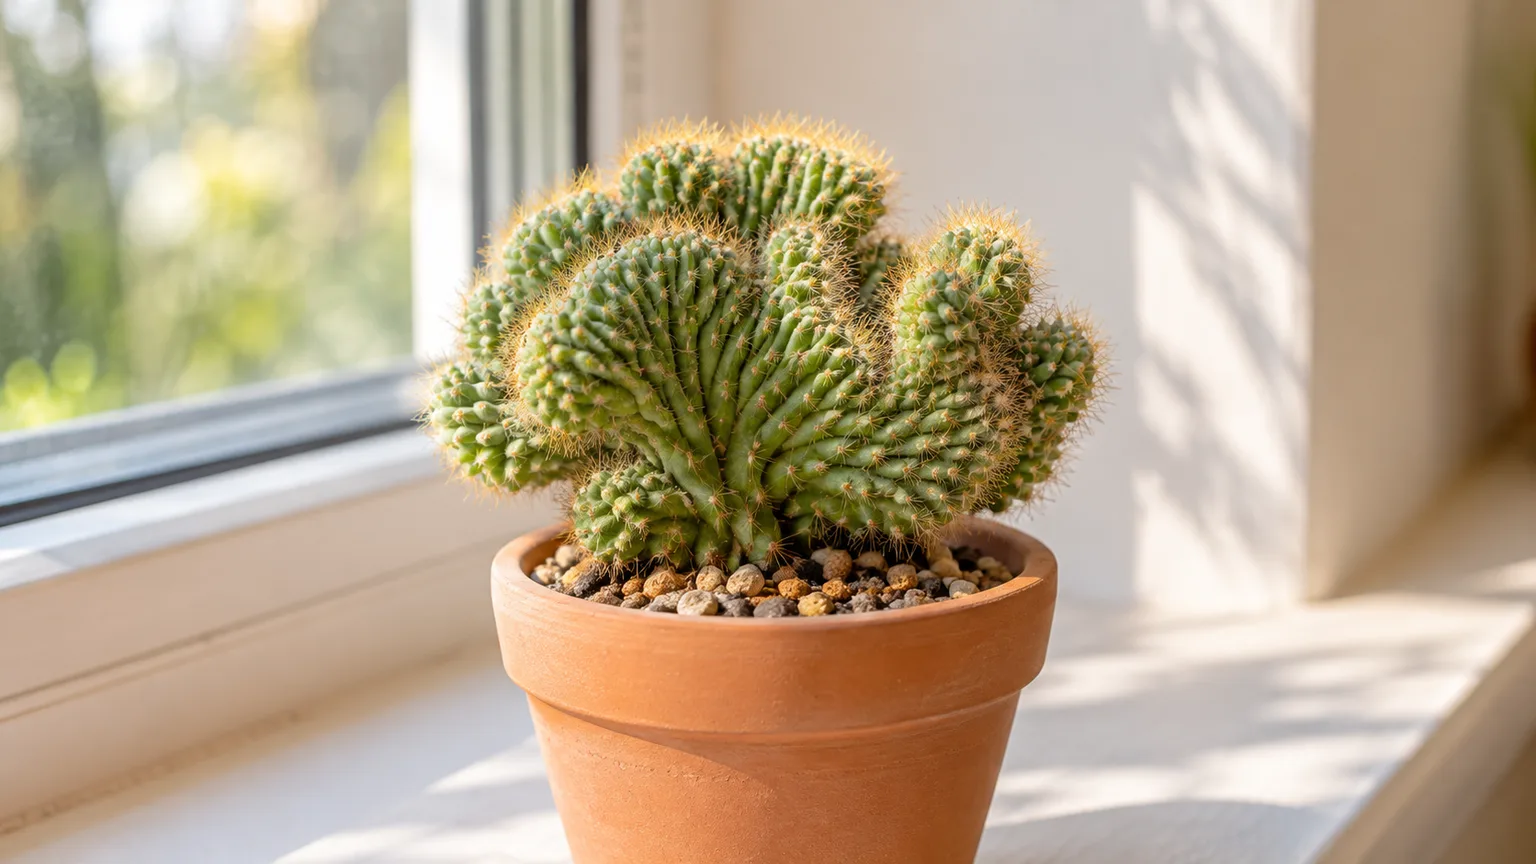
A brain cactus is a crested form of Mammillaria elongata: instead of making the familiar upright, fingerlike stems, its growing points spread into dense, twisting ridges. That unusual crest is also the part that makes care a little different. Water can linger between folds, the plant is easy to bruise while handling, and a sudden move into strong sun can scar it.
The steady approach is simple: give it the brightest light it can adapt to, use a small pot with a drainage hole and a gritty mix, then water thoroughly only after that mix has dried all the way through. The calendar is a poor guide because a cactus in a cool room or a plastic pot can stay wet much longer than one in a warm, bright spot.
What a brain cactus is—and what the crest changes
The plant sold as brain cactus is usually labeled Mammillaria elongata ‘Cristata.’ The species is part of the cactus family, Cactaceae; Kew’s Plants of the World Online entry recognizes Mammillaria elongata as a species and places its native range in Mexico, while the NCBI Taxonomy record indexes the same species name. “Cristata” describes the crested form sold by growers, rather than a promise that every new shoot will keep the convoluted shape.
A crest is a growth abnormality in which a growing point widens into a ridge instead of extending as a regular stem. The exact cause can vary, and it is not a cue to injure a healthy cactus in an attempt to reproduce the form. A new shoot or pup may grow straight like ordinary Mammillaria elongata; that does not mean the original plant is reverting or dying. The plant-specific overview from Promesse de Fleurs describes the crest as a slow-growing, compact form with small seasonal flowers, but individual plants vary in shape and bloom.
The folds also change how you handle water and debris. Fine grit, dust, and dead flower remains can lodge in tight creases, so avoid pouring water over the crown or packing decorative stones against it. Keep the body visible and dry between irrigations; the root zone needs a drink, but the crest does not need to be misted.
Choose a firm, healthy plant before bringing it home
Look for a plant that feels firm when gently touched through protective gloves or packaging. Healthy tissue is generally evenly green and taut, with no expanding black or translucent patches, sour smell, or soft base. A few old, dry, tan marks near the soil line can be harmless corking, so inspect whether discoloration is dry and stable rather than judging color alone.
Check the bottom and center of the crest for cottony white clusters, tiny insects, webbing, or damp debris. Mealybugs can hide where ridges meet, and a dense plant makes them harder to see than on a straight cactus. If the seller’s soil is peat-heavy and still wet, let the plant acclimate in bright shade and plan to repot after it is stable; do not immediately tug at a healthy plant just because the nursery mix looks different from yours.
Give it strong light and acclimate it gradually
Brain cactus needs bright light to stay compact. Indoors, place it close to a bright east-, south-, or west-facing window, adjusting for hemisphere, seasonal sun angle, and how hot the glass gets. A bright window can still be dim if trees or buildings block the sky; if the plant stretches into long, loose sections or loses its dense shape, increase light gradually rather than compensating with more fertilizer.
A plant bought from a shaded greenhouse may scorch if placed in hours of hot direct sun on its first day. Start with bright indirect light, then add a short period of gentle morning sun every few days over roughly two weeks; pause if the skin becomes pale, yellowed, or develops crisp tan patches. Once acclimated, the plant can handle more direct light, but filter harsh afternoon sun behind hot glass and turn the pot periodically so one side does not lean toward the window.
Outdoors, choose a sheltered position with morning sun and quick drainage. Bring the pot indoors before frost or extended cold, wet weather; a small container can be moved, which is useful even in warm regions when winter rain keeps the mix saturated.
Use a draining pot and an airy mineral mix
The drainage hole matters more than the pot material. A terracotta pot dries faster and is easy to grip during handling, but plastic can work if the mix is open and the grower checks moisture rather than watering on a timer. Never leave the pot standing in a saucer of runoff, and avoid a container much wider than the root ball: extra wet soil around a small root system can take a long time to dry.
Use a commercial cactus mix only if it dries readily in your home. Dense mixes with a large amount of fine peat may hold water for too long, especially in a cool room. Improve them with pumice, perlite, or another coarse, stable mineral ingredient; very fine sand can fill air spaces instead of improving them. The goal is a mix that accepts water, drains freely, and leaves air around the roots.
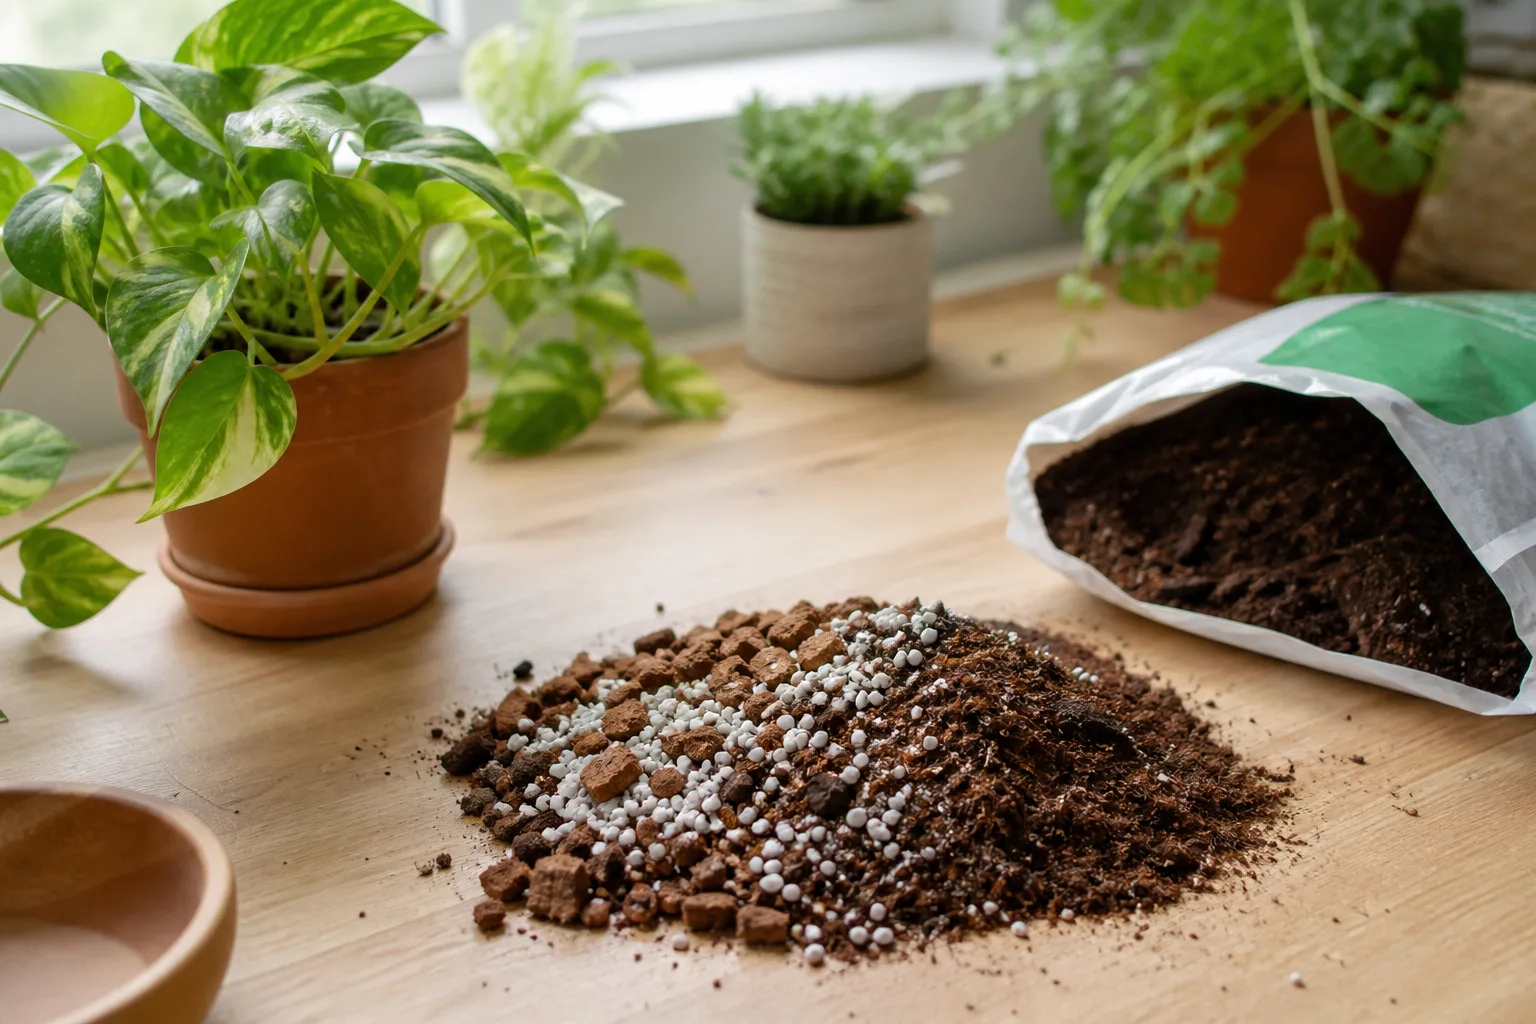
A simple brain cactus soil recipe
For a starting blend, combine one part ordinary potting mix with one to two parts pumice or coarse perlite by volume. In a humid climate or for a grower who tends to water early, use the more mineral-heavy end; in a hot, dry home, a little more potting mix can keep roots from desiccating too quickly. This is a practical starting ratio, not a universal formula, because particle size, room temperature, pot material, and airflow all change the dry-down.
Before planting, lightly moisten a handful and squeeze it. It should fall apart when released instead of forming a dense lump. If the root ball stays damp for many days, increase coarse mineral content or use a smaller pot with a drainage hole before changing to an aggressive watering schedule.
Water by full dry-down, not by the calendar
Check moisture below the surface with a wooden skewer or by lifting the pot. If the mix is still cool or dark several inches down, wait; a dry crust over a wet center is not a dry pot. When the mix is dry from top to bottom, water slowly at the soil line until excess drains through the hole, then empty the saucer. Avoid wetting the crest, where water can sit in the ridges. Gardening Know How’s brain-cactus guidance also calls out moisture trapped in the folds and recommends directing water away from the plant body.
During active growth in warm, bright spring and summer conditions, the soil may dry quickly enough to need more frequent checks. In winter, shorter days and cooler temperatures slow growth and evaporation, so watering intervals lengthen; some growers may water only occasionally, while a cool, dim plant may need to stay nearly dry. Do not follow a fixed weekly or monthly schedule when the actual pot is still wet.
If the cactus is shriveling, first check the roots and mix rather than automatically adding water. A plant with dry, brittle roots may be thirsty, but a plant with damaged roots can also wrinkle because it cannot absorb moisture. A firm plant does not need extra irrigation simply because the surface looks dusty.
Keep it warm, dry, and frost-free
A normally heated room is suitable as long as the plant receives strong light and the soil can dry. Avoid cold drafts against a wet pot, enclosed display cases with stale air, and persistently humid rooms where condensation settles on the crest. Ordinary household humidity is usually easier to manage than excess water in the soil; there is no need to mist this cactus or run a humidifier for it.
If it spends summer outside, bring it under cover before cold nights and definitely before frost. The exact safe threshold depends on how long the cold lasts, wind exposure, whether the roots are dry, and how sheltered the plant is. When in doubt, a dry, frost-free place is safer than testing a small potted crest against cold rain.
Fertilize lightly while it is growing
A brain cactus does not need heavy feeding. If it is growing in fresh commercial cactus mix, skip fertilizer at first; many mixes already contain a modest nutrient charge. Otherwise, during warm, bright active growth, use a cactus fertilizer diluted to a low fraction of the label rate every few waterings or about monthly, whichever produces the lighter feeding schedule.
Do not feed a plant that is cold, dormant, newly repotted with damaged roots, or recovering from rot. Excess fertilizer salts can injure roots, and a high-nitrogen push can encourage soft, uneven growth rather than a compact crest. Water the soil first if the label calls for feeding a moist root zone, and stop by early fall as light and growth decline.
Understand its size, growth rate, and flowers
This is a slow, compact cactus, so a small plant may take years to change noticeably. A mature clump can spread wider than it grows tall; shop descriptions often quote a maximum near 6 inches tall and 12 inches across, but shape, pot size, and growing conditions make those figures approximate. Do not move it into a large bowl simply to make it look fuller—give the roots a snug container and let the crest fill it gradually.
Mature, well-lit plants may produce a ring or scattered crown of small flowers near the growing points, often in spring or summer. Flower color may range from cream or pale yellow to pinkish tones, depending on the plant. Lack of flowers alone is not a distress signal: low light, immaturity, frequent disturbance, and a warm winter without a rest can all affect flowering, and many plants are grown primarily for their sculptural form.
Repot without crushing the crest
Repot when roots fill the container, the mix has broken down and stopped draining, or the plant repeatedly dries unevenly—not just because a calendar says two years have passed. Spring or early summer is convenient because the plant can resume growth, but correcting waterlogged soil or active root rot should not wait for a preferred season. Choose a pot only modestly wider than the root ball and confirm its hole is open before you start.
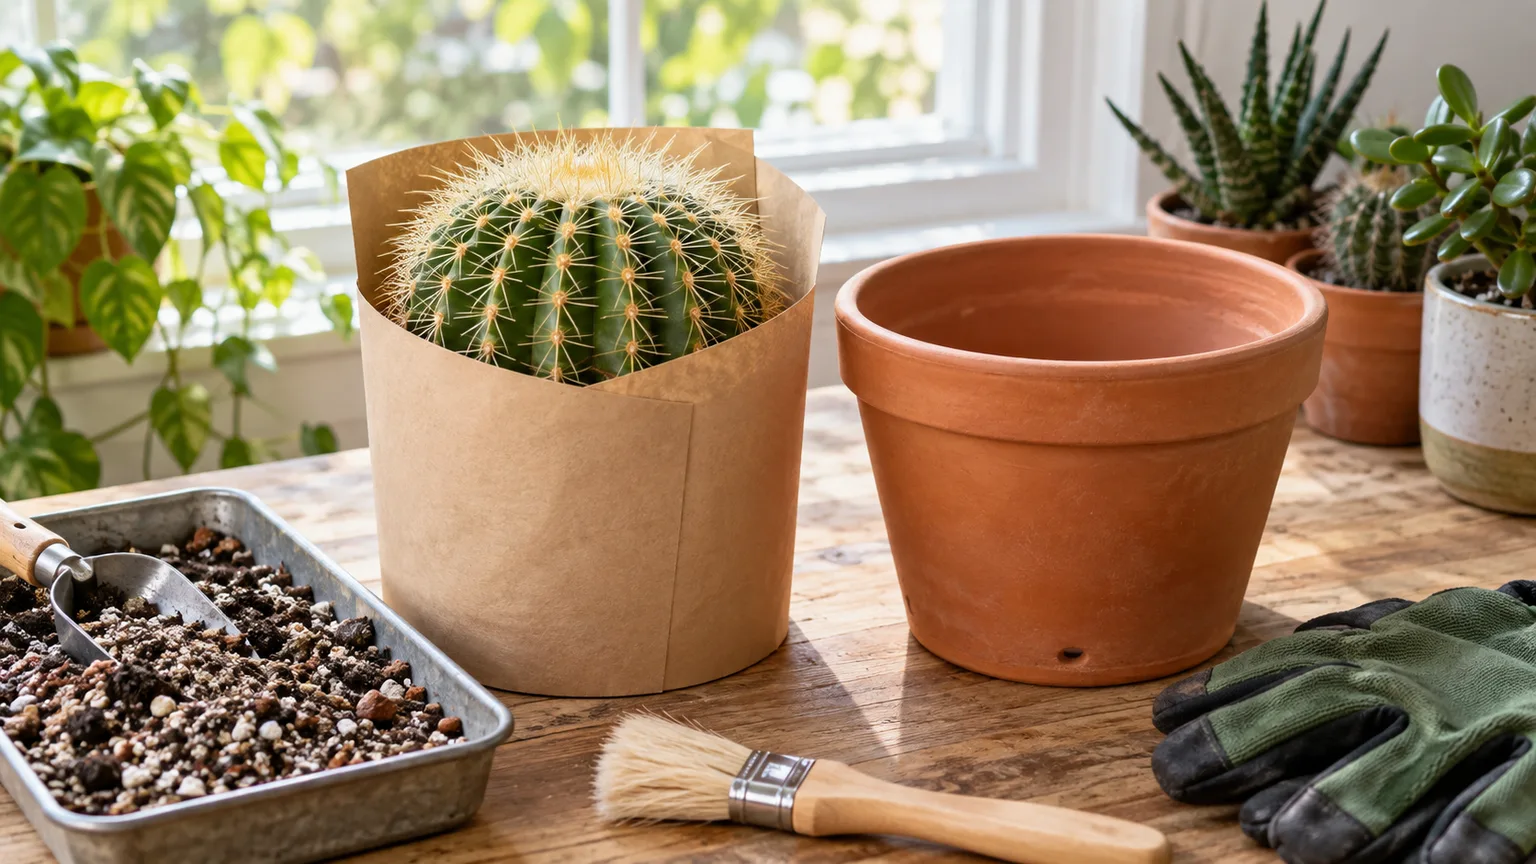
Protect your hands and the plant’s spines. Use folded cardboard, a thick towel, or rolled newspaper as a sling around the sides; do not squeeze the crest or pull it by one ridge. Ease the root ball out, brush away loose old mix, and inspect roots. Healthy roots are firm; trim only clearly black, mushy, or hollow sections with a clean tool, then let any cuts dry before planting into fresh mix.
Set the plant at the same depth it was growing before, keeping the crown above the soil and avoiding a mound of grit pressed into its folds. Backfill gently without compacting the mix. If the roots came out intact, wait a few days before the next full watering; if you cut damaged roots, keep the plant dry longer until cuts have callused, then resume cautiously. This short recovery period is about damaged roots and wounds, not a requirement to dehydrate every cactus after routine repotting.
Propagate carefully and set expectations
Propagation is possible, but preserving the crest is the difficult part. A seed-grown plant may not reproduce the parent’s exact shape, and an offset from below the crest can grow as the straight, fingerlike form of the species. If the sculptural crest matters, keeping the original plant healthy is more reliable than cutting it apart for a second specimen.
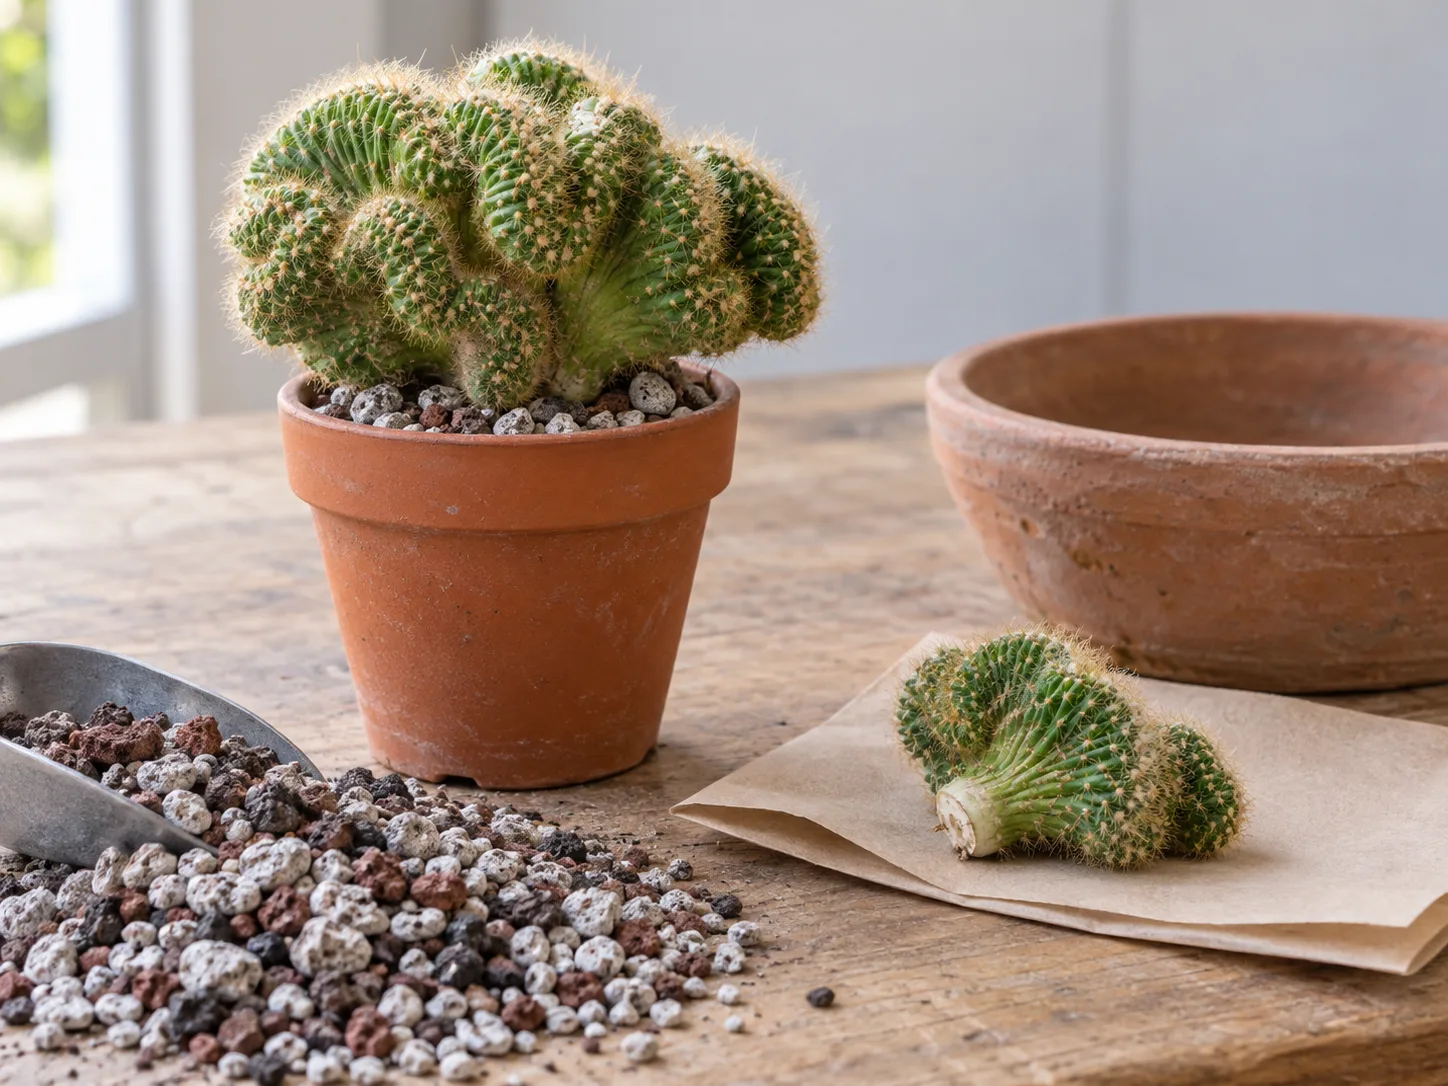
Remove offsets only when they are ready
A naturally detached or well-developed offset is the least complicated material to try. Wear gloves, use a clean blade if it remains attached, and let the cut surface dry in a warm, shaded, airy place until it is callused. Set the base shallowly on a dry, gritty cactus mix; do not bury the soft crown. Keep it bright but out of harsh sun while it forms roots, and resist repeated watering—moisture around an unrooted cutting can trigger rot before it can drink.
Once it resists a very gentle tug and shows new growth, return it gradually to the stronger light used for the parent. If the new growth is cylindrical rather than crested, that is a normal outcome for an offset with a different growing point, not proof that the propagation failed.
Root or graft a cutting with patience
A crest cutting can sometimes root on its own, but large, irregular pieces are prone to instability and rot. Choose a small healthy section, make a clean cut through firm tissue, and allow the cut to callus fully before it touches substrate. Keep the cutting supported above the mix on a dry surface at first, then place it shallowly on gritty medium; do not water it as if it already had working roots.
Grafting is another way specialist growers preserve or support a crest, but it requires a compatible, actively growing rootstock, clean precise cuts, and stable contact while the graft unions. If you have never grafted a cactus, practice on expendable material or buy a plant already grafted rather than cutting a prized brain cactus. The method can keep a weak crest alive, but it does not remove the need for bright light, drainage, and careful watering.
Troubleshoot pests and changes in the plant
A useful first check is texture, not color: firm and dry changes are different from soft, wet, or spreading lesions. Before treating a problem, move the cactus away from neighboring plants and check the mix, roots, drainage hole, and recent light changes. Changing water, fertilizer, and light all at once makes it harder to identify what actually helped.
Find mealybugs in the folds
Mealybugs look like tiny white cottony deposits, often tucked where ridges meet or near the base. Isolate the plant and inspect the entire crest, pot rim, and nearby plants; a few missed insects can restart the infestation. Remove visible insects carefully with a dry cotton swab or soft brush, then recheck every few days. For a larger infestation, choose a product labeled for cactus or indoor ornamentals and follow its label exactly; test a small area first because sprays can mark sensitive tissues.
Separate rot, sunburn, and normal corking
Root or stem rot usually feels soft, wet, or collapsing and may darken or smell unpleasant. Remove the plant from wet mix, cut away only tissue that is clearly rotten with a sterilized blade, and save firm material if enough remains; severely affected plants may not recover. Correct the underlying cause—slow-drying soil, a blocked hole, or watering before the pot is dry—or the replacement tissue will face the same conditions.
A dry, firm brown patch can be old corking as the lower stem ages. Crisp tan or bleached areas on the sun-facing side point more toward sunburn, especially after a sudden move outdoors. Corking does not reverse, and a sunburned patch may remain visible, but neither automatically calls for more water. Protect the plant from further stress and judge the next growth rather than expecting old scars to turn green again.
Conclusion
The brain cactus does best when its unusual crest stays dry while its roots get a thorough drink only after the mix has dried completely. Give it strong but gradually introduced light, a small draining pot, airy mineral soil, warmth, and a light hand with fertilizer. That steady routine is more dependable than a rigid calendar or frequent repotting.
Handle the plant gently and treat propagation as an experiment: a cutting may root, but an offset may grow straight rather than preserve the crest. If the plant changes, check firmness, moisture, light history, and roots before deciding it is dying. Those observations will tell you whether to wait, adjust care, or intervene.



