Beginner’s Guide to Orchid Care: Light, Water, and Reblooming
Learn beginner orchid care with a practical guide to light, watering, potting mix, humidity, fertilizer, repotting, troubleshooting, and reblooming.
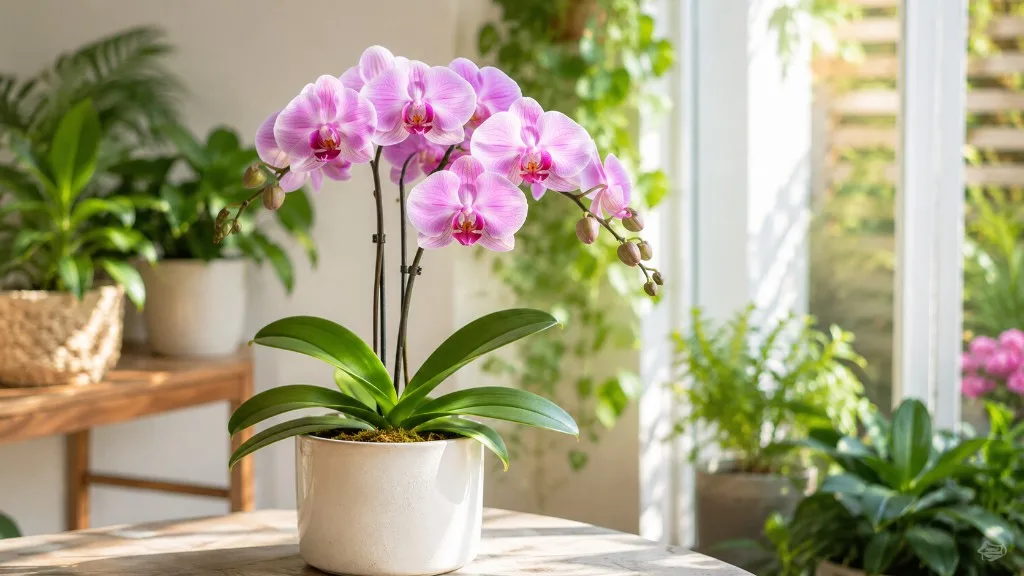
An orchid that drops its flowers is usually finishing a normal bloom cycle, not asking to be thrown away. The challenge is that “orchid” covers plants with different needs. The plant sold in a grocery store is often a Phalaenopsis, or moth orchid, and it makes a forgiving first orchid when its roots receive light, air, and moisture followed by a little drying time.
This guide uses Phalaenopsis as the beginner baseline and flags where other orchids differ. Observe before acting: check the plant’s name, roots, medium, and drying speed, then adjust one condition at a time. A calendar can remind you to inspect; it cannot tell you whether the orchid is thirsty.
Orchid Care at a Glance
For a typical indoor Phalaenopsis, provide bright filtered light, a warm room without cold drafts, and an airy orchid medium in a pot that drains freely. Water the medium thoroughly when it is nearly dry, then empty all water from the outer decorative pot. Feed weakly and regularly while roots and leaves are actively growing, and repot when the medium breaks down or the roots need attention.
Use this quick check as a starting point:
- Light: bright indirect light; an east-facing window is a reliable first choice.
- Water: wet the root zone completely, drain it, and wait until the medium is nearly dry before repeating.
- Pot: use a container with drainage and an orchid mix that leaves air around the roots.
- Temperature: keep a Phalaenopsis comfortably warm, away from heating vents, air conditioners, and cold glass.
- Humidity: moderate indoor humidity with gentle air movement is better than a stagnant, wet corner.
- Fertilizer: apply a diluted orchid fertilizer during active growth and occasionally flush the medium with plain water.
These are not rules for every orchid. A plant with pseudobulbs, a terrestrial slipper orchid, or a cool-growing Cymbidium may need a different watering rhythm or seasonal temperature pattern. The American Orchid Society’s Phalaenopsis culture sheet and RHS growing guide are useful references when the plant is identified as a moth orchid.
Identify Your Orchid Before You Follow a Routine
Look for a plastic tag, receipt, or label on the pot before choosing care instructions. Phalaenopsis usually have broad, firm leaves arranged in a low fan and arching flower stems. Cattleya flowers are often large and showy, while Oncidium types may carry branching sprays of smaller blooms. Dendrobiums grow on upright canes, and Paphiopedilum slipper orchids have distinctive pouch-shaped flowers. These visual clues are helpful, but hybrids can blur the categories; a botanical name is more reliable than flower color alone.
Orchids also differ in where and how they grow. Many familiar houseplant orchids are epiphytes: their roots attach to trees in nature, exposed to air and rain rather than packed into ordinary soil. Some orchids are lithophytes that grow on rock, while others are terrestrial and grow in soil-like forest litter. The University of Connecticut Extension’s orchid care and repotting guide explains why the roots of common epiphytic orchids need a loose, breathable medium.
If the tag is missing, start with the safest shared principle: use a draining pot, avoid leaving roots in standing water, and give the plant bright filtered light while you seek an identification. Do not repot a healthy flowering plant just to replace a decorative pot. First remove any sealed sleeve or hidden cachepot that traps water, and check whether the inner nursery pot actually has drainage holes.
Choose the Right Light
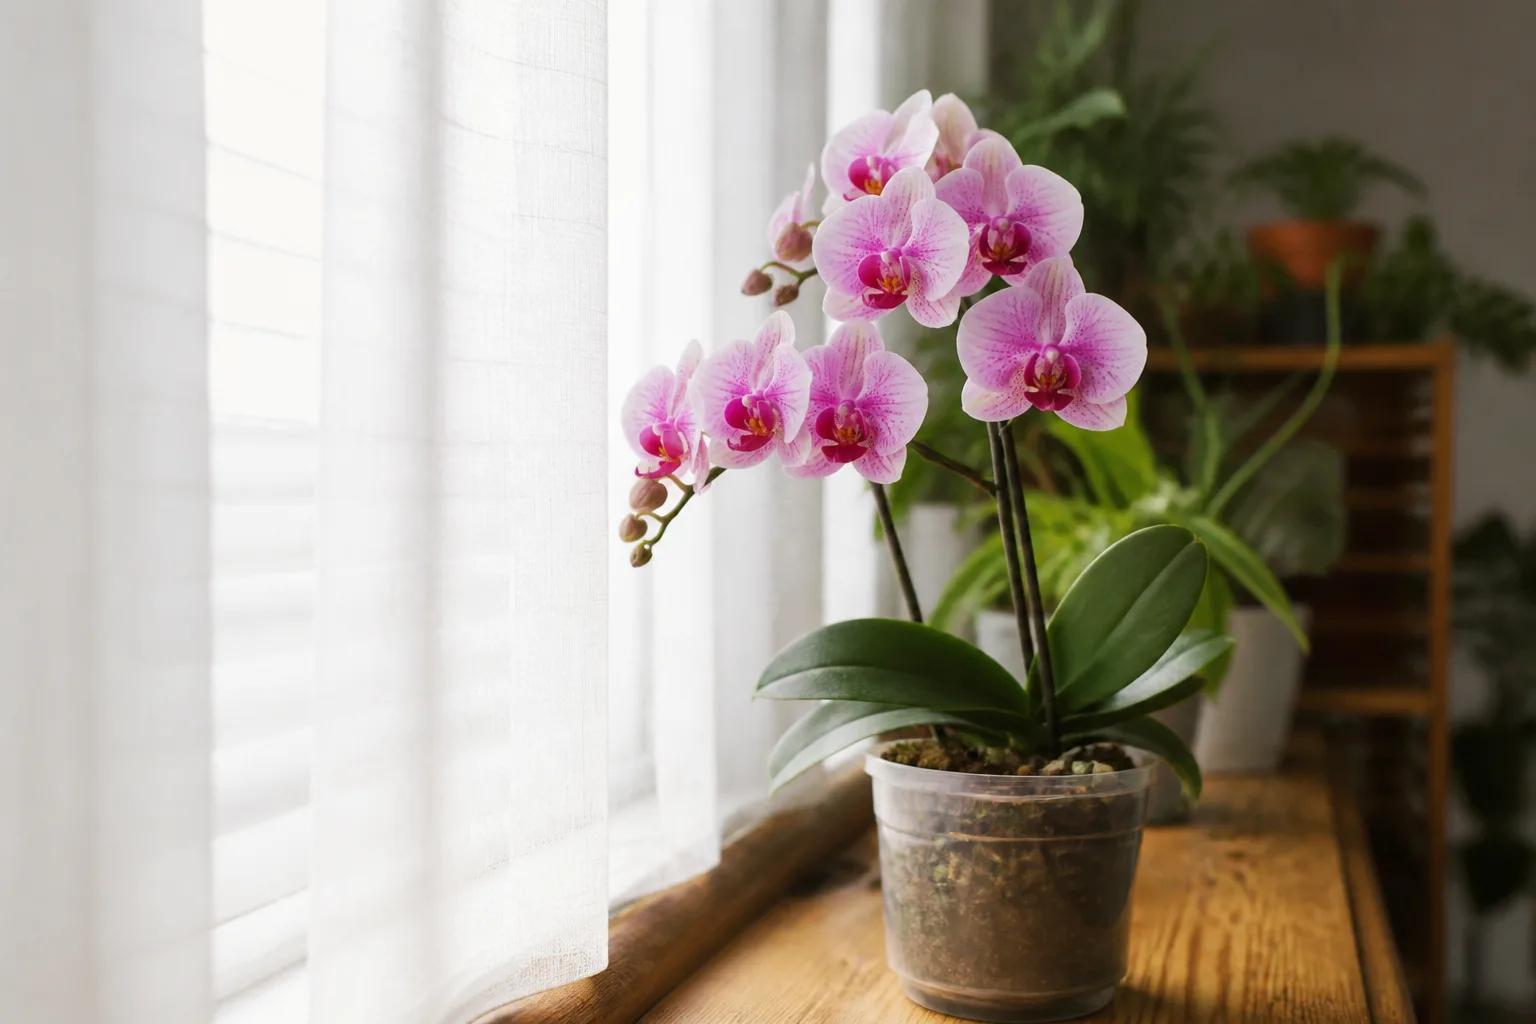
Set a Phalaenopsis in bright, indirect light. An east-facing window often provides gentle morning sun and enough brightness for steady growth. A south- or west-facing window can also work if a sheer curtain filters the strongest rays or the plant sits back from the glass. In a dim room, a suitable grow light can help; position it according to its instructions and keep enough distance to prevent leaf overheating.
Watch the leaves rather than relying only on a compass direction. Healthy Phalaenopsis leaves are usually medium green and firm. Very dark green leaves and a plant that makes leaves but never flowers can signal inadequate light, though nutrition, plant maturity, and seasonal conditions also matter. Bleached or scorched patches on the window-facing side suggest too much direct sun. A sudden move into stronger light can burn leaves even when the same location might suit a plant that has acclimated gradually.
Turn the pot occasionally if the plant leans toward the window, but avoid twisting a developing spike. The American Orchid Society recommends bright conditions with little or no direct sun for Phalaenopsis, while Epic Gardening’s beginner orchid guide notes that light needs vary by orchid group. Cattleyas and many Oncidiums tolerate brighter light than a moth orchid, so identify the plant before moving it into direct sun.
Water by the Roots and Potting Medium
Water when the potting medium is close to dry, not because a certain weekday has arrived. A bark mix in a warm, bright room may dry much faster than tightly packed moss in a cool corner. Pot size, airflow, season, and the amount of living root mass all change the interval. For many Phalaenopsis, checking once or twice a week is reasonable; watering may be needed less often in winter or more often during warm, dry weather.
If the orchid is in a clear pot, look at the roots. Roots that are green after watering and turn silvery as they dry can help show moisture change, but color is not a perfect gauge in every pot. Lift the pot and notice its weight, then feel the mix near the center rather than only at the surface. Bark often looks dry on top while the interior is still damp. With sphagnum moss, a gentle squeeze or a wooden skewer inserted briefly can reveal retained moisture.
When it is time, water thoroughly with room-temperature water until it runs through the drainage holes. You can soak a nursery pot briefly, then let it drain completely. Never leave the pot standing in a bowl of water. Empty the cachepot and saucer, and keep water from collecting in the crown—the point where the leaves meet. Watering in the morning gives stray droplets time to evaporate. The Colorado State University PlantTalk guide and UConn Extension both emphasize drainage and allowing conditions to change between waterings.
Avoid both extremes. A chronically wet, airless mix deprives roots of oxygen and encourages decay; a Phalaenopsis allowed to become bone dry for prolonged periods may develop limp, wrinkled leaves. If a plant is mounted or growing in a very coarse mix, it may need more frequent watering than one in moss. Adjust based on drying, not on the label “orchid.”
Choose an Airy Pot and Orchid Medium
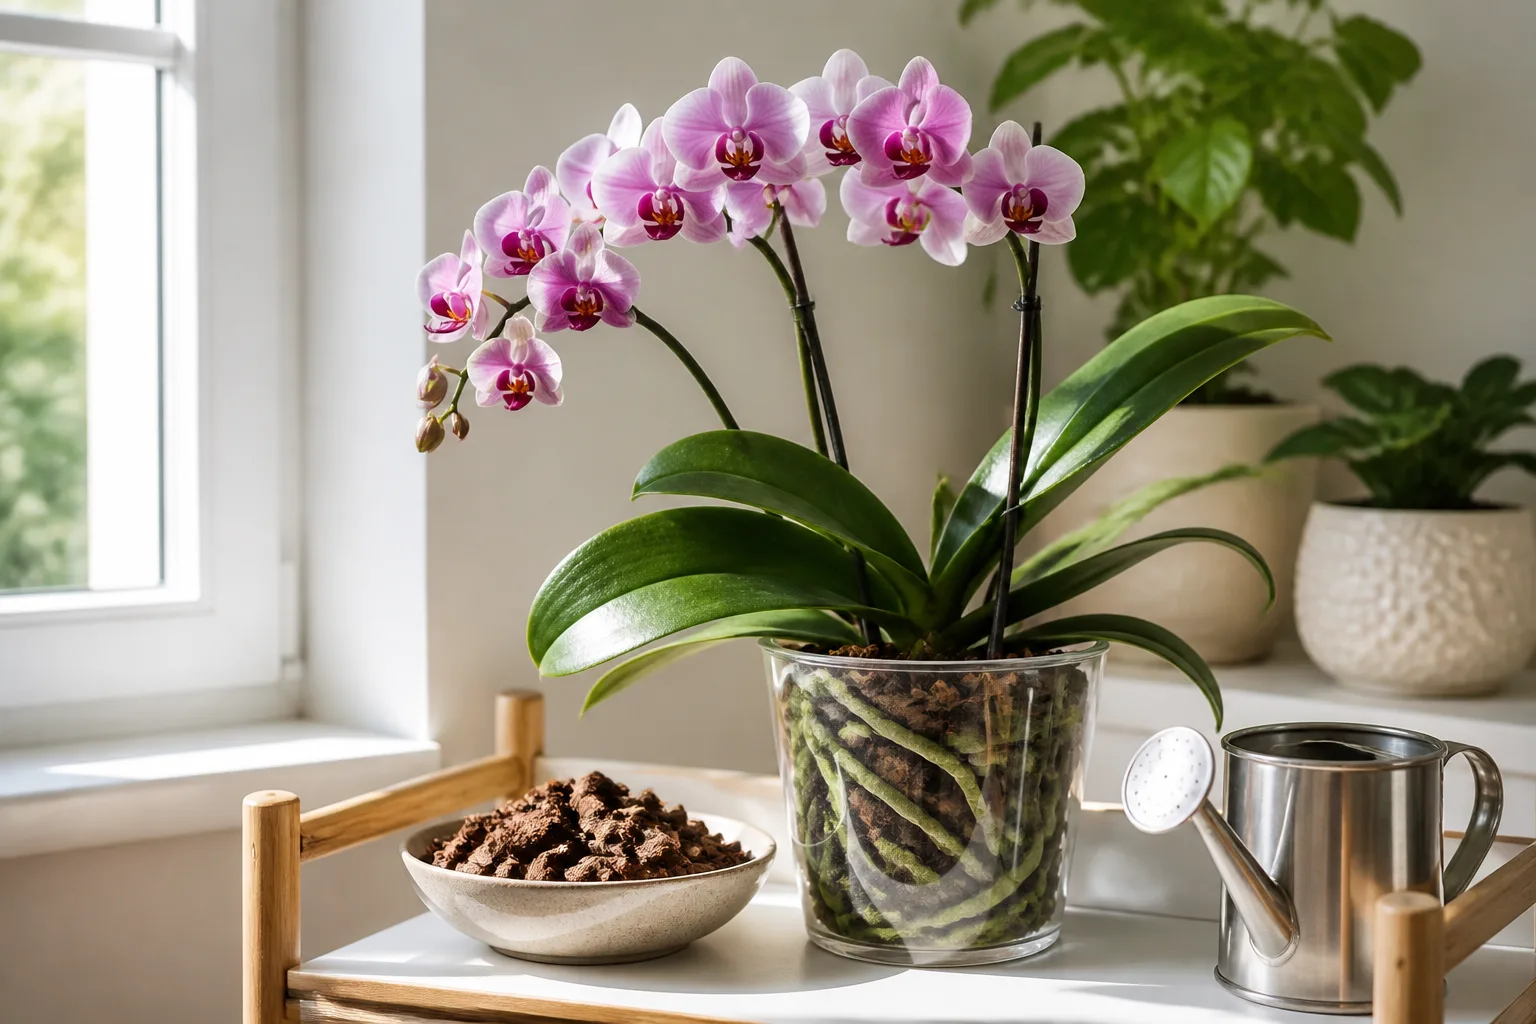
Use a draining pot and a medium made for the orchid you own. For a typical epiphytic Phalaenopsis, coarse bark or a chunky orchid mix leaves air around roots. All-purpose potting soil is usually too dense and stays wet too long. A clear pot makes roots and moisture easier to inspect, but an opaque pot can work if it drains and you learn how the medium dries.
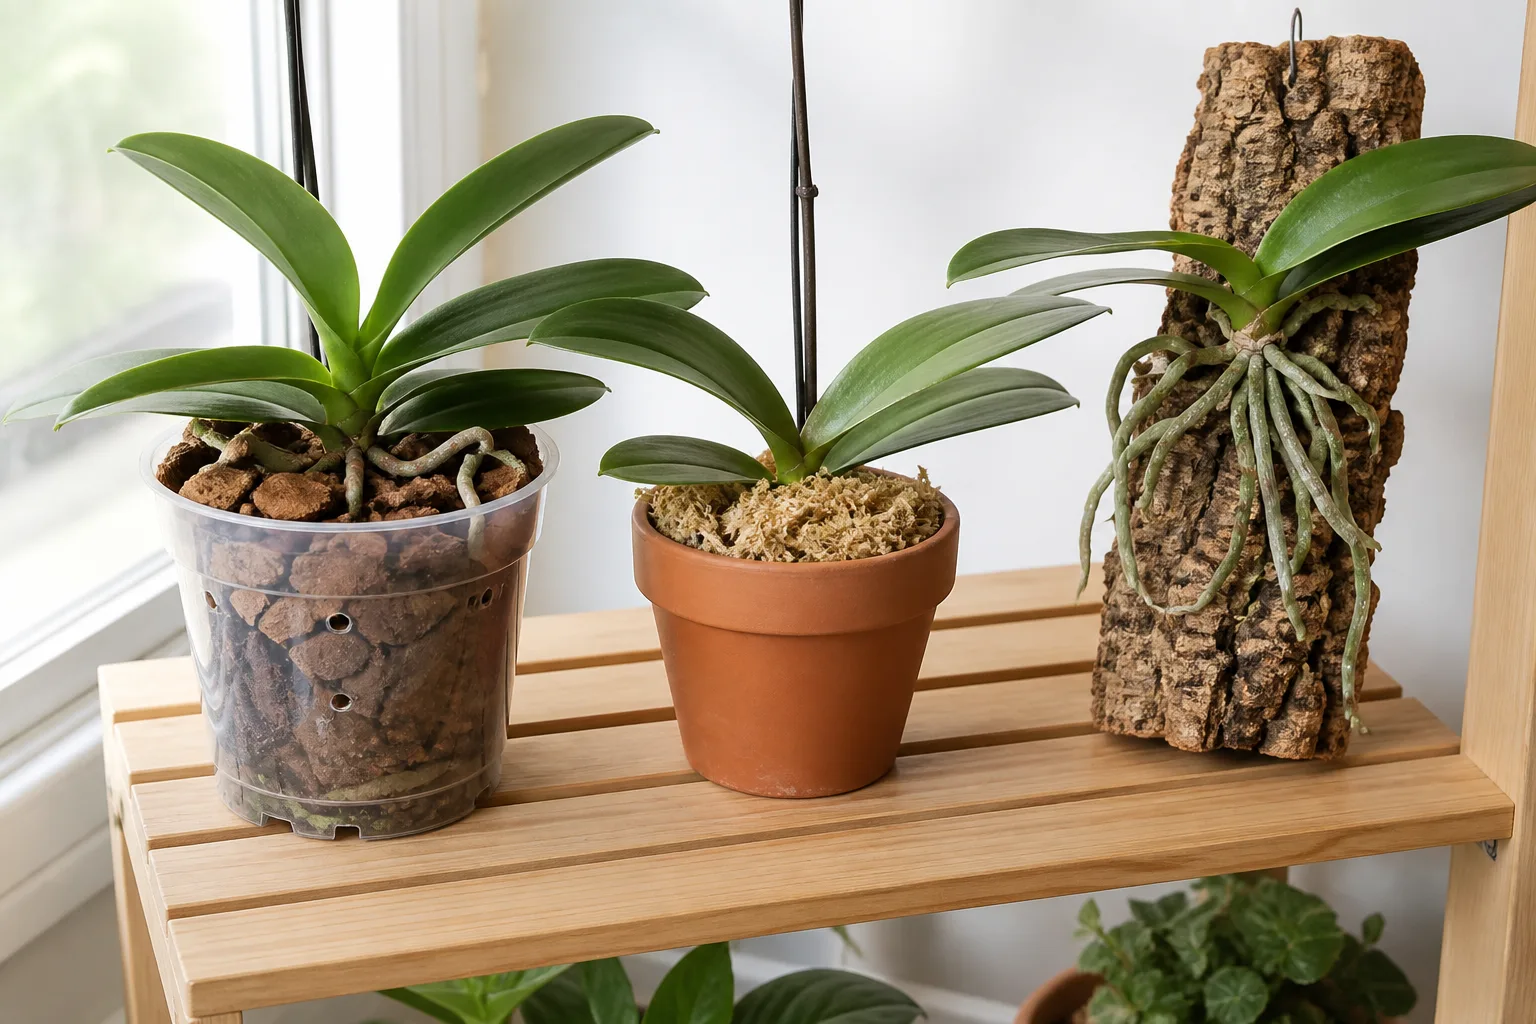
Bark dries quickly and makes overwatering less likely in a humid or cool home, but may need more frequent checks in a warm, dry room. Sphagnum moss holds moisture longer. It can suit a dry home or a grower who checks carefully, but dense moss packed around the root ball can stay wet in a decorative pot and lead to root damage. If a new orchid arrives in a tight plug, do not pull it apart while it is flowering unless there is a clear problem; note how long the center stays damp and plan to assess it after bloom.
Choose a pot only slightly larger than the root system. Excess medium around a small root ball dries slowly, so an oversized container makes it harder to judge moisture. If you use an outer ceramic cover, lift out the draining nursery pot for watering and return it only after excess water has stopped dripping. Different setups—bark, moss, and mounted roots—cannot be watered on the same schedule.
Set Temperature and Humidity
Most home-grown Phalaenopsis are comfortable in ordinary warm indoor conditions. Keep the plant away from cold window glass, exterior doors, and sudden blasts from heating or cooling vents. A room that feels comfortable to people is often a reasonable starting point, but prolonged cold can stress a warm-growing moth orchid. The American Orchid Society’s culture guidance describes warm daytime conditions and nights above about 60°F for routine growth; its seasonal cooler-night cue is a separate reblooming tactic, not a reason to expose a plant to frost or drafts.
Humidity matters, but indoor airflow matters too. A humidifier or a pot placed above—not in—a pebble tray can modestly raise local humidity. Keep the pot above the water line and allow air around leaves. A hygrometer is more useful than misting, which briefly wets foliage but does little to raise room humidity and can leave water in the crown.
Avoid a wet, stagnant setup even if humidity is low. RHS guidance and the American Orchid Society pair humidity with ventilation. Other orchids may prefer cooler nights or a stronger seasonal temperature difference, so check an identified plant’s care sheet.
Feed Lightly During Active Growth
Use a fertilizer labeled for orchids and dilute it according to the product label. A modest, regular feeding during active leaf or root growth is easier to manage than a large dose intended to force flowers. Many growers use a diluted solution every few waterings, but the correct concentration depends on the product, water quality, medium, and plant activity. If the orchid is not growing or is stressed from damaged roots, fertilizer is unlikely to fix the underlying problem.
Water the roots before applying fertilizer if they are very dry, and never let a fertilizer solution sit in the outer pot. Periodically water with plain water to flush accumulated salts from bark or moss. White crust on the mix or pot can be a clue that mineral salts are building up; repotting may be needed if the medium is old as well. Avoid treating fertilizer as a bloom switch. A plant needs adequate light, healthy roots, and time to store energy before it can flower well.
The RHS recommends light, regular feeding for Phalaenopsis and flushing the medium periodically. Follow the label for any orchid or balanced houseplant fertilizer; combining several feeds or “bloom boosters” can burn roots rather than improve flowering.
Keep Leaves and Roots Clean
Inspect the plant when you water. Look at the undersides of leaves, the base of the flower spike, and the crevices where leaf and stem meet. Mealybugs can appear as white cottony clusters, while scale may look like small brown or pale bumps. Isolate a newly purchased orchid from nearby plants for a short observation period, and move an infested plant away promptly so pests do not spread.
Wipe dust from leaves with a soft damp cloth. Use clean water and a gentle touch; do not polish leaves with oily products that can block their surface or make them glossy at the expense of plant health. Keep the crown dry after watering. If water collects between leaves, tilt the plant carefully or blot the droplet with a corner of clean tissue. Remove dead fallen leaves and old medium debris so pests and rot are easier to spot.
Do not cut firm aerial roots merely because they extend beyond the pot. They are normal on epiphytic orchids and can help the plant take up moisture from the air. A healthy root is generally firm; a decayed root is often brown, hollow, mushy, or has an outer layer that slips away. If disease or insects persist, identify the pest or symptom before selecting a treatment, follow the product label, and avoid applying household remedies that may damage leaves or roots.
Understand the Bloom Cycle and Reblooming
An orchid’s flowers may last for weeks or months, but the plant will eventually finish that display. A pause between blooms is normal. After flowering, a Phalaenopsis may grow new leaves and roots before it produces another spike; that recovery period is part of its annual rhythm, not proof that the plant is dormant or dead.
To encourage a healthy moth orchid to rebloom, first improve the basics: bright filtered light, functioning roots, appropriate watering, and light feeding during growth. Some Phalaenopsis hybrids initiate a spike after several weeks of slightly cooler nights in autumn. This is a gentle seasonal cue, not a guaranteed trick, and different hybrids respond differently. Keep daytime temperatures comfortable and do not put the orchid outside where it might encounter a cold snap. A plant that is too dim or has lost most of its roots may not bloom just because the room becomes cooler.
Orchid expert Mary Gerritsen, in a Gardenista interview about Phalaenopsis reblooming, stresses that flowering depends on giving the plant conditions that support growth rather than trying to force a result. Expect timing to vary; a mature, healthy plant may still take months to make a new spike. Keep its care stable and look for a firm, rounded growth emerging from between the leaves. Roots tend to have a rounded green tip, while a flower spike often has a flatter, mitten-like tip, although early growth can be hard to distinguish.
Decide What to Do When Flowers Fade
Wait until the flowers fall, then inspect the spike. If it is still green and the plant is strong, you can leave it alone or trim just above a healthy lower node to encourage a side branch. A side spike may flower sooner but often carries fewer blooms. If the spike is yellow or brown all the way down, cut it near the base with clean snips. Do not remove green foliage or healthy roots to make the plant look tidy.
When the plant has weak roots, wrinkled leaves, or a recent repotting injury, removing a spent green spike at the base can let the orchid direct energy toward recovery. The decision is a tradeoff: keeping a green spike may produce another, smaller flush, while cutting it may favor new root and leaf growth. Other orchid genera handle flower stems differently, so do not apply Phalaenopsis spike advice to every orchid.
After the last bloom, continue the same watering and light routine. Do not dry the plant out to make it “rest” or increase fertilizer to compensate for dropped flowers. If leaves and roots stay firm, give it time; if it declines, check roots, medium, light, and temperature rather than focusing on the missing bloom.
Repot Without Damaging Healthy Roots
Repot when the potting medium is breaking down, staying soggy, smelling sour, or when roots have outgrown the pot—not simply because the flowers are gone. Bark eventually decomposes into smaller particles that hold more water and less air. Many Phalaenopsis need fresh medium every one to three years, depending on the mix, watering, and indoor conditions. The RHS notes that a medium often needs replacing as it decomposes, while Savvy Gardening’s Phalaenopsis repotting walkthrough offers a practical root-by-root approach.
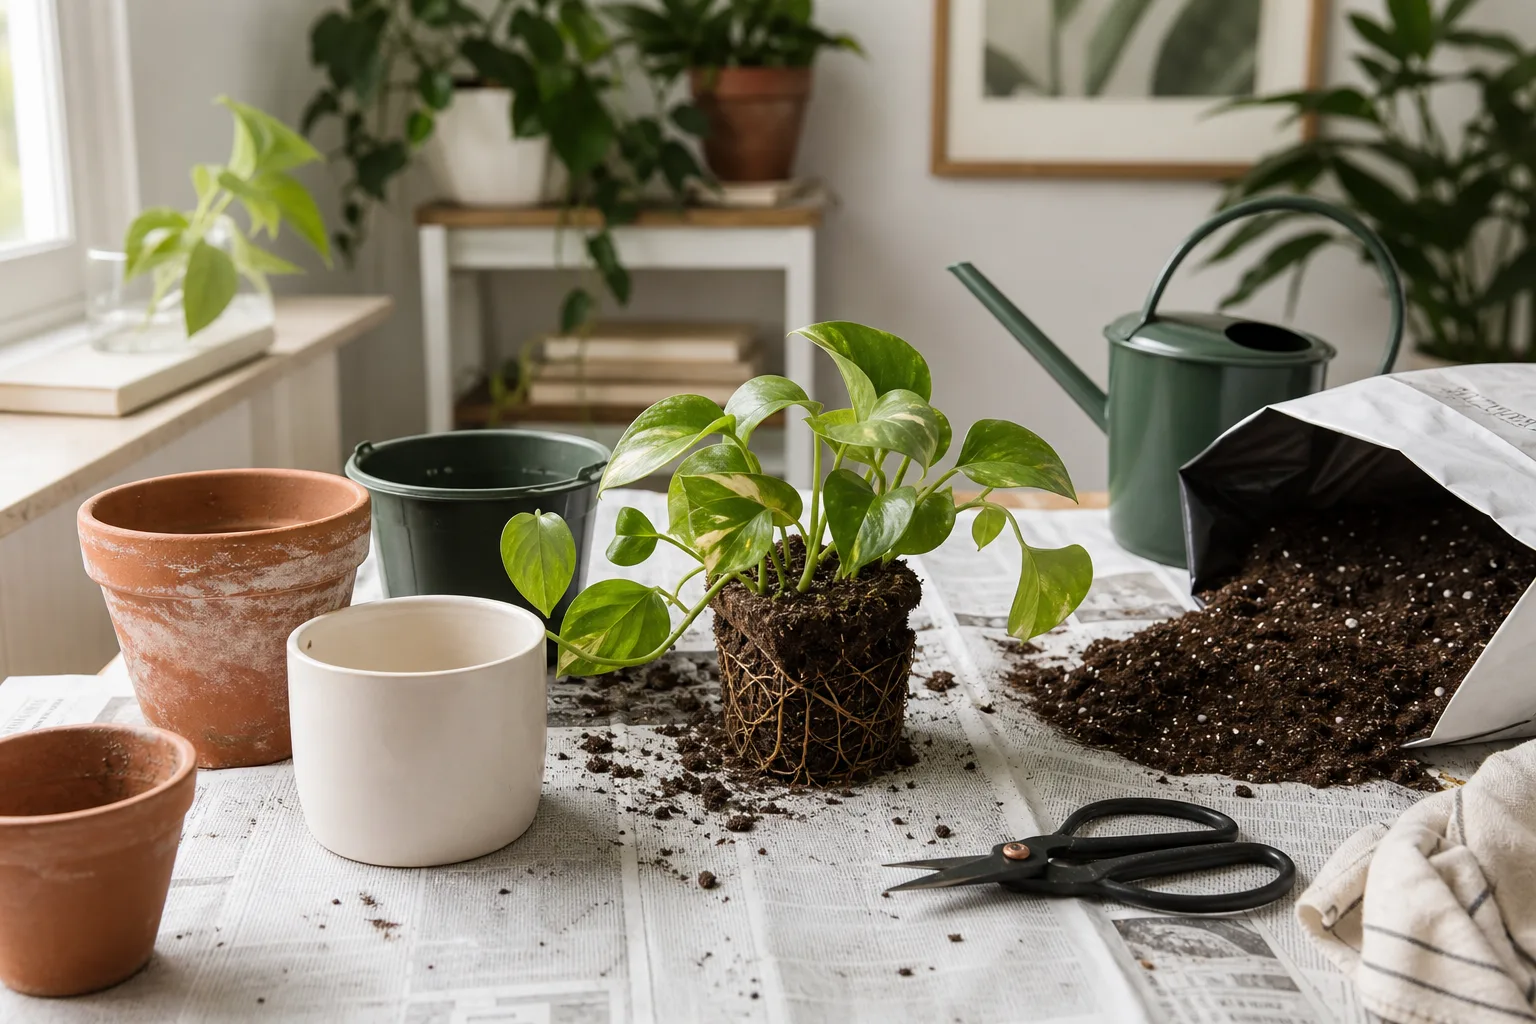
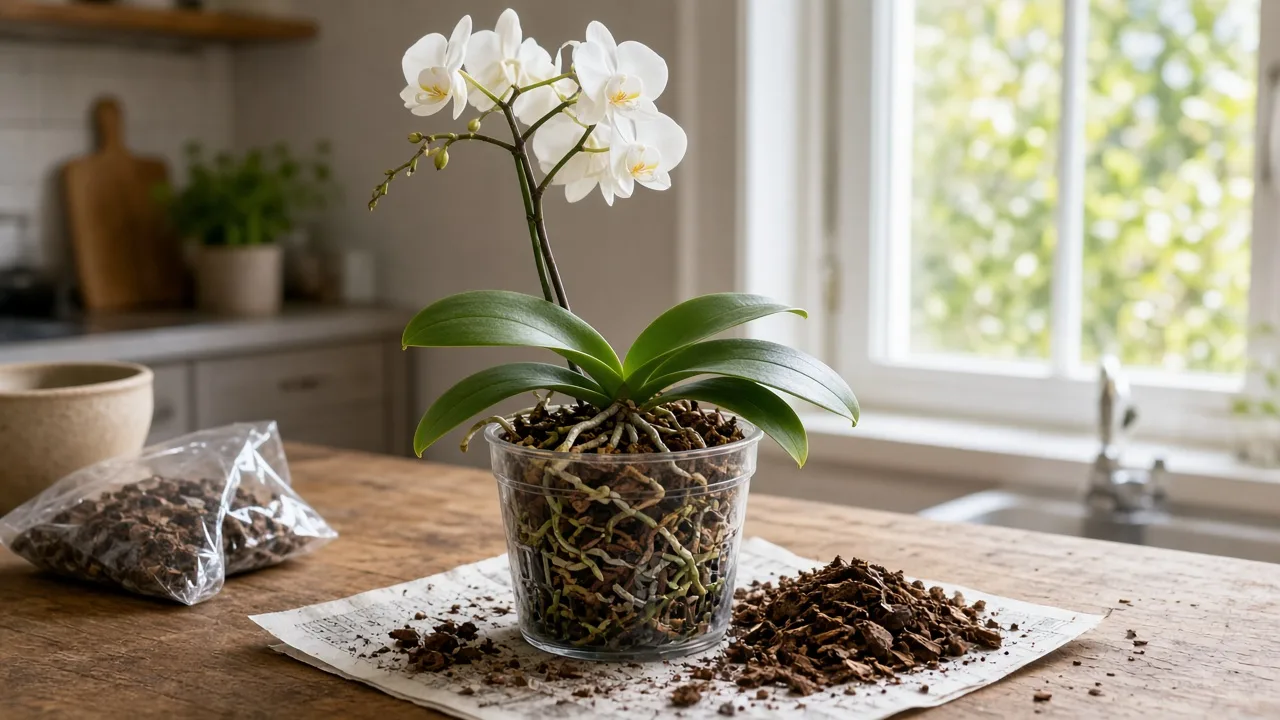
If the plant is healthy and flowering, wait until flowers fade unless the existing mix is causing urgent root trouble. Choose a pot with good drainage that fits the root mass, remove the old medium gently, and rinse or tease away loose pieces. With clean, sharp scissors, trim only roots that are clearly dead or rotted; firm green, silver, or cream-colored roots are worth keeping. Do not cut aerial roots just to fit the pot. Set the plant so its crown sits above the medium, then add fresh orchid mix around the roots without packing it tightly.
After repotting, water according to the medium and the condition of any roots that were trimmed. Keep the plant in bright, indirect light while it adjusts, and delay fertilizer until signs of active growth return if roots were disturbed. Avoid moving a small orchid into a much larger pot. UConn Extension advises using fresh, airy orchid medium and avoiding the dense garden soil used for ordinary houseplants; the same point is central to successful Phalaenopsis repotting.
Propagate Orchids Only When the Plant Is Ready
Many beginner orchids are propagated commercially by seed or tissue culture, so a home grower is more likely to see a small plantlet called a keiki than to divide the orchid. Some Phalaenopsis produce a keiki on a flower spike or near the base, but it is not guaranteed. Leave a keiki attached until it has several leaves and roots long enough to establish independently; separating a tiny plant too early can set it back.
When a keiki is ready, use clean tools and pot it in a small container with fine, airy orchid medium. Keep it warm and humid with gentle airflow while it establishes, and avoid watering the tiny pot on the same schedule as a mature orchid. Certain Dendrobiums and sympodial orchids can be divided when they have several healthy growths, but division methods differ by genus. Do not cut a plant apart solely to make more orchids if it is weak, newly repotted, or in bloom.
Seed propagation is not a simple beginner project because orchid seeds need specialized sterile conditions to germinate reliably. For a home grower, a keiki or division of an identified mature orchid is more practical. Confirm the plant’s genus before attempting propagation.
Troubleshoot Common Orchid Problems
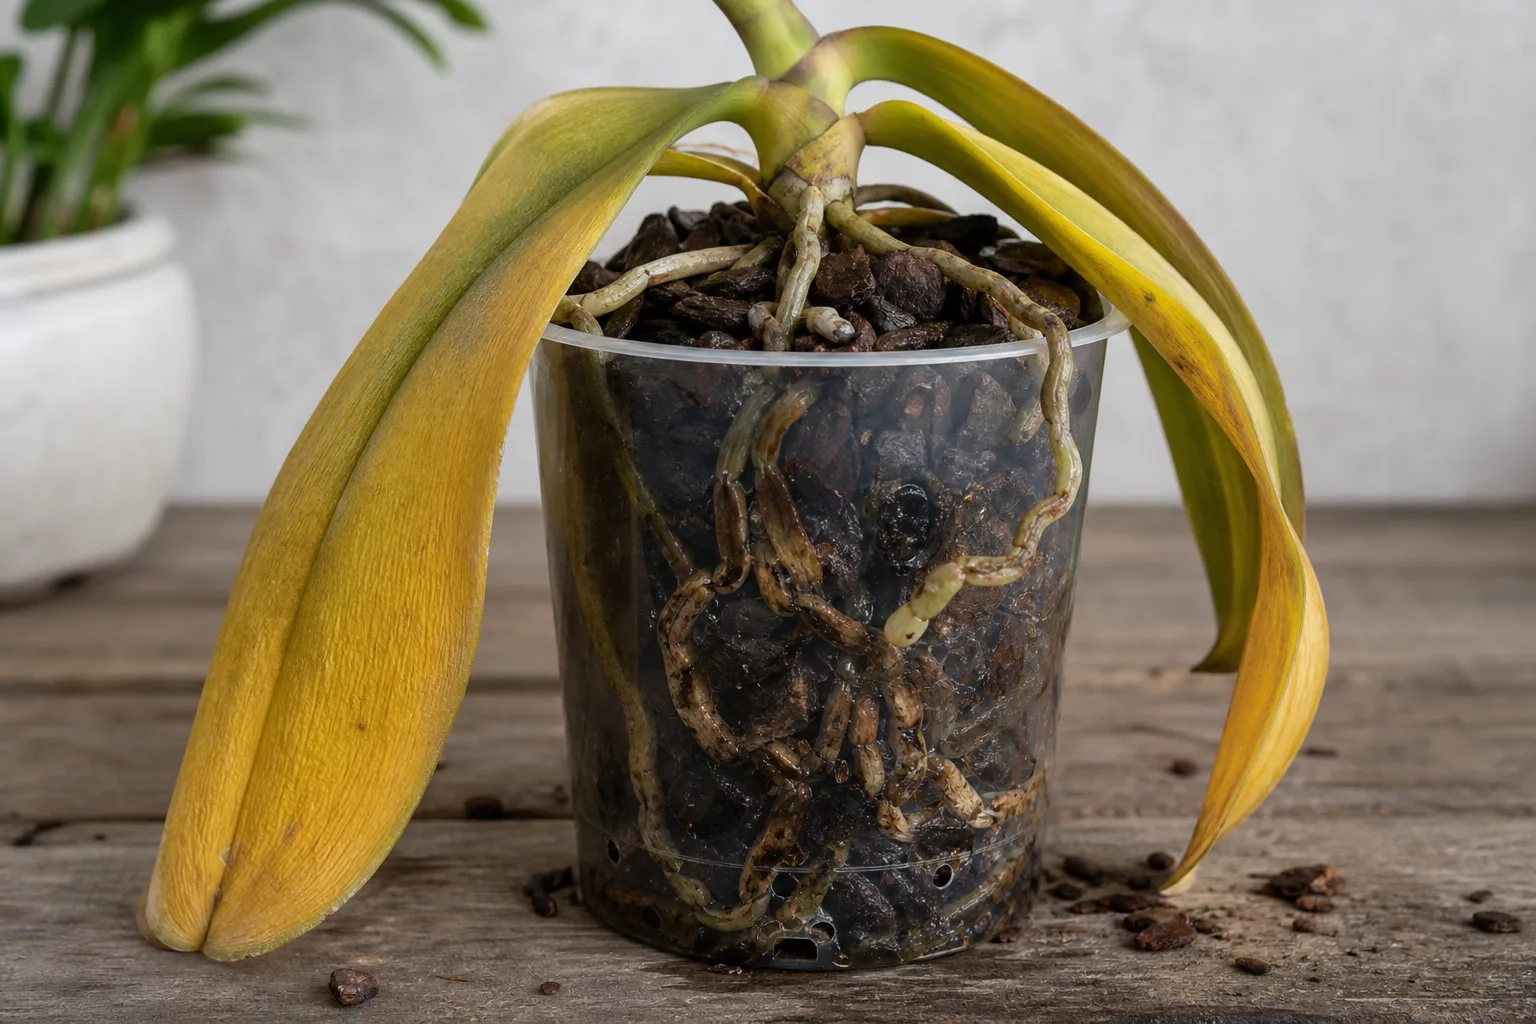
Yellow leaves: One aging lower leaf can yellow naturally, especially if the rest of the plant is firm and growing. Multiple leaves turning yellow quickly can point to light stress, cold, root damage, or watering trouble. Check the roots and medium before changing several conditions at once. Direct sunlight may bleach the exposed side; prolonged sogginess may cause roots to fail and leaves to lose support.
Wrinkled or limp leaves: This often indicates that water is not reaching the leaves, but the cause may be either underwatering or rotted roots. A plant sitting in wet bark can look thirsty if damaged roots can no longer absorb moisture. Unpotting may be necessary if the medium smells sour or roots feel soft and hollow. Remove only the decayed parts and repot into fresh, open mix. If most roots are still firm, recovery is possible with steadier moisture and patience.
No flowers: Confirm the plant is mature enough to bloom, gets suitable light, and has healthy roots. A healthy Phalaenopsis can skip a bloom season after stress, and a newly purchased plant may need time to acclimate. Better feeding alone cannot make up for a dark window or root loss.
Bud drop: Buds may fall after abrupt changes in temperature, light, watering, or location. Keep a budding orchid away from cold drafts, heater vents, and repeated moves. Check for pest activity too. Bud drop has several possible causes, so consider what changed recently rather than assuming that the plant needs more water.
Root rot: Roots that are brown, mushy, hollow, or shedding their outer tissue need attention. Healthy roots are generally firm even when their color differs by moisture level. Root problems commonly follow an airless, decomposing medium or water left standing around roots. The Colorado State University Phalaenopsis guide connects poor drainage with root and stem decay. If the crown is still firm and some living roots remain, repotting and correcting the wet conditions may save the plant.
Change one factor at a time when possible. For example, move a plant away from harsh afternoon sun and observe new growth before also changing fertilizer, pot, and watering. This makes it easier to learn what the plant responds to and reduces the risk of stressing it with repeated interventions.
Adjust Care Through the Seasons
Indoor orchids still respond to seasonal changes. Winter light is weaker and days are shorter, so a plant near a window may receive less energy even though the room feels bright. At the same time, heating can lower humidity and make a bark pot dry more quickly at the surface while a dense center remains damp. Check the medium more often but do not automatically water more. Lower light and cooler temperatures can slow water use, so a pot may stay moist longer.
In spring and summer, stronger sun can scorch leaves through glass and warmth may speed drying. Use a sheer curtain if needed, inspect more often during hot spells, and keep air moving. Acclimate outdoor orchids gradually to shade, protect them from midday sun and heavy rain, and bring warm-growing Phalaenopsis indoors before nights turn chilly.
Autumn can bring cooler nights that encourage some mature Phalaenopsis to form a spike. Keep the temperature change moderate and stable, and make sure the plant has enough light and healthy roots first. The seasonal cue differs across genera. Cool-growing Cymbidiums, for example, may benefit from a stronger day-night pattern than a warm-growing moth orchid, while other groups have distinct rest periods. Use a named orchid’s care sheet instead of imposing the same seasonal routine on the whole collection.
Build a Simple Beginner Routine
Make care a short inspection rather than a checklist of automatic chores. Once or twice a week, look at the plant and ask: Is it receiving bright filtered light? Is the pot still heavy or the medium wet in the center? Are roots firm? Is water trapped in the cachepot or crown? Are new leaves, roots, or spikes appearing? The answers tell you whether to wait, water, adjust location, or investigate a problem.
Note when you water and how long the medium takes to dry. After a few cycles, you will know the interval for that orchid in that room and pot. Recheck after seasonal changes, repotting, or a move. Clear pots help, but a lightweight nursery pot and observation work too.
Start with a drainage pot, the right orchid medium, a stable bright location, clean scissors, and a small amount of orchid fertilizer. You do not need a greenhouse or a shelf of gadgets. If the plant has a label, keep it; if it does not, photograph the flowers and leaves so you can identify it before experimenting with care that suits another genus. Most importantly, judge success by firm growth and healthy roots, not by whether every orchid is in bloom year-round.
Conclusion
For a beginner, Phalaenopsis care becomes manageable when you match water to the roots and medium, provide bright filtered light, and let the pot drain fully. Keep the plant warm, feed lightly during active growth, and treat the end of flowering as a normal stage rather than a failure. Repot when the mix degrades or roots need help, and let the plant’s name guide any advice that differs from the moth-orchid baseline. With a few regular observations and modest adjustments, you can keep an orchid healthy through its quiet growing months and give it a good chance to bloom again.