How to Grow and Care for Clematis (Leather Flower)
Learn how to grow clematis with the right planting depth, support, root-zone care, and pruning group, plus practical checks for wilt and poor flowering.
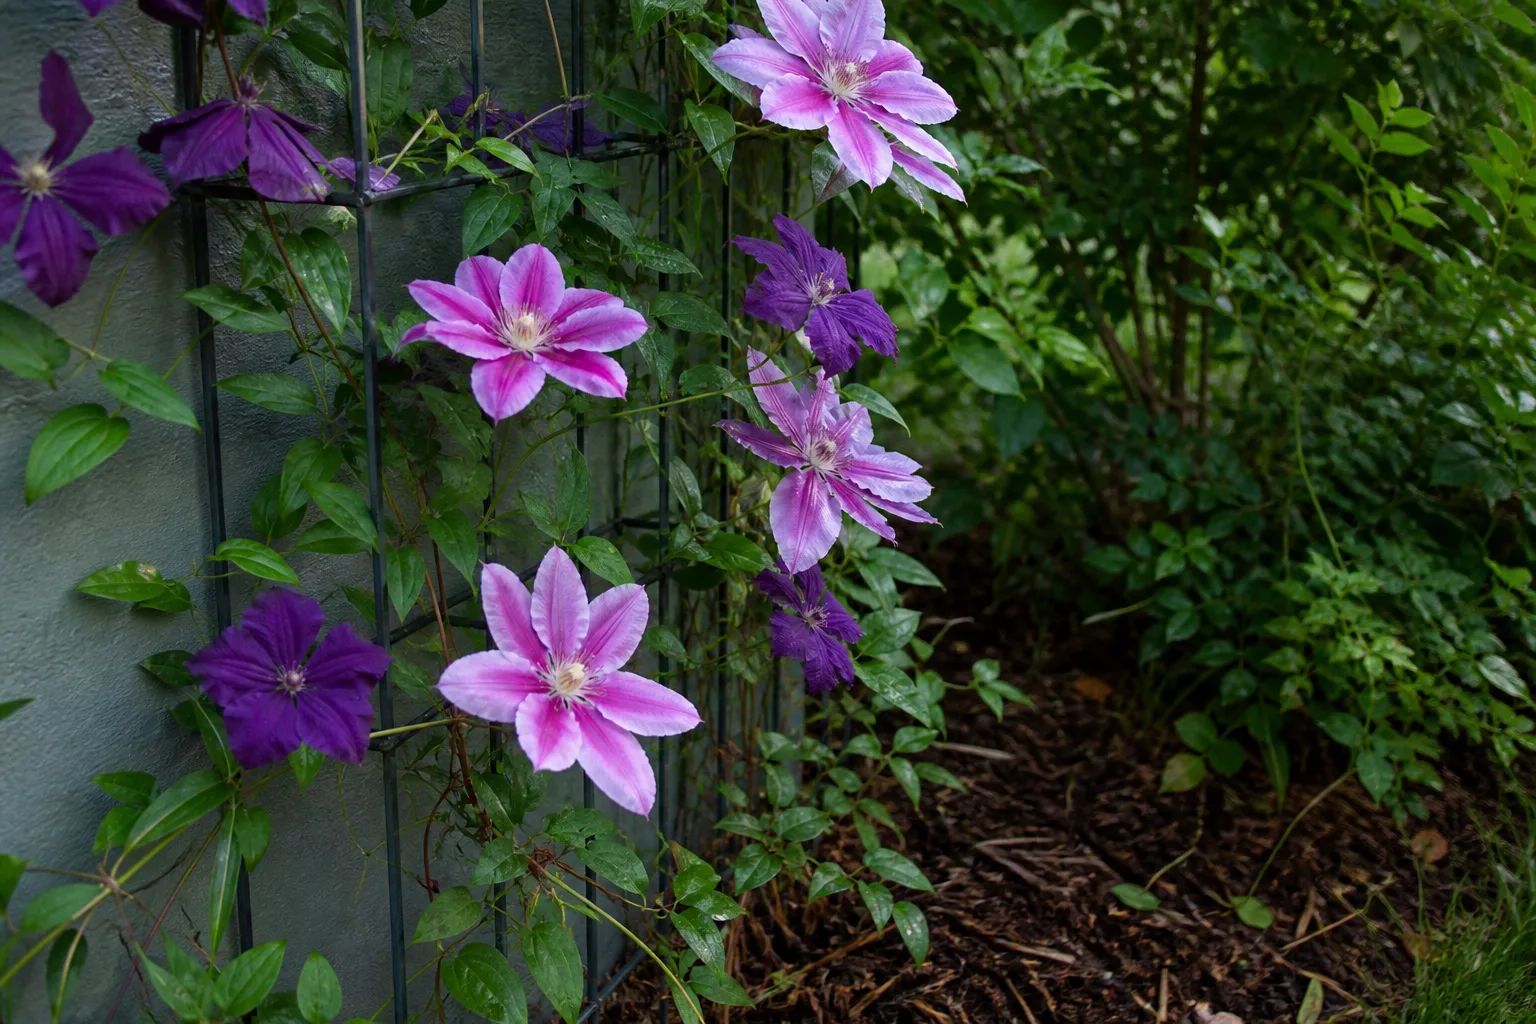
Clematis is a large, varied genus, not one vine with one set of rules. Some cultivars bloom in spring on stems that grew the year before; others flower later on new growth. That difference determines when to prune, while the plant’s size, rootball, and climate tolerance determine where and how to grow it.
For most garden clematis, aim for a bright, well-drained site, steady moisture while the plant establishes, cool roots, and a fine support the leaf stalks can wrap around. The part that trips gardeners up is pruning: identify the flowering group before making a major cut. A wrong cut usually costs flowers for a season; it does not mean the vine is dead.
Choose a clematis that fits the site
The name “leather flower” is used for clematis, but the plants sold under that name vary widely. North Carolina State Extension describes nearly 400 species and many more cultivars and hybrids, including climbing vines, sprawling groundcovers, and herbaceous forms that do not climb at all. Check the plant tag for mature height, flowering season, pruning group, and hardiness rating before you buy; genus-wide claims such as “all clematis grow to 20 feet” or “all are hardy in the same zones” are not useful for choosing a specific plant. (North Carolina State Extension)
Match vigor to the structure and the amount of pruning you can reach. A compact cultivar suits a large pot or short fence, while vigorous types need a sturdy arbor, long fence, or room to scramble through a shrub. Spring-flowering species such as Clematis montana can make a dramatic display but may overwhelm a small trellis; large-flowered hybrids tend to make a more contained focal point; late-flowering C. viticella types give summer-to-fall color and are usually easier to prune hard.
Flower form and scent are also cultivar traits, not guarantees for every clematis. Large flowers can be striking, while small-flowered species often produce many blooms, seed heads, or fragrance. Choose the flowering window and mature size first, then choose color; this avoids planting a beautiful vine that flowers too early for the support or space you have.
Plant where shoots get light and roots stay cool
Most clematis flower best with good light on the upper growth. A site with roughly six hours of sun is a useful starting point for many garden varieties, although some tolerate partial shade and hot-summer gardens can benefit from afternoon shade. The roots prefer cool, evenly moist soil, so shade the base with a shallow-rooted groundcover or mulch rather than putting the whole vine in deep shade. (NC State Extension, Missouri Botanical Garden)
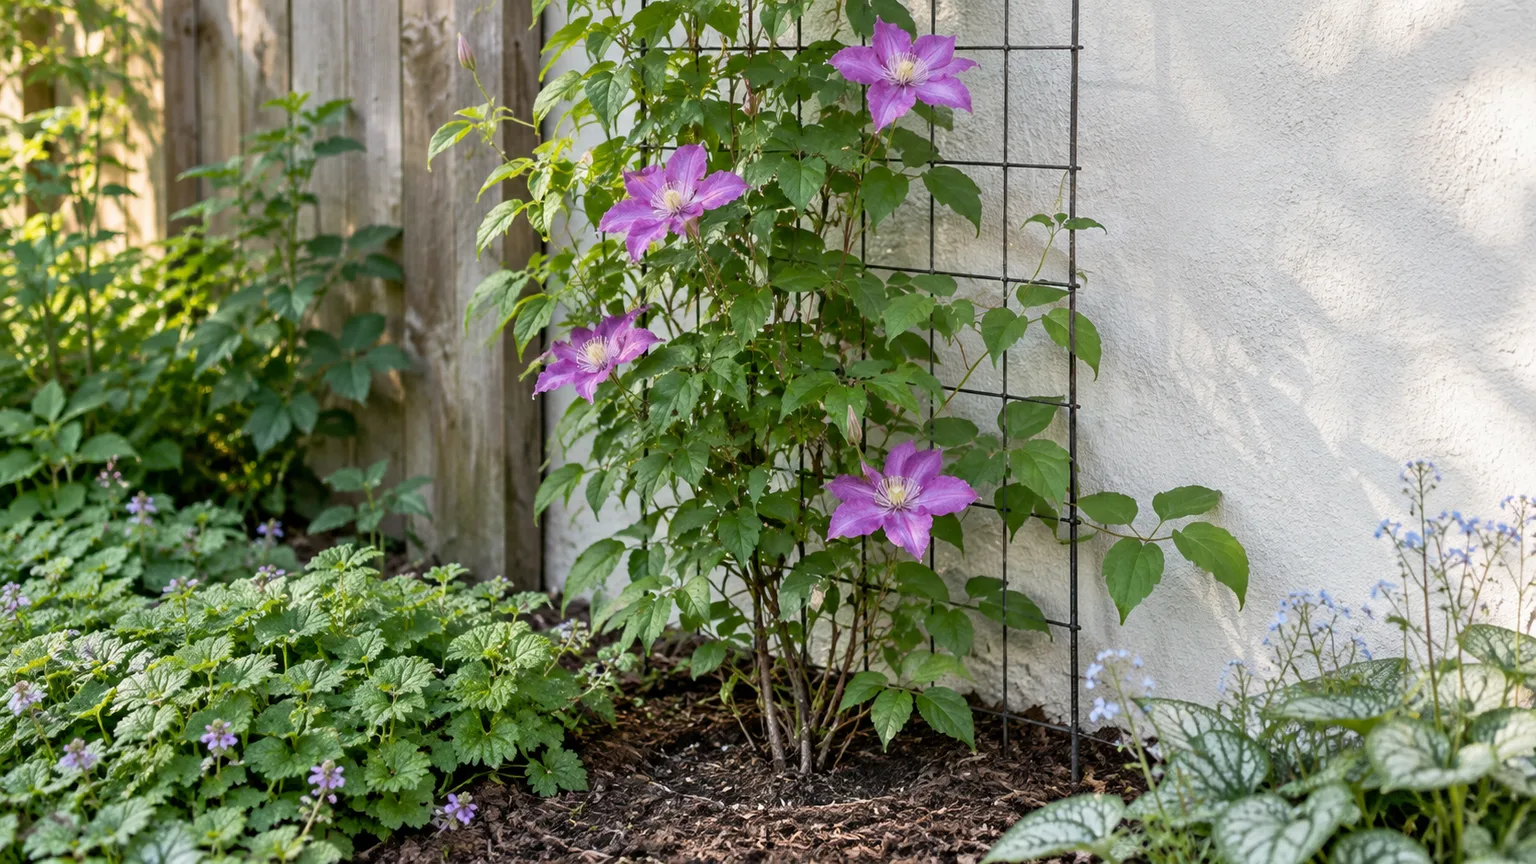
Keep clematis out of a dry rain shadow immediately against a wall or beneath a roof overhang. The RHS advises placing the planting hole about 12 to 18 inches from a wall or fence; this leaves room for roots and gives you soil that is easier to water. Use a short cane or temporary guide to direct the young vine toward the permanent support. If you plant beside a shrub or tree, leave enough distance that the new clematis is not competing directly with established roots for water. (RHS growing guide, Sarah Raven’s clematis guide)
In warm regions, morning sun with afternoon protection can reduce heat stress while still supporting flowers. In cooler regions, a sunnier exposure usually helps the vine ripen growth and bloom. Evergreen and winter-flowering types may need a more sheltered position than deciduous summer cultivars, so use the individual plant label and local advice for borderline climates.
Prepare the soil and set the rootball at the right depth
Clematis likes fertile soil that holds moisture but drains freely. If water stands in the planting hole after rain, improve drainage or choose a raised site; a wet root zone is a poor substitute for the consistently moist soil the vine needs. Work compost or other well-rotted organic matter into a broad area of heavy or sandy soil, but do not fill a small hole with a rich, sharply different mix that leaves the roots sitting in a “pot” surrounded by compacted ground.
Planting depth depends on the kind of clematis. The RHS recommends setting the rootball of many large-flowered hybrids about 2 to 3 inches below the soil surface; this can encourage shoots from below ground and give the plant a better chance of regrowing after stem damage. Many species clematis, spring-flowering types, and herbaceous forms should instead sit with the top of the rootball level with or just below the surrounding soil. Follow the cultivar tag when it gives a more specific instruction. (RHS growing guide)
Dig a hole wide enough to spread the roots without bending them upward, water the plant in its nursery pot before removing it, and firm soil gently around the rootball. Water thoroughly after planting so the soil settles around the roots. Spring or early fall is usually easiest for establishment because the ground is workable and temperatures are less punishing than midsummer; avoid frozen or waterlogged soil. Container-grown plants can be planted at other workable times if you can keep them watered while they establish.
Do not bury the crown much deeper simply because clematis roots prefer cool conditions. Planting deeply is a cultivar-specific technique for many large-flowered hybrids, not a cure for poor drainage or a universal rule for the genus. A plant set too deep in heavy, wet soil can struggle just as one planted too shallow in a hot, dry position can.
Give the vines a support they can grip
Climbing clematis do not attach to a flat wall like ivy. They climb when their leaf stalks, or petioles, curl around slender wires, mesh, or narrow trellis bars. Give the plant a small-diameter grid with openings close enough for those stalks to reach; wide, thick rails may leave new growth dangling in open air. The RHS notes that trellis attached to a wall should stand slightly away from the surface so the vine can thread behind and through it. (RHS growing guide, Gardener’s Path clematis guide)
Install the support before planting so you do not drive posts through the root zone later. Guide young stems gently and use soft ties in a loose figure eight if they cannot reach the grid on their own. Clematis stems are fragile; pulling a vine free or tightening a plastic tie can snap or girdle it. Check new growth every week or two during the first flush, because a short guide now can prevent a tangled knot at the base later.
Water deeply and feed according to the soil
Water a newly planted clematis whenever the root zone is beginning to dry, not just when the soil surface looks pale. Soak the soil slowly enough to reach the deeper roots, then let excess water drain away. During the first growing season, check more often during heat, wind, or drought; established vines in good garden soil usually need supplemental water mainly during prolonged dry spells, while pots dry much faster.
If a vine droops on a hot afternoon, check the soil several inches down before watering again. Dry soil and limp foliage point toward water stress; soggy soil and a plant that remains weak call for checking drainage and roots rather than adding more water. A thorough soak followed by time to drain is better than keeping the crown constantly wet.
Fertilizer guidance differs among reputable references. NC State Extension suggests a low-nitrogen, slow-release fertilizer during active growth, while the RHS says clematis in fertile ground generally do not need routine feeding and recommends annual organic mulch; it does advise feeding container plants through spring and summer. For an in-ground vine with strong, normal-colored growth, begin with a spring mulch of compost and skip automatic monthly feeding. If growth stays weak after you have checked light, moisture, and pruning, use a soil test or a label-directed, balanced or low-nitrogen feed rather than guessing. (NC State Extension, RHS growing guide)
Too much nitrogen can produce long, leafy shoots at the expense of flowers and may make a vine harder to train. Do not pile compost or mulch against the stems, where persistent dampness can encourage rot. A thin, broad layer over the root zone protects moisture and soil structure without burying the crown.
Follow a seasonal care rhythm
In late winter or early spring, inspect the support and remove only dead or clearly damaged stems until you know the pruning group. Group 3 cultivars can be cut back before new growth starts; spring-flowering Groups 1 and 2 may already carry the buds that will open soon. Add compost mulch when the soil is workable, keeping it away from the stem bases.
During active growth, guide new stems across the support, water deeply when the root zone dries, and watch for slug damage on tender shoots. After the first flush of flowers, identify whether the plant is one of the repeat-flowering Group 2 types before deadheading or trimming. In fall, leave healthy stems on old-wood types in place and allow ornamental seed heads to remain if you like their texture.
In cold-winter areas, use the cultivar’s hardiness rating to decide whether the plant needs winter protection. A mulch layer can buffer the root zone, but it cannot make a tender evergreen cultivar hardy in a climate that is too cold. For container vines, the roots are more exposed to temperature swings; move the pot to a protected location if the cultivar’s label recommends it, and do not let the container sit in standing water.
Treat those as seasonal cues, not fixed dates. A gardener in a mild coastal climate may prune and plant weeks before someone in a cold inland area; gardeners in the Southern Hemisphere should shift the seasons accordingly. The vine’s buds and flowering time are more reliable signals than a calendar date copied from another climate.
Prune by flowering time and wood age
Before making a large cut, find the cultivar name and determine whether its flowers form on last year’s stems, new growth, or both. The RHS and North Carolina State Extension both organize clematis into three pruning groups around this distinction. If the name is missing, watch one flowering season and record when blooms appear before pruning for size; removing the wrong stems can erase the next flush. (RHS pruning guide, NC State Extension)
| Group | Typical flowering pattern | Safe pruning approach |
|---|---|---|
| 1 | Winter or spring flowers on last year’s stems | Little regular pruning; tidy after flowering |
| 2 | Large early-summer flowers on old wood, often followed by a lighter new-growth flush | Lightly shape in late winter or early spring; trim spent flowers after the first flush if needed |
| 3 | Summer or fall flowers on new growth | Cut back hard in late winter or early spring before new shoots emerge |
Group 1: spring flowers on last year’s stems
Group 1 includes many early-flowering species such as C. montana and C. alpina. The stems formed in the previous season carry the next spring’s flowers, so do not cut the whole vine back in winter. After flowering ends, remove dead or tangled growth and shorten stems only as much as needed to keep the plant within its space.
If an established Group 1 vine has become too large, renovate it just after its main bloom, accepting that a hard renewal cut may reduce the next flowering season. Spread major size reduction over more than one year when possible. This preserves some flowering stems while you retrain the remaining growth.
Group 2: an early flush and possible repeat bloom
Group 2 usually includes large-flowered hybrids that bloom in late spring or early summer on short shoots from last year’s growth. Some then produce a lighter second flush on new growth. In late winter or early spring, remove dead stems and lightly shorten healthy growth to a strong pair of buds; a severe cut can remove the first, often showier display.
After the first flush, cut spent flowers back to a healthy bud or pair of leaves if you want to encourage tidier new growth and a possible repeat. Do not shear the whole plant just because flowering has finished: old stems can be carrying the next season’s first flowers. If you do not know whether your cultivar is Group 2 or 3, wait for its bloom pattern before making a hard cut.
Group 3: summer or fall flowers on new growth
Group 3 plants flower on stems produced in the current growing season, so they can be cut back hard before growth begins. In late winter or early spring, shorten the old stems to a low pair of healthy buds, often about 6 to 18 inches above the soil depending on the plant and support. This keeps flowers within reach and encourages fresh stems from near the base.
The low cut looks drastic, but it matches how these cultivars flower. Use clean pruners, make cuts above sound buds, and remove the cut material rather than leaving a mat over the crown. Do not apply this method to an unidentified spring bloomer simply because the stems look old.
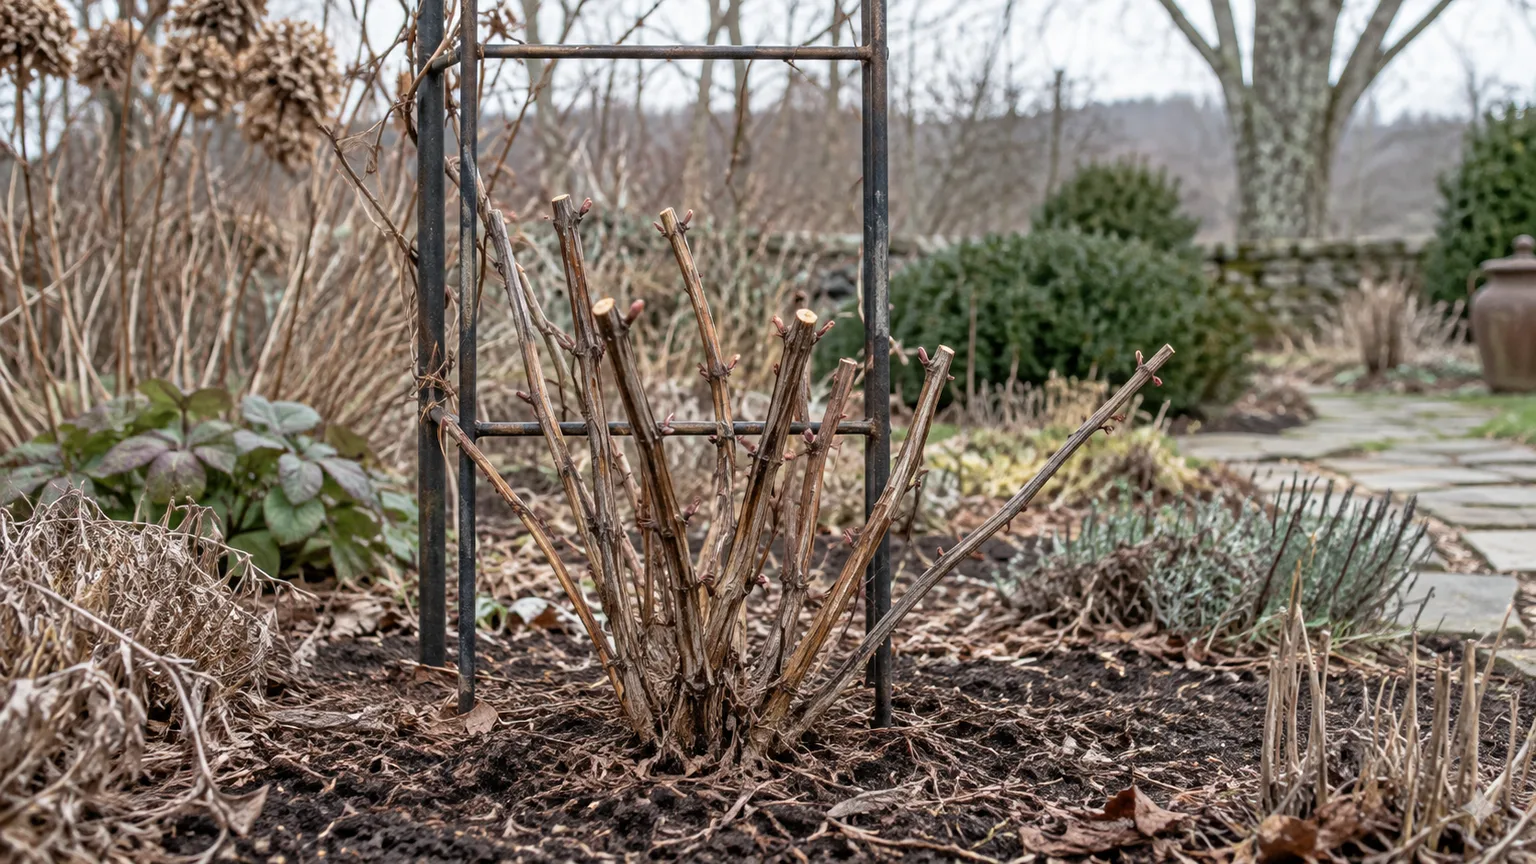
Newly planted climbing clematis are sometimes given a formative cut to encourage branching close to the ground. The RHS recommends this for new plants, but the timing and cost in flowers depend on the cultivar’s flowering wood. If the plant tag calls for formative pruning, follow its instructions; if preserving the first bloom matters and the vine flowers on old wood, keep some healthy stems and make any stronger cut after flowering.
Encourage flowers without forcing fertilizer
If a clematis produces leaves but few flowers, check the pruning history first. A Group 1 or 2 vine cut hard in winter may need a season to rebuild the stems that carry flowers. A late-flowering Group 3 plant left unpruned for years can turn into a tangled framework with flowers high above the base, so prune it as a Group 3 rather than feeding it harder.
Next, look at light and root competition. A vine shaded by a roof, dense tree canopy, or fast-growing shrub may grow but flower poorly; move or retrain young growth toward brighter light where practical. If the soil dries repeatedly, improve watering and mulch before adding fertilizer. If the vine is in a pot, check that the container is large enough, drains freely, and has not become packed with roots.
Many clematis take time to establish, and their mature size and bloom season depend on cultivar. A healthy plant that is growing new stems but has not flowered yet is not necessarily failing. Keep the support in place, avoid repeated disturbance around the roots, and reassess after a full flowering cycle before moving or replacing it.
Deadheading is optional for many clematis. Remove faded flowers when you want a tidier appearance or when a Group 2 type may make another flush; leave the silky seed heads if you enjoy their autumn and winter texture. Deadheading cannot compensate for shade, an unsuitable cultivar, or pruning that removed the flowering wood.
Diagnose problems before changing care
Wilted leaves do not automatically mean the plant needs more water or has a disease. Check soil moisture several inches below the surface, inspect for snapped or rubbed stems, and look at whether one shoot or the whole vine is affected. A recently dry rootball often points to drought stress; a localized stem that collapses and blackens quickly deserves a closer look for clematis wilt.
Sudden collapse and black stems may be clematis wilt
Clematis wilt can cause a stem to collapse suddenly, with leaves and stems darkening over the next few days. Missouri Botanical Garden notes that large-flowered hybrids are more susceptible and that a plant may recover even after aboveground growth is lost. The symptom can resemble drought stress at first, so check the root zone and examine the stem before deciding the whole plant has died. (Missouri Botanical Garden clematis-wilt guidance, Gardener’s Path)
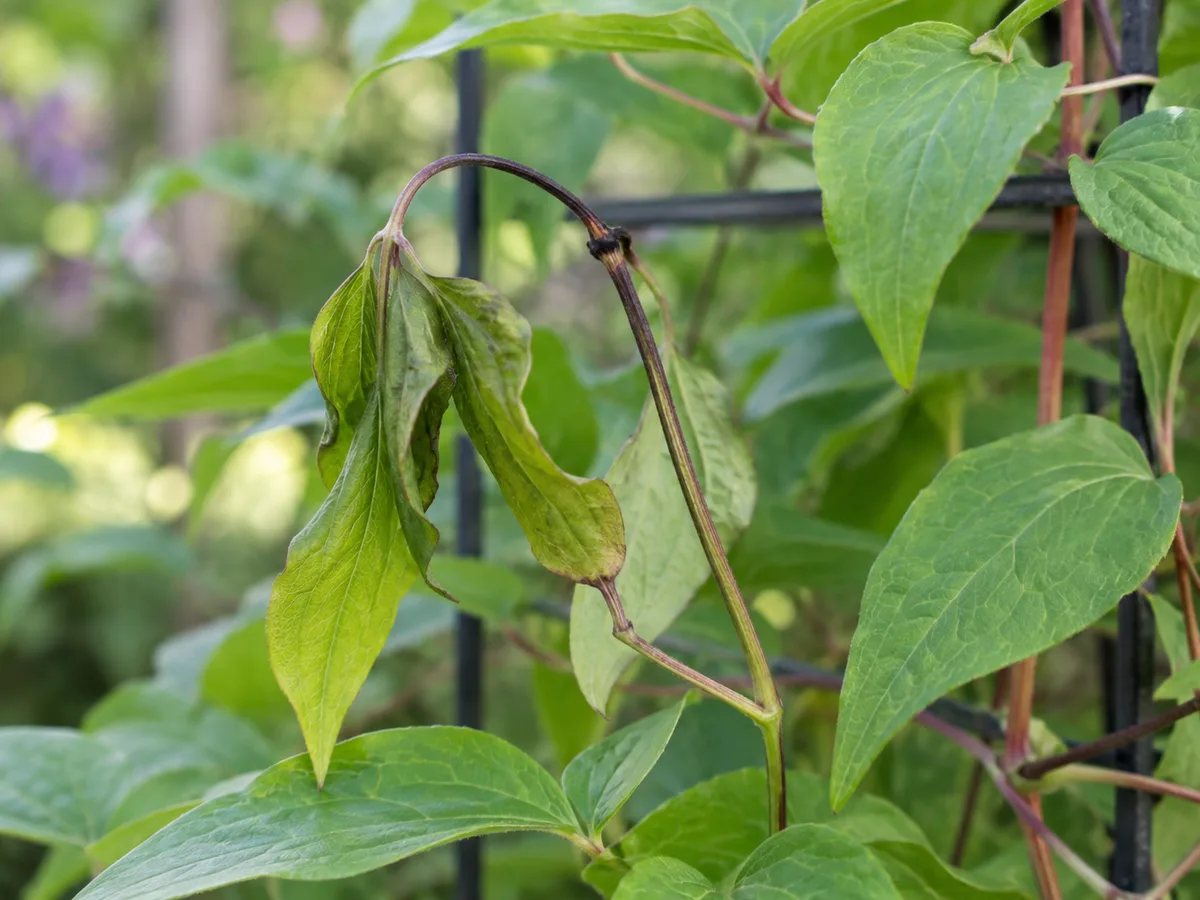
A localized darkened stem and drooping leaf can be a warning sign; confirm moisture and inspect the full vine before diagnosing disease.
Remove affected stems below the visibly damaged section and discard them in household waste; do not compost suspect diseased material. Clean pruners between cuts and avoid wounding neighboring stems. If the entire top growth collapses, leave the root system in place and maintain ordinary care while you wait to see whether new shoots emerge; do not dig up a crown based on one bad week.
Check mildew, pests, and common flowering setbacks
Powdery mildew appears as a pale, powder-like coating on leaves and stems, often where growth is crowded and airflow is poor. Thin tangled stems after flowering when the cultivar allows it, water the soil rather than repeatedly wetting the foliage, and remove badly affected leaves. Use a pesticide or fungicide only if the product is labeled for the plant and problem in your location; basic site and airflow corrections are the first step.
Slugs and snails often feed on tender shoots near the shaded base. Check under pots and mulch, especially after rain, then remove hiding places or use a locally approved control method. Aphids may cluster on new growth; a small infestation can often be dislodged with a firm stream of water, followed by another inspection a few days later.
Brown leaf edges or drooping during hot weather more often call for checking the root zone, recent rainfall, and drainage than applying a spray. Yellowing across the whole plant can follow waterlogged roots, drought, or nutrient issues; inspect the soil and stem bases before feeding. When damage is limited to one stem and progresses quickly, treat it as a possible localized disease rather than changing care for the entire vine.
Grow clematis in a container or make new plants
Choose a compact or moderate-growing cultivar for a pot, not a vigorous vine that will outgrow its support and dry out daily. Use a large, deep container with drainage holes and a stable trellis or obelisk installed before planting. A pot around 18 inches wide and deep is a practical starting point for many varieties, but a larger cultivar may need more room. Keep the root zone shaded with a low companion plant or mulch, and check moisture frequently because a container has less soil volume than a garden bed. (RHS growing guide, Sarah Raven)
Stem cuttings and layering are the most practical ways to make another plant that resembles the parent. Take cuttings from healthy, non-flowering growth and keep them in a humid, bright place while they root; exact timing depends on whether the stem is soft or semi-ripe. Layering works by pinning a flexible stem section against moist soil until it forms roots. (RHS growing guide, Gardener’s Path)
Seed is slower and is not a reliable way to reproduce a named hybrid or cultivar exactly. Seedlings can differ from the parent, and some clematis seeds take a long time to germinate. If you want the same flower form and pruning behavior, start with a cutting or a labeled plant rather than assuming seed will come true.
Handle clematis with sensible precautions
Clematis can irritate skin when handled, so wear gloves while pruning and wash sap from your hands before touching your face. The ASPCA lists clematis as toxic to dogs, cats, and horses, with signs that can include salivation, vomiting, and diarrhea. Keep prunings and fallen stems away from animals that chew garden debris; contact a veterinarian or animal poison service promptly if a pet eats the plant. (Poison Control, ASPCA Animal Poison Control)
Conclusion
Clematis grows best when you match the cultivar to the space, give its shoots a fine support, keep the root zone moist and cool, and let flowering time determine pruning. Planting depth varies by type, fertilizer needs depend on soil and growing conditions, and a sudden wilt should be investigated before you assume the vine is thirsty or dead.
Start with the plant label, note when the flowers appear, and make only the cuts that fit that group. With those details in place, routine watering, spring mulch, and a quick pass to guide young stems are usually enough to keep the vine productive and manageable.



