How to Create a Moss Pole for Indoor Plants
Make a moss pole for indoor plants with a durable core, damp moss, safe ties, and a repotting plan that protects roots as vines climb.
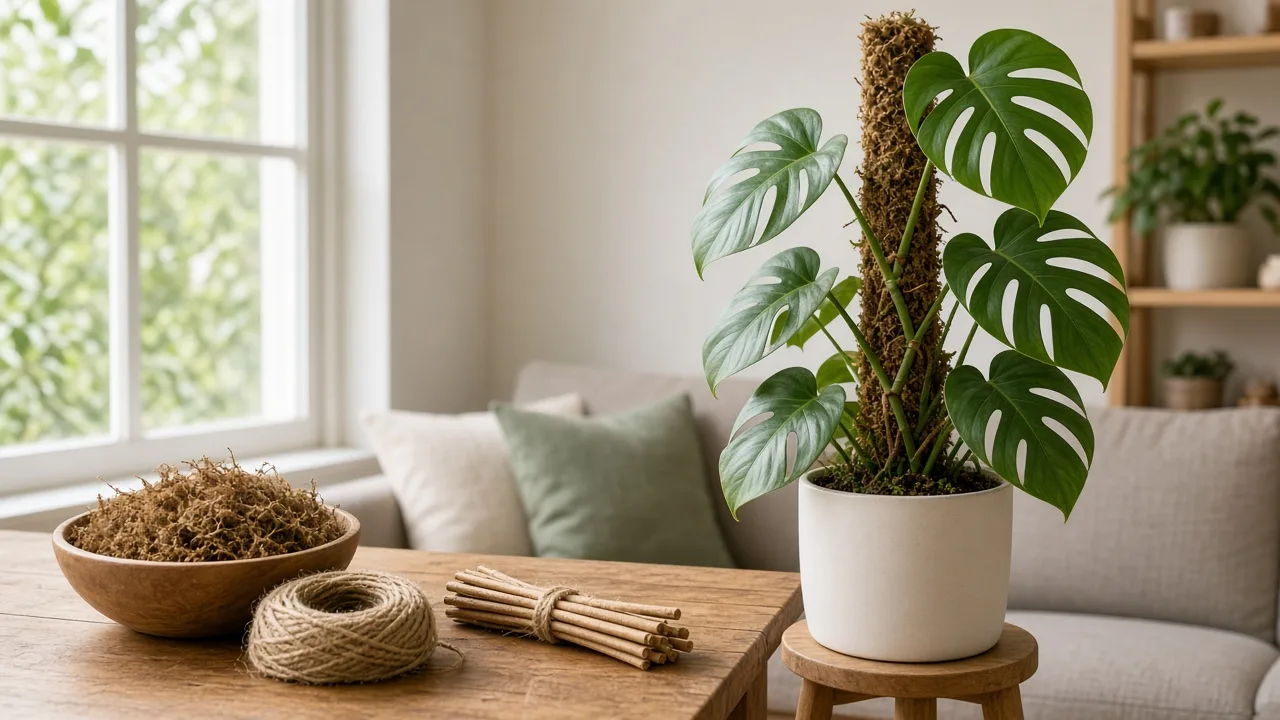
A moss pole is useful when a climbing houseplant is trying to grow upward but has nothing stable to grip. It gives the main stem a vertical route, and a moss-covered surface can give aerial roots a place to contact as the plant matures. It is not a cure for weak light, poor roots, or a plant that simply prefers to trail.
The most reliable DIY design is a firm central support surrounded by damp sphagnum moss and held inside a mesh sleeve. You can size it to the plant, anchor it during repotting, and extend it later. The details that determine success are less glamorous than the moss: the pole must not wobble, ties must not cut into the stem, and moss must stay damp without staying saturated.
Decide Whether a Moss Pole Is the Right Support
A moss pole is a vertical stake, tube, or mesh column covered or filled with moss. The core carries the load; the moss supplies a rough, moisture-holding surface that can be more useful to a climbing plant than a smooth cane. Your goal may be as simple as keeping a plant upright, or it may include giving aerial roots a surface to explore. Those are related jobs, but they are not identical.
Monsteras, pothos, heartleaf philodendrons, Rhaphidophora, many Syngoniums, and Scindapsus are common candidates because they produce flexible stems and, in many cases, aerial roots at or near their nodes. NC State Extension describes Monstera deliciosa as a climbing vine that begins life on the ground and can become epiphytic after reaching a sturdy tree, which is useful context for why a vertical support can suit its growth habit (NC State Extension’s plant toolbox). A houseplant does not need to be forced into that shape, though: a small plant, a trailing cultivar, or a grower who prefers a cascading display may be happier without a pole.
Which Indoor Plants Respond Best to a Moss Pole?
Choose a moss pole when the plant’s newest growth is naturally reaching, climbing, or leaning and you want to guide it upward. A Monstera deliciosa with a long main stem, a pothos whose vine is spilling out of its pot, or a velvet philodendron with nodes spaced along a climbing stem can all make good candidates. Aerial roots are a useful clue, but their presence is not a requirement and does not guarantee that they will attach indoors.
Use a plain stake or trellis when the only problem is tipping. A non-climbing plant with a stiff upright habit does not gain much from a wet rooting surface, and keeping moss damp adds another task. If the plant is already stressed, recently repotted, or suffering from root rot, solve that problem first; tying a weak plant to a taller support increases the load without improving its health.
Moss Pole vs Trellis vs Stake
The choice becomes easier when you name the job. A plain stake props a stem temporarily. A trellis gives several contact points and is often the better choice for a plant that needs a broad frame or a decorative fan shape. A moss pole combines structural support with a textured surface that may hold moisture against aerial roots. The pole is not automatically “better”; it is simply more maintenance-intensive.
Pick a trellis if you want to spread several vines across a plane, keep the foliage visible from both sides, or avoid watering a column. Pick a bamboo or coated stake if the plant only needs a little help standing. Pick a moss pole if you can keep the surface damp and the pot stable, and if the plant has a genuine climbing habit you want to encourage. A coir pole is another middle ground: it is textured and durable, but it usually holds less water than loose sphagnum moss.
Plan the Pole Around the Plant and Pot
Measure the plant’s main stem from the soil line to the newest growing point, not from the pot rim to the highest leaf tip. The stem is what you will train; a long petiole or a temporary leaf position can make a plant look taller than the support actually needs to be. Also look at the pot: a tall pole turns the whole container into a lever, so a lightweight nursery pot may become unstable even if the pole itself is strong.
Before buying materials, decide whether you are building for a small vine that will be tied at a few points or for a heavy Monstera with large leaves. The latter needs a rigid core, a deep anchor, and a heavy, well-drained pot. No amount of moss can compensate for a support that rocks every time the plant moves.
Choose a Core and Outer Material
For a simple project, use a sturdy PVC pipe, plastic garden stake, wooden dowel, or coated hardware-cloth cylinder as the core. PVC will not rot, while wood looks natural but eventually degrades in a damp setup. Plastic-coated mesh forms a convenient moss-holding sleeve; bare hardware-cloth cut ends can scratch you, the plant, and the pot.
The outer surface can be sphagnum moss, coco coir, or another purpose-made climbing medium. Sphagnum is springy and moisture-retentive when properly wetted, but it shrinks and breaks down. Coir is often cleaner and more durable as a dry support, but it does not stay wet for as long. Do not use moss gathered from outdoors around a houseplant collection: it can carry insects, weed seeds, or unwanted microorganisms, and it will not behave like clean, dried horticultural sphagnum.
Gardening.org’s practical DIY design uses plastic-coated hardware cloth, a coated support wire, and pre-soaked sphagnum moss; its useful insight is that the coating protects both the material and the plant from sharp, rust-prone edges (the hardware-cloth build). You can simplify that design for a small plant, but keep its safety logic: no exposed sharp wire, no loose mesh, and no core that bends under the expected weight.
Set the Height, Diameter, and Burying Depth
As a starting point, make the finished pole 6 to 12 inches taller than the plant’s current highest useful node, while leaving 6 to 12 inches of bare support to go into the pot. That gives the plant room to climb without creating an unnecessarily tall lever. A small vine may need only a slim pole; a heavy plant with broad leaves benefits from a wider moss column and a stronger central stake.
The lower section should reach deep enough to resist rocking, but it should not crowd the root ball or block drainage. For many medium containers, 6 to 8 inches in the pot is a practical starting range; use more depth for a taller, heavier pole if the pot and root space allow it. Treat these as design starting points, not a universal rule. The pot’s diameter, the core material, the plant’s weight, and the construction method all matter.
Keep the moss column close to the main stem. If the aerial roots must cross a large gap, they may dry before reaching it, and ties will have to carry all the support. Place the pole where the plant’s nodes can sit against or very near the moss without bending the stem sharply.
Gather Materials and Prepare the Workspace
Set up on a tarp, balcony, or washable work surface. Wet moss sheds fragments, and mesh leaves sharp offcuts. Wear sturdy gloves and eye protection while cutting or closing it, then remove or fold every wire end that could touch a stem.
For one medium pole, gather the following:
- a sturdy core such as a PVC pipe, dowel, or plant stake;
- plastic mesh or coated hardware cloth wide enough to wrap the core;
- dried horticultural sphagnum moss;
- coated garden wire, strong nylon cord, or ties for closing the sleeve;
- soft plant tape, hook-and-loop ties, or soft clips for the stem;
- a bowl or bucket of clean water;
- measuring tape, scissors or wire cutters, gloves, eye protection, and a tarp.
You may also want a heavy cachepot or a larger drainage pot, extra potting mix, and a second support stake for a top-heavy plant. Prepare the pot before you start the wet work. If the pole will go in during repotting, pre-moisten the potting mix, identify the back of the plant, and set aside the tie material so you are not balancing a wet plant while searching for tools.
Take sphagnum safety seriously without making the project frightening. The CDC notes that Sporothrix can live on plants and in sphagnum moss and recommends gloves, long sleeves, and pants when handling plant matter (CDC sporotrichosis guidance). Cover cuts, keep wet moss away from your eyes and mouth, wash your hands afterward, and keep the work area away from food. If wound infections are a particular concern for you, choose a safer support or ask a clinician about precautions.
Build a Mesh-and-Moss Pole
The build has two tests: the moss must be damp and evenly supported, and the finished pole must be safe to handle. Do not make the column excessively thick. An overstuffed pole becomes heavy and hard to re-wet, while a loose one sheds moss when the plant is tied to it.
Soak and Wring the Sphagnum Moss
Put on gloves, place only the moss you expect to use in a bowl, and cover it with clean water. Let dried moss expand until it is flexible; 10 to 20 minutes is a useful starting window, but the texture matters more than the clock. Our Wild Garden also recommends soaking the moss before wrapping it because damp strands mold around the support more easily (its simple wrapped-pole method).
Lift out a handful and squeeze it firmly. The target is damp, not dripping: when you release it, it should hold together without streaming water. Starting with a small batch keeps the unused moss from sitting in a bucket of stagnant water while you work. If the moss is dusty, the first soak also makes the project cleaner.
Shape, Pack, and Close the Pole
Cut the mesh to the planned height, remembering to leave the lower 6 to 12 inches of the core bare for the pot. Roll or fold the mesh around the core into a cylinder, leaving enough overlap to close the seam. For a heavy plant, put the rigid stake or pipe inside the sleeve before packing; for a lightweight vine, a properly closed coated mesh column may be sufficient.
Pack damp moss in handfuls from the bottom upward. Press it firmly enough that there are no hollow pockets, but do not compress it into a hard plug. A layer roughly 1 to 2 inches thick around a small core is a useful starting point; add more around the side that will face the plant if the roots need a broad contact surface. Keep the density consistent so the pole does not develop a soft spot where the stem will pull against it.
Close the long seam with coated wire, strong cord, or purpose-made ties. Work in short intervals up the pole rather than using one very tight wrap that crushes the moss. Tuck or bend the ends inward, then run your gloved hand over the entire column. If anything catches, snip, fold, or cover it before installation. Finish by holding the bare base and gently shaking the pole. Moss should not pour out, and the column should not twist around the core.
Do not add fertilizer to the soak water as a default. Fertilizer belongs in a measured plant-care routine, and a nutrient-rich, constantly wet pole can encourage algae or odors. Plain water makes it easier to see whether the construction and moisture routine work before you introduce another variable.
Install the Pole Without Damaging Roots
The best support is one that is stable from day one. Place the pole behind the plant’s main stem, not in front of the foliage where the plant has to bend around it. The broad face of the foliage can still turn toward the window, while the stem and its nodes remain aligned with the support.
Choose Between Repotting and an Established Pot
Repotting is the cleanest time to install a moss pole. Put the bare base of the pole into the empty drainage pot first, hold it upright, and add enough mix to lock it in place. Set the plant’s root ball in front of the pole, arrange the main stem against the moss, and backfill while checking that the pole remains vertical. Finish by watering the soil according to the plant’s normal routine, not simply because the pole is new.
Do not use a much larger pot just to bury a taller pole. Oversizing the container can leave the root zone wet for too long, and a wet root zone is not a substitute for a damp pole. If the pole makes the plant top-heavy, use a heavier pot, a wider base, or a second support rather than packing stones tightly against roots or blocking drainage holes.
You can add a pole to an established plant, but do it slowly. First look through the top layer of mix and choose a clear path near the inner pot wall or behind the root ball. Lower the bare base gently; if you meet firm resistance, stop. Never drive the support through a root mass to reach the bottom. If there is no safe channel, repot when the plant is ready, use a surface-mounted trellis, or support the stem with a lighter stake until the next repotting window.
After the pole is in place, test it before attaching the plant. Hold the pot steady and move the top a little. Flex is normal; rocking at the soil line means the base needs more support. Fix it now. Tightening plant ties later will not cure a wobbly anchor.
Attach and Train the Plant
Training is guidance, not force. Start with the lowest strong section of the main stem and work upward. Use the pole to decide the direction of new growth, but allow the plant to keep its natural curve. A mature vine that has been trailing for months may need several loose adjustments rather than one dramatic bend.
Find the Back, Nodes, and Petioles
On a climbing aroid, the “back” is generally the side of the stem where nodes and aerial roots are easiest to place against the support. The node is the joint where a leaf and usually a new bud or root can arise. The internode is the stem section between nodes. The petiole is the leaf stalk, and it needs to remain free so the leaf can orient toward light.
Face the nodes toward the moss, then use a soft tie around the main stem or an internode. Leave enough room for the stem to thicken—about a finger’s width is a useful visual check—and never make the tie do the job of a clamp. Attach every second or third node at first, then add another tie only where the new growth starts to pull away. Keep leaf blades and petioles outside the tie.
If an aerial root is already close to the moss, lay it gently against the surface. Do not bend a stiff root sharply, staple it, or pack moss over it. Some roots will attach; some will dry back; some will grow past the pole and later reach the soil. The pole should make contact easier, not turn normal roots into a test the plant can fail.
Check the ties once a week during active growth. A loop that looked loose at installation can become restrictive surprisingly quickly. When a lower section stays in position after the tie is loosened and the pole is stable, you can remove that tie or leave it as light insurance. Research on aerial roots in structurally dependent plants shows that their growth pattern is not the same as a typical soil root and can be slow or variable; patience is more useful than repeated handling (the peer-reviewed study).
Water and Maintain the Moss
Think of the pole and the pot as two different watering zones. The soil supplies the plant’s primary root system; the pole is a support with an optional moist contact surface. Do not water the soil every time the pole feels dry, and do not leave the pot sitting in runoff while trying to hydrate the moss.
The ideal moss texture is similar to a well-wrung sponge: cool and damp through the column, but not dripping when pressed. Pour clean water slowly over the top of the pole and let it travel down the moss. A narrow-spouted bottle or funnel helps direct water where it belongs. Surface misting can refresh the outer strands, but it evaporates quickly and rarely re-wets a dry core.
There is no honest universal schedule. A tall, thin pole in a dry room may need checking every few days, while a dense pole in a humid room may stay damp much longer. Check the surface, weight, and a small area near the top and middle. If water runs down the outside, the moss may have dried and become water-repellent; wet it gradually rather than flooding the pot.
Keep airflow moving around the plant and inspect for musty odor, slimy moss, or a persistently waterlogged base. A little green growth on an exposed damp surface is not the same as a dangerous root problem, but a sour smell or collapsing moss means the column is staying too wet or has started to decompose. Let it dry slightly, reduce the volume of each watering, and replace the affected material if the smell or collapse continues.
Normal plant care still sets the ceiling for growth. Give the plant the light, drainage, temperature, and nutrition its species needs. A moss pole can organize a plant and give it a climbing route; it cannot make a low-light plant produce large mature leaves, repair a damaged root system, or force fenestrations on a juvenile Monstera.
Troubleshoot Leaning, Dry Moss, or No Attachment
When the setup fails, change one variable at a time. The most common mistake is adding more water when the real problem is an unstable base or a tie attached to a petiole. Use the symptom to identify the job that is actually unfinished.
| What you see | Likely cause | First correction |
|---|---|---|
| The pole rocks at the soil line | Shallow anchor, light pot, or loose surrounding mix | Stabilize the base during repotting, add a deeper compatible anchor, or move to a heavier pot; do not tighten the stem ties. |
| Moss dries within a day or two | Very dry room, thin column, or water running around rather than through it | Pour slowly from the top, check the core, and add a wider or more water-retentive moss layer only if the pot remains well drained. |
| Moss smells sour or stays slimy | Constant saturation and poor airflow | Allow slight drying, reduce watering, and replace decomposed moss; never keep adding water to hide the smell. |
| Aerial roots stay against the surface | Pole is too far away, moss is dry, or the plant is not actively growing | Move the pole closer at repotting, keep the moss damp, improve growing conditions, and give the root time. |
| The stem leans away from the pole | Light source is off to one side, ties are too few, or the plant was bent too quickly | Turn the pot gradually, add a loose tie at an internode, and guide new growth rather than forcing old tissue. |
| Leaves yellow after installation | Root disturbance, soil staying wet, or general stress | Check the root zone and drainage first, pause extra pole watering into the pot, and avoid tying or repotting again immediately. |
| The plant reaches the top quickly | Pole was sized to the leaves rather than the growth point | Extend the pole before the newest node has nowhere to go, or switch to a wider trellis if the plant has outgrown the form. |
No aerial-root attachment does not automatically mean failure. The roots may be young, the plant may be growing slowly, the moss may be too dry, or the plant may use the pole mainly as physical support. If new leaves are healthy and the stem is stable, keep the routine simple rather than chasing attachment with fertilizer or daily misting.
If a tie has cut into the stem, remove it immediately and inspect the area without scraping the tissue. If a wire edge has touched a root or petiole, replace or cover the offending section. Small construction errors are easier to correct before the plant has grown around the pole.
Know When to Extend, Refresh, or Remove the Pole
Extend the pole before the plant reaches the last usable node, not after the top has already become a tangled mass. A mesh extension can overlap the existing core and be secured to it, then packed with fresh damp moss. Keep the joint rigid and conceal every wire end. A very tall extension may need its own support stake or a wall-safe anchor; otherwise the upper plant becomes a sail that tips the pot.
When a stem has rooted firmly into the moss, treat the pole and plant as one unit during repotting. Do not pull the plant sideways to free it from the surface. Support the pole with one hand, loosen the root ball and pot with the other, and move the whole assembly together when possible. If the moss has collapsed around the roots, cut away only what is necessary and give the roots a stable new surface rather than stripping them clean.
Refresh the pole when the moss has shrunk, dried into a hard shell, developed persistent odor, or fallen out of the sleeve. You may be able to open the seam, replace the moss, and close it again around the same sound core. Replace the core if wood is soft, PVC is cracked, mesh is rusting, or sharp edges are exposed. A pole that is technically reusable is not worth keeping if it has become a hazard.
Remove the pole at repotting if the plant is healthier as a trailer, the pot cannot support the added height, or maintaining damp moss is creating more root-zone problems than it solves. Loosen ties first, support the main stem, and avoid yanking any root that has entered the moss. A good support is optional; good drainage, light, and a healthy root system are not.
Conclusion
To create a moss pole that lasts, build around the plant rather than around a fixed recipe. Choose a rigid core, a safe mesh sleeve, and enough damp sphagnum to make a stable rooting surface; leave a bare base for the pot, anchor it deeply enough for the plant’s weight, and install it when repotting whenever possible.
Then face the nodes toward the pole, tie only the main stem loosely, keep petioles free, and hydrate the moss like a wrung sponge while treating the soil separately. If the plant leans, dries the pole, or refuses to attach, inspect stability, distance, moisture, light, and growth stage before changing everything. The pole is a tool for guided climbing—not a requirement and not a shortcut around basic houseplant care.



