24 Easy DIY Trellis Ideas for Your Garden
Build a better garden trellis with 24 easy ideas, from bamboo teepees to cattle-panel arches, plus sizing, anchoring, and plant-training tips.
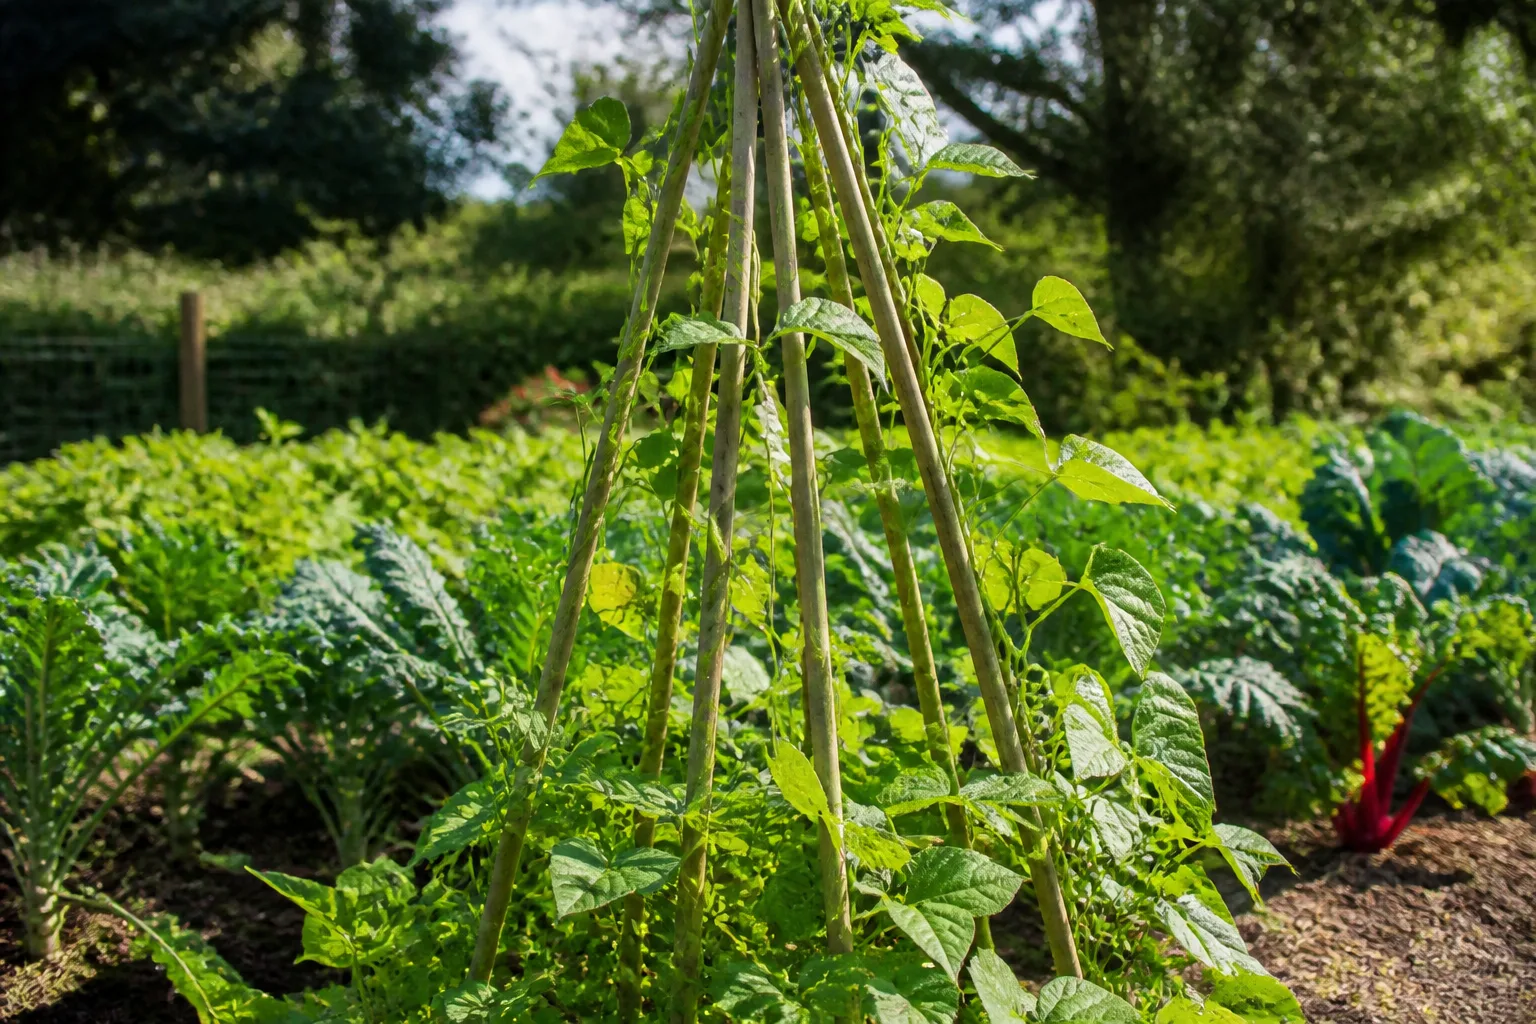
A good trellis does three jobs at once: it gives a climbing plant somewhere to go, keeps fruit and foliage easier to reach, and turns unused vertical space into growing room. The best DIY trellis is not necessarily the prettiest one. It is the one that matches the plant’s mature weight, the wind at your site, and the way you want to harvest or walk around the garden.
Use a light bamboo teepee for peas or a seasonal bean crop, a stronger frame for cucumbers, and a properly anchored panel for a heavy perennial vine. The 24 ideas below are grouped by the job they do, so you can skip the designs that do not fit your space and build the one that will still be standing when the plant reaches full size.
How to choose a DIY trellis that will actually work
Before cutting wood, decide whether the trellis is a seasonal support, a portable container feature, or a permanent garden structure. Seasonal supports can be quick and inexpensive; permanent structures need weather-resistant materials, a repairable connection system, and anchors that transfer the load into soil, posts, or a frame rather than into a thin fence board.
Match the structure to the plant’s weight and climbing habit
Plants do not all climb in the same way. Peas use tendrils, beans twine around supports, cucumbers grip with tendrils but often need early guidance, and many ornamental vines twine or wind around whatever they can reach. A rose, squash vine, or mature perennial climber can become much heavier than a young plant suggests, especially after rain.
For crop-specific support, the University of Minnesota Extension’s cucumber guidance is a useful reminder that vertical growing is a management choice, not just a decorative one. A cucumber trellis can make fruit easier to find, but the frame must be wide and stable enough for the plant’s foliage and developing fruit. Likewise, pole beans need a structure tall enough for their season-long climb; a short decorative grid will force you into constant redirection.
Use this quick match-up:
| Plant or goal | Trellis style that usually fits | Watch out for |
|---|---|---|
| Peas and sweet peas | Fine netting, twig lattice, or bamboo A-frame | Gaps that are too large for young tendrils |
| Pole beans | Teepee, ladder, tower, or tall netting | A narrow base that tips when vines fill in |
| Cucumbers | Broad net, cattle panel, or framed mesh | Sharp wire and weak top connections |
| Clematis or annual flowers | Fan lattice, wall grid, or obelisk | Attaching heavy growth to fragile siding |
| Squash and melons | Strong panel with slings or ground-level support | Expecting a vertical frame to carry fruit without help |
| Privacy planting | Panel, pergola, or fence-mounted grid | Blocking access, airflow, or a neighbor’s boundary |
Decide where the load will go before you build
A freestanding trellis should have a wide enough footprint, two or more points driven into the ground, or a low crosspiece that resists racking. A wall trellis should stand slightly away from the wall so stems can be reached and the wall can dry. A fence trellis should be attached to posts or a self-supporting frame whenever possible, not only to pickets that were designed to look good rather than carry a wet mass of foliage.
If a structure will sit in a raised bed, build or install the support before planting. Pushing stakes through a tangle of roots later is harder on the plants and usually produces a shallower, less stable anchor. For small patios and balconies, give the container enough width and weight that the combined planter, frame, and vine cannot act like a sail.
24 DIY trellis ideas, organized by garden job
The ideas below range from nearly tool-free seasonal supports to more permanent frames. Each is practical, but each has a best use. Treat the materials as a starting point and adjust the width, height, and anchoring to your plant rather than copying a fixed dimension.
Small-space and container trellises
-
Window-box dowel trellis. Fit vertical dowels into a long planter and connect them with two or three horizontal slats. It is light enough for a balcony and works well for small flowering vines, peas, or a compact edible climber; use a deep planter or tie the box to a secure rail so the whole assembly does not tip.
-
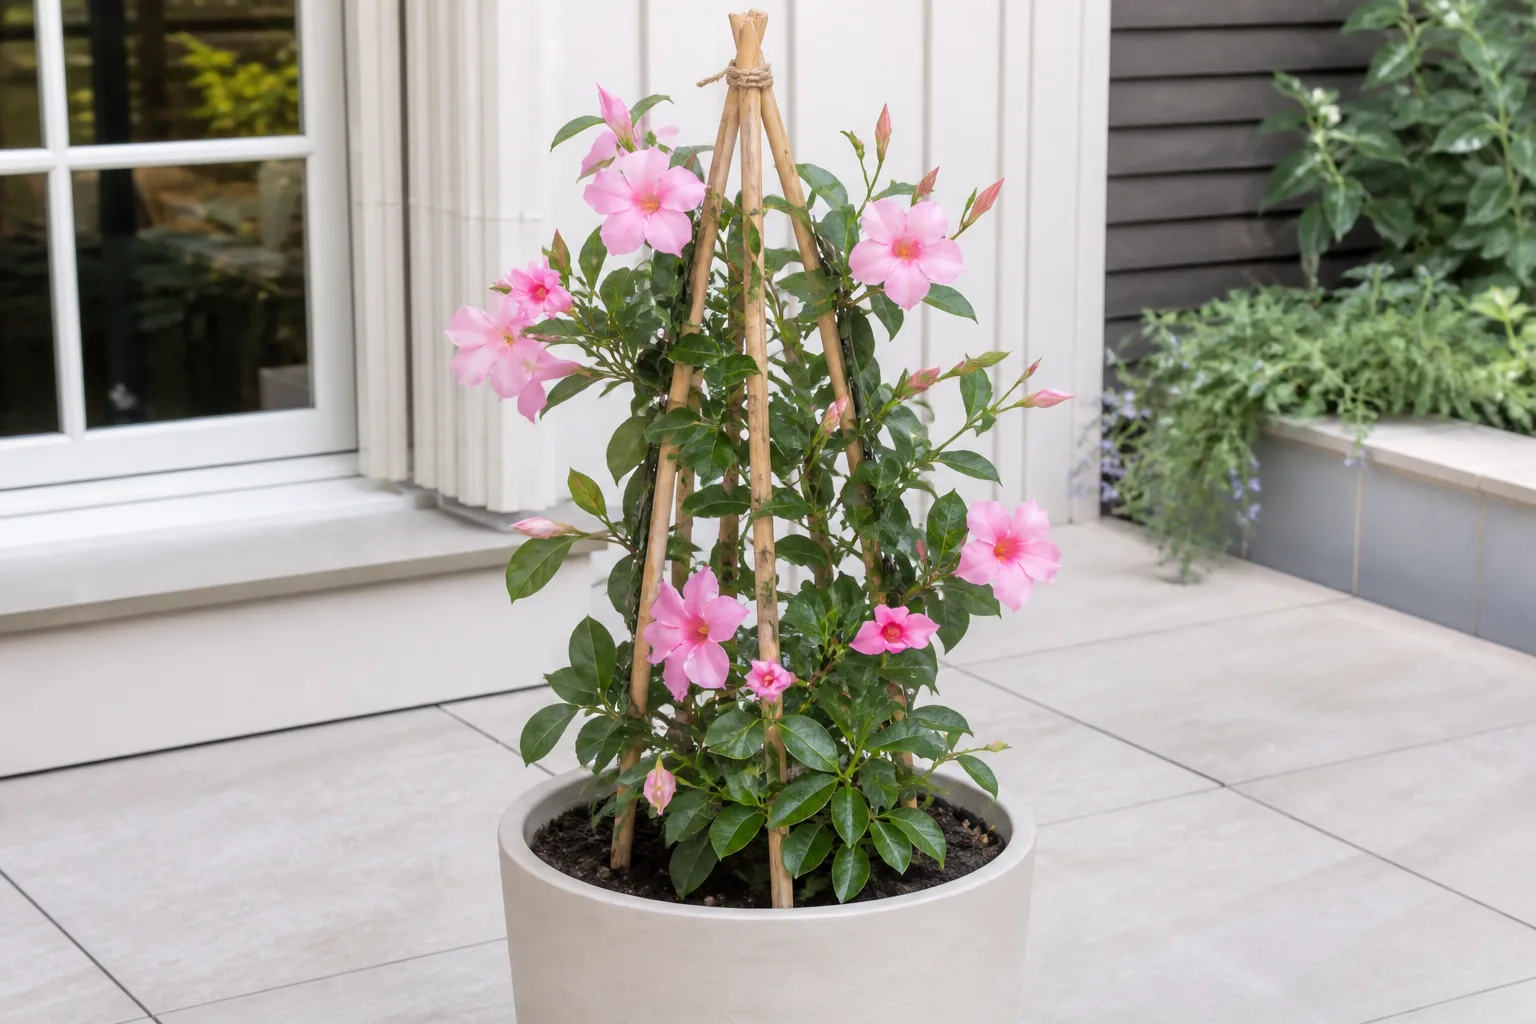
Container bamboo teepee. Push three or four bamboo canes around the edge of a large pot, bring the tops together, and tie them with weather-resistant twine. This is one of the easiest DIY trellises to build, but it is best for seasonal beans, sweet peas, or a light flowering vine rather than a woody perennial.
-
Planter-and-net cucumber frame. Make a rectangular frame from furring strips or thin cedar, staple trellis netting to the back, and set it behind a planter. Leave room at the bottom for the stems and use a wide base; a narrow, tall planter with a full cucumber canopy can overturn surprisingly easily.
-
Expandable coat-rack trellis. An old wooden accordion coat rack can become a movable fan support when opened, cleaned, and fastened in position. Use it for morning glories, light annual vines, or a patio privacy accent, but do not rely on an unsealed rack for a permanently wet bed; check every joint before the plant covers it.
Easy bed and A-frame supports
-
Bamboo teepee for beans. Arrange long canes in a circle, cross or lash them near the top, and add one or two horizontal rings if the plant needs more handholds. The shape spreads the load over several ground points and makes a quick harvest tunnel, while the open center lets you reach fruit from more than one side.
-
Triangular bean trellis. Build two sloped panels from garden stakes and furring strips, then hinge or tie them at the ridge. Placed over a raised bed or between two rows, this A-frame gives pole beans or peas a long climbing surface and is easier to brace than a single flat panel.
-
Two-ladder standing trellis. Make two narrow ladder frames from outdoor-rated boards, lean them toward each other, and connect their tops with bolts or a strong hinge. Add crossbars at intervals that fit the crop. The design is forgiving for beginners because the ladders can be built square before you set the final angle.
-
Cedar tower trellis. Join four tall cedar slats into a square or tapered tower and add short crosspieces on each face. A tower can sit in a raised bed or at the end of a border, giving fava beans, peas, or a flowering vine multiple faces to climb. It needs a broad base or buried stakes because a tall tower catches wind.
Fence, wall, and privacy trellises
-
Fence-mounted cedar lattice. Build a flat grid from cedar strips and fasten it to the fence posts with spacers. The air gap makes it easier to tie stems and helps the fence dry, while the post attachments keep the vine’s weight from pulling on individual pickets.
-
Salvaged window trellis. Secure chicken wire or welded wire to the back of an old window frame and lean or hang it behind a planter. It creates a ready-made privacy panel for a porch, but remove loose glass and use a frame that is sound, not one that is already splitting at the corners.
-
Wire wall trellis. Create a light grid from picture-frame wire, stainless fasteners, or small eye screws on a separate wood or metal frame. This is a clean choice for a shed wall or narrow side yard. Keep the grid accessible so you can loosen ties and remove dead growth without scraping against the wall.
-
Fan-shaped cedar lattice. Use progressively shorter horizontal slats between two or more uprights to make a fan that leans against a fence or sits at the back of a border. The widening shape gives a young vine room to spread and makes a small flowering climber look fuller without building a large screen.
Durable arches and heavy-duty frames
-
Raised-bed cattle-panel arch. Bend a galvanized livestock panel over a raised bed and secure both sides to sturdy posts or T-posts. It creates a walk-through harvest arch for cucumbers, beans, or small melons, but leave enough headroom and brace the ends before the panel is covered in foliage.
-
T-post livestock-panel trellis. For a straight, durable wall, fasten a section of livestock panel to two or more deeply driven T-posts. This is a strong answer for vigorous crops and large gardens. Use gloves and cap or bend cut wire ends; the panel is useful because it is rigid, but its cut edges are not forgiving.
-
Square grid above a raised bed. Mount a square mesh panel between posts at the back of a bed or across the end of two beds. The consistent grid is easy to weave peas and cucumbers through, and its flat shape makes harvest predictable. Keep the lower edge high enough to clear mulch and allow a hoe or hand to pass.
-
Beginner obelisk. Join four vertical boards or stakes with evenly spaced crosspieces, tapering the top if you want a classic garden shape. You do not need perfectly mitered corners for a vine-covered obelisk; stable joints and a level base matter more than decorative precision. Use extra bracing for a permanent clematis or rose support.
Salvaged and natural-material trellises
-
Twig lattice. Collect straight, sound twigs and tie them into a diamond or ladder pattern with jute twine. This suits a cottage garden and roots the design in materials already on the property, but it is a seasonal structure: replace soft or brittle twigs before a loaded vine pulls the lattice apart.
-
Repurposed garden-tool trellis. Sink the handles of old, structurally sound tools into the soil and attach slim crossbars between them. The result is a rustic vertical support with real character. Avoid tools with loose heads, sharp exposed metal, peeling finishes, or handles that will rot at the soil line.
-
Crib-rail or bed-rail trellis. A sturdy rail can lean against a fence or be fitted with stakes to stand at the back of a bed. Inspect every surface, remove hazardous hardware, and use it only when you can verify the material is sound and appropriate for the location. A rail’s wide openings suit a vine with larger stems better than a tiny tendril crop.
-
Old gate or shutter frame. A salvaged garden gate, shutter, or narrow screen can become a freestanding trellis when supported by two buried stakes or a simple rear brace. It gives you a ready-made visual focal point and can be moved between beds. Seal or paint only with an outdoor product suitable for the surface and intended use.
Decorative focal-point trellises
-
Copper-pipe trellis. Assemble copper pipe with connectors or mechanical fasteners into a rectangle, fan, or narrow arch. The material adds a warm color that works especially well on a patio, but measure carefully because pipe is less forgiving to alter than wood. Support it at the base and use clamps rather than depending on a decorative connection alone.
-
Copper-detailed obelisk. Build the main frame from outdoor-rated wood, then add copper tubing or strips as trim. This gives you the easy-to-repair structure of wood with a more finished look. Keep the decorative metal from creating sharp protrusions where people brush past it.
-
Midcentury screen trellis. Assemble clean vertical boards with evenly spaced horizontal members to create a freestanding screen between a patio and a garden. The open pattern provides partial privacy while letting air and light through. Anchor the screen like a fence panel, especially if it is taller than it is wide.
-
Decorative tomato-cage trellis. Make a square or rounded cage from pine boards, garden wire, or a ready-made cage reinforced with stakes, then add a finial or painted top if desired. It can support a tomato, climbing flower, or compact vine while keeping the footprint small. Make sure the openings are wide enough for harvesting and that the cage is anchored before fruit weight builds.
Build any DIY trellis safely in five steps
The exact design can change, but the build sequence should stay consistent. A trellis fails most often because it is sized for the seedling in front of you rather than the mature plant, or because the connection is attractive but cannot transfer weight into the ground.
Step 1: Measure the mature plant and the space
Measure the bed, planter, walkway, and the reach of your tools before deciding on height. Then check the plant’s expected spread and whether you want to harvest from one side or both. A cucumber or bean support that leaves no path for your hand will turn a space-saving idea into a difficult picking job.
Give the plant a little room beyond its expected height and width, but do not build so large that you create an unnecessary sail. For a balcony or exposed roof garden, a shorter, wider design is usually easier to stabilize than a tall narrow one. Leave enough clearance from doors, windows, vents, and property boundaries.
Step 2: Choose weather-ready materials and fasteners
For wood, choose a species or finish intended for outdoor exposure and smooth rough edges. For metal, galvanized or stainless fasteners are practical choices where rain is frequent. Use weather-resistant twine or soft plant ties for stems; bare wire can cut into growing tissue as the vine thickens.
The Royal Horticultural Society’s guidance on training and supporting climbers supports the basic principle behind every design here: a support should be appropriate to the climber and installed where you can guide growth. For edible beds, make a conservative material choice and follow the product label for any treated lumber, stain, or coating used near crops.
Step 3: Anchor the structure before vines get heavy
Set stakes, posts, or feet first, then attach the trellis surface. Test the frame with both hands: push gently from several directions and look for twisting, lifted feet, loose fasteners, or a fence panel that flexes. If you can move the structure easily before the plant grows, wind and wet foliage will move it much more.
For a freestanding frame, use two or more ground contacts and add a cross brace when the structure is tall. For a fence or wall design, attach to structural posts or a separate frame with spacers. Never assume siding, a thin decorative fence board, or a balcony rail is rated to carry the combined weight of wood, hardware, wet leaves, and fruit.
Step 4: Add the climbing surface at the right scale
The mesh or crossbar spacing should match the plant. Fine tendrils need a surface they can catch early; large twining stems can use wider bars. If you are using netting, pull it taut enough to provide a clear path but not so tight that a storm can turn it into a drum.
Inspect every cut wire end and cap, bend, or cover it. Place the bottom edge where you can mulch, weed, and water without fighting the frame. A trellis is part of the garden’s working layout, not just a backdrop.
Step 5: Test access and plan the end of the season
Reach through the structure before planting and imagine the densest canopy. Can you see fruit, remove yellow leaves, and cut the plant free without climbing? If the crop is annual, design for removal: a teepee that can be untied or a panel that can be lifted is easier to clean and store than a permanent tangle.
The University of Florida IFAS overview of vertical gardening is useful context for this final check: going upward saves ground space, but it does not eliminate the need to manage light, water, access, and support. Build the trellis around those jobs, not around height alone.
Train, tie, and prune vines without damaging them
Install the trellis before the vine needs it. A young plant is easier to guide than a mature one, and early training prevents you from bending a stiff stem around a bar later. Place the plant close enough to reach the support but not so close that the crown is crowded against a post or panel.
For twining plants such as beans, point new growth around the support in the direction it naturally wants to wind. For tendril climbers such as peas and cucumbers, gently place the tendrils on the net or crossbar; use soft ties only when the plant cannot catch on its own. Tie in a loose figure eight so the stem has room to thicken, and check ties every week during fast growth.
Do not pull a vine tight to make a neat outline. A little slack protects stems during wind and gives new shoots a route to the next opening. Remove dead or damaged growth, but do not prune a plant simply to make a small trellis look tidy if that reduces the leaf area the plant needs to grow and fruit.
Common DIY trellis mistakes and quick fixes
The trellis leans after a storm. Add a second ground stake, widen the base, or install a diagonal brace before the canopy gets larger. If the soil is loose, a deeper anchor or a crosspiece near the ground will do more than simply tightening the top tie.
The fence is bending. Remove the plant load temporarily and move the attachment to posts or a self-supporting frame. A fence-mounted trellis should follow the fence’s structural logic; it should not turn a decorative picket into a beam.
The vine has nothing to grip. Add horizontal twine, netting, or small crossbars at the spacing the plant can reach. A smooth vertical pole may be sturdy but still fail as a climbing surface.
The stem is pinched by its tie. Cut the old tie rather than trying to slide it over swollen growth, then replace it with a loose loop of soft material. Put recurring tie checks on your watering routine during the growing season.
The frame rots at the soil line. Lift or replace the affected piece and change the design so the wood is kept above standing water where possible. A short sacrificial stake, metal bracket, or removable foot can make future repairs easier.
The plant outgrows the idea. Do not keep adding random extensions to a weak frame. Harvest or prune according to the plant, then move the vine to a stronger panel, arch, or permanent support before the next season.
Conclusion
The easiest DIY trellis is the one that matches the plant and the place: bamboo for a quick seasonal teepee, a framed net for a compact cucumber, a ladder or tower for a raised bed, and a braced panel or arch for a vigorous vine. Choose the structure first by mature load and access, then by appearance.
Build the anchor before the foliage, use weather-ready connections, and leave enough room to tie, harvest, water, and dismantle the support later. With those decisions in place, even a simple set of canes and twine can give your garden more growing space without becoming another garden problem.



