How to Grow and Care for English Walnut Trees
Learn how to site, plant, pollinate, prune, and harvest an English walnut tree, with practical guidance on cultivars, juglone, and common problems.
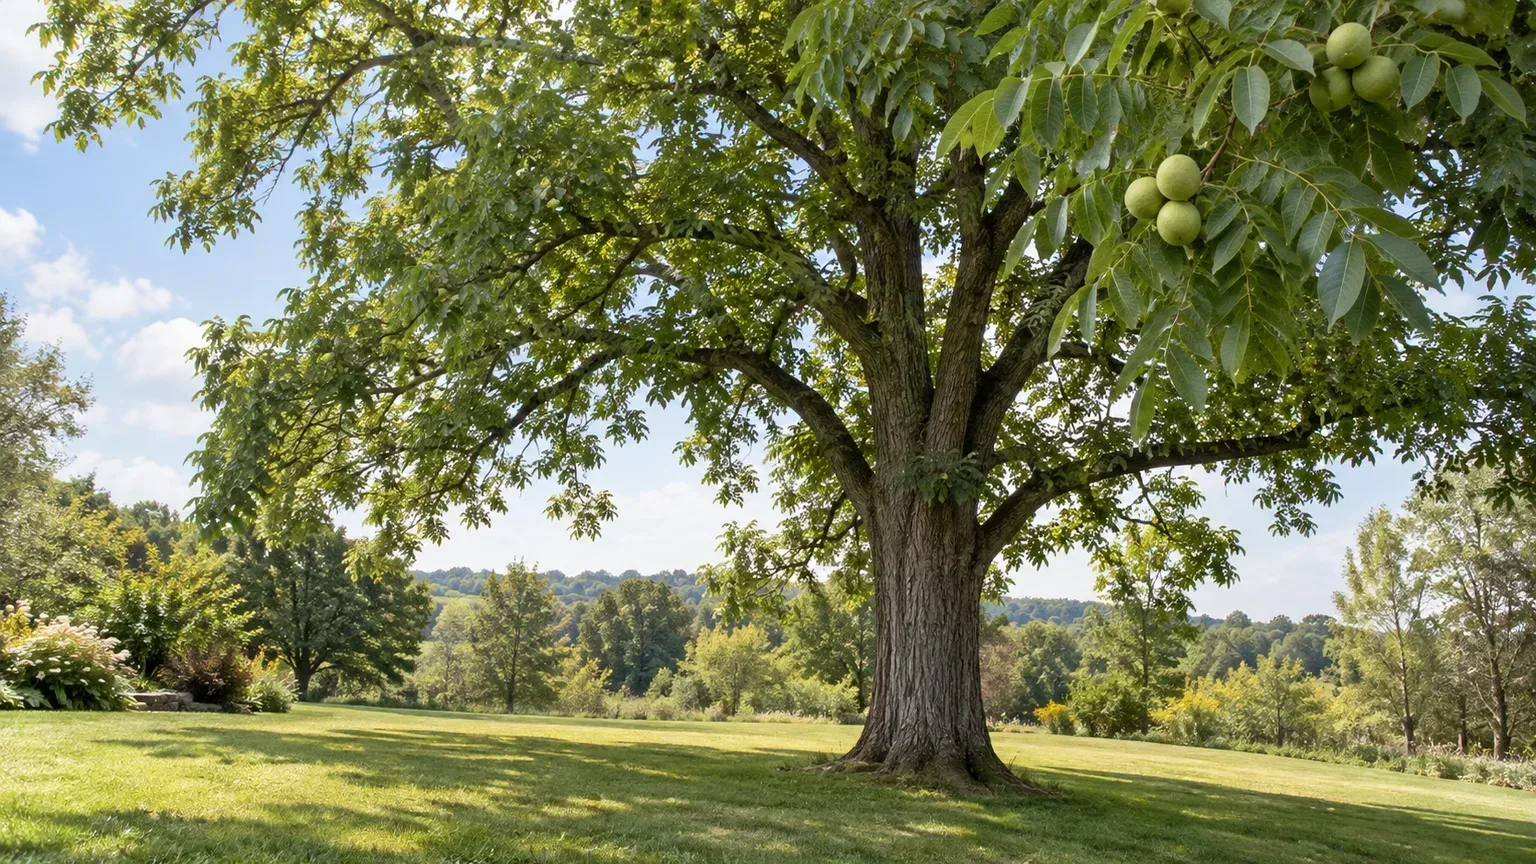
An English walnut can provide generous shade and an autumn harvest, but a young nursery tree gives little hint of its future size. Before buying, decide whether you can provide sunny, deep, well-drained space and wait several years for a crop. Then select a cultivar suited to your climate and pollination situation; those choices shape the result more than a strict fertilizer calendar.
English Walnut vs. Black Walnut
The English walnut, Juglans regia, is also called Persian walnut or common walnut. It is the species grown for the familiar large, edible nuts sold in shells or as kernels. The name “English” reflects a trading history, not the tree’s original home. It is distinct from black walnut, Juglans nigra, a North American species valued for both its timber and smaller, strongly flavored nuts.
The distinction matters when you read advice about walnut roots, nut cracking, or plants that grow beneath the canopy. The species differ in traits, and black walnut is generally the stronger concern in discussions of juglone, a compound associated with growth inhibition in some neighboring plants. When choosing a nursery tree, check the botanical name on the label instead of relying on a common name alone.
Is an English Walnut Right for Your Garden?
Treat the mature tree as a landscape decision, not a small fruit-tree purchase. Depending on cultivar, climate, and growing conditions, an English walnut can become a tall tree with a wide crown; the RHS gives a mature size of about 30 meters (100 feet) tall and 15 meters (50 feet) wide. That is enough to shade a large part of a garden, compete with nearby plants for water and light, and make routine harvesting difficult if branches extend over a roof, driveway, or neighboring property.
Map the tree’s future canopy before planting. Consider the house, overhead wires, underground services, fences, paths, patios, and the sunny beds you want to keep. A mature tree needs a generous, uninterrupted root zone. If your only available spot is cramped, heavily shaded, persistently wet, or close to utility lines, choose a smaller nut tree rather than trying to control a walnut’s eventual size with severe pruning.
A walnut is a poor choice if you want a quick crop, a compact ornamental, or a tree that can be held to a small footprint. It is a better fit for a large yard, orchard edge, or homestead where shade, seasonal interest, and nuts are all welcome. Allow space for fallen husks and leaves as well: they stain paving and can make harvest messy for a few weeks each year.
Choose a Named Cultivar or Grow From Seed
For a predictable crop, buy a healthy grafted tree of a named cultivar from a reputable nursery. Grafting preserves the traits of the selected upper portion, or scion, while the rootstock supports the tree. That gives you a better chance of getting the expected nut quality and flowering pattern than planting an unknown seedling. The RHS walnut guide notes that grafted trees can begin cropping after about four years, though cultivar, climate, establishment, and local growing conditions can shift that timing.
Cultivar names are not interchangeable labels. The RHS describes ‘Broadview’ as a relatively compact, partially self-fertile tree that crops better with cross-pollination; it also lists ‘Buccaneer’ as self-fertile and ‘Lara’ as a newer cultivar with large nuts. Garden writer Charles Quest-Ritson, writing in Country Life’s guide to growing walnuts, highlights ‘Broadview’ and ‘Franquette’ as early-yielding choices in suitable British gardens. These examples are not a universal ranking: ask a local nursery or extension service which cultivars perform in your climate, and confirm their mature size, disease resistance, flowering overlap, and harvest window before ordering.
If nuts matter, favor a grafted tree. A seedling may become a handsome shade tree, but its nuts can differ from the parent and it can take longer to bear. If you mainly want a tree for habitat or shade and can accept uncertainty, growing from seed is an inexpensive experiment. Either way, be skeptical of “dwarf walnut” claims: a more compact cultivar may still become a substantial tree and is not automatically suited to a small patio.
Find a Sunny Site Outside the Frost Pocket
Choose full sun for the best growth and nut production. A little shade can be tolerated while a tree is young, but a mature canopy in shade will not deliver the same crop as a tree with open exposure. Give it room to branch without crowding from buildings or other large trees. A sunny site that also has good air movement helps foliage dry after rain, but avoid a windy, exposed location that rocks a newly planted tree or damages spring growth.
Spring frost is a different risk from winter cold. A dormant tree may tolerate winter conditions that would damage newly emerged leaves, flowers, or young nuts. Avoid low spots where cold air settles and sites that regularly catch late frost; a sheltered slope or open garden position can be safer. In regions with wet springs, local cultivar and disease recommendations are especially valuable because weather during flowering affects both pollination and nut health.
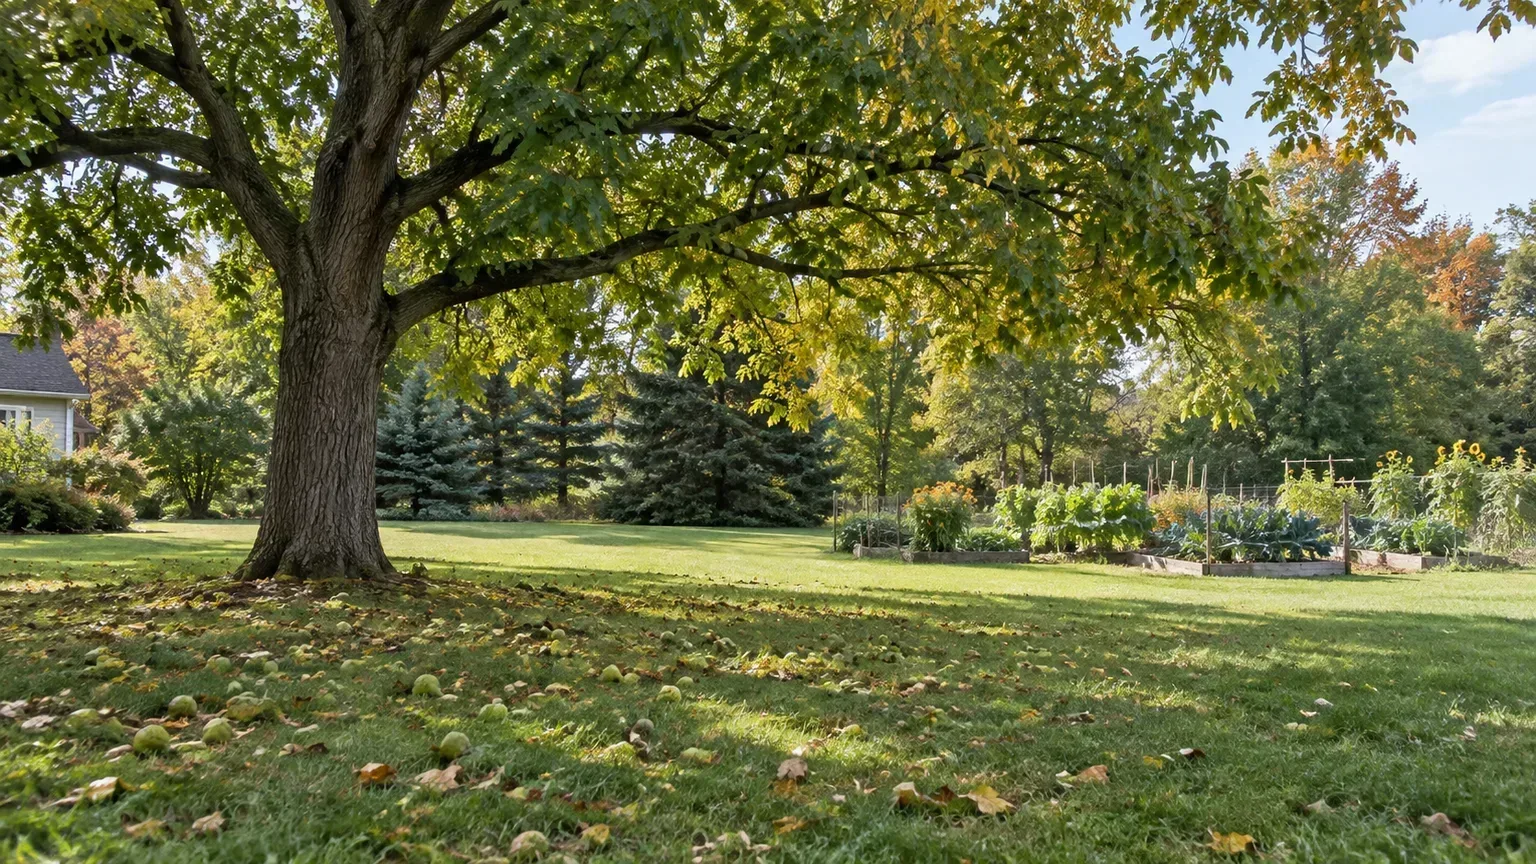
Before choosing the exact spot, look at it after heavy rain and during the hottest part of summer. If water stands there, the root zone may stay saturated; if soil bakes hard or the area is exposed to drying winds, young trees will need closer attention as they establish. A good planting location balances sun, drainage, shelter, and long-term space rather than optimizing one factor in isolation.
Prepare Deep Soil That Drains Well
English walnuts do best in deep, fertile soil that can hold moisture without staying waterlogged. A loam with good structure is ideal, but garden soils vary widely; test drainage first rather than trying to recreate a textbook mix. Dig a test hole about a spade deep and fill it with water. If it remains full for a long time after surrounding soil has drained, choose a better site or address the broader drainage problem before planting.
Avoid planting into a shallow pocket of amended potting mix surrounded by dense clay. That can collect water around the roots instead of helping them expand into the garden soil. If the ground is compacted, loosen a broad planting area and improve the soil structure with mature organic matter across that area. Do not dig a narrow, overly enriched “bathtub” for the root ball.
Soil pH recommendations can differ by region and source, so do not add lime or sulfur based on a generic number. A soil test can show whether pH or nutrients actually need correction. The practical priorities are adequate depth, drainage, fertility, and enough moisture through establishment; changing acidity without a test can create a new imbalance without solving poor growth.
Plant a Young Walnut Tree Without Burying the Graft
In climates with cold winters, plant a bare-root tree during dormancy after leaf fall and before spring growth begins, when the soil is workable and not saturated or frozen. Container-grown trees can offer more flexibility, but avoid planting during heat or drought unless you can keep the root ball consistently moist. The RHS recommends autumn to winter planting and cautions against pot-bound plants because walnut roots need to spread into surrounding soil.
- Inspect the roots. Choose a young, vigorous tree with moist roots and no circling, girdling mass. If container roots are tightly coiled, select another plant or gently tease the outer roots where appropriate rather than forcing a root-bound tree into a small hole.
- Dig wide, not excessively deep. Make the hole at least as wide as the spread roots. The root flare should sit at or just above finished soil level; the graft union, if present, must remain above the soil.
- Position the tree carefully. Spread bare roots naturally and avoid bending the taproot upward. A tree with a long taproot may need a deeper hole, but never force roots into a J shape or bury the trunk to make the plant fit.
- Backfill with the native soil. Break up large clods and firm the soil gently to remove air gaps without compacting it. Do not pack fertilizer or fresh manure against roots.
- Water slowly. Settle the soil around the roots and add more soil if the tree sinks. A stake is useful if the root ball rocks in wind, but keep ties loose and remove or adjust them as the trunk thickens.
- Mulch the root zone. Spread organic mulch in a broad ring, leaving a clear gap around the trunk. Mulch should reduce weeds and moisture loss, not bury the bark or hold wet material against it.
Good planting is mostly about root placement and consistent aftercare. Do not prune heavily at planting to “balance” the roots; remove only broken or badly damaged growth. Give the tree a clear area free of lawn competition so water reaches its roots instead of feeding turf.
Water and Mulch During Establishment
For the first growing seasons, water deeply when the root zone begins to dry rather than following a fixed weekly schedule. The right interval depends on soil texture, rainfall, heat, wind, tree size, and whether the tree is in a lawn. Check moisture below the mulch near the original root ball: if soil is still cool and damp, wait; if it is drying several inches down, soak slowly so water reaches the roots instead of running off the surface.
Use a slow hose flow, drip line, or watering bag only if it delivers water to the root zone and does not keep the trunk wet. During a dry spell, inspect weekly and adjust based on the soil. In heavy clay, water less often and make sure it can drain; in sandy soil, check more frequently because it dries quickly.
Keep grass and weeds away from the young tree. A wide mulch ring reduces competition and evens out moisture, but mulch piled into a “volcano” against the trunk invites bark problems and hides damage. As the canopy and roots expand, irrigation can usually taper, though a mature walnut may still need supplemental water during extended drought, especially while developing nuts.
Plan for Pollination Before Buying
English walnut trees have separate male and female flowers on the same plant. Male flowers appear as dangling catkins; female flowers are small and sit near the ends of new shoots. Wind carries the pollen, but some cultivars release pollen at a different time from when their female flowers are receptive. This mismatch, called dichogamy, can reduce nut set even though the tree has both flower types.
A tree described as self-fertile may produce some nuts alone, but that does not mean it will crop equally well in every garden. The RHS notes that walnuts may be partially self-fertile and that cross-pollination can improve cropping. The practical question is whether a compatible walnut nearby flowers at the right time and whether wind can carry pollen between trees. The Permaculture Magazine walnut guide explains how flowering overlap can vary and why a second cultivar may help. If no nearby walnut is present, ask the nursery which locally suitable cultivars overlap in bloom before buying a pair.
Do not assume a second tree is necessary in every setting. A mature walnut in a neighbor’s yard may provide pollen, while two trees of the same poorly matched flowering pattern may not improve the crop as much as expected. A local supplier can recommend combinations for your region; take down the cultivar names and ask specifically about male and female flowering times rather than simply asking whether a tree is “self-pollinating.”
Feed Only When the Tree Needs It
A walnut does not need automatic high-nitrogen feeding every spring. First look at the tree’s annual growth, leaf color, soil condition, irrigation, and possible root competition. Pale foliage and weak extension growth can result from drought, waterlogged roots, deep shade, or poor establishment; fertilizer will not correct those problems and can push soft growth that is more vulnerable to stress.
Use a soil test if the tree shows persistent poor growth or if you are planning a regular fertilizer program. Apply only the nutrient the test or a local horticulture professional identifies, at the labeled rate and timing. A surface layer of mature compost or mulch can support soil structure, but keep it away from the trunk and do not bury the root flare. The goal is steady growth, not the largest possible flush of shoots.
Prune Lightly and at the Right Time
Start with a sound structure while the tree is young. A central leader with well-spaced scaffold branches is a practical form for a large shade-and-nut tree; remove competing leaders, crossing limbs, and damaged growth before they become large cuts. Do not try to keep the tree permanently small by topping it. Heavy heading creates weak regrowth, spoils the crown, and still cannot turn a large walnut into a true dwarf.
Walnuts can bleed sap from pruning wounds, so timing matters. The RHS advises pruning from mid-summer to early autumn, when the risk of sap bleeding is lower; avoid making routine winter cuts. Make clean cuts just outside the branch collar and do not leave long stubs. For a small tree, remove only what you can reach safely from the ground with appropriate hand tools.
Once a walnut is tall, pruning becomes an arborist’s job. Do not use a chainsaw from a ladder or remove large limbs above your skill level. If a branch is dead, split, over a target, or rubbing on a structure, have a qualified arborist assess it. A walnut can tolerate thoughtful formative pruning, but it does not reward repeated severe cuts.
Grow an English Walnut From Seed
A seed-grown walnut is a good project when you want to learn or grow a future shade tree and can accept uncertain nut quality. Freshly fallen nuts are more promising than old, dried cooking nuts because drying can reduce germination. Remove the green husk promptly, wear gloves if you do not want stained hands, and protect the nut from squirrels and mice while it is cold-stratified outdoors.
One simple approach is to sow a fresh, husk-free nut about 3 centimeters (roughly 1¼ inches) deep in a pot of well-drained growing medium in autumn. The RHS propagation guidance recommends this approach and notes that seedlings may be ready for budding the following summer. Leave the pot outside in a protected spot through winter so natural cold and moisture can break dormancy, but keep the medium from becoming saturated. Mark the pot clearly and protect it from animals; a buried nut is easy to forget and a favorite squirrel snack.
Germination timing varies, so do not discard a viable-looking seedling simply because it has not emerged early in spring. Once growth is sturdy, pot it on or plant it in a nursery bed where you can protect it from mowing, drought, and competition. Transplant while young, before the taproot becomes difficult to handle. If the tree will eventually produce food, remember that a seedling will not necessarily reproduce the parent cultivar and can take considerably longer to fruit than a grafted tree.
When Will the Tree Produce Its First Nuts?
There is no single reliable year for a first harvest. The RHS says grafted walnuts may begin cropping after about four years, while Juglans regia grown from seed may take many more years and produce nuts that differ from the parent. Garden writer Charles Quest-Ritson notes that some seedling trees can take up to 20 years to crop, illustrating why seed-grown trees are a poor choice when an early, predictable harvest is the goal.
“First nuts” also does not mean “full crop.” A young tree may set only a few nuts, and the first crop can be lost to late frost, poor flowering overlap, drought, or pests. Build the tree’s framework and root system before judging its long-term productivity. If it flowers but does not set nuts, note the dates of male catkin release and female flower opening over more than one season; that observation helps distinguish a pollination mismatch from a tree that is simply still immature.
Harvest, De-Husk, Dry, and Store Walnuts
English walnuts ripen in autumn, but the exact harvest period depends on cultivar and climate. Watch for the green outer husk to split and for ripe nuts to fall naturally. Collect them promptly rather than waiting for every nut to drop at once; squirrels, birds, wet weather, and lawn equipment can all make a delayed harvest costly. The tree may produce nuts at different times, so check beneath it regularly while the husks are opening.
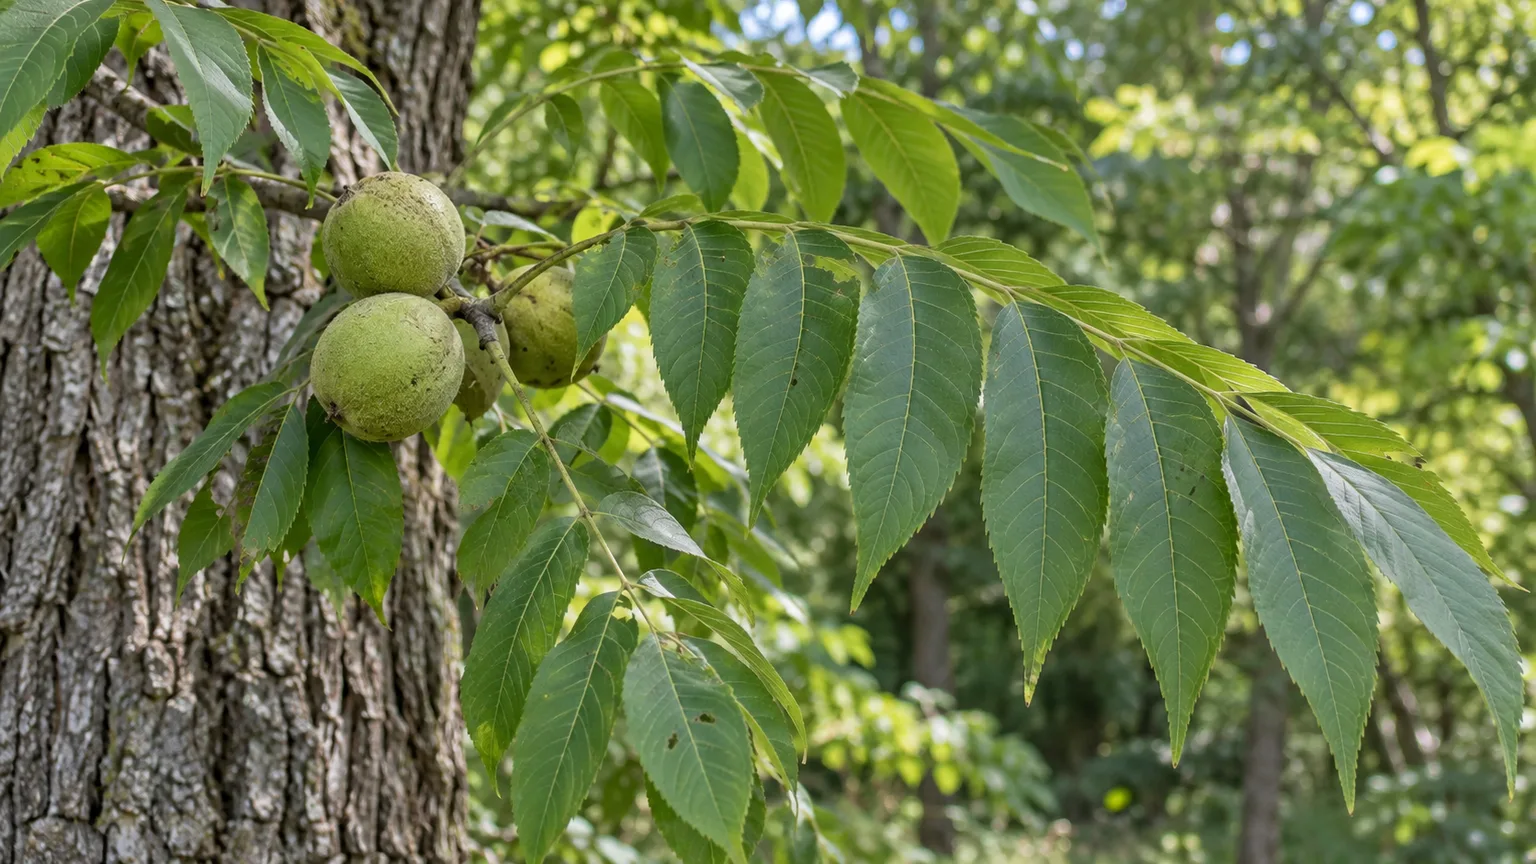
Remove the fleshy husk soon after harvest and separate damaged or moldy nuts. Wear gloves because husks can stain skin and clothing. Rinse away residue if needed, then spread sound nuts in a single layer with good airflow in a dry, shaded place. Turn them periodically and keep them away from damp floors, rain, and direct high heat. The RHS suggests drying at no more than 40°C (104°F); gentle heat and ventilation are safer than trying to rush the job in a hot oven.
A properly dried walnut should have a firm kernel rather than a soft, damp one. If nuts smell musty, show mold, or have shriveled kernels, discard them instead of tasting them. Store dried in-shell nuts cool, dry, and protected from pests; refrigerate or freeze kernels if you want them to keep longer without going rancid. Country Life garden writer Mark Diacono describes the difference between freshly harvested “wet” walnuts and dried shop-bought nuts, and notes that green walnuts can also be used before the shell hardens. Green-walnut recipes require the correct harvest stage and food-safe handling; do not confuse immature pickling nuts with ripe nuts ready for ordinary cracking.
Understand Juglone and Nearby Plants
Walnuts produce juglone, but warnings about a completely barren zone around every tree are often overstated. The RHS says the effect is more noticeable with black walnut, Juglans nigra, than with English walnut, J. regia, while also noting that tomatoes and apples are said to be especially affected. Soil, distance, drainage, leaf litter, roots, and the sensitivity of a particular plant all influence what happens in a real garden.
Plan conservatively without assuming that nothing will grow beneath the canopy. Keep a vegetable bed or sensitive prized plant a reasonable distance from the trunk, avoid piling fresh walnut leaves and husks around plants that already struggle, and test less-sensitive planting in a small area before committing a whole border. Remember that shade and root competition may be responsible for a plant’s failure even when juglone is not the cause.
Do not automatically send walnut leaves to the trash or avoid composting them forever. Break down leaves thoroughly in a managed compost pile and use the resulting material cautiously, especially around sensitive seedlings or crops. If a plant declines beside the tree, compare its light, soil moisture, and root competition with conditions farther away before blaming juglone alone. The best takeaway is a measured buffer and observation, not a fixed “nothing grows here” radius.
Recognize Walnut Pests and Disease
A few damaged leaves do not automatically mean a tree needs treatment. Identify the problem, look at whether it is affecting the canopy or the nuts, and consider the season and weather. UC IPM’s walnut management index covers many orchard pests and diseases; its commercial recommendations are not a home-garden spray schedule, but its symptom descriptions can help you recognize when to seek local advice.
Walnut blight is a bacterial disease that can blacken young nuts, shoots, catkins, and leaves, especially when rain spreads bacteria across susceptible green tissue. The UC IPM walnut blight guide notes that wet spring conditions and cultivar susceptibility affect risk. In a small garden, focus first on choosing a locally suitable cultivar, avoiding chronic overhead watering, and removing fallen diseased plant material where practical. If blight repeatedly ruins a crop, ask a local extension office or qualified arborist to confirm the diagnosis before using a pesticide; products, labels, and permitted uses vary by location.
Walnut husk fly larvae feed within the green husk. The UC IPM walnut husk fly guide explains that early infestation can shrivel kernels and increase mold, while later damage can stain shells and make husks harder to remove. In a home orchard, inspect nuts if husks turn soft or black prematurely and remove fallen, damaged fruit. Do not assume the kernel is sound if it is moldy or shriveled. If the crop loss is substantial, use local diagnostic help; orchard spray timings are monitoring-dependent and should not be copied onto a backyard tree without checking local labels and guidance.
Other problems may include aphids, leaf spots, mites, squirrels, and drought stress. Squirrels can take nuts before they ripen, a frustration described by horticulture writer Charles Quest-Ritson in Country Life. A tree guard may protect a young trunk from gnawing, but it will not secure the canopy crop. Netting a very large tree is rarely practical; timely collection and accepting some wildlife loss may be the realistic plan.
Fix Common Walnut-Tree Setbacks
Few or no nuts. If a tree is young, age may be the whole explanation. If it flowers but forms little fruit, look for late frost damage, drought during spring growth, a pollination mismatch, or a cultivar unsuited to the site. Keep brief notes on bloom dates, frost events, watering, and harvest; one season of observation is more useful than adding fertilizer blindly. A compatible pollinator may improve the crop, but it cannot compensate for a tree planted in deep shade or a frost pocket.
Black or softening husks. Some husk discoloration develops as the nut ripens, so judge the whole fruit rather than reacting to one dark patch. Premature softness, blackening, small egg-laying punctures, or early nut drop can point to husk fly or blight. Split a few affected nuts to check kernel condition, remove damaged material, and compare with healthy nuts on the same tree. If the pattern repeats, photograph the leaves, husks, and nuts and ask a local extension service to distinguish disease from insect damage before treating.
Yellowing leaves or declining branches. First check soil moisture and drainage. A tree that is wilting in wet soil may have damaged roots, while one in dry soil may be showing drought stress; yellowing can also follow shade, nutrient problems, pests, or disease. Note whether decline affects one branch, the upper canopy, or the whole tree, and whether lesions, holes, or dieback are present. Correct obvious watering or competition problems, then get a diagnosis if branches keep dying; fertilizer alone is not a reliable cure for an unknown decline.
Conclusion
An English walnut succeeds when its scale, site, cultivar, and pollination needs line up. Give it full sun, deep well-drained soil, protection from damaging spring conditions, and enough room for a broad mature crown; then establish it with careful planting and moisture checks rather than routine heavy feeding or pruning. Choose a grafted cultivar for more predictable nuts, and treat a seedling as a long-term experiment.
Expect variability even with good care. Flower timing, spring weather, local pests, and wildlife all influence the harvest, while the tree’s eventual size is a permanent part of the garden. If you plan for that reality before planting, a walnut can provide shade and food for decades without demanding a complicated maintenance routine.